Medical Records
The Medical Records module is used by HSO Personnel to manage and maintain the medical information of students and employees.
It allows you to encode patient details, record examination results, track medical history, and issue medical forms with diagnosis and prescribed medicines. You can also upload medical files such as X-rays and other documents.
Required Permissions
Add Medical Form - Allows the user to create a new medical form for a patient, including entering diagnosis and prescribed medicines.
Delete Medical Form - Allows the user to remove an existing medical form from the system. This should be used carefully as deleted records may not be recoverable.
Edit Medical Form - Allows the user to update or modify an existing medical form, such as correcting details or adding new information.
View Medical Form - Allows the user to view and review medical forms of patients without making any changes.
How to Access the Module
To access the module, make sure you have the View Medical Form permission. If it doesn’t appear in your portal, request access from your System Administrator.
In NUNSIS portal, go to Health Care > Medical Records. Click the module tab to redirect to the Manage Medical Records list view page.
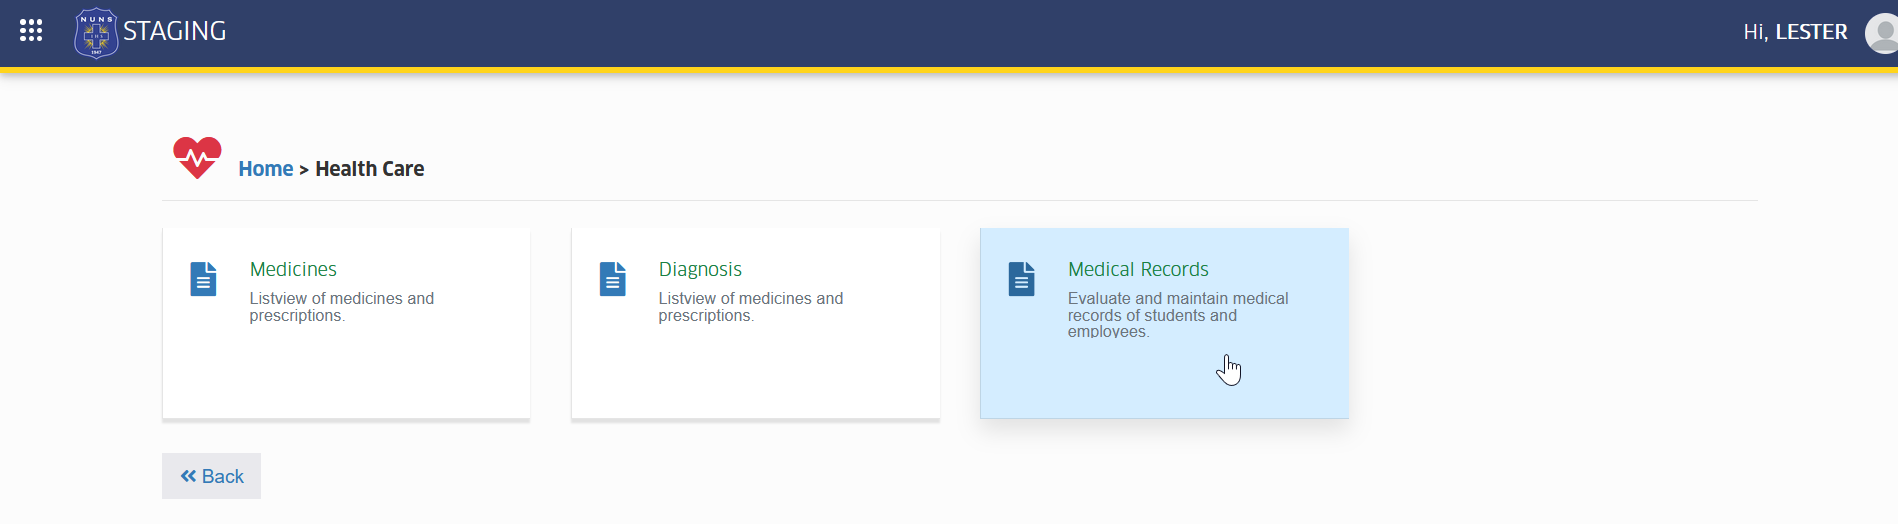
How to Use the Module
This section provides step-by-step instructions on how to navigate and perform actions within the module. It guides users through the available functions to ensure tasks are completed properly and efficiently.
Manage a Patient
This section allows you to search for an existing patient and access their medical record for viewing or updating. You can also add a new patient if they are not yet registered in the system.
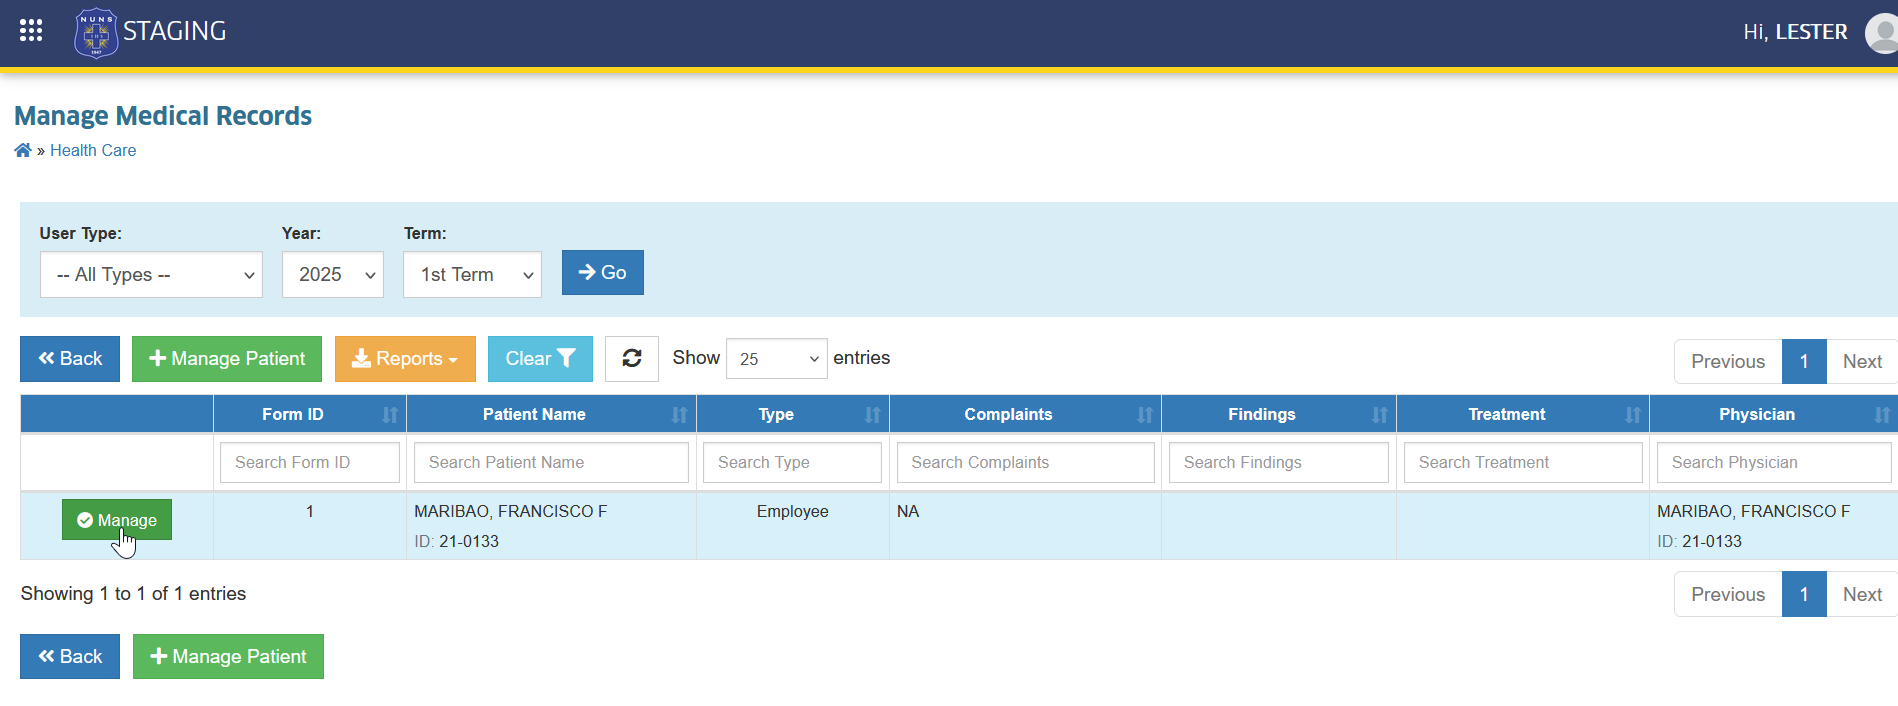
STEP 1. Use the filters to find patient you want to manage.
STEP 2. Click the corresponding button of the selected patient.
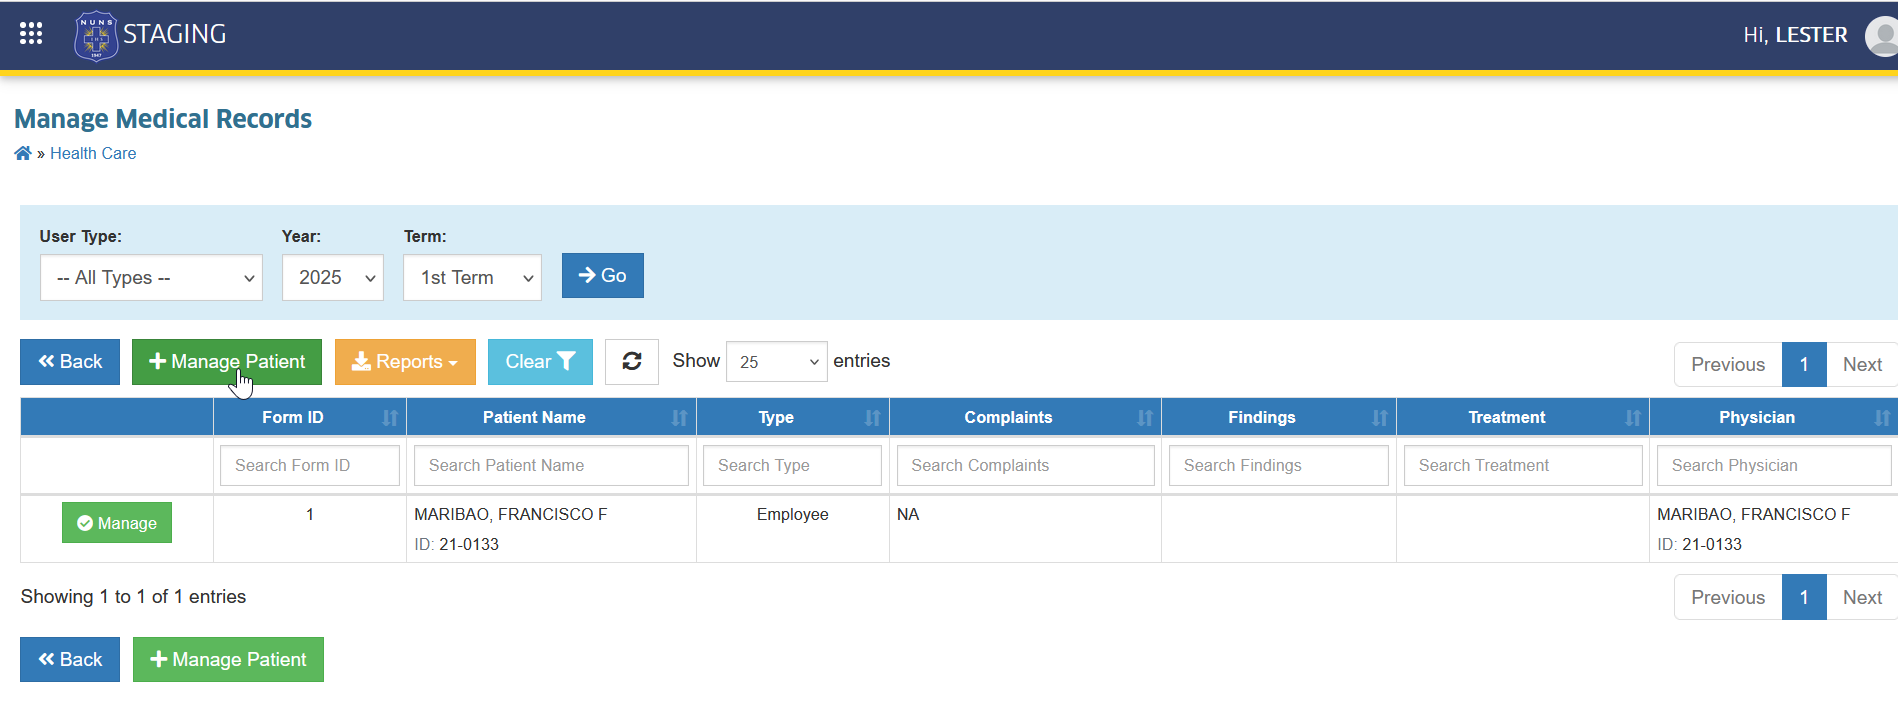
STEP 3. If the patient is not yet in the system, click the button to add a new record.
STEP 4. Select the Patient Type and enter Patient ID or Name.
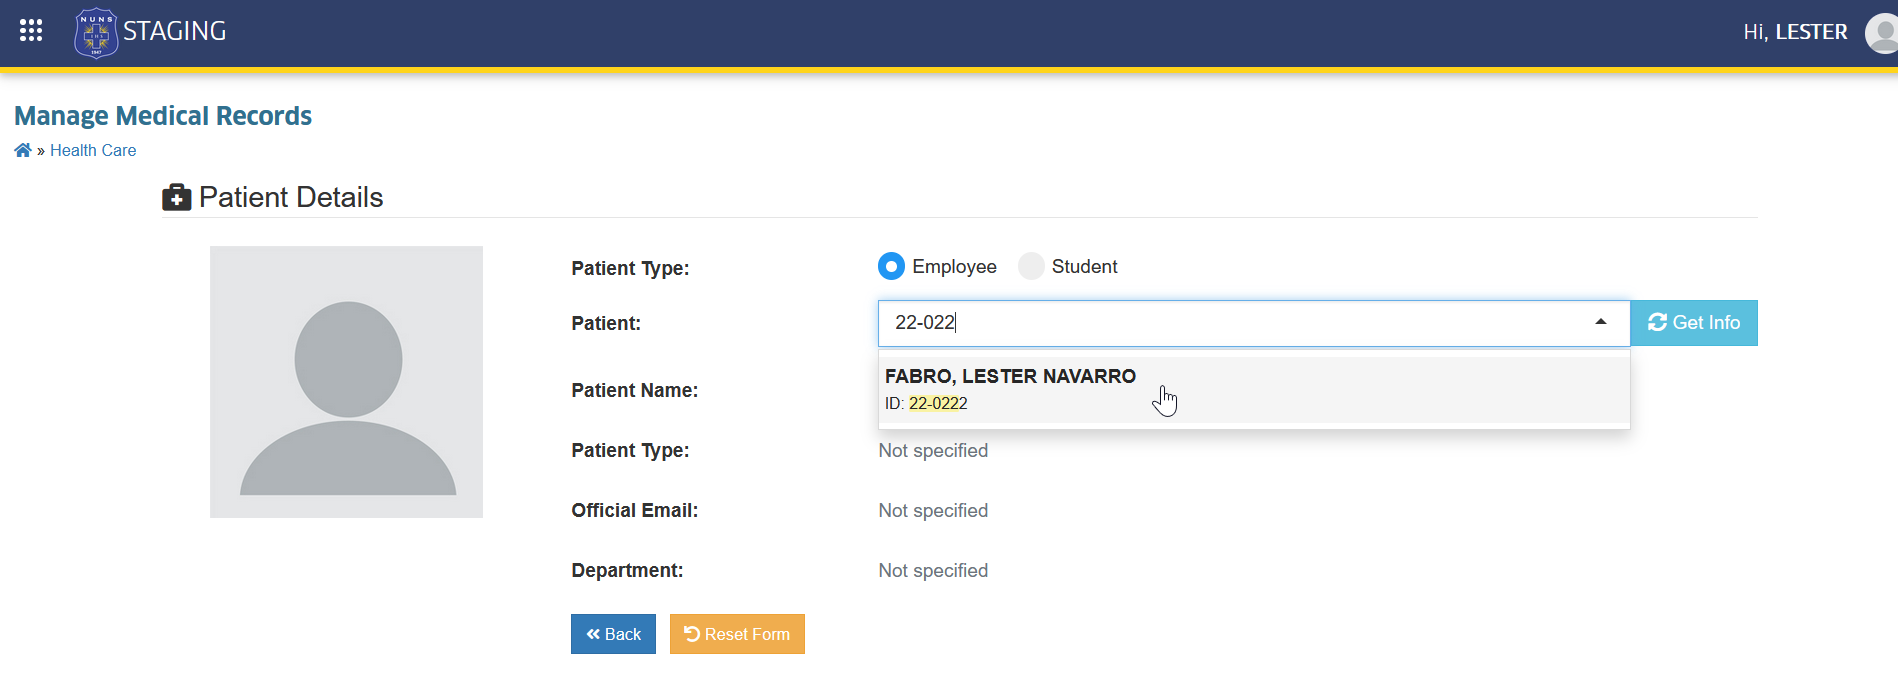
About the Patient
Upon selecting a patient, the basic information is automatically displayed based on Employee Profile (for employees), and Student Personal Profile (for students).
To update a patient's or user's details, please coordinate with appropriate offices below:
-
Registrar's Office for Student Records.
-
Human Resource Office for employee Records.
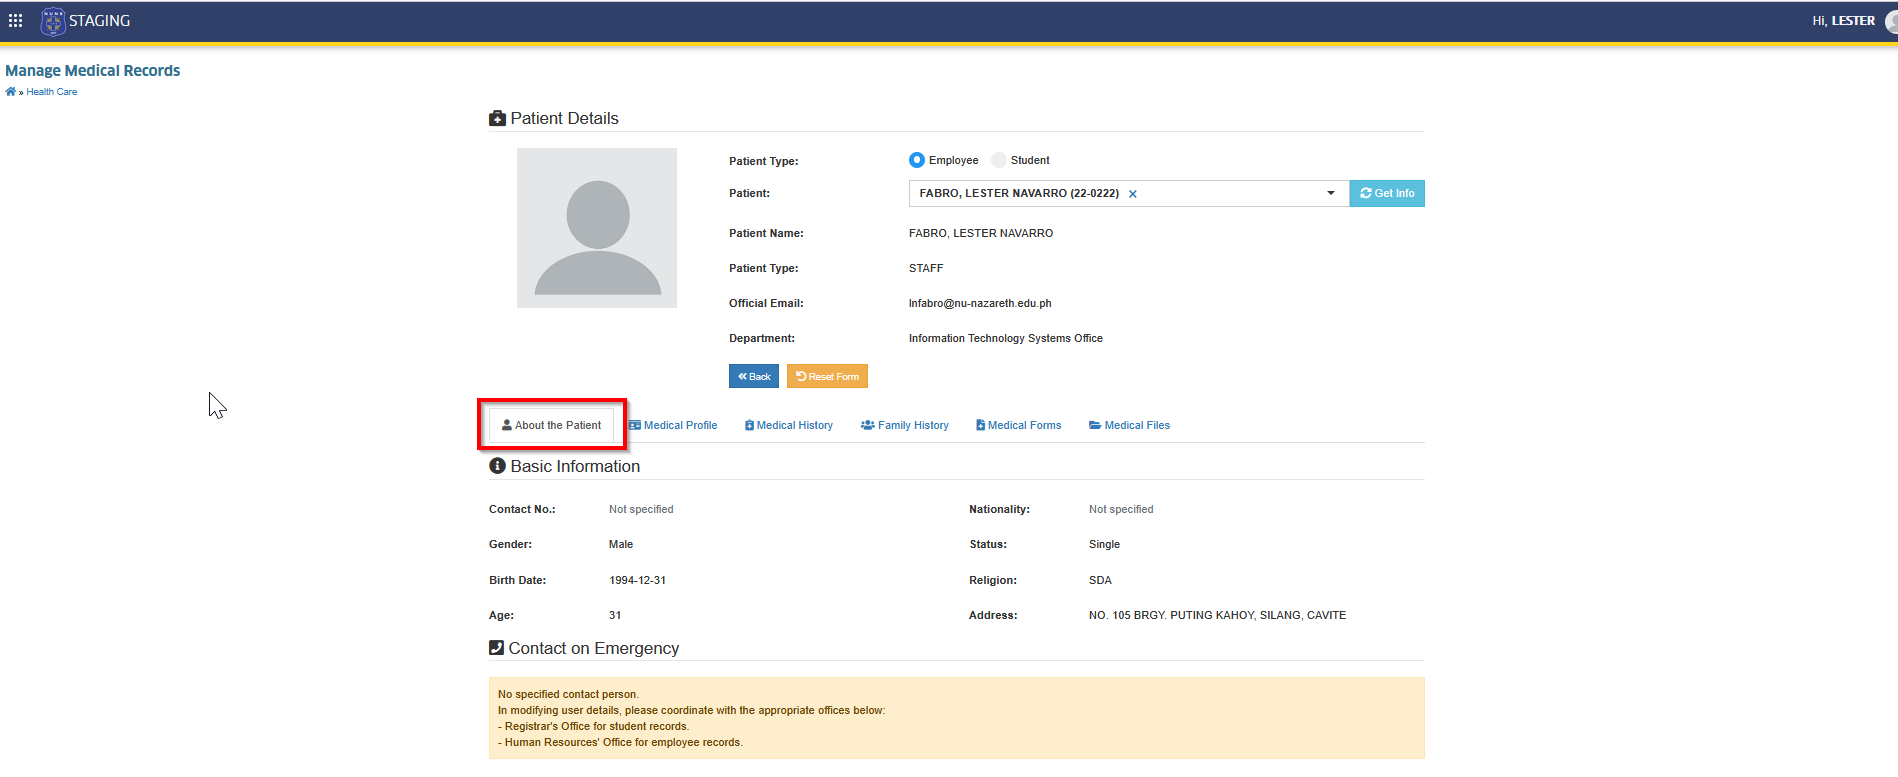
View Medical Profile
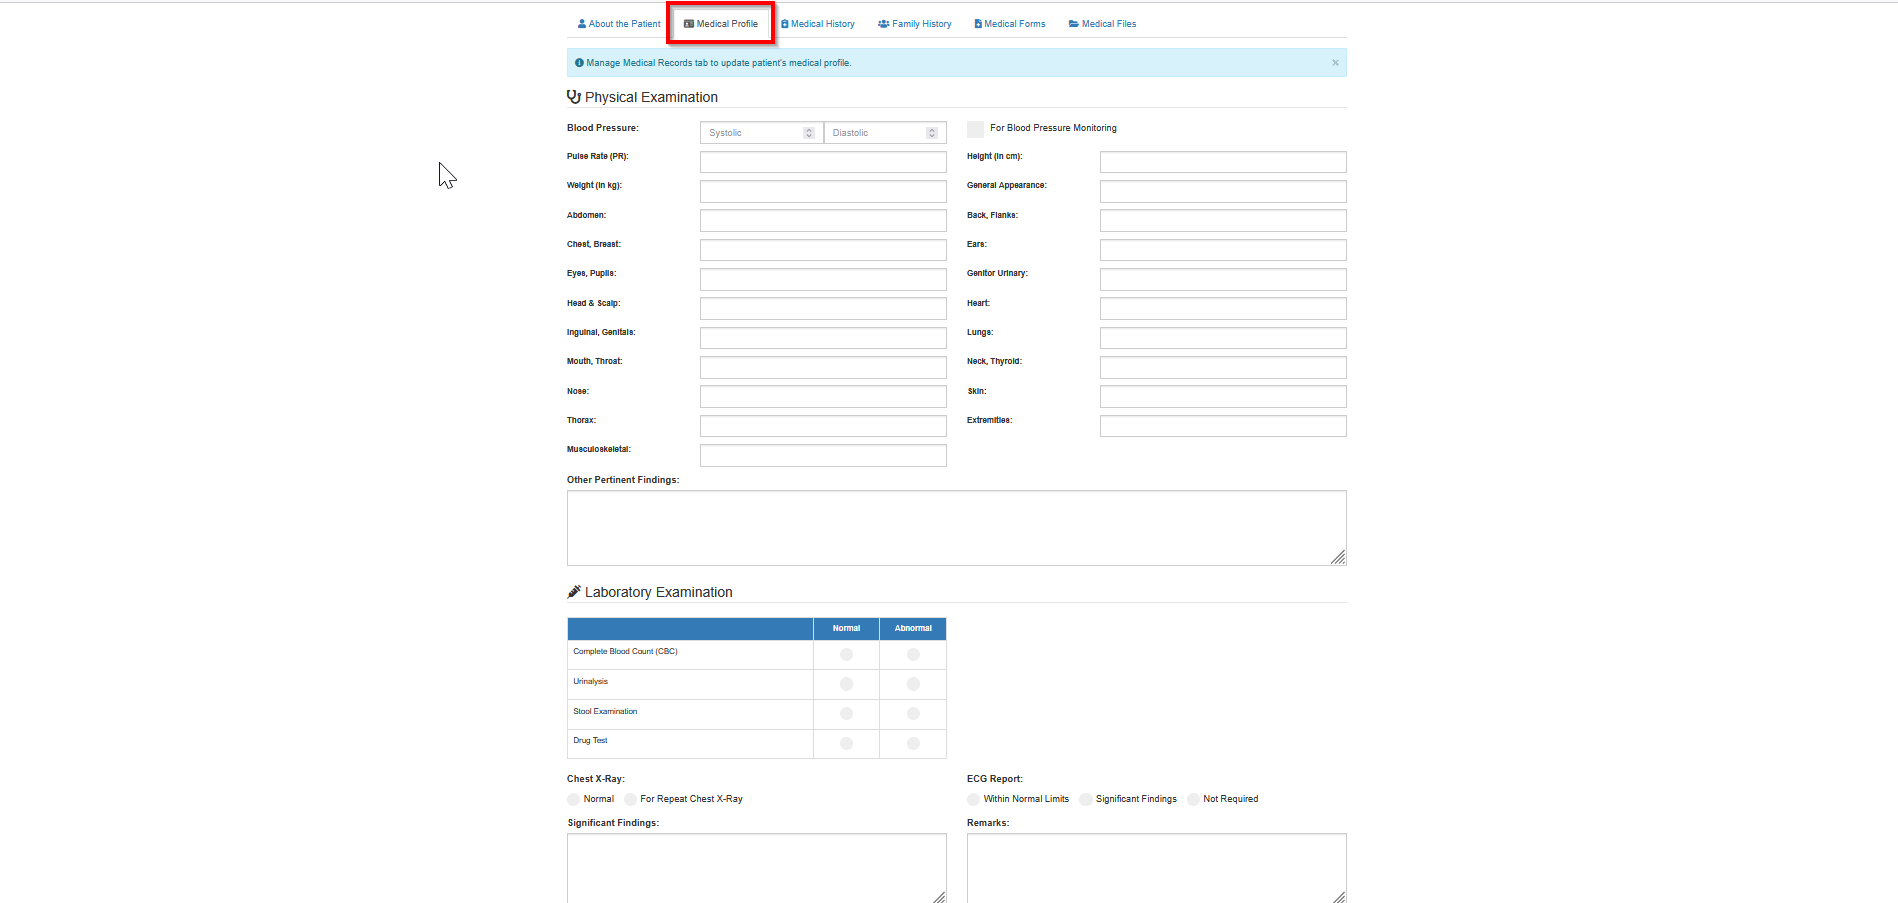
This section allows you to view the patient’s medical examination records, including physical, laboratory, chest X-ray, and ECG results. It provides an overview of the patient’s latest medical information for reference.
STEP 1. Go to Medical Profile tab.
STEP 2. In Medical Profile tab, you can view the patient's updated:
-
Physical Examination
-
Laboratory Examination
-
Chest X-ray
-
ECG Report
Record Examination Results
This section allows you to add and save a patient’s examination results, including physical exams, laboratory tests, chest X-ray, and ECG reports. It ensures that all medical findings are accurately recorded in the patient’s medical profile.
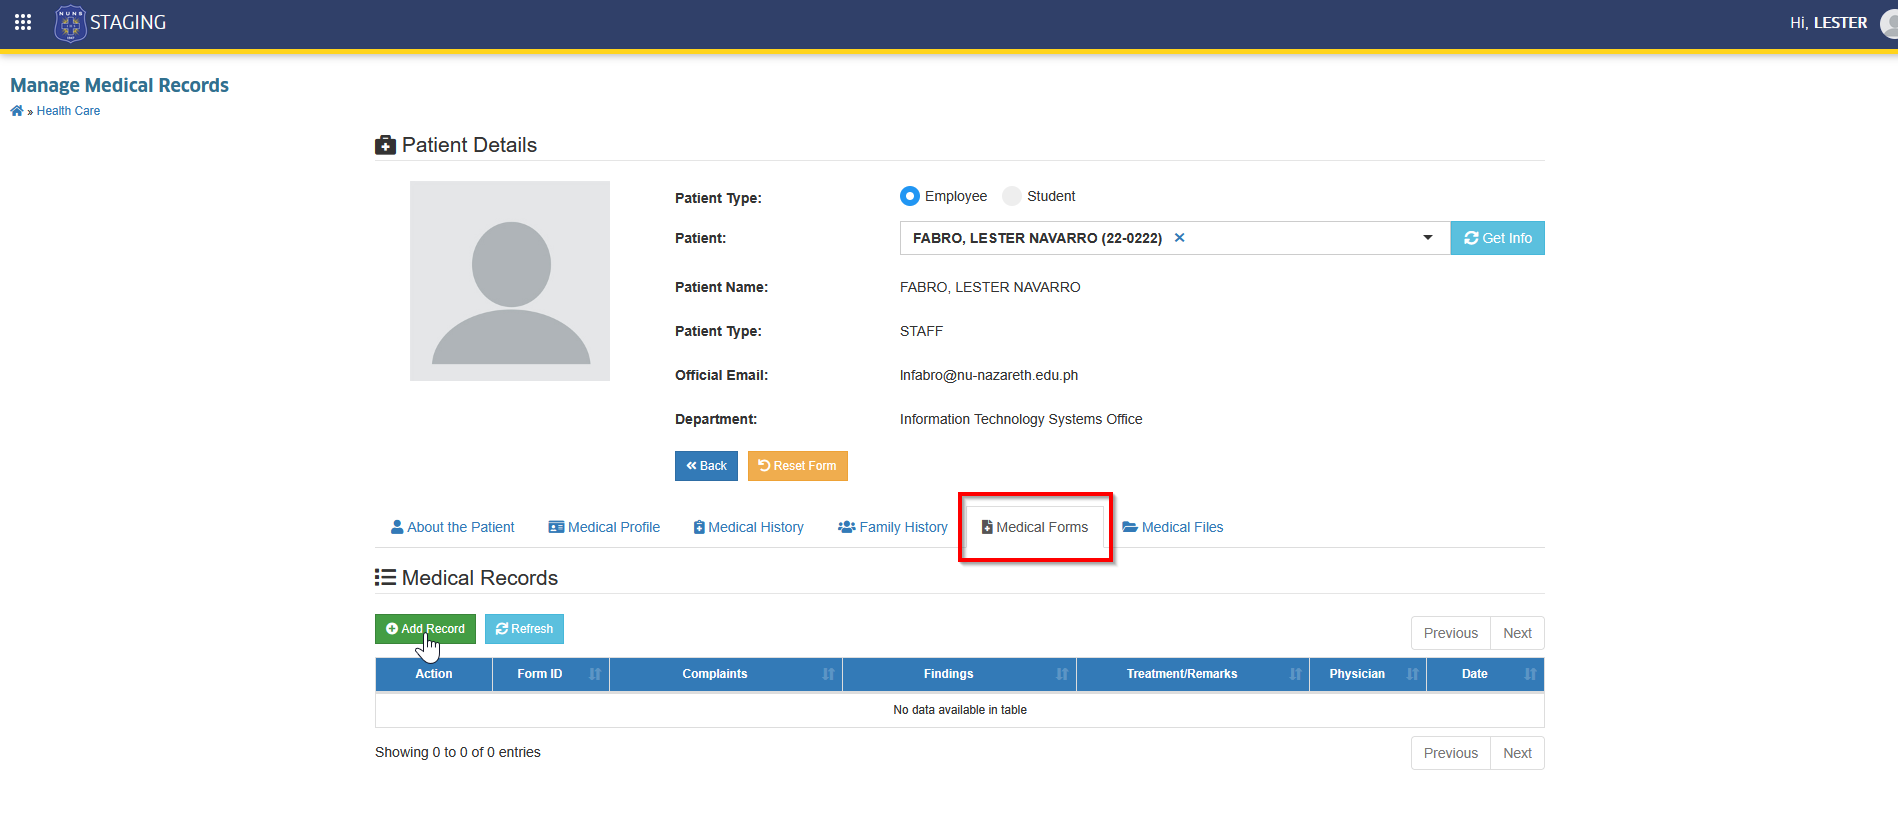
STEP 1. Go to the Medical Forms tab.
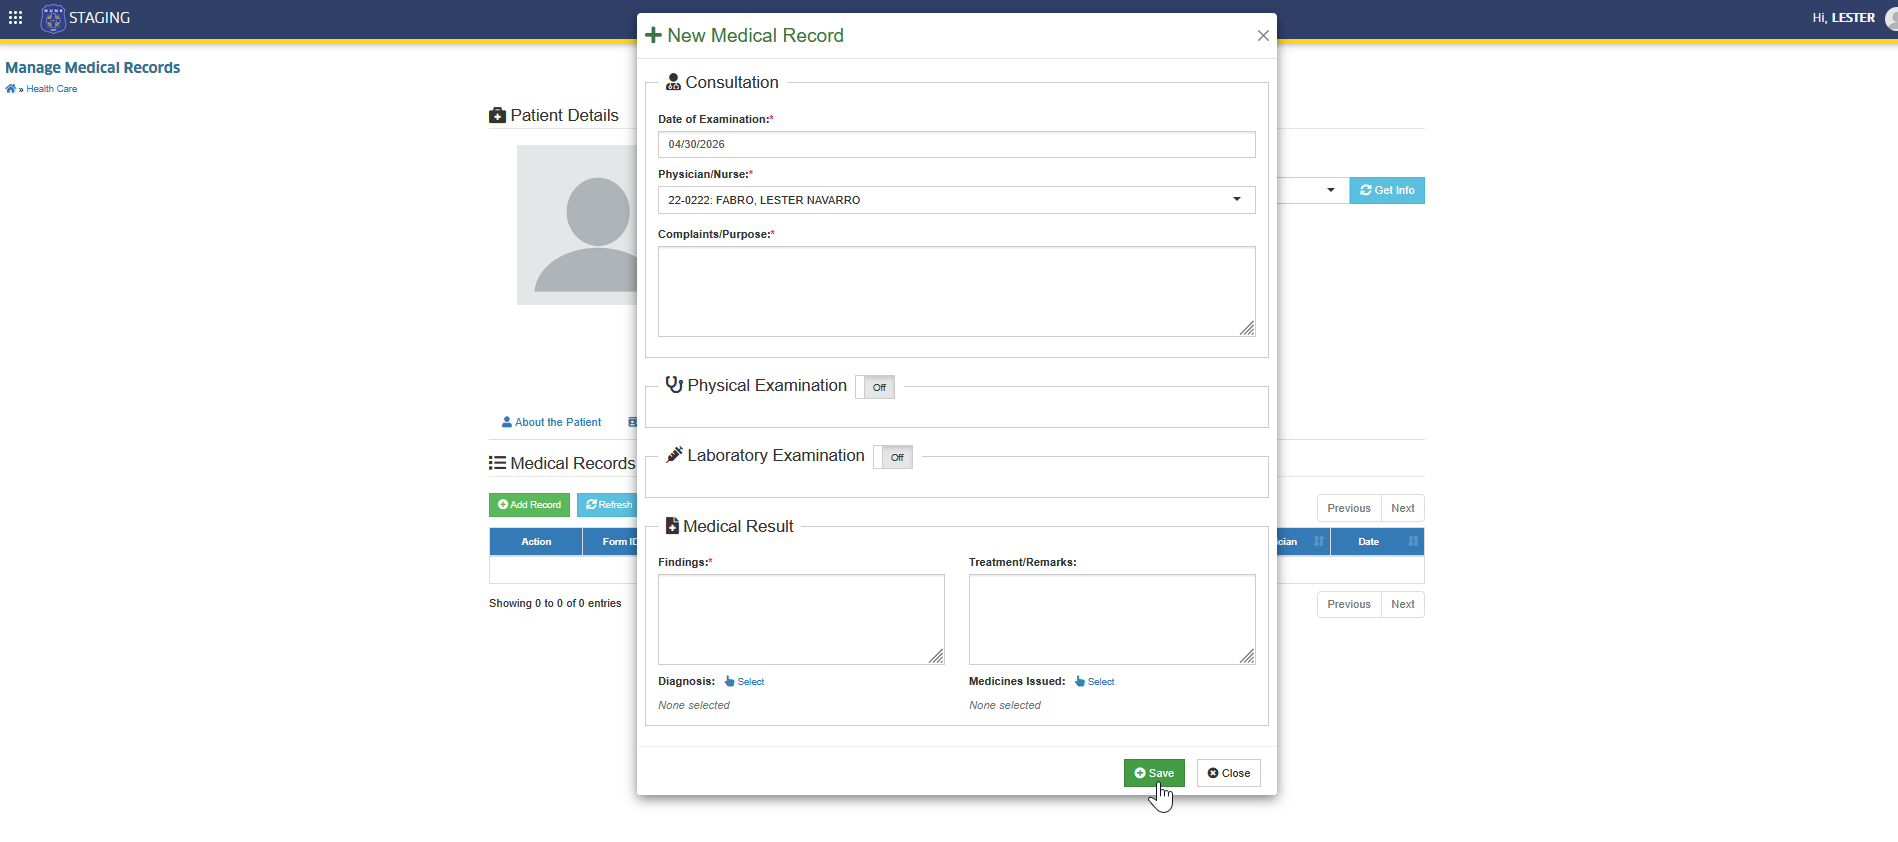
STEP 2. Locate and click the button. The Add New Medical Record prompt will appear.
STEP 3. Fill out all examination results in the prompt, then click the button.
Update Existing Medical Record
Follow the steps below to update existing medical record.
STEP 1. In the Medical Forms tab, click the corresponding button of the record you want to update.
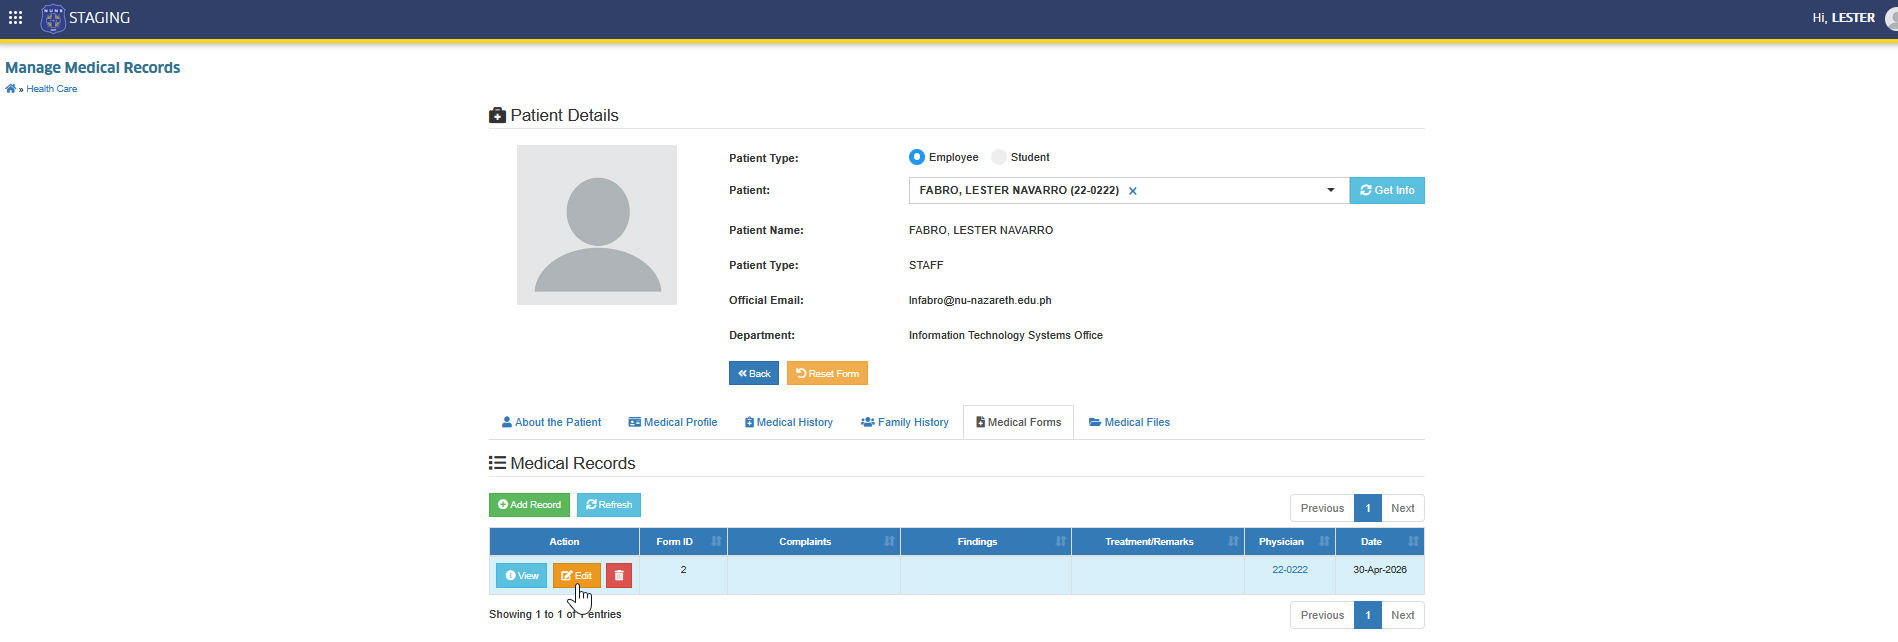
STEP 2. Update the necessary information, then click the button.
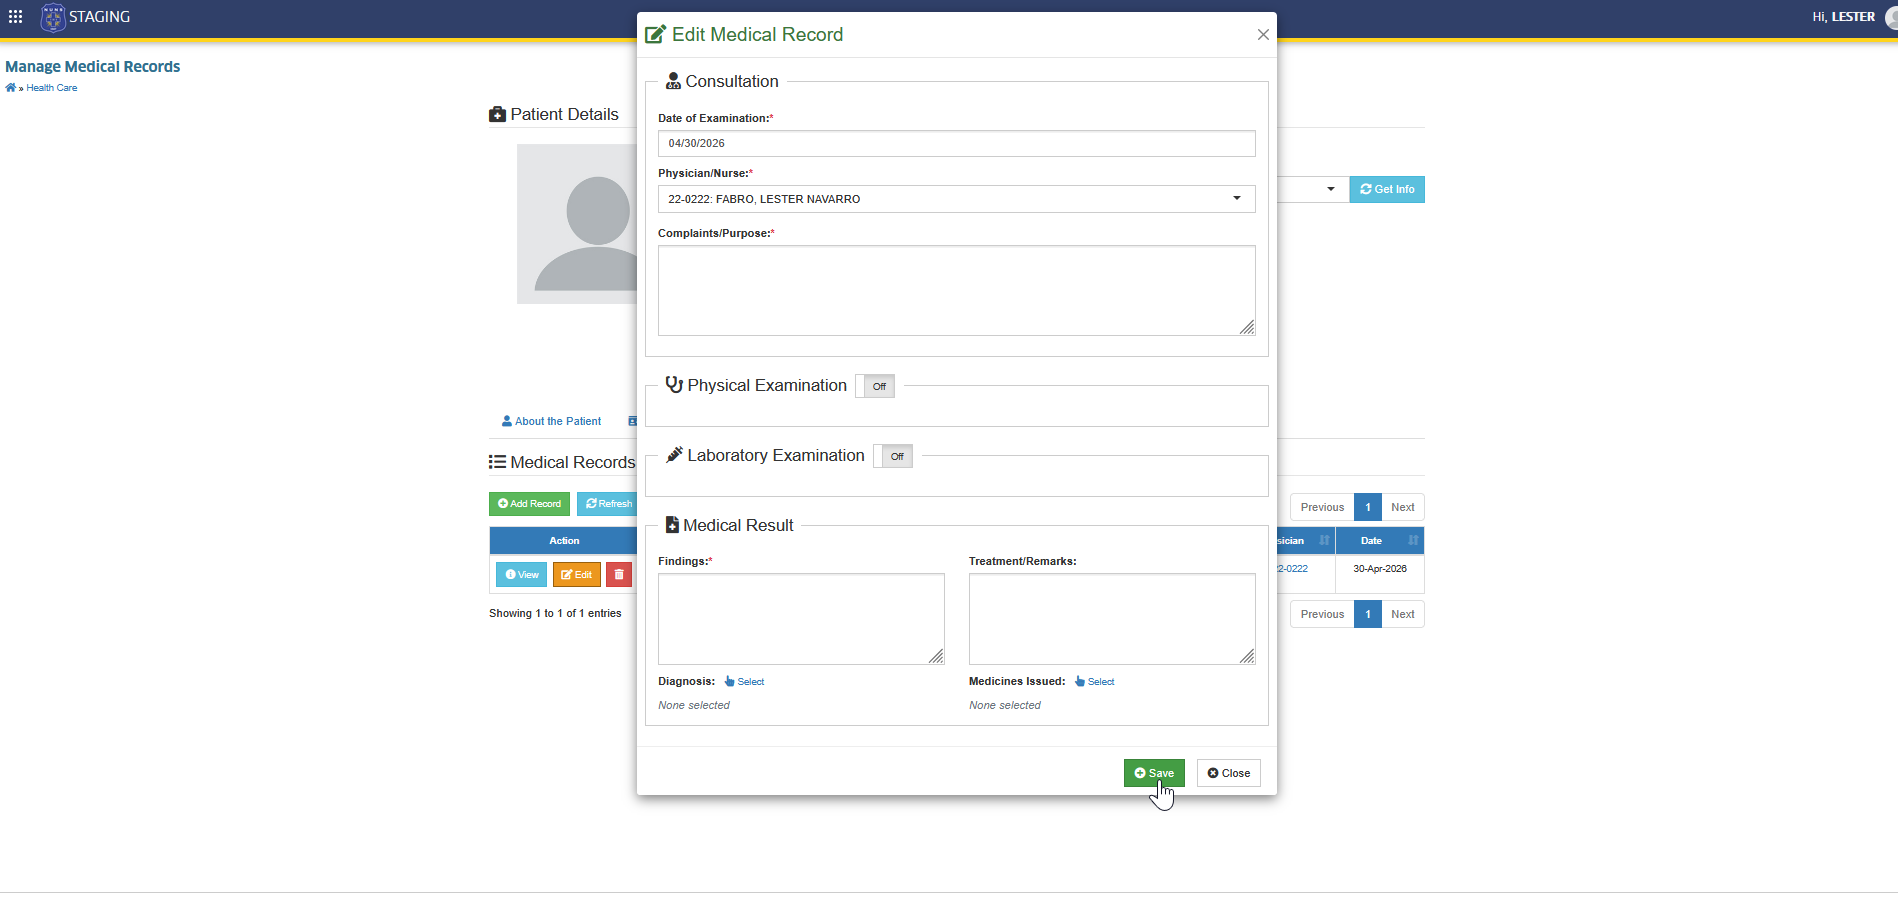
Delete Medical Record
Follow the steps below to remove a patient's medical record.
STEP 1. In the Medical Forms tab, click the corresponding button of the record you want to delete. The Delete Medical Record prompt will appear.
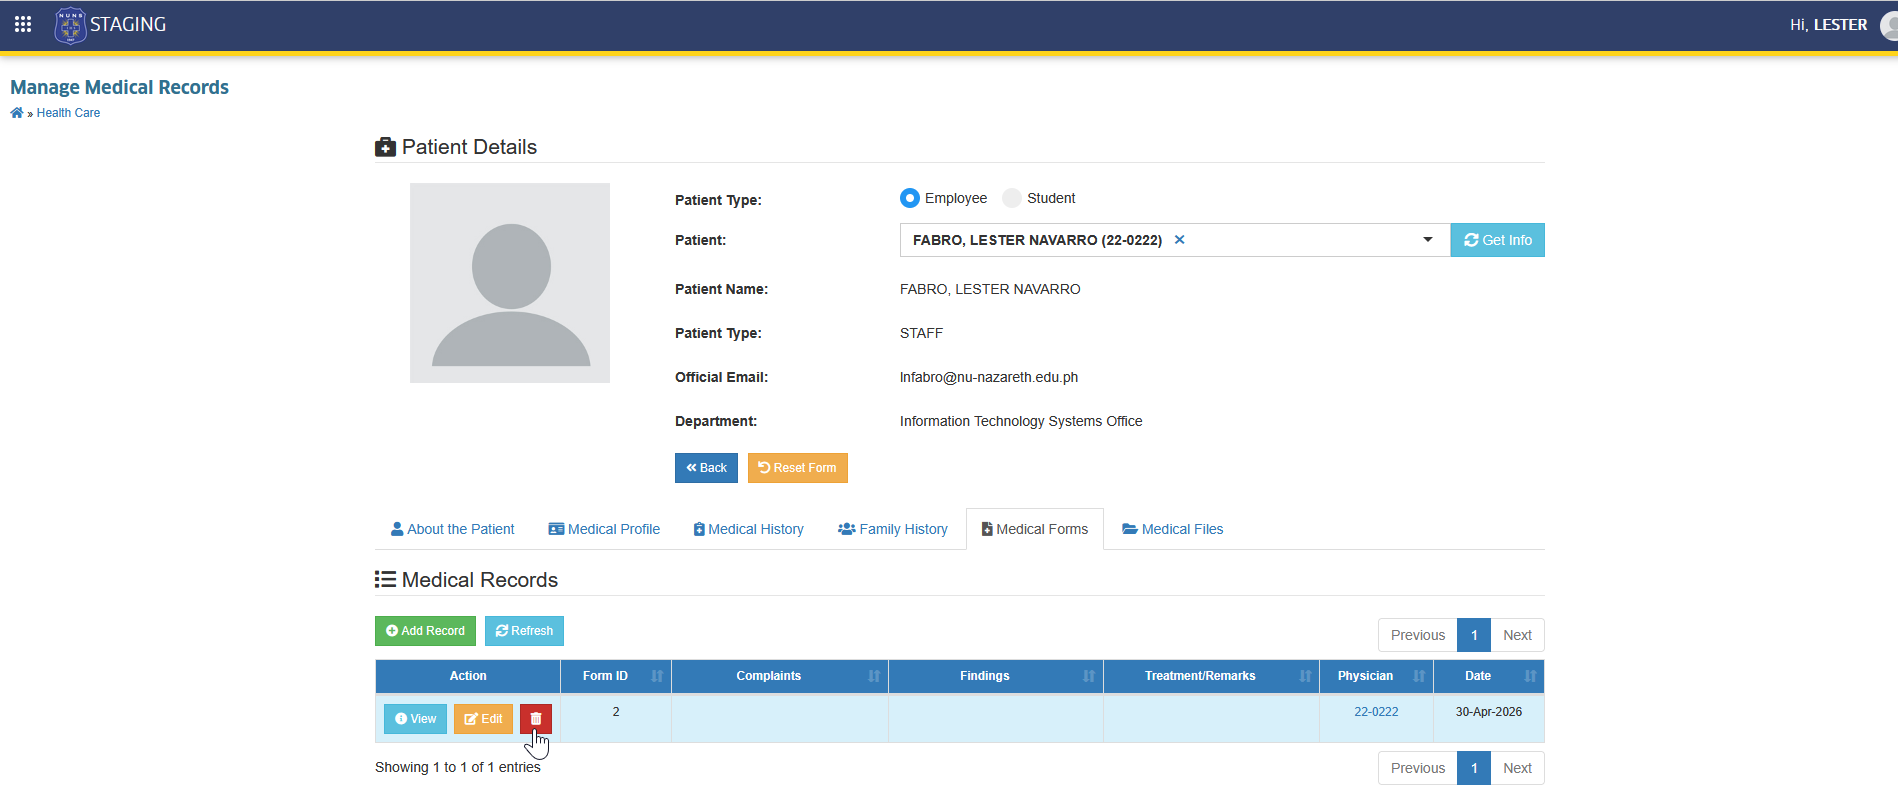
STEP 2. Confirm the deletion by clicking the button in the prompt.
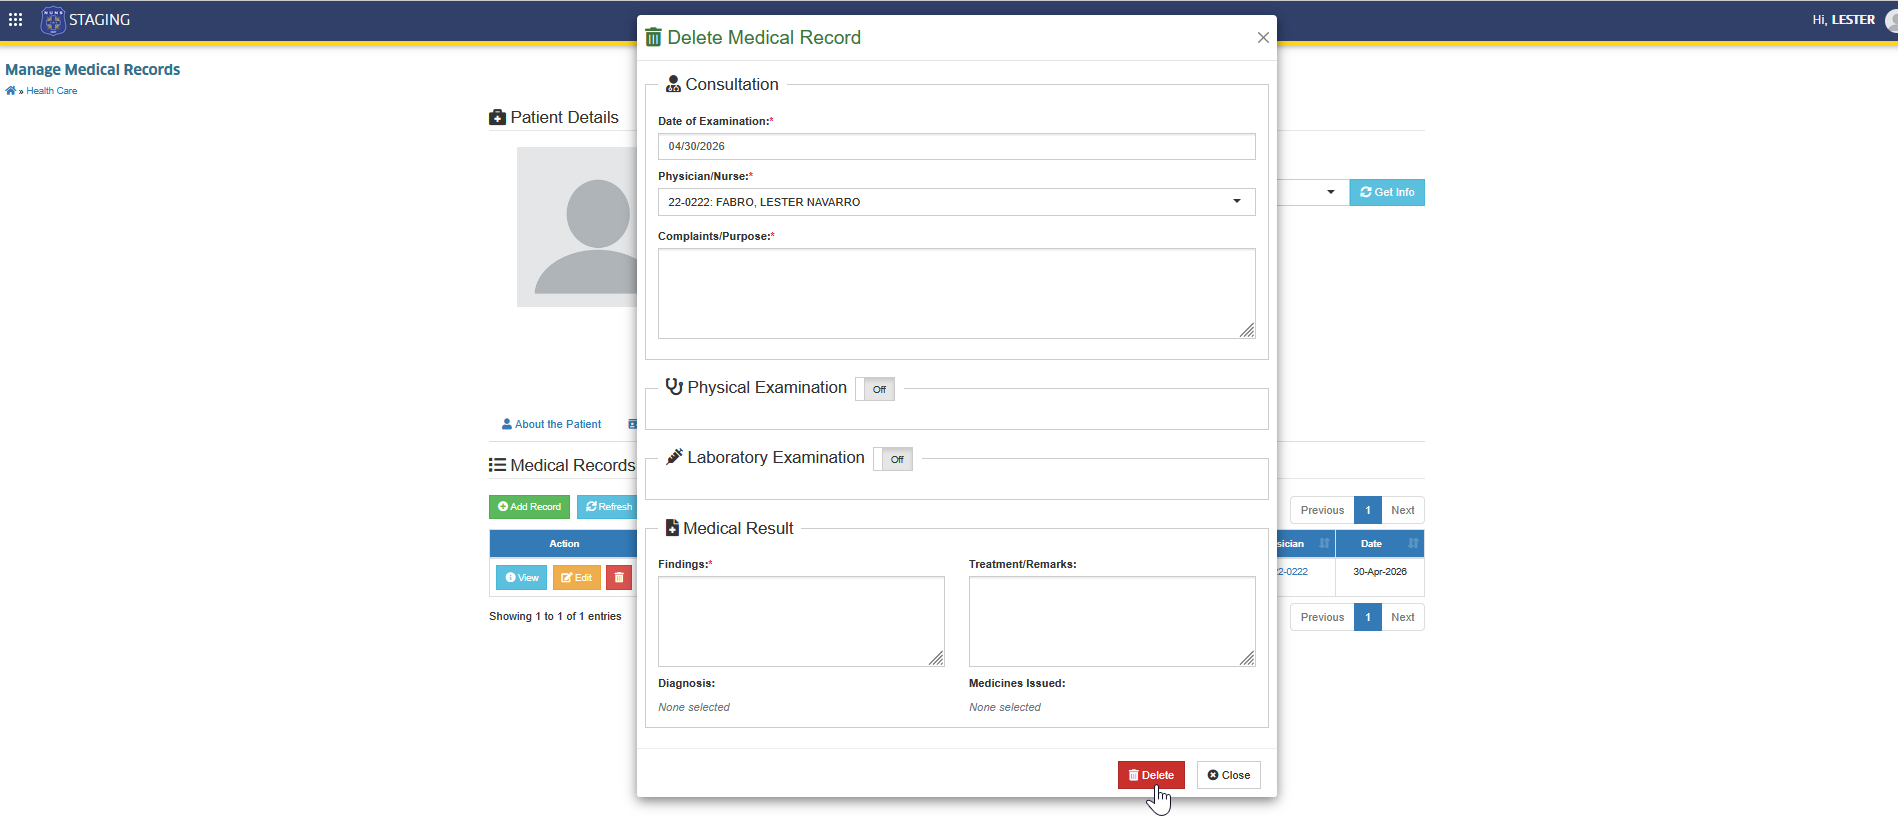
Add Patient's Diagnosis
Follow the steps below to add patient's diagnosis.
STEP 1. In the Medical Record form, scroll down to the Medical Results section.
STEP 2. Enter the findings, then click the button to choose the diagnosis from the dropdown of diagnosis.
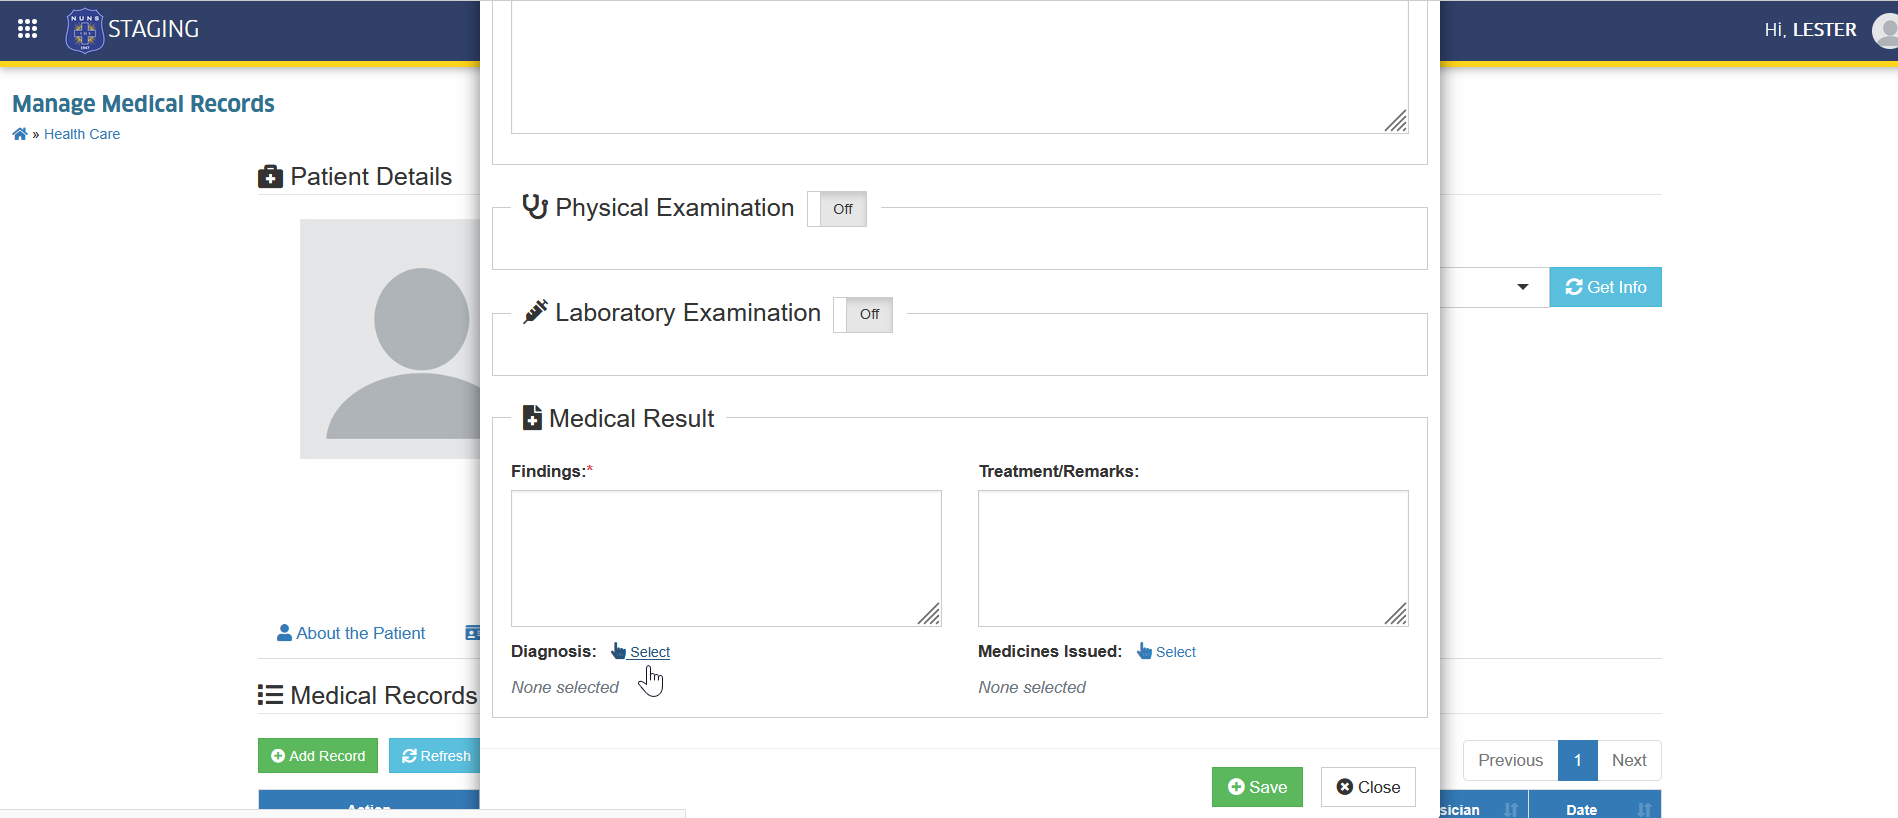
STEP 3. Select the diagnosis by checking the corresponding checkbox.
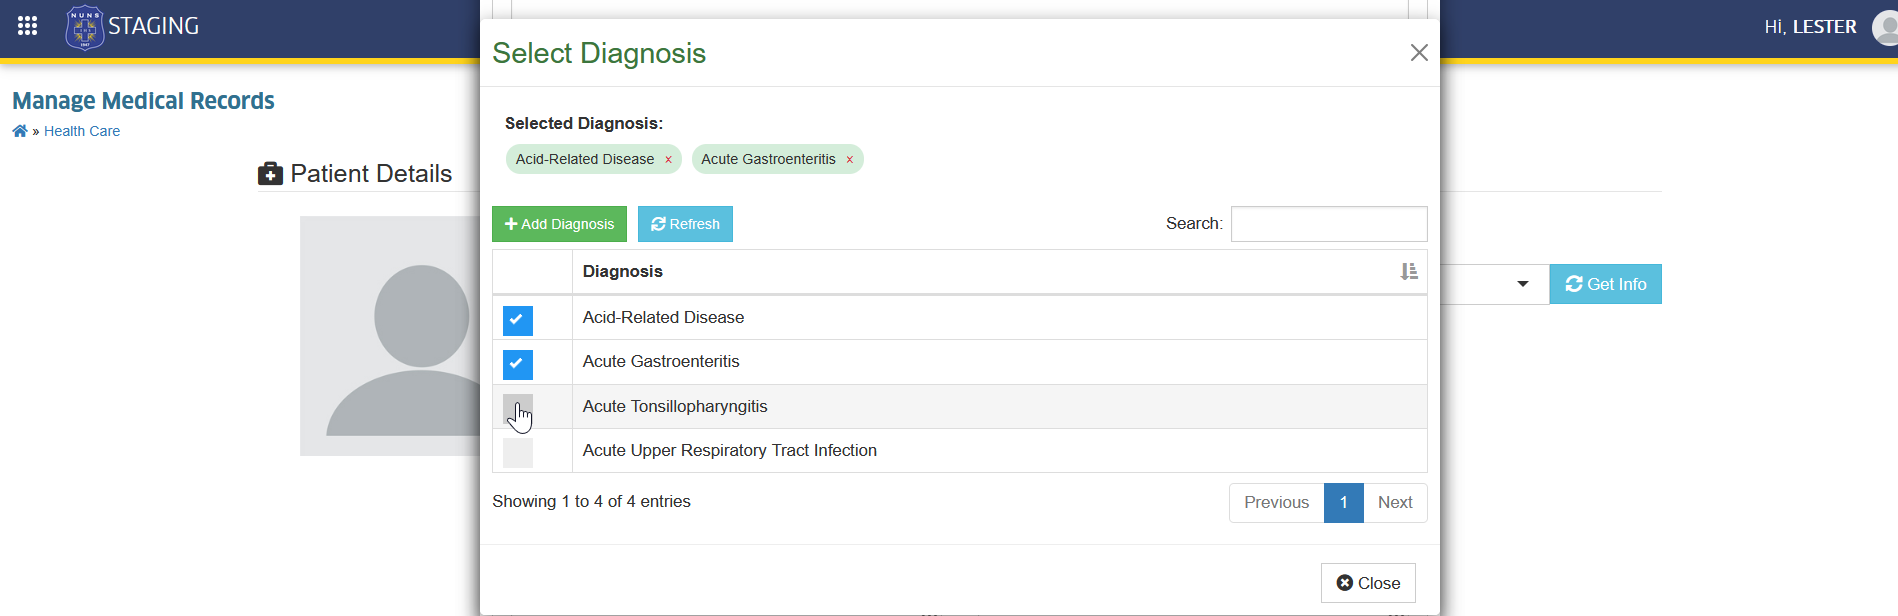
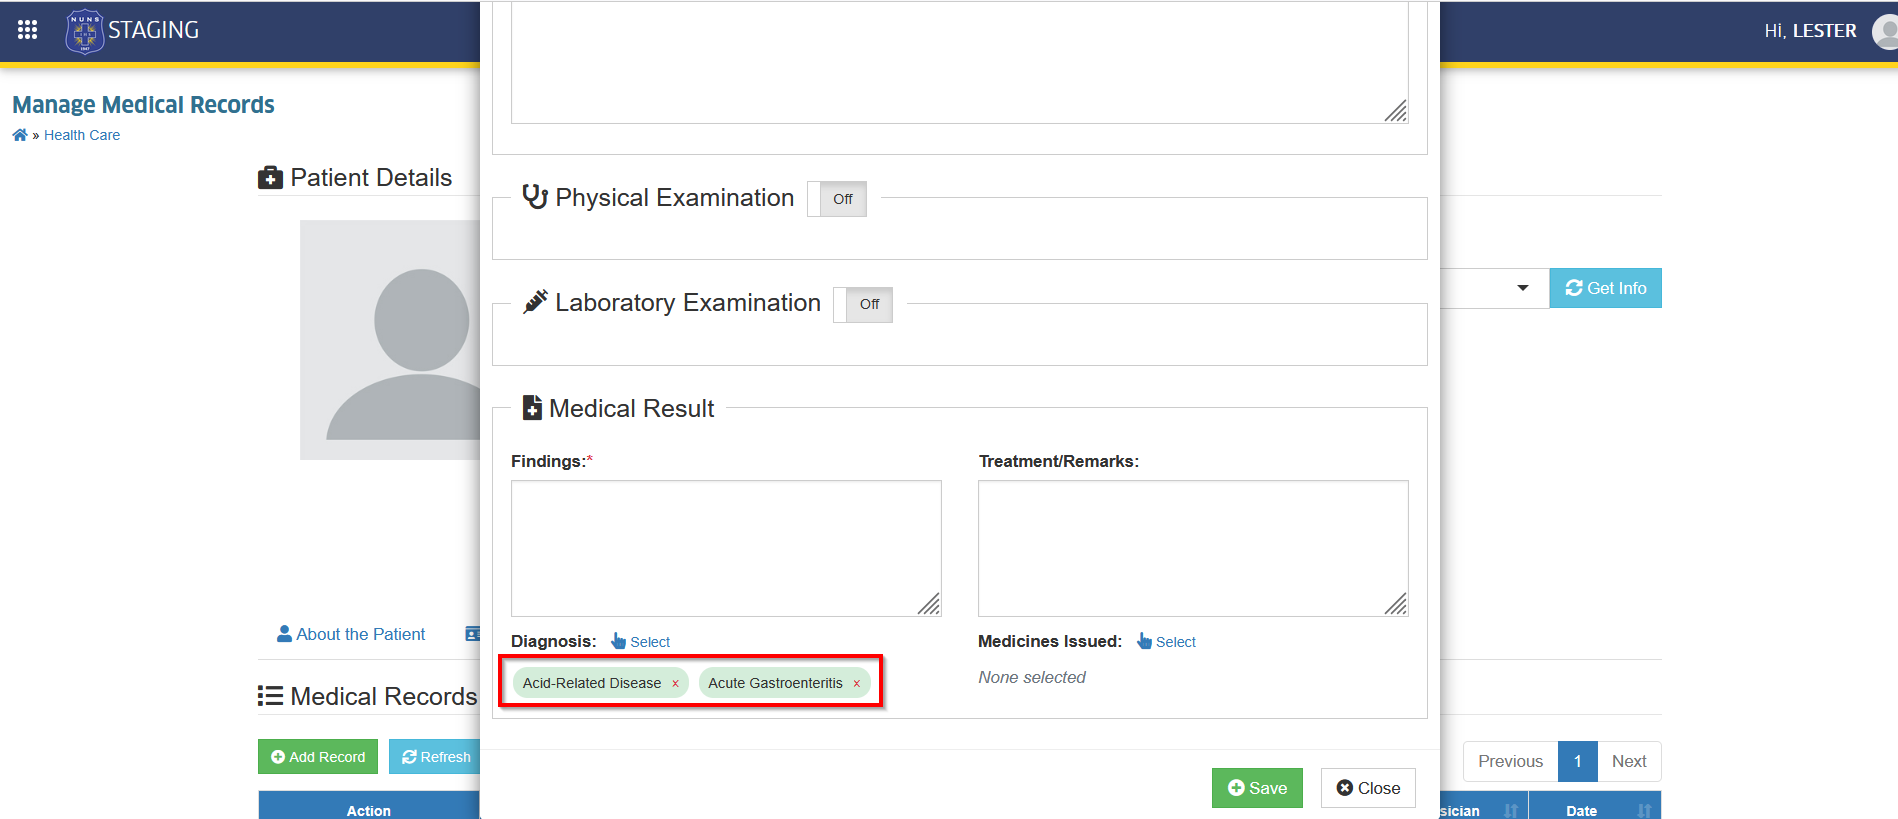
STEP 4. After selecting the diagnosis, close the prompt. The selected diagnosis will be reflected in the record.
Issue Medicine to a Patient
Follow the steps below to record issued medicine for a patient.
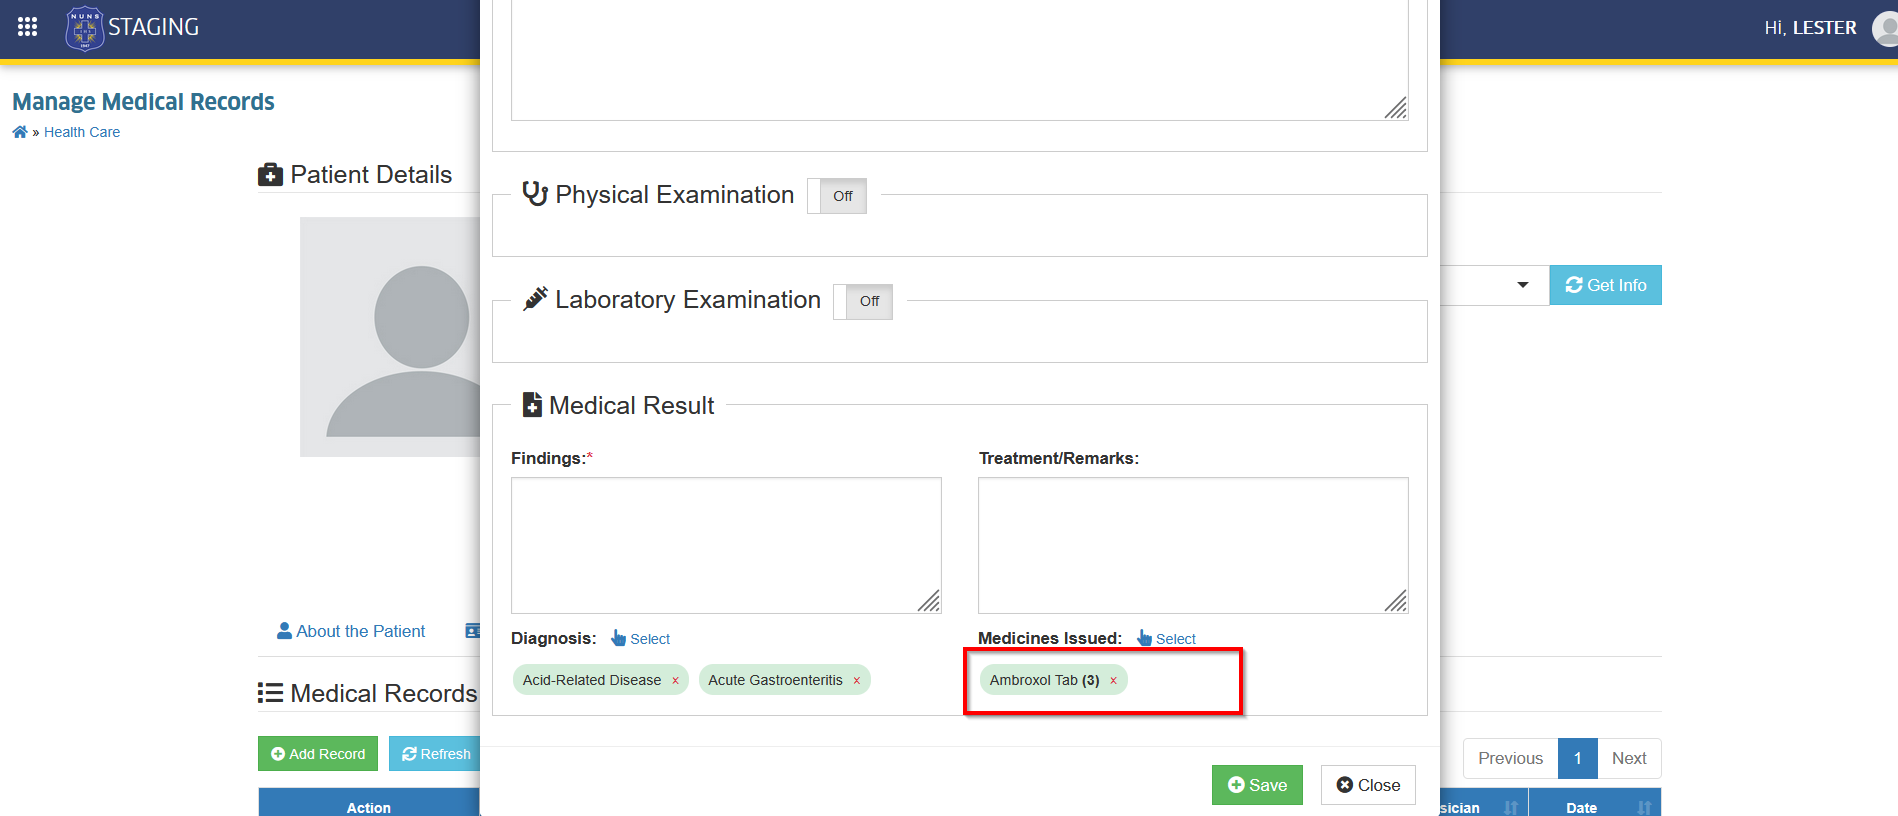
STEP 1. In the Medical Record form, scroll down to the Medical Results section.
STEP 2. Enter the Treatment/ Remarks, then click the button to choose the medicine(s) to be issued.
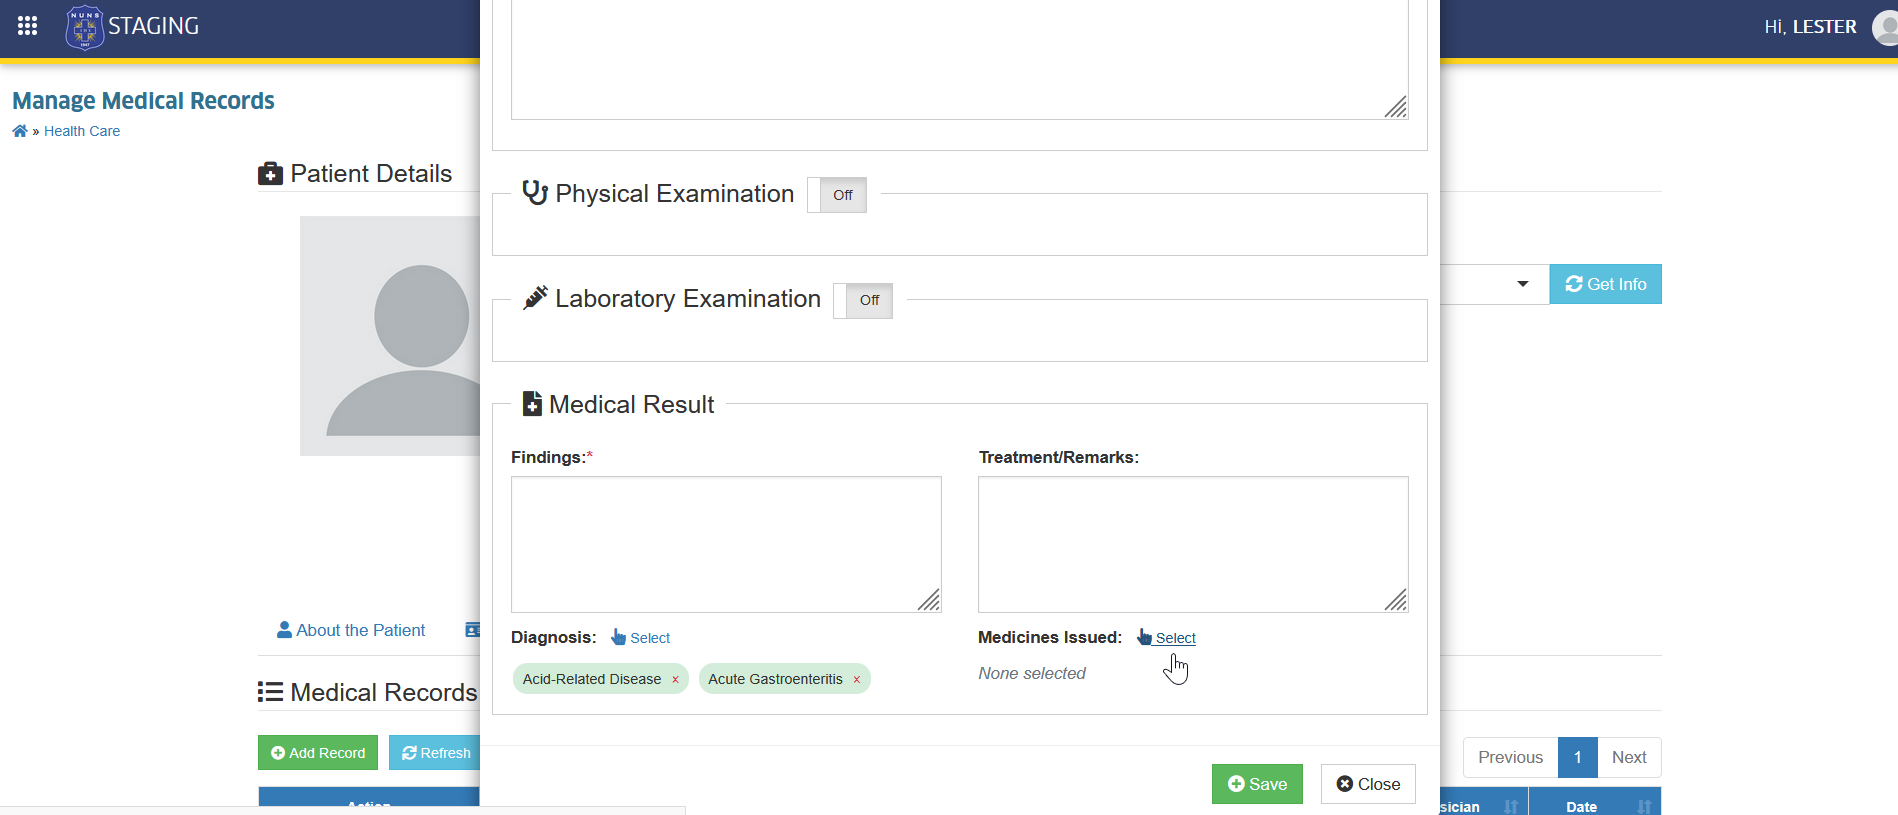
STEP 3. Select the medicine and specify the quantity.
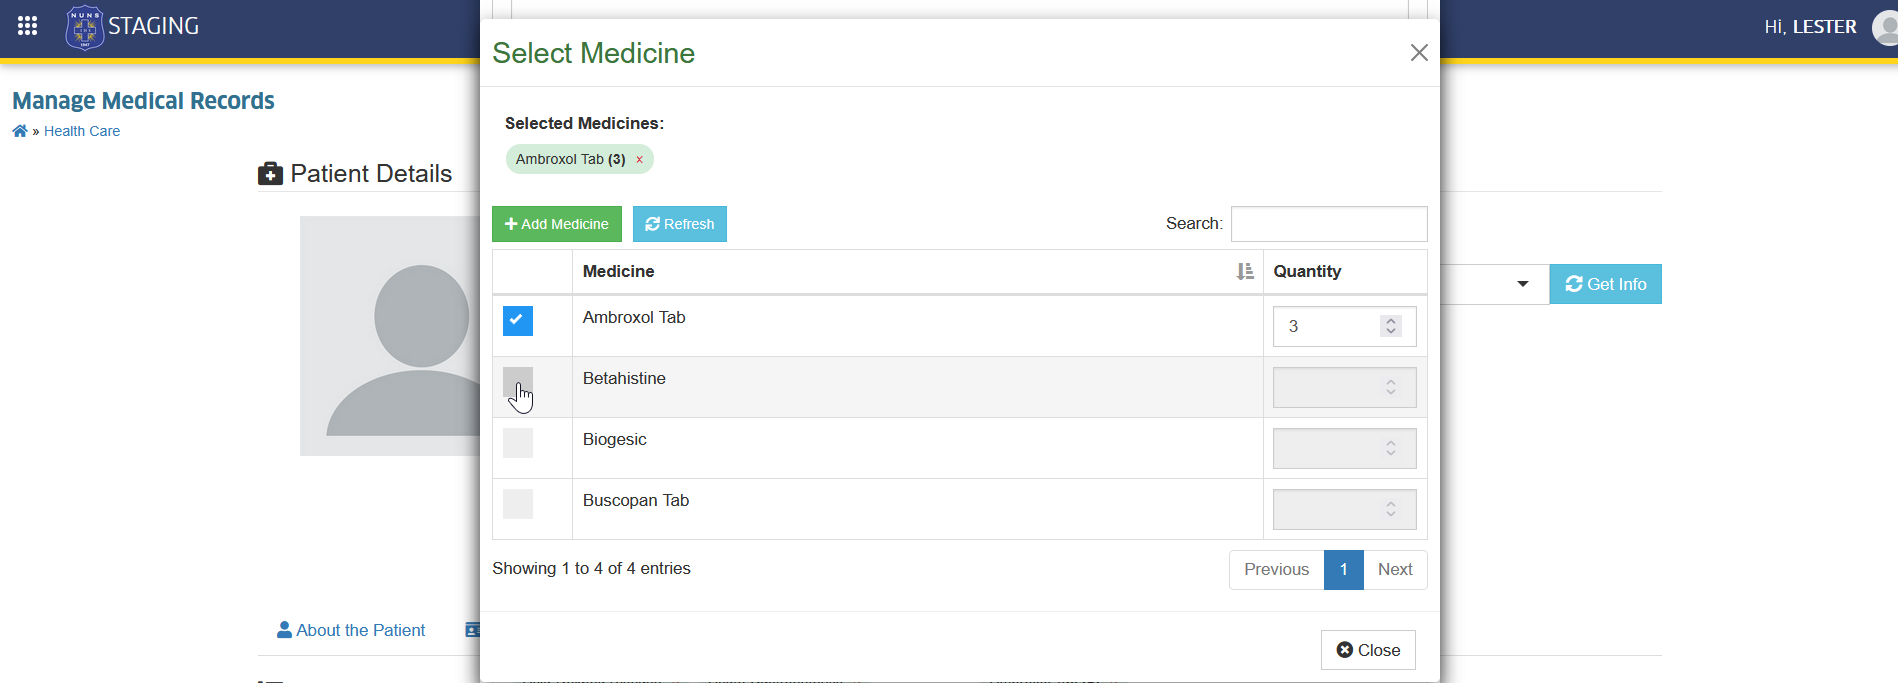
STEP 4. After selecting the medicine(s) , close the prompt. The issued medicine(s) will be reflected in the record.
Encode Medical History
This section allows you to record the patient’s medical history. It helps provide a complete background of the patient’s health for better evaluation and treatment.
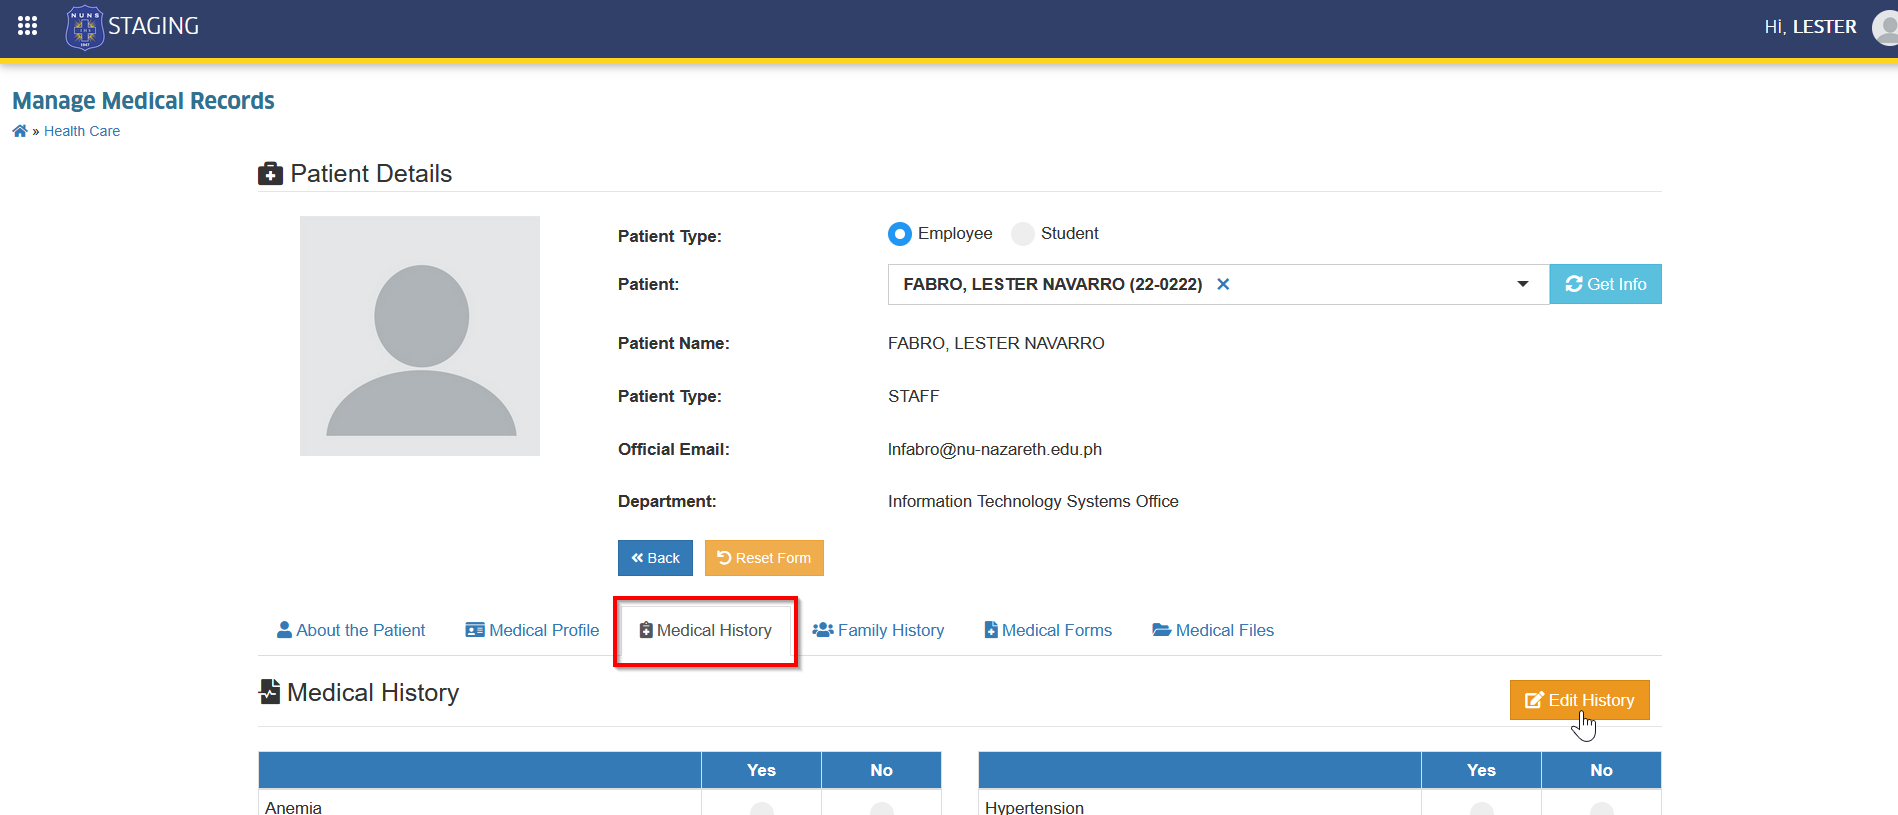
STEP 1. Go to Medical History tab.
STEP 2. Click the button.
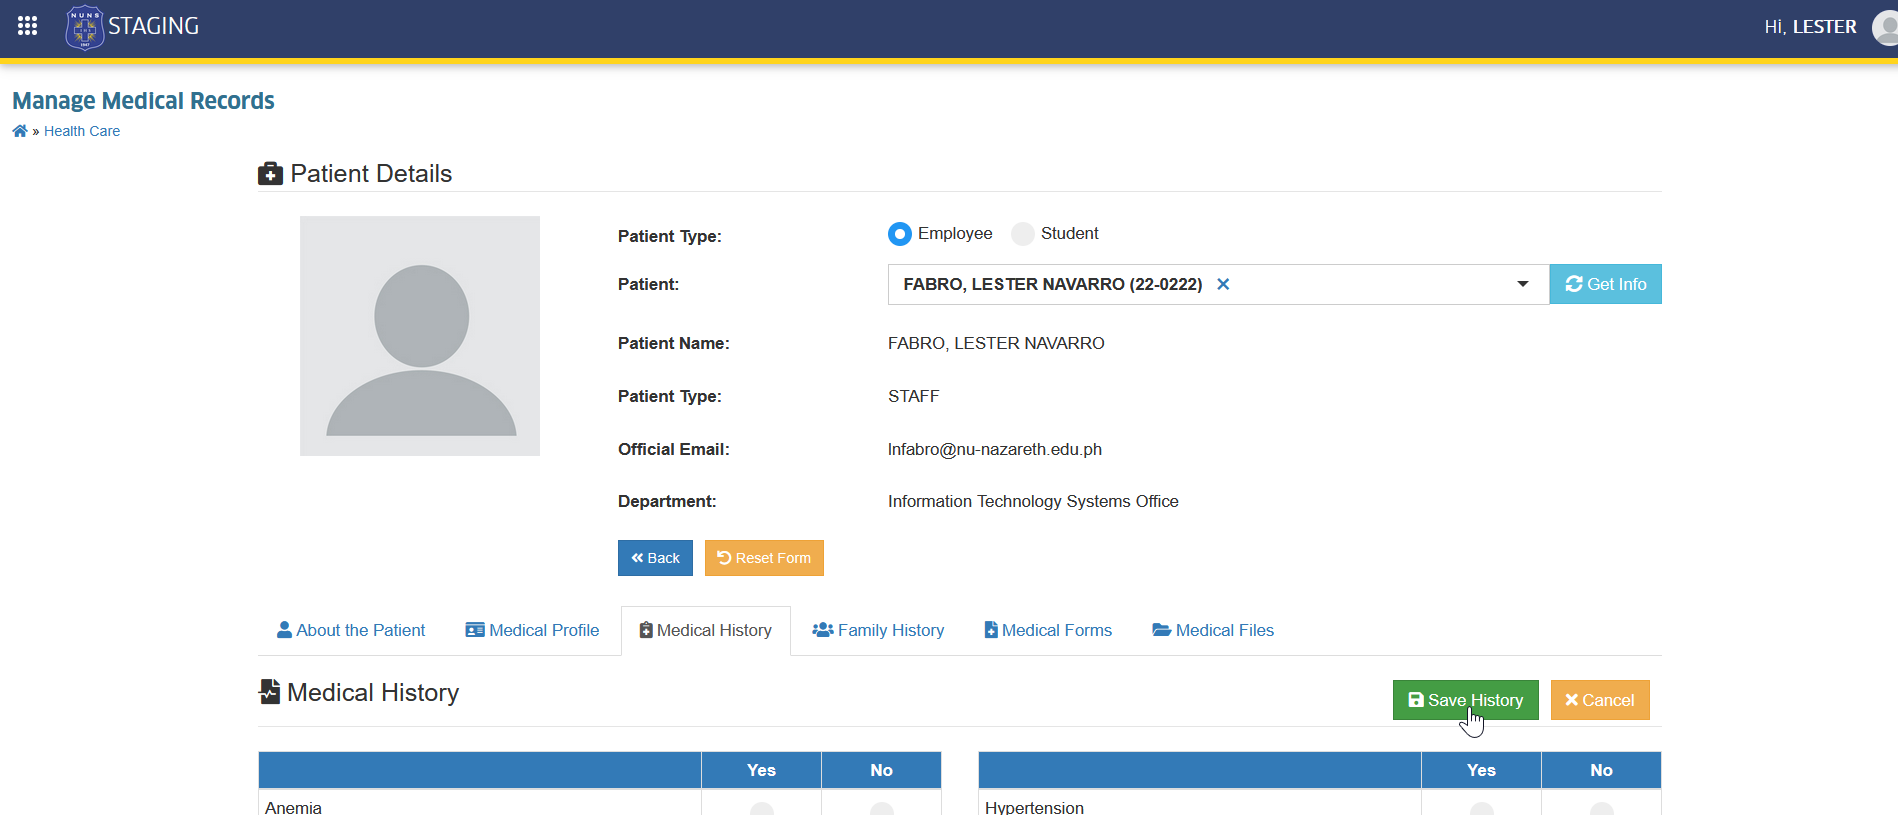
STEP 3. Fill out the required information. Then click the button.
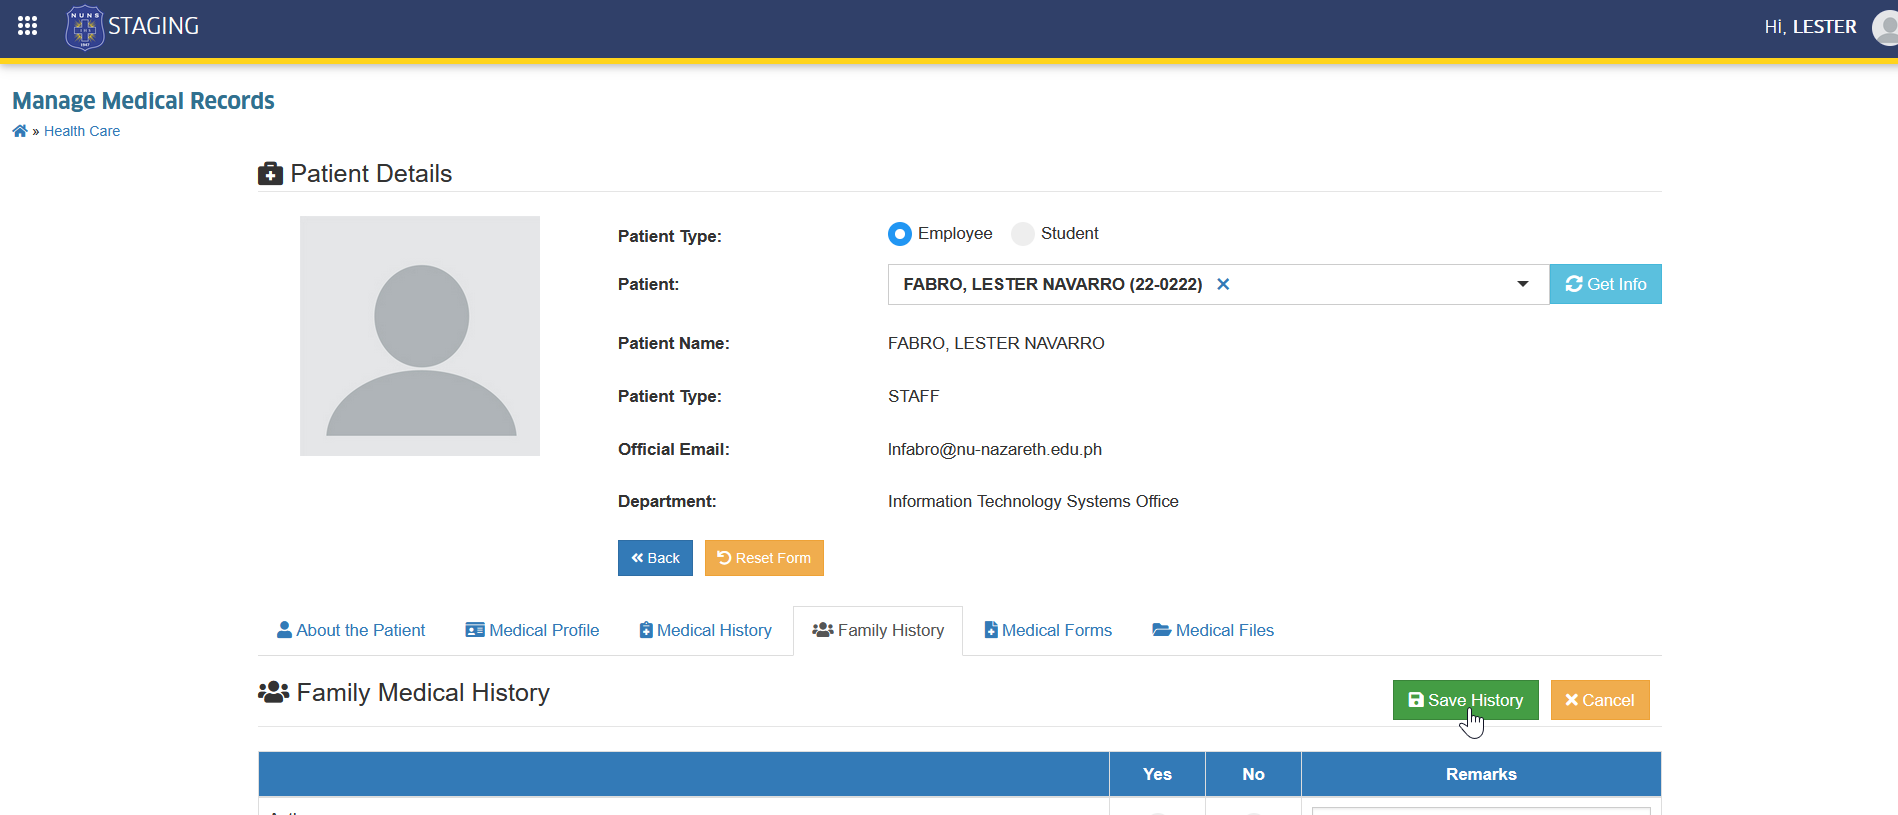
Encode Family History
This section allows you to record the patient’s family medical history. It helps identify possible hereditary conditions and supports better medical evaluation.
STEP 1. Go to Family History tab.
STEP 2. Click the button.
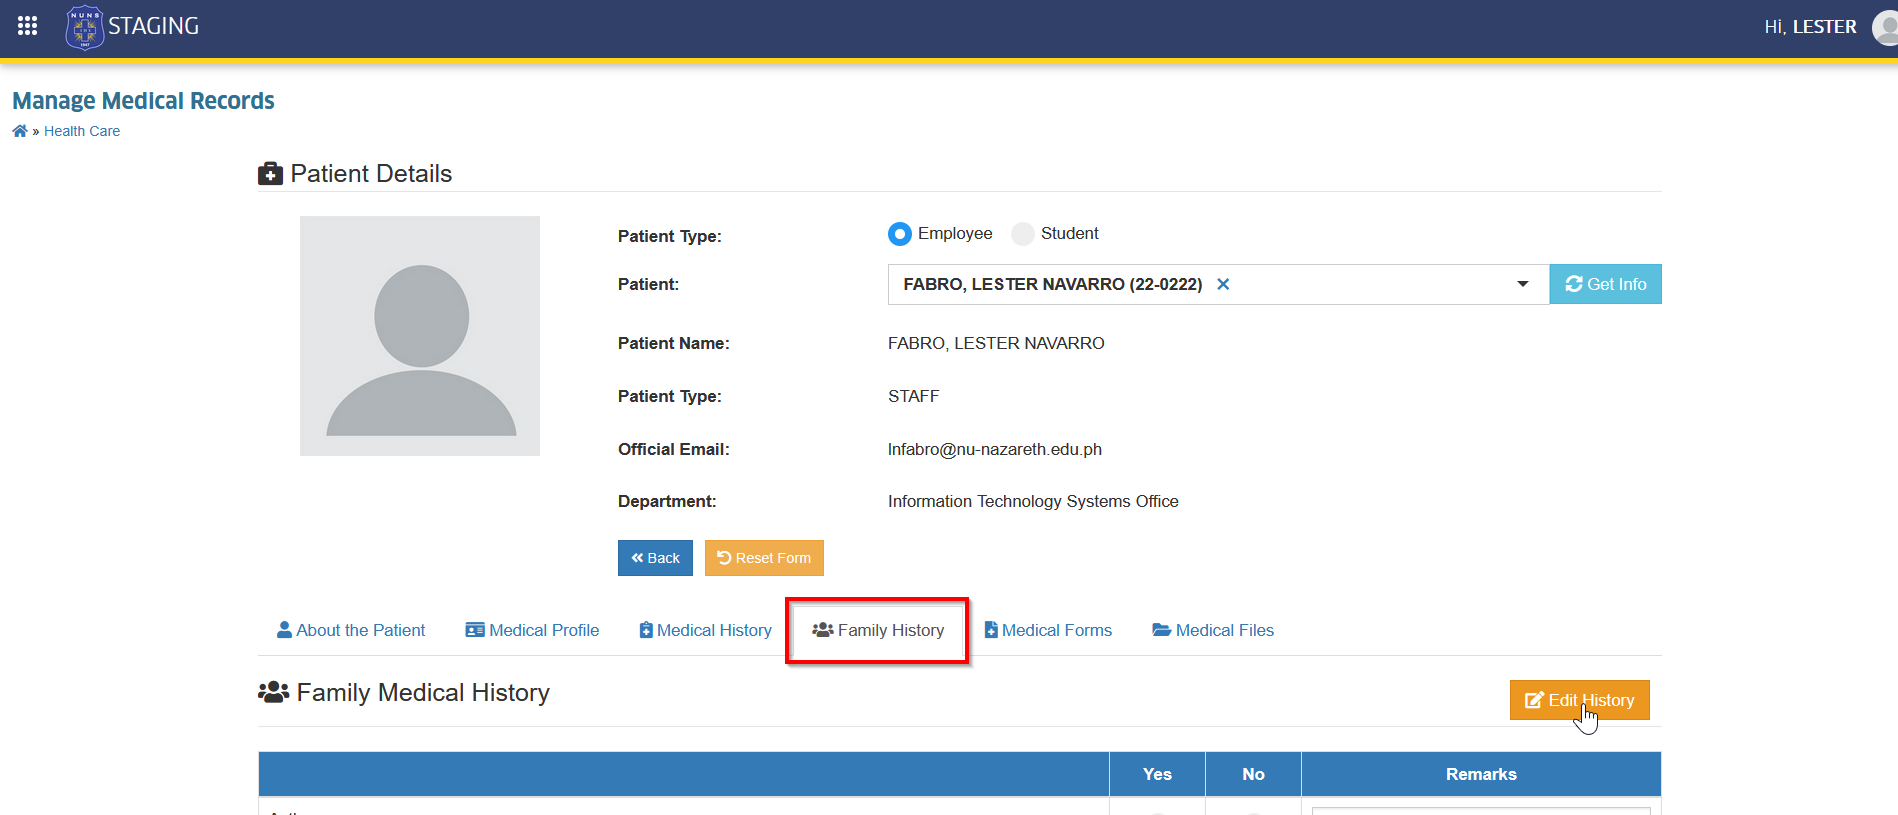
STEP 3. Fill out the required information. Then click the button.
Upload Medical Files
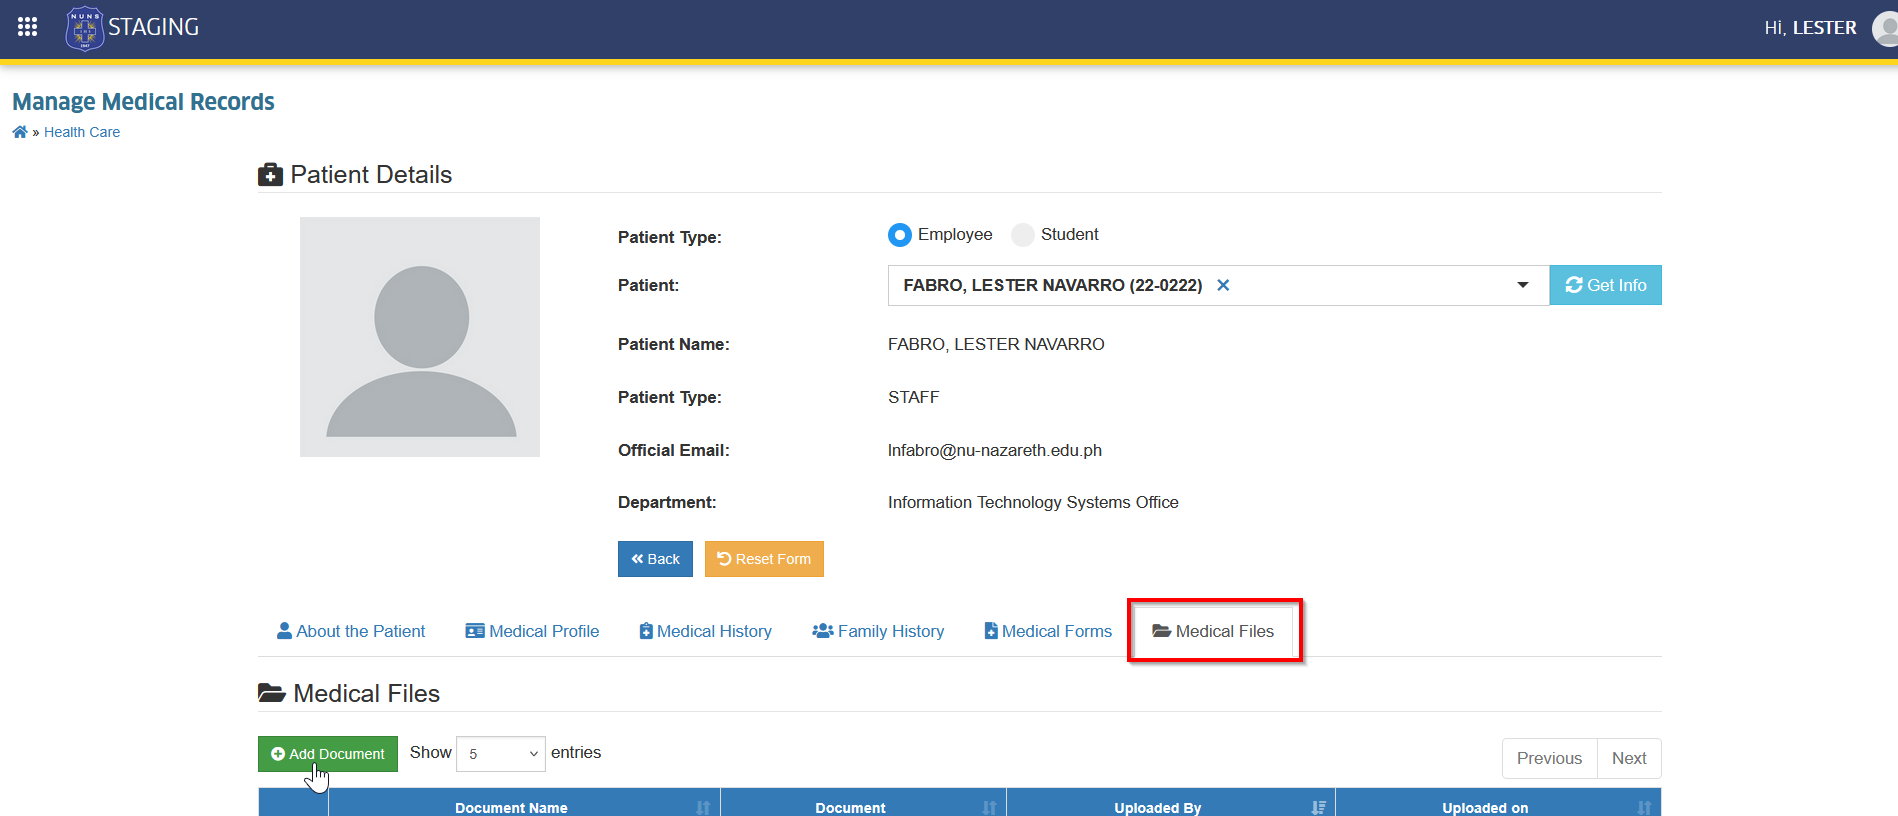
This section allows you to upload and store the patient’s medical documents, such as X-ray images, laboratory results, and other related files for reference.
Follow the steps below to upload medical files.
STEP 1. Go to Medical Files tab.
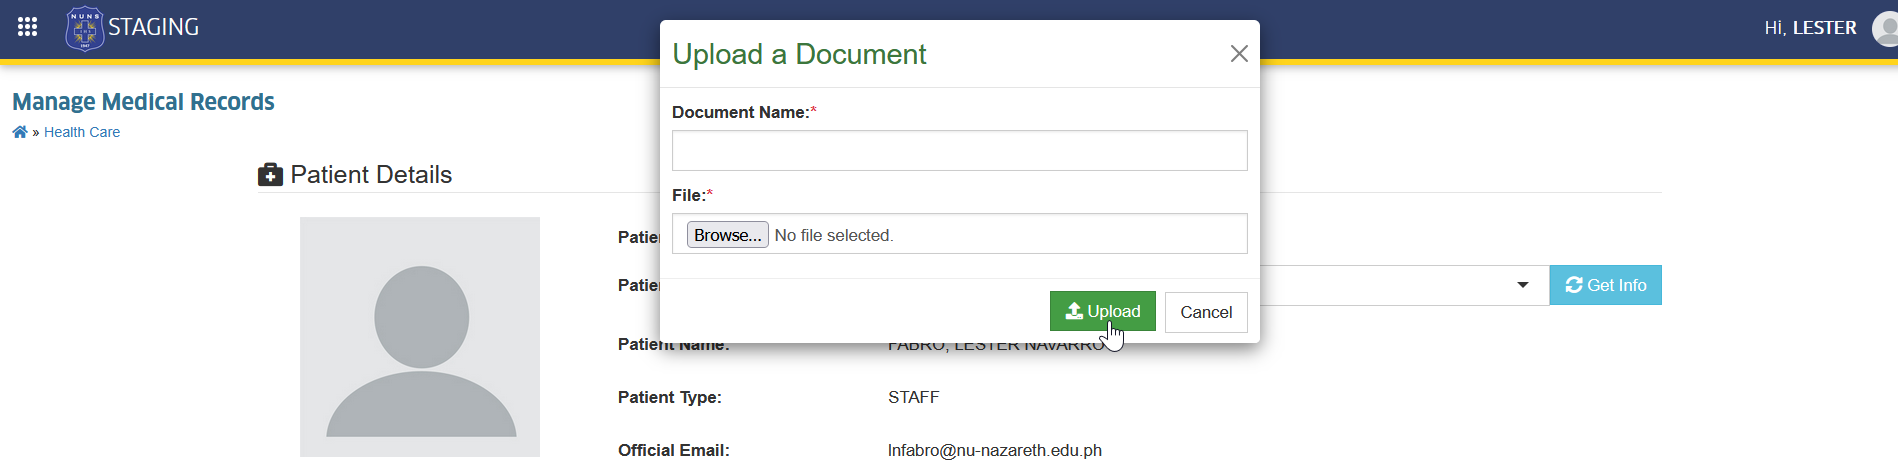
STEP 2. Locate and click the button. The Upload Document prompt will appear.
STEP 3. Encode the Document name and the browse the file from your device to upload in the system. Click the button to upload the file.
View Consultation Reports
This section allows you to view and monitor all consultation records in the system. It provides an overview of patients’ consultations, including examination results, diagnoses, and issued medicines for reference and reporting purposes.
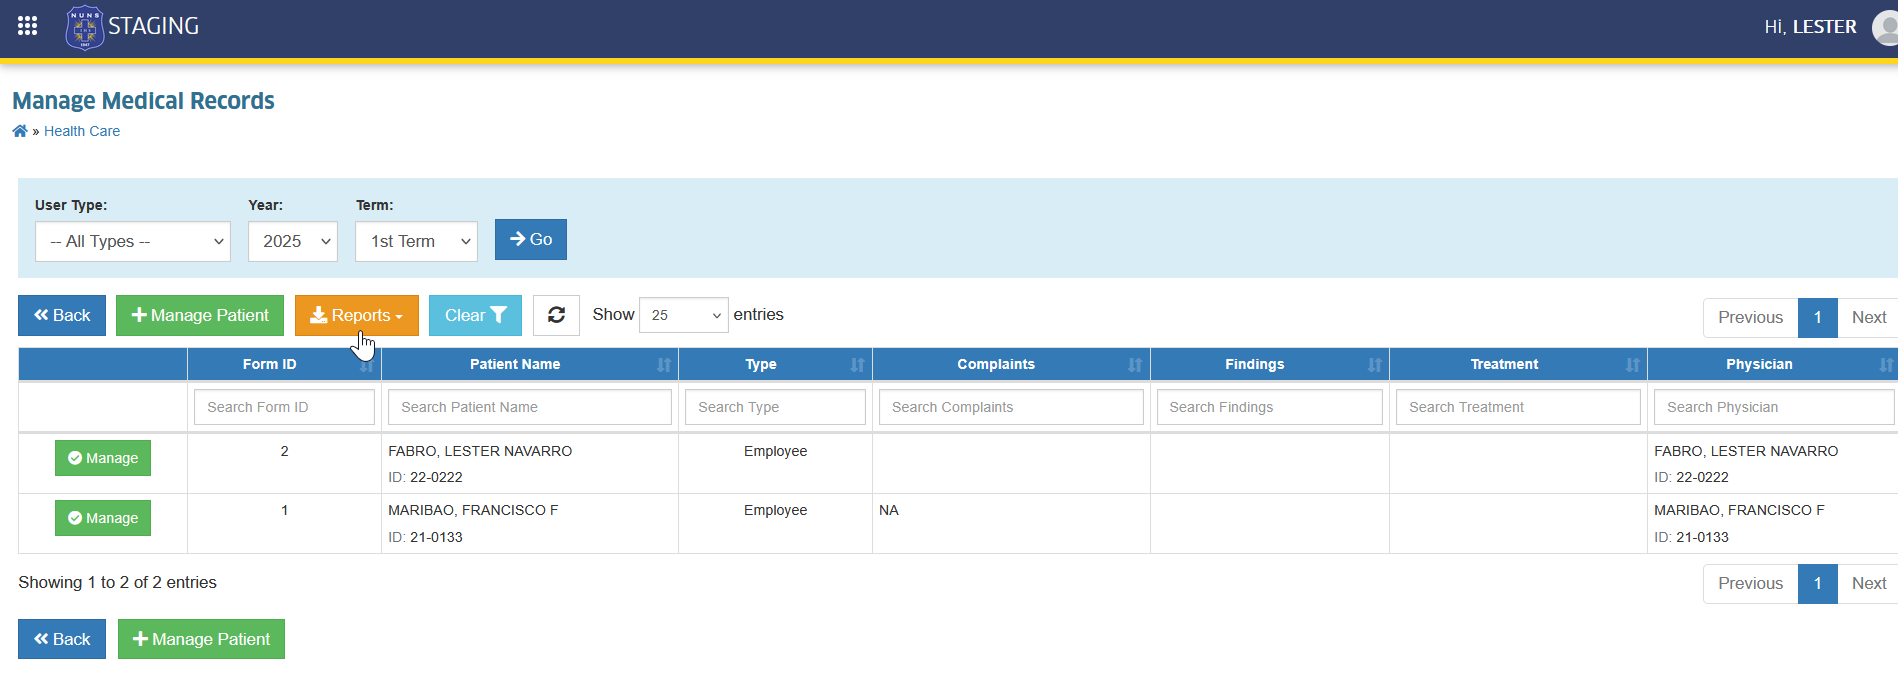
Follow the step below to view consultation report.
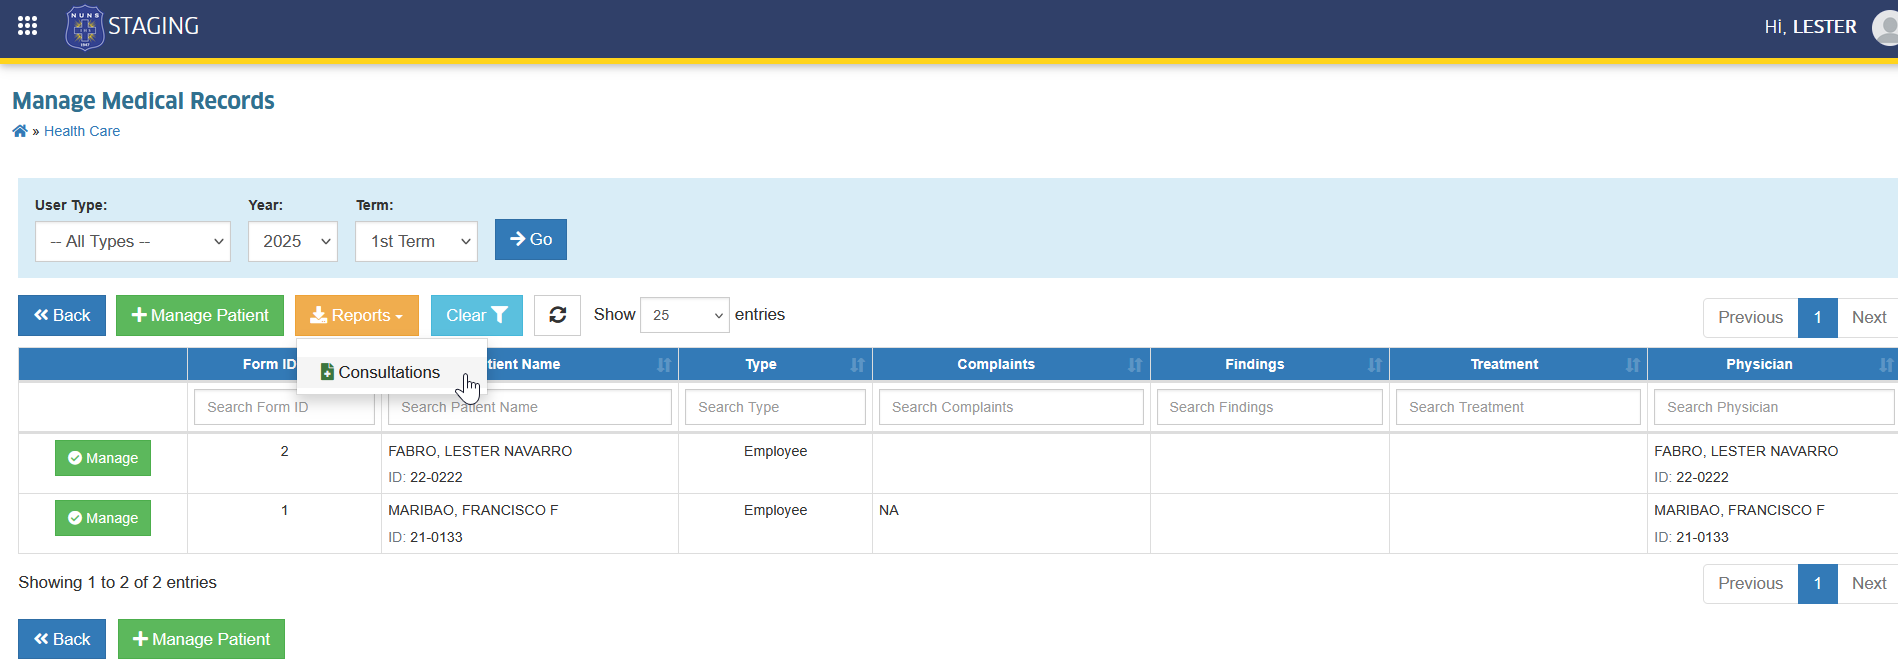
STEP 1. On the Manage Medical Record page, locate and click the button.
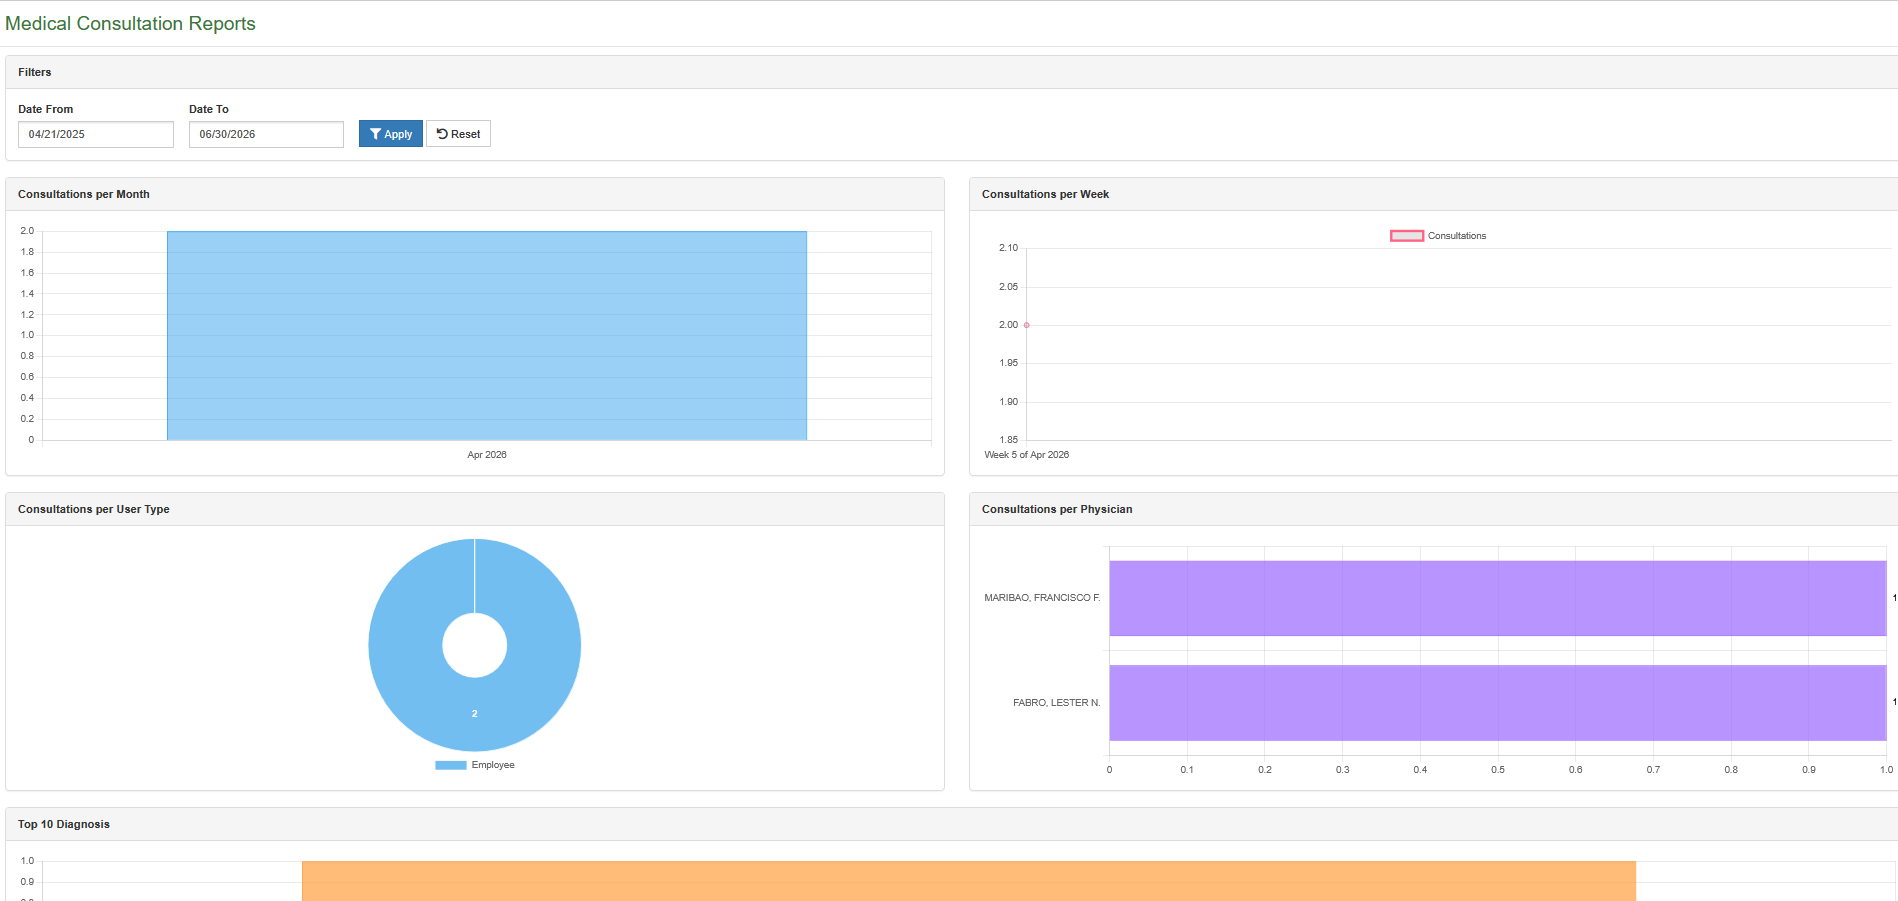
STEP 2. Click the button. You will be redirected to the Medical Consultation Reports page.
Sample of Medical Consultation Reports page.
For more questions or concerns, email us at nu-desk@national-u.edu.ph