NUIS - WFH Application Using NUIS

· 5 min read
Lester N. Fabro
Technical Associate

Work From Home (WFH) is a type of leave available within the NUIS Official Business (OB) & Leaves Application module. Users can select the WFH leave type when submitting their leave application. Upon selection, users are required to provide the necessary details and submit attachment(s) based on their work output requirements.

This feature ensures that WFH applications are properly documented, supported with required output attachments, and processed efficiently through the existing leave application workflow in NUIS.

Objective of the WFH Application Module

The WFH leave feature aims to:

  • Provide employees with an organized way to apply for Work From Home arrangements through the OB & Leaves module

  • Ensure required work output attachments are submitted for validation

  • Streamline approval processes for supervisors and administrators

  • Improve transparency in leave monitoring and status tracking

  • Maintain centralized records for WFH leave applications

Who Can Access

The module is accessible to:

  • Employees applying for WFH leave

  • Immediate supervisors or designated approvers

  • HR personnel or administrators for monitoring and reporting

How to Use the Module

This section provides step-by-step guidance on how to apply for WFH leave, submit required attachments, and track application status in the NUIS OB & Leaves Application module.

Employee Application Process

Step-by-step process for employees to submit a Work From Home (WFH) leave application, complete required details, upload necessary attachments, and track approval status.

STEP 1. Log in to your NUIS account.

STEP 2. Navigate to the Official Business (OB) & Leave Application module
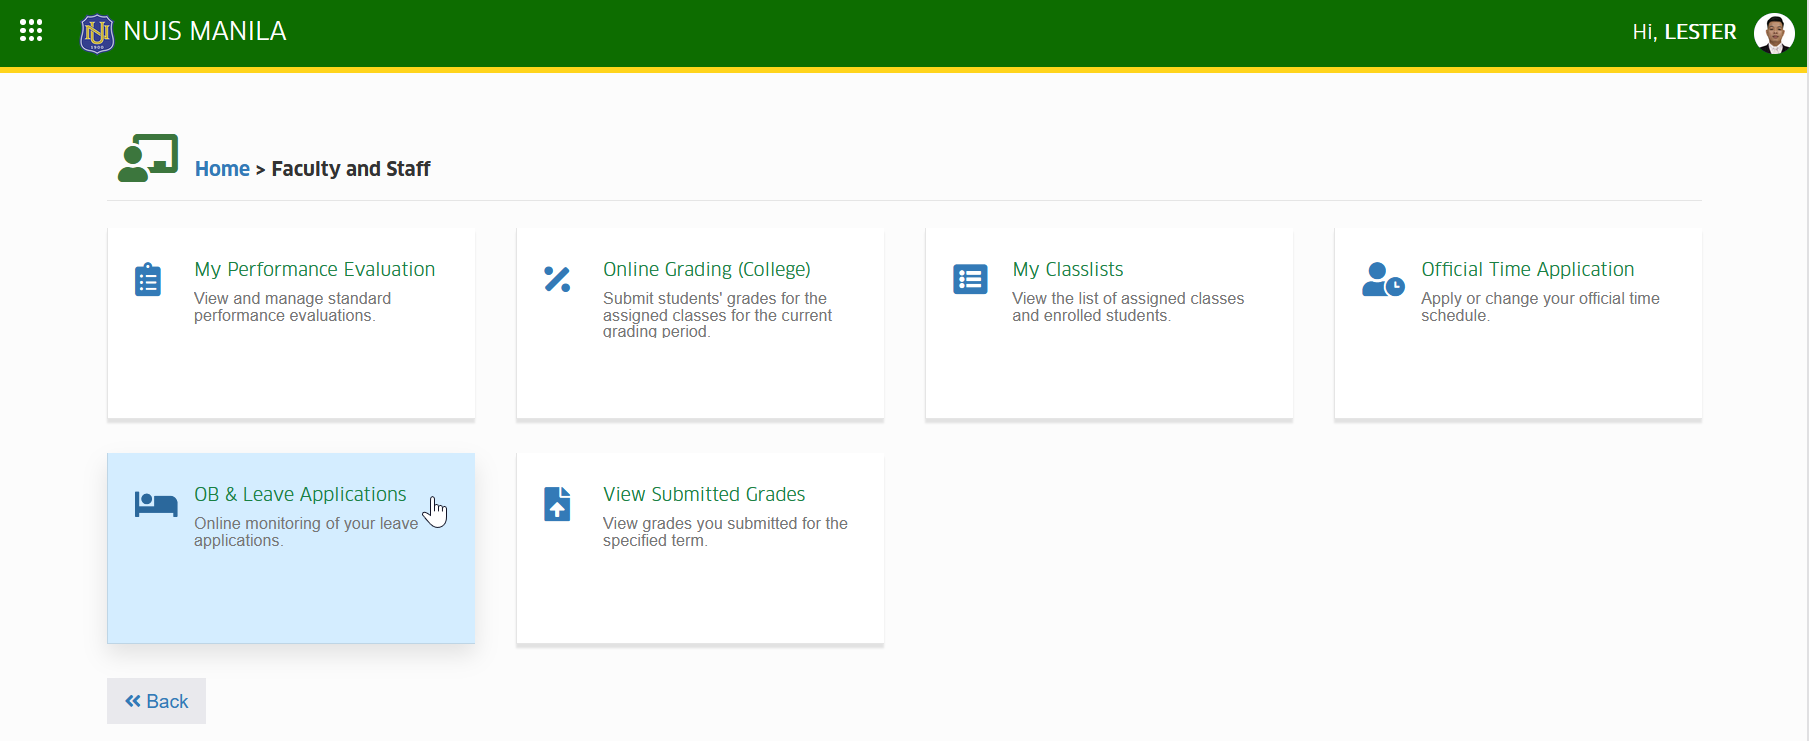
ob leave application module tab

STEP 3. On the My Leave Applications page, locate and click the button.
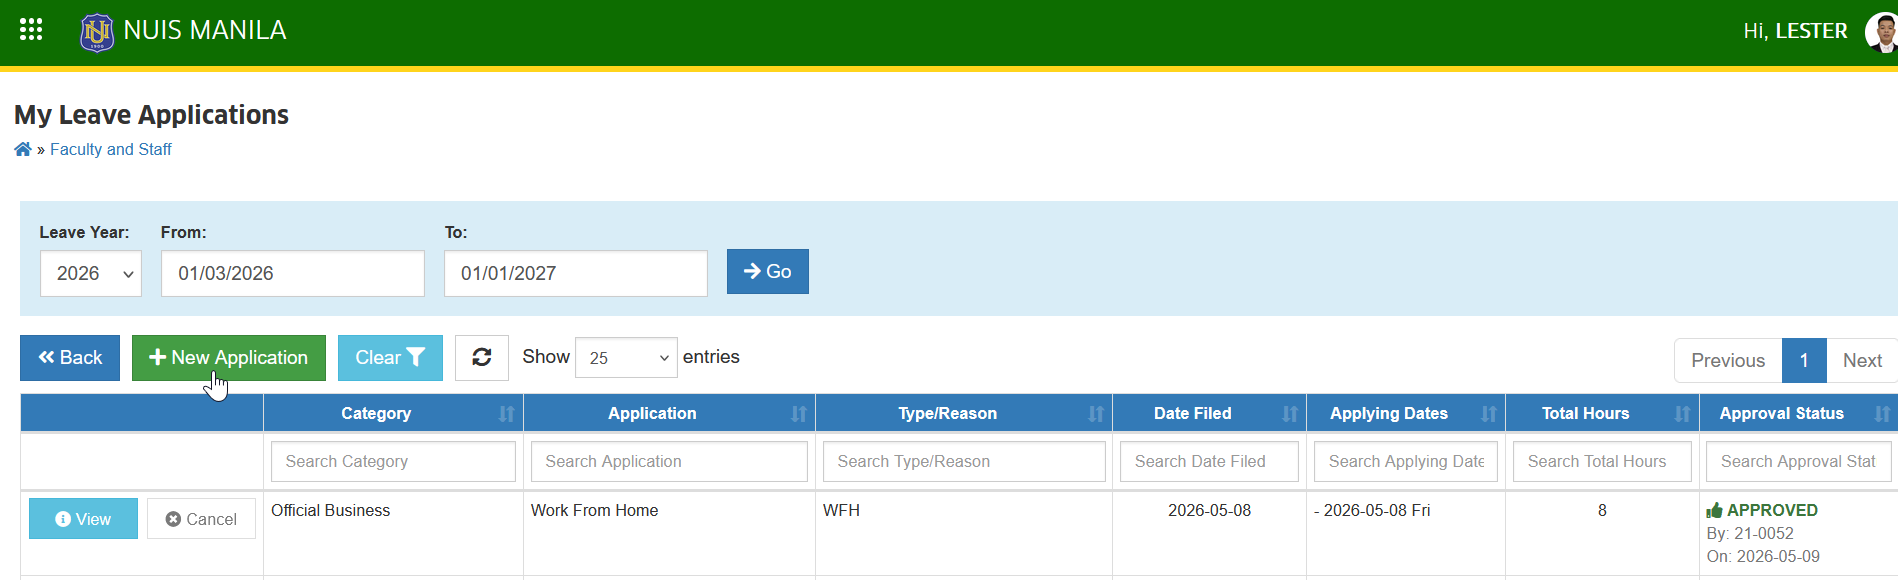
new application button

STEP 4. Select WFH as the leave type in the Application Type required field.
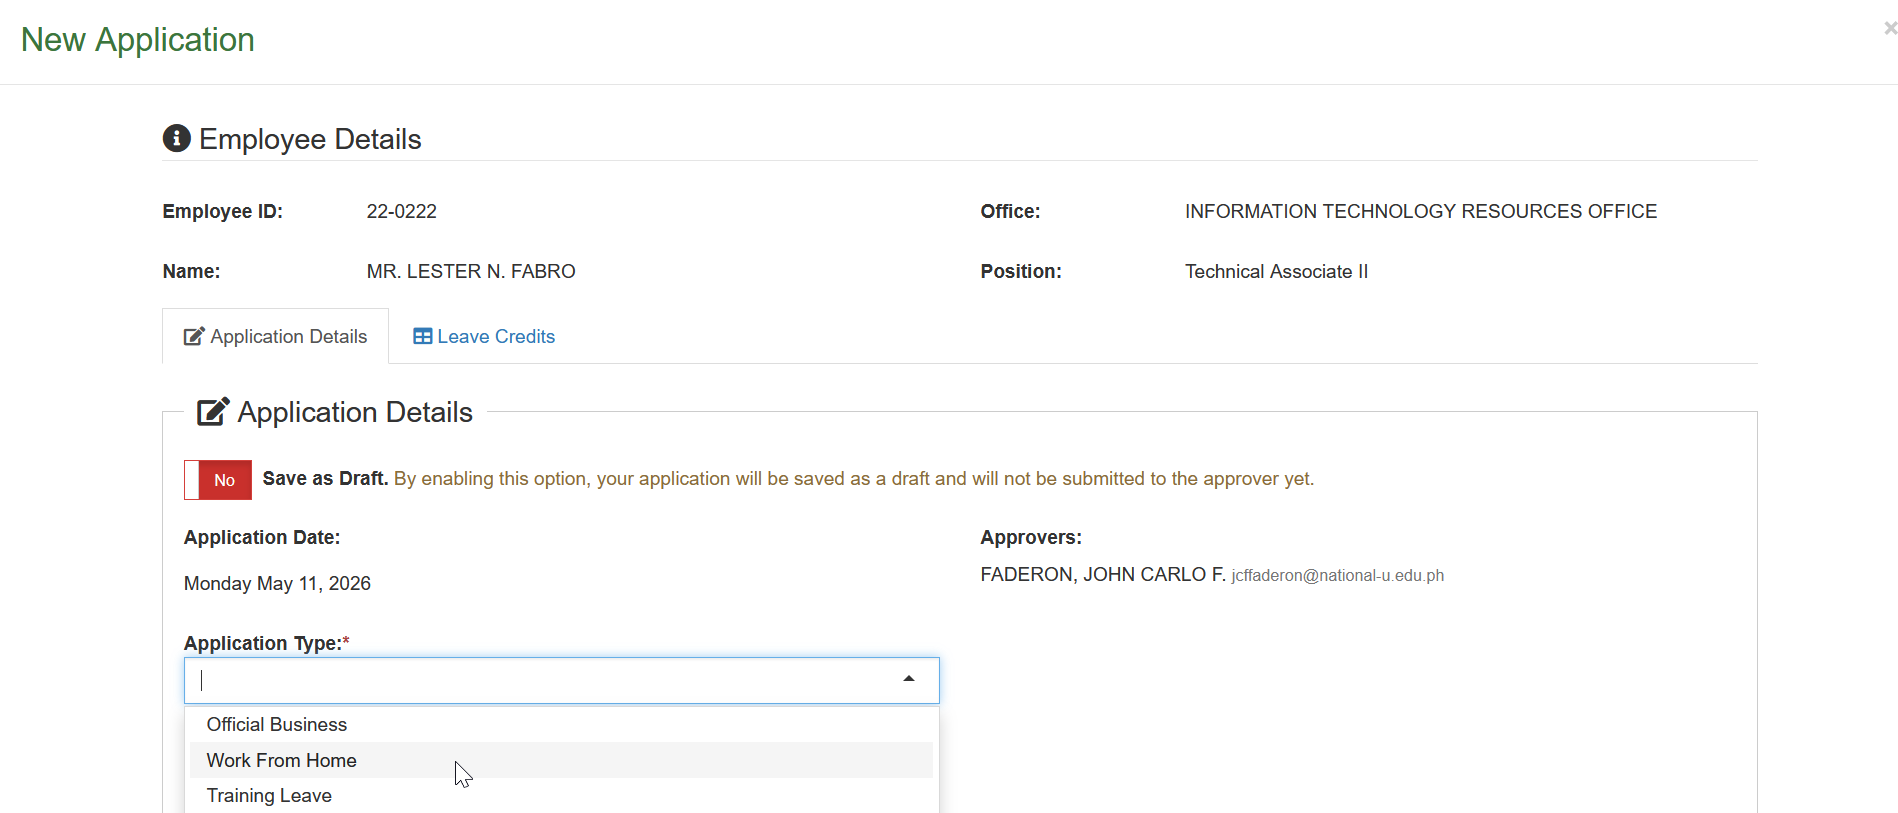
select wfh

STEP 5. Fill out all the required fields, such as Date Range and the Reason/Remarks.
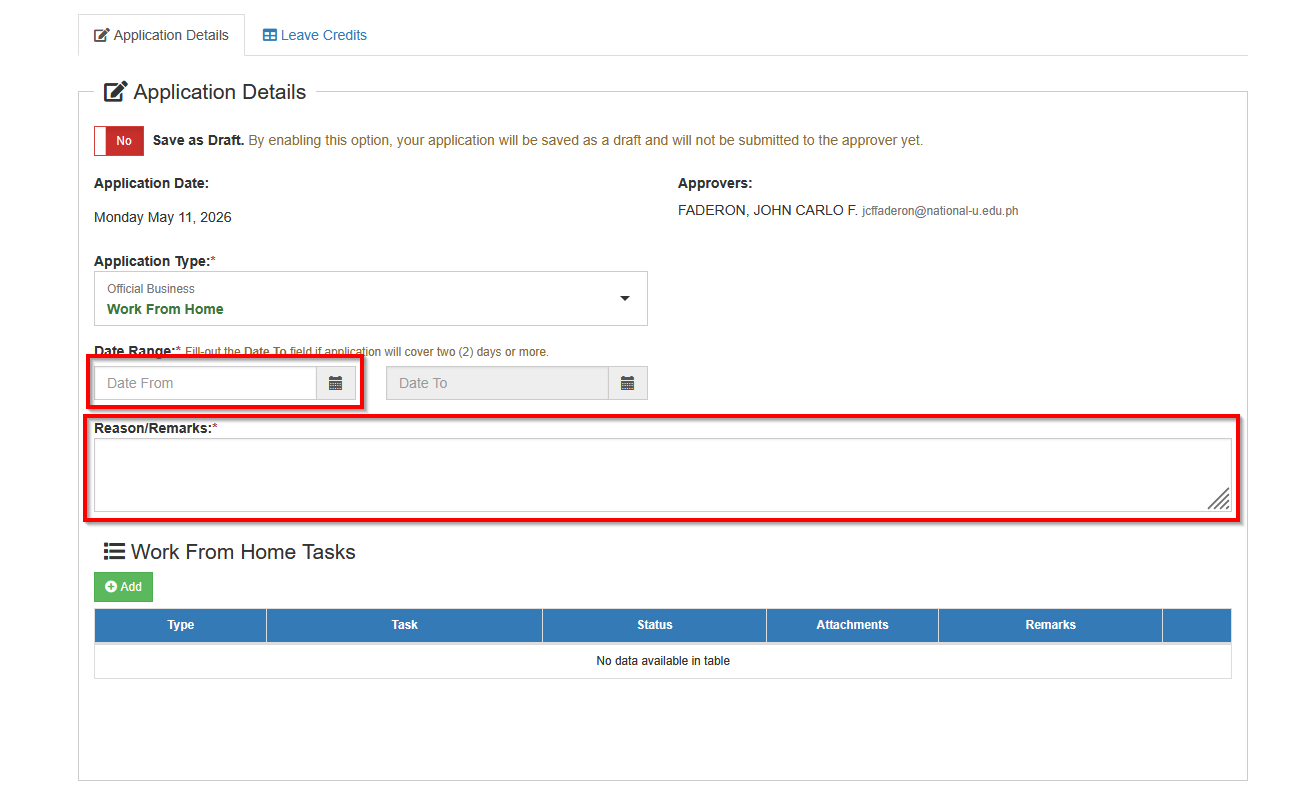
date range remarks

STEP 6. In the Work from Home Tasks section, enter your wfh output and attach supporting documents each entry. To add WFH output, click the button.
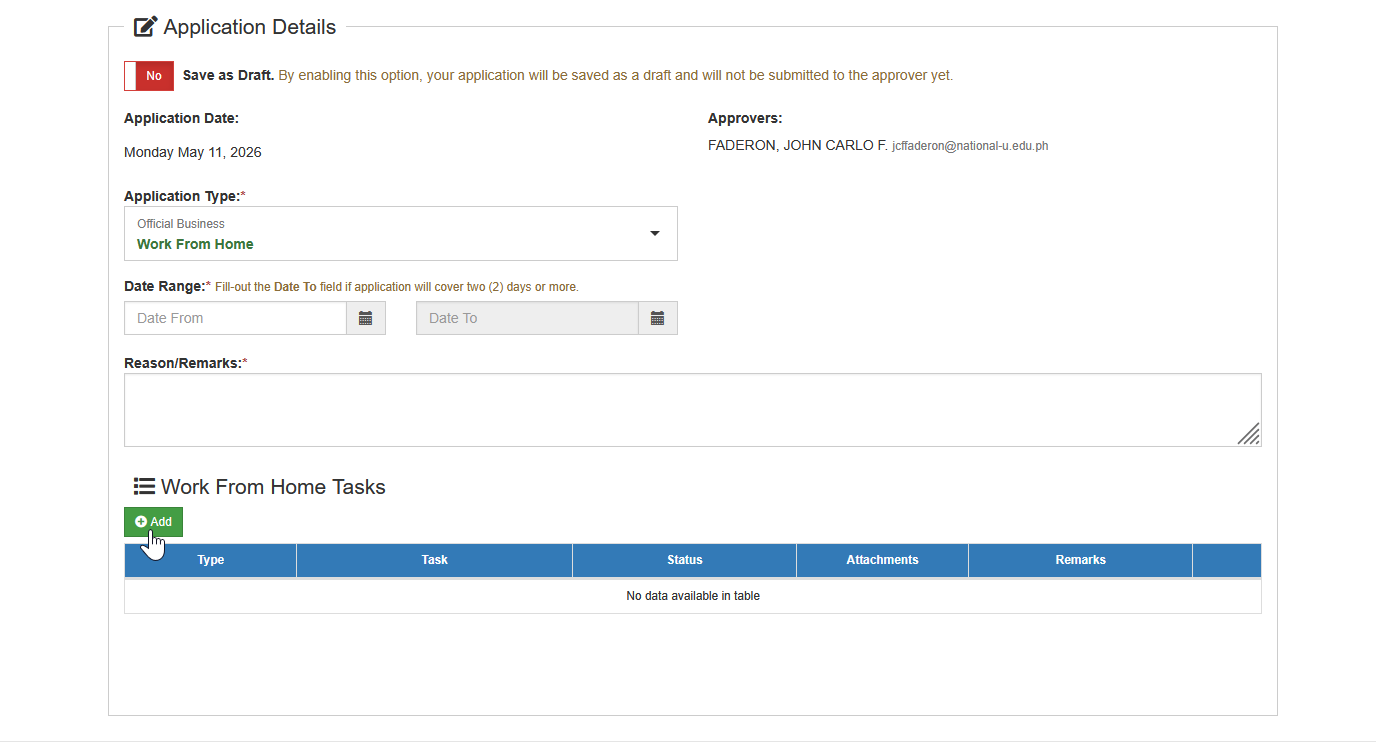
add button

STEP 7. Complete the required fields for each WFH task and upload the necessary attachments.

STEP 8. Click the button to submit your WFH leave application for approval by your immediate superior.
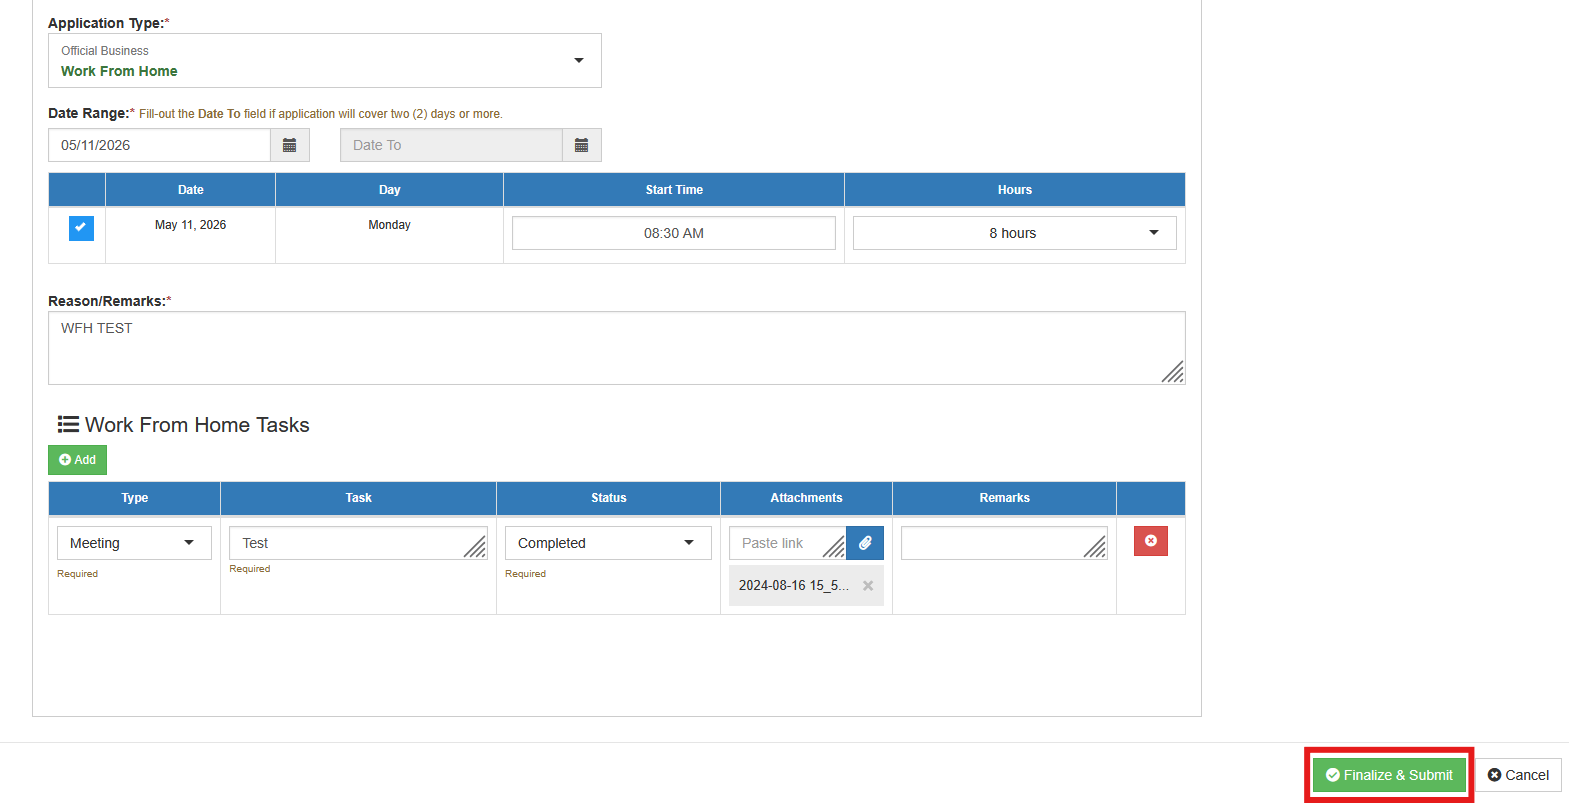
finalize & submit

Save as Draft

Allows users to save their WFH leave application as a draft before final submission, so they can review, edit, or complete it later

Follow the steps below to save your tasks before final submission.

STEP 1. On the Application Details section, Enable the Save as Draft feature by clicking the Save as Draft toggle.
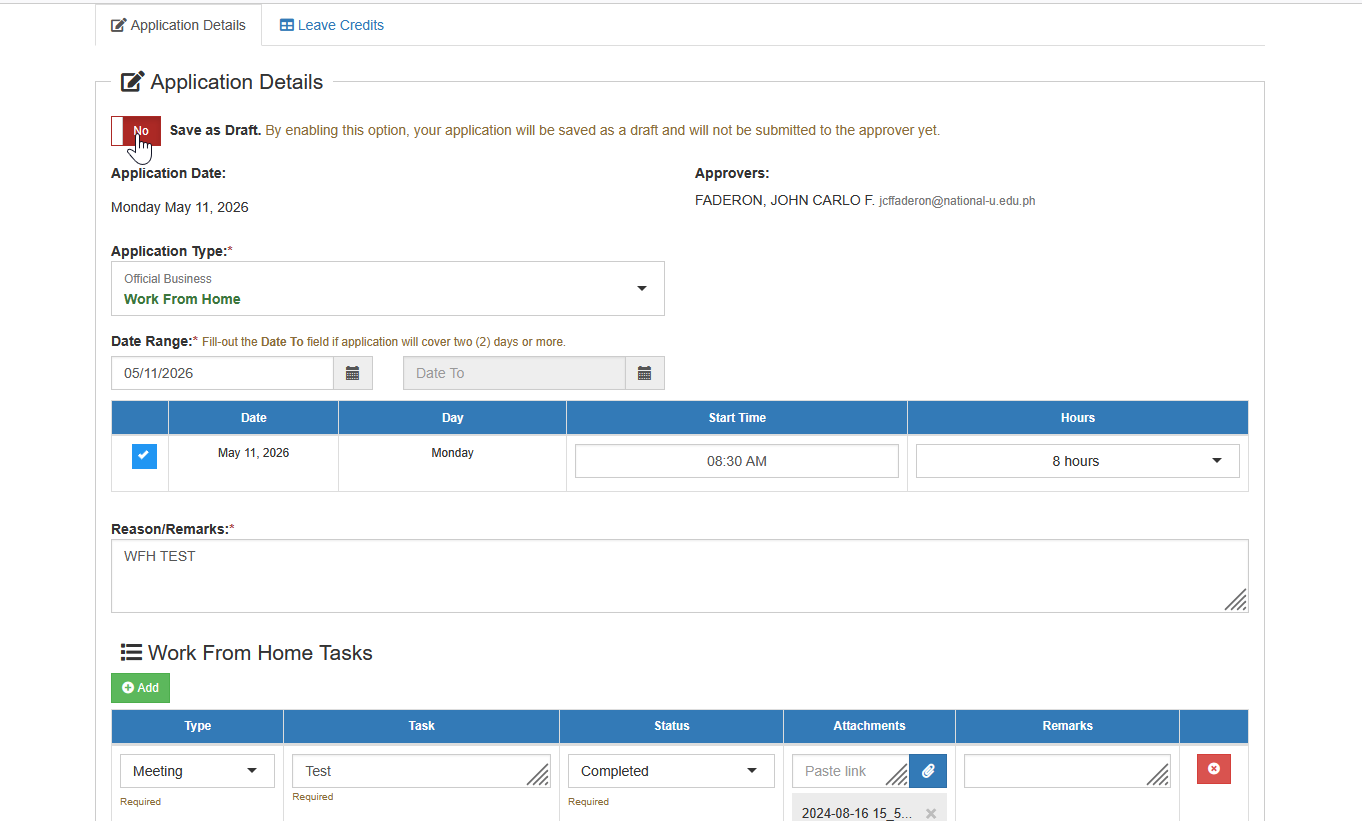
save as draft

STEP 2. Complete the required fields for each WFH task and upload the necessary attachments.

STEP 3. Click the button to save your tasks as draft.
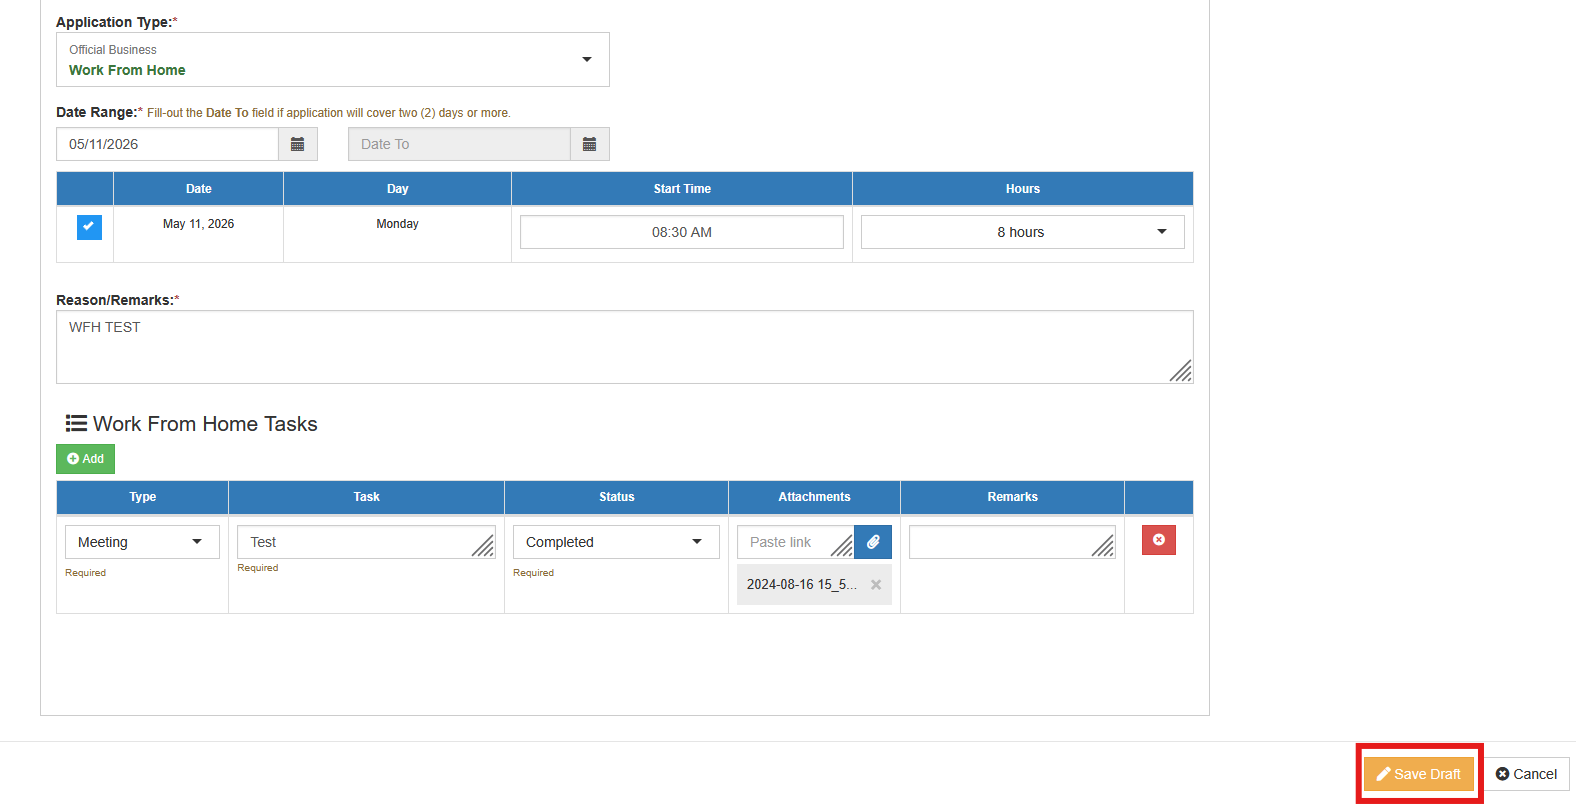
save as draft

STEP 4. To continue your application later, go to the My Leave Applications page and clicking the button. resume
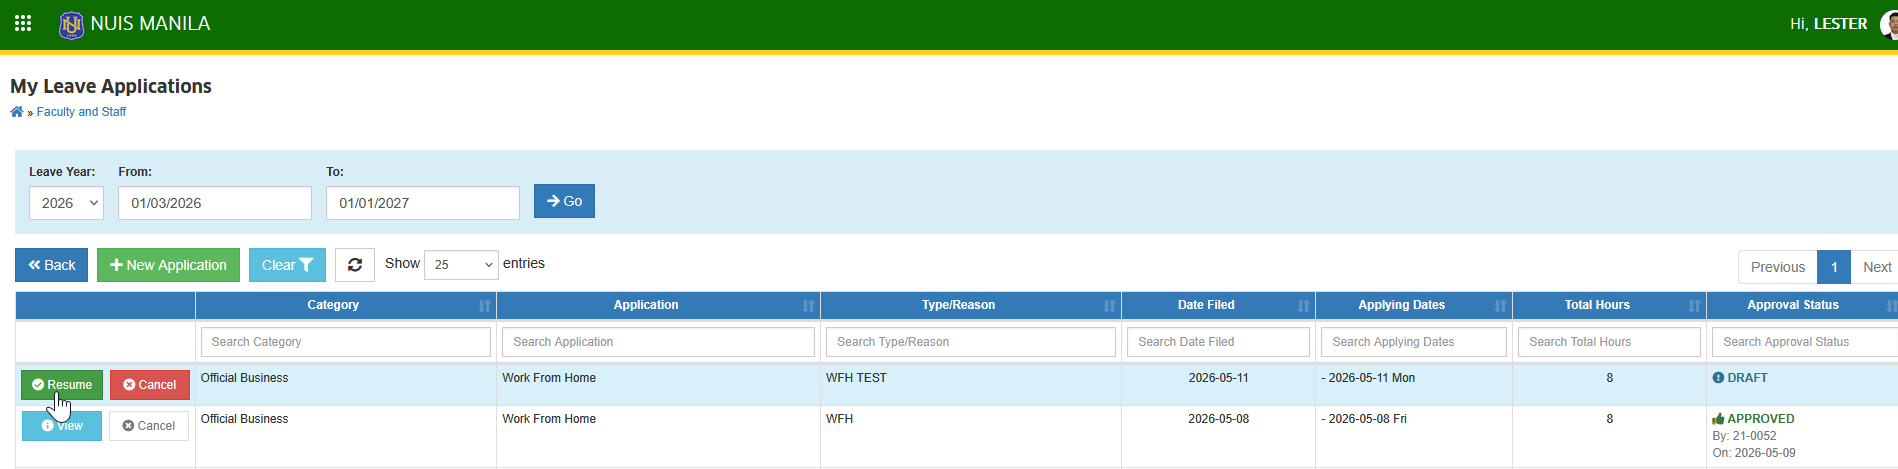
STEP 5. Once all tasks have been completed, disable the Save as Draft toggle.
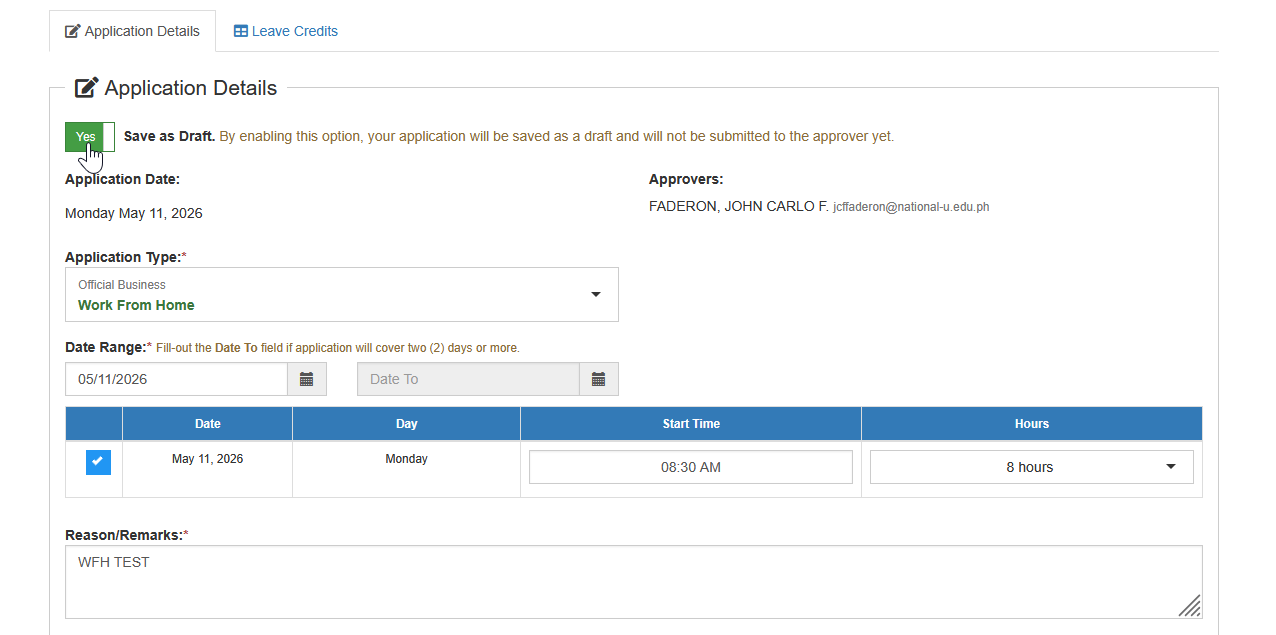
disable save as draft

STEP 6. Click the button to submit your WFH leave application for approval by your immediate superior.

finalize & submit

How to Approve WFH Applications

Step-by-step guide for approvers to review, validate, and process submitted Work From Home (WFH) leave applications.

STEP 1. Go to Human Resource > Attendance & Leave Mgmt > Approval of OB & Leave Application
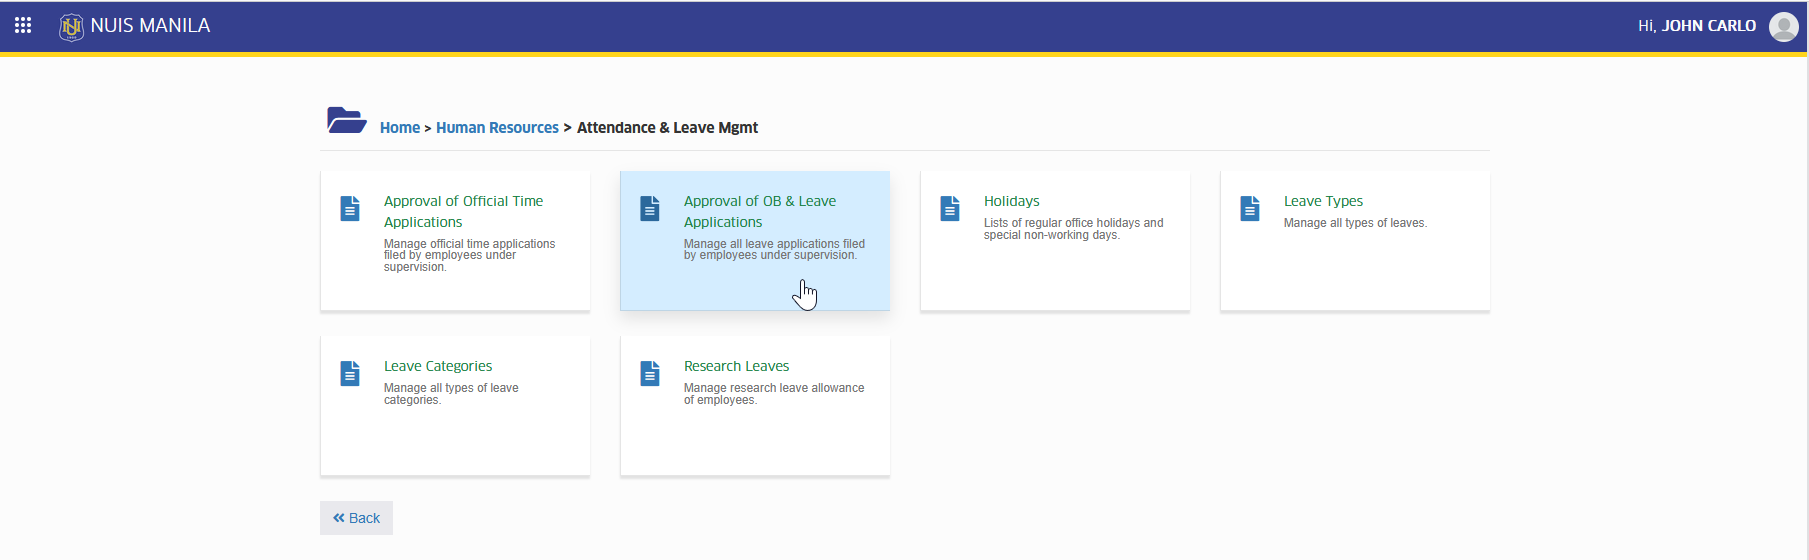
approval of leave module tab

STEP 2. Locate the WFH leave application you want to review, then click the corresponding button.
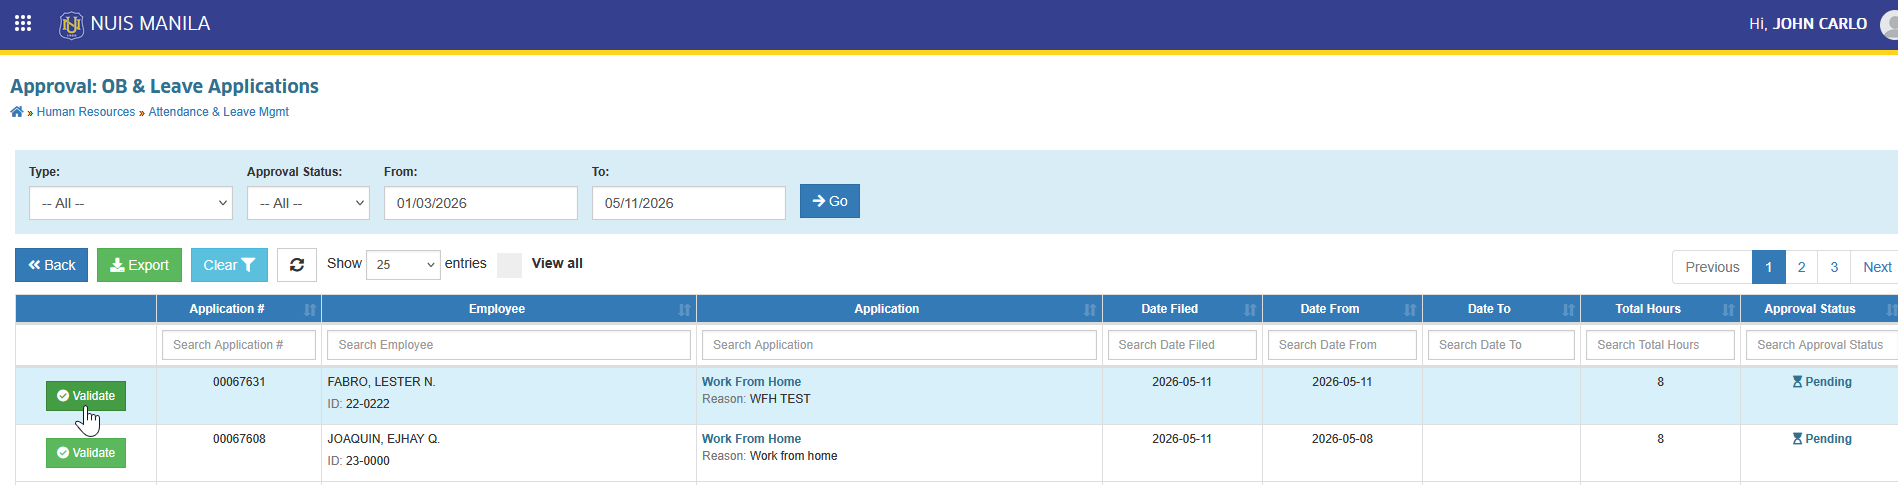
validate button

STEP 3. Review the application details, including submitted tasks and attachment. You may click the attachment links to view supporting documents. Enter your remarks and click the button.
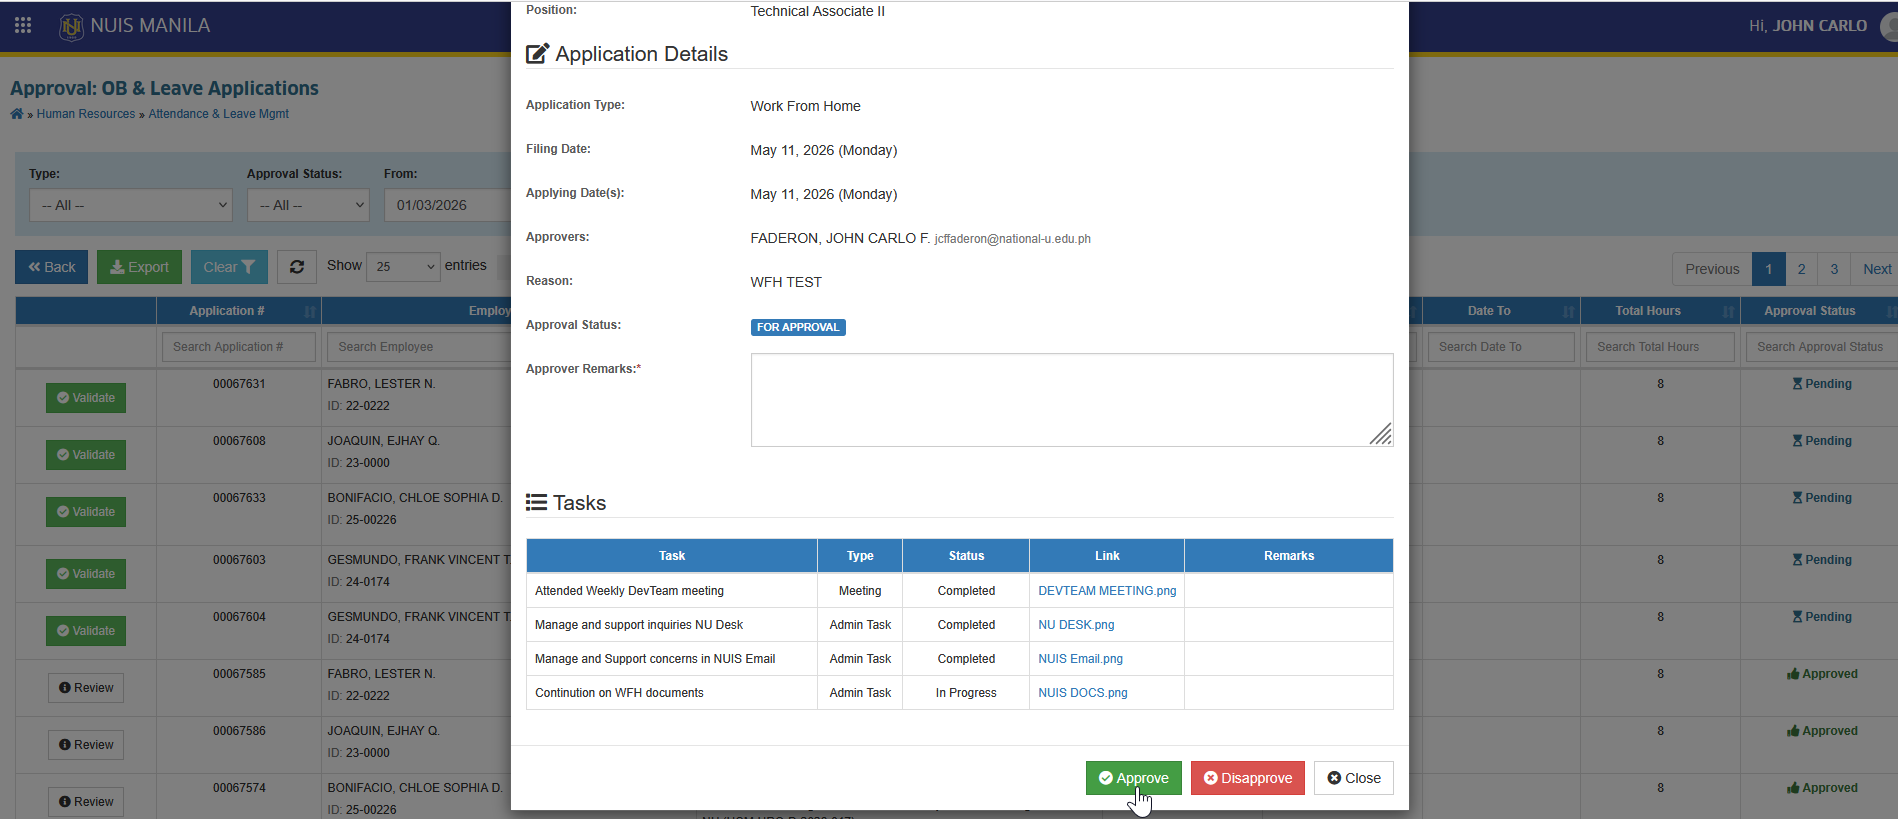
approve button

HR Monitoring

Step-by-step guide for HR personnel to monitor, review, and manage submitted Work From Home (WFH) leave applications for tracking, compliance, and reporting purposes.

STEP 1. Go to Human Resource > Attendance & Leave Mgmt > Approval of OB & Leave Application

approval of leave module tab

STEP 2. In the Approval: OB & Leave Applications page, enable the View All to display all leave applications.
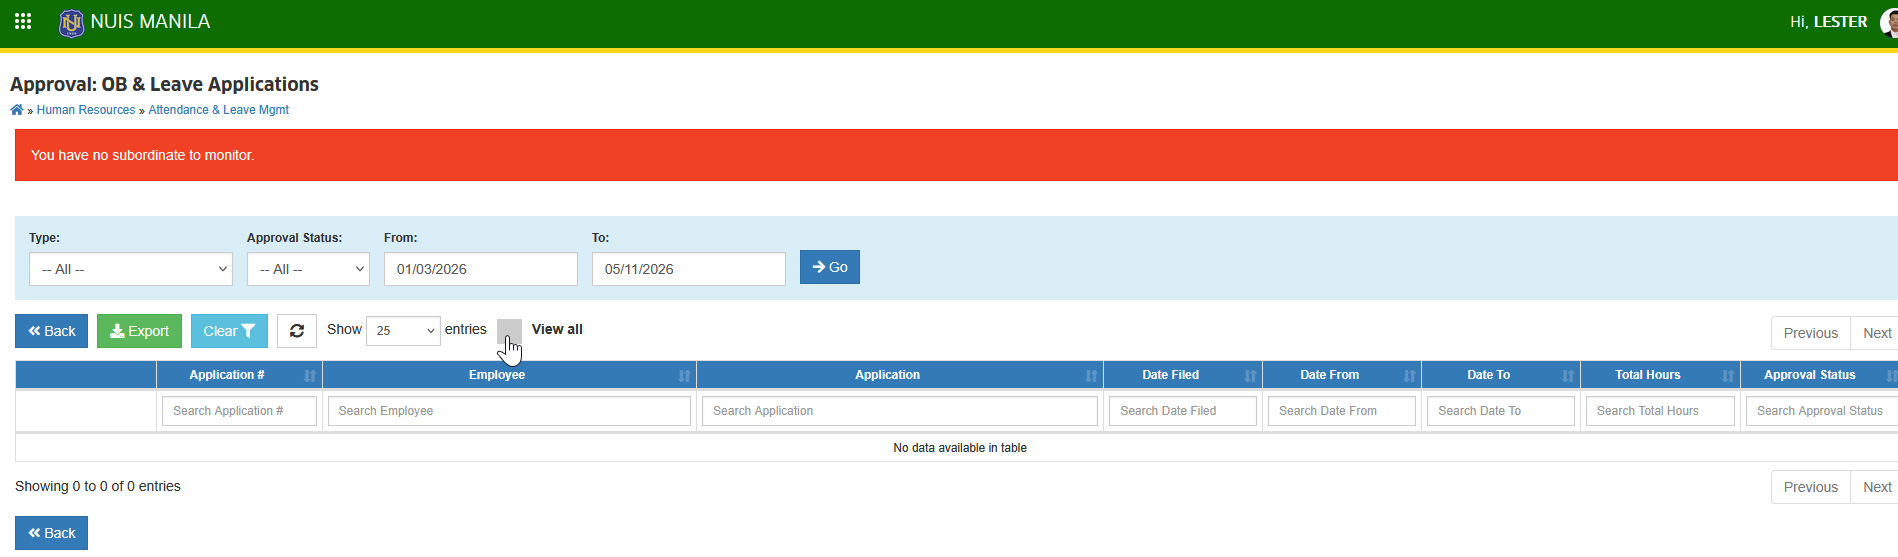
view all

STEP 3. For easier searching, use the filtering feature to quickly locate employees' WFH leave application. Click the corresponding button to view application details, including the WFH Output attachments for verification.
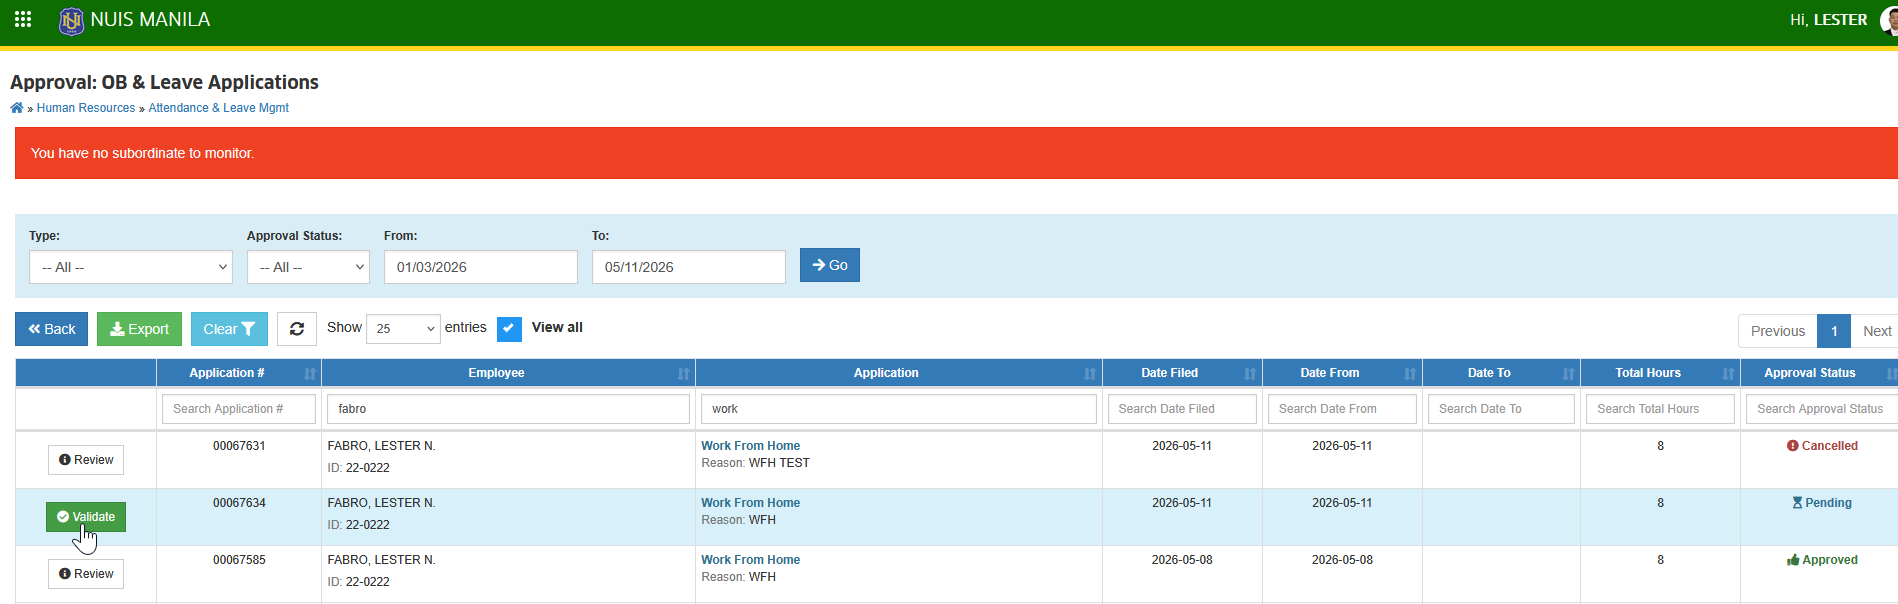
validate button

STEP 4. Review all application details, including the WFH file attachments and supporting documents. After reviewing, click the button to exit the details view.
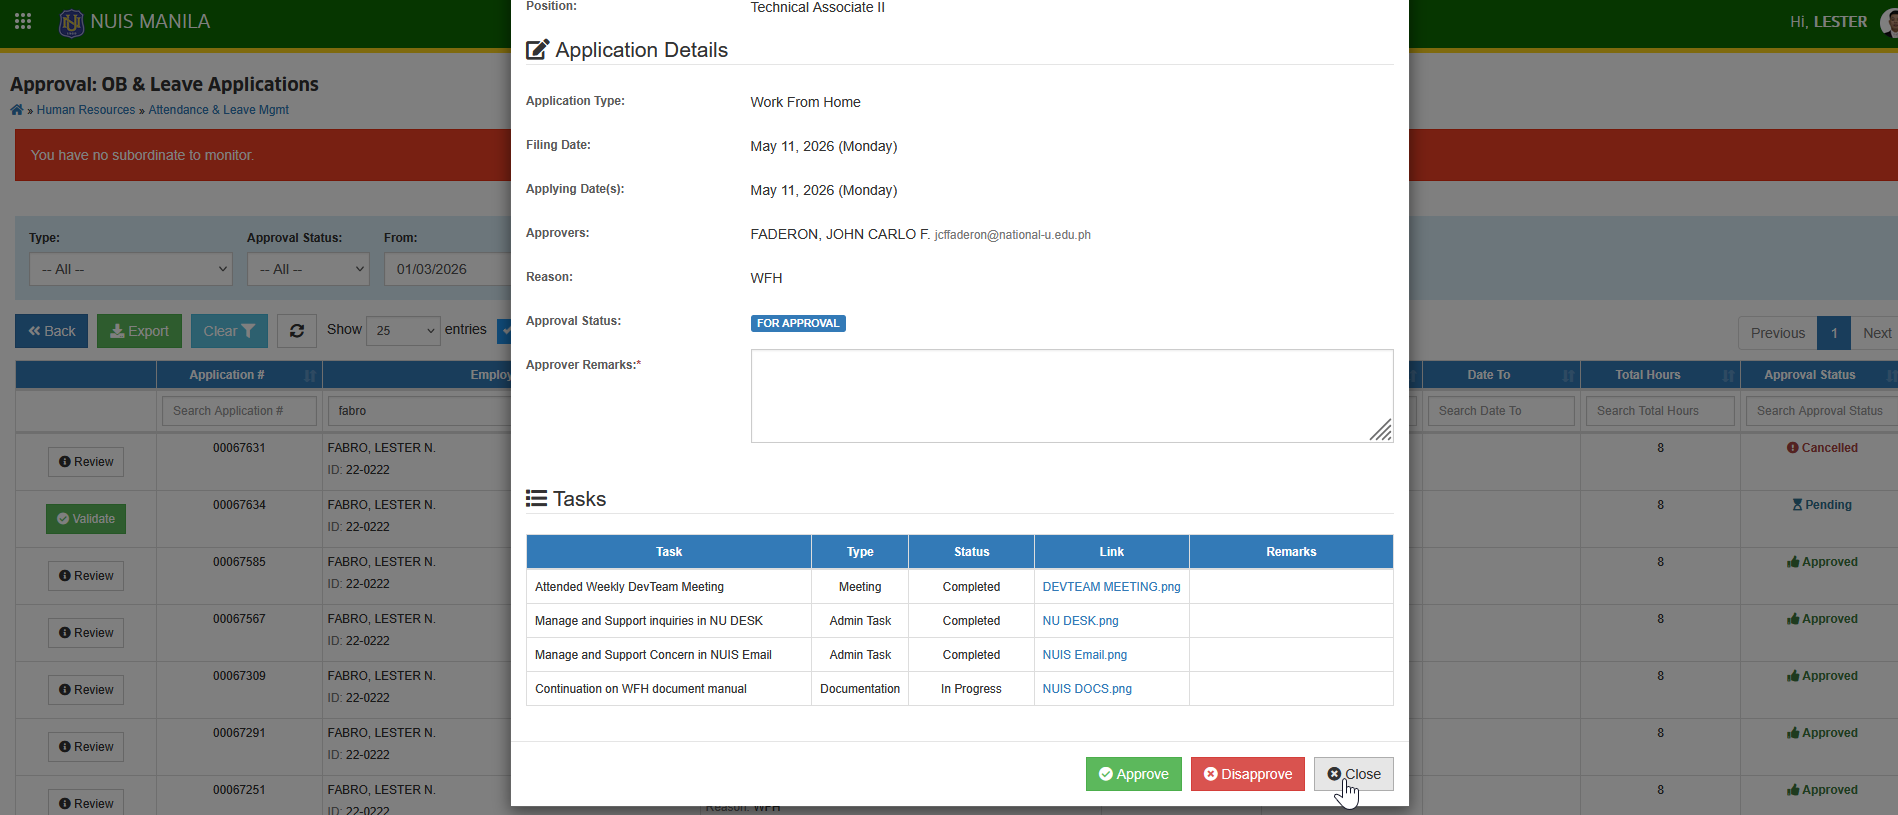
close button

Temporary Access

· 3 min read
Lester N. Fabro
Technical Associate

The Temporary Access feature allows administrators to grant a user additional system access for a limited time. This is useful for temporary assignments, substitutions, or special tasks that require extra permissions.

Once the Temporary Role expires, the additional access is automatically removed. The user’s main role remains applied at all times, and no manual update is required from the administrator.

Required Permission

  • Edit User - Allows the user to modify existing user account details, roles, access settings, and temporary access configurations.

How to Set Temporary Access

Follow the steps below on how to set temporary access.

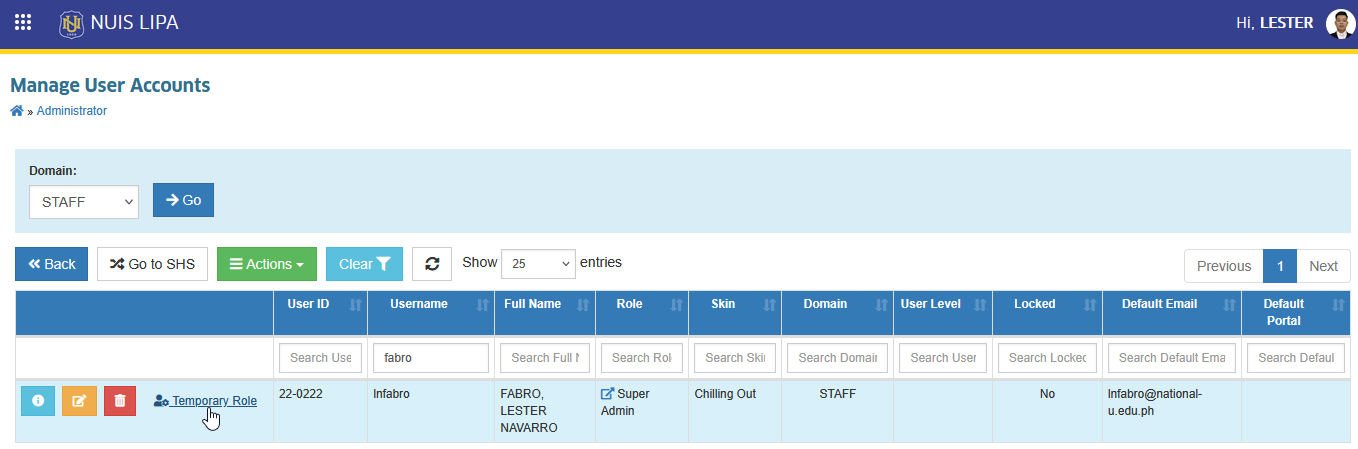
STEP 1. On the Manage User Accounts page, select the user you want to assign temporary access to.

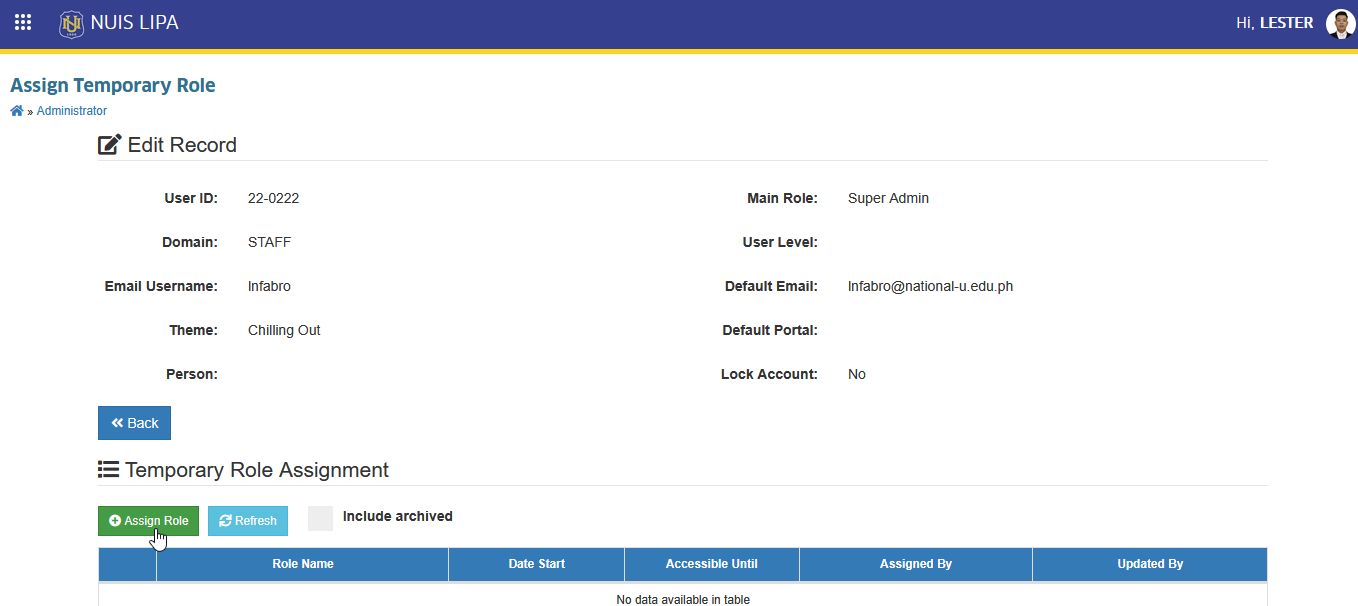
STEP 2. Click the button. The system will redirect you to Assign Temporary Role page.

temporary access button

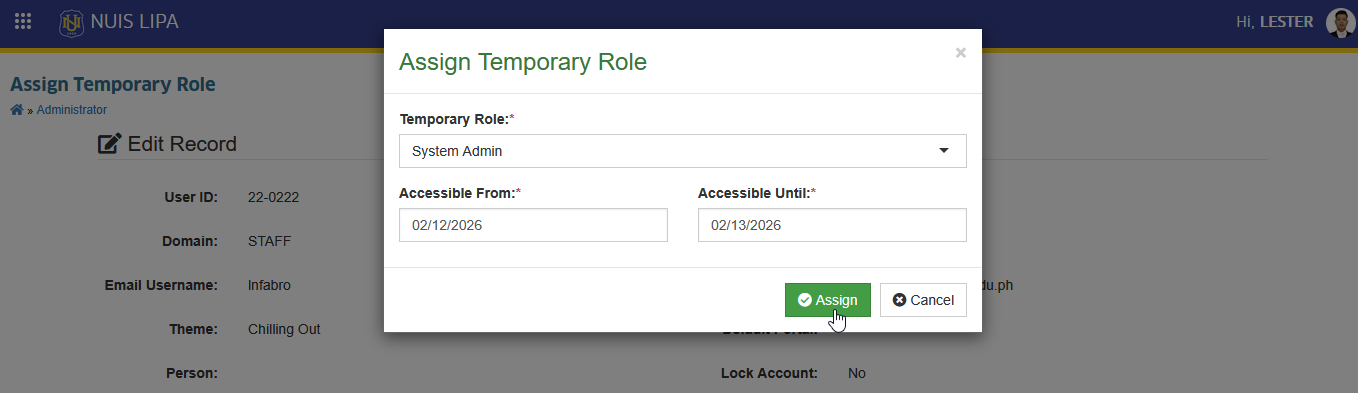
STEP 3. On the Assign Temporary Role page, under Temporary Role Assignment section, click the button. The Assign Temporary Role prompt will appear.

assign role button

STEP 4. Fill out all the required fields in prompt.

Field NameDescription
Temporary RoleSelect the user role to be assigned temporarily from the dropdown list.
Accessible FromSet the start date when the temporary role will take effect.
Accessible UntilSet the end date when the temporary role will automaticaly expire and the user's main role will resume.

STEP 5. Click the button to save.

assign button

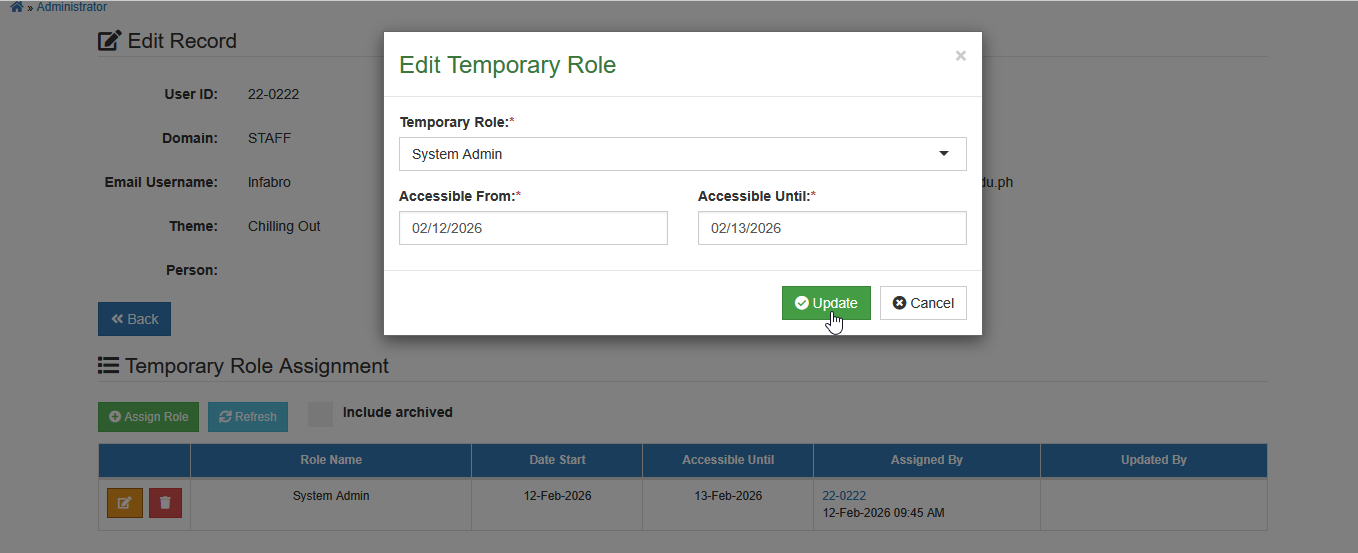
Once assigned, the record will be displayed in the Temporary Role Assignment table.

assign button

How to Edit Temporary Role Access to User

Follow the steps below to modify the user's temporary access details.

STEP 1 Go to User's Temporary Access record and click the button. The Edit Temporary Role prompt will appear.

edit tempo access button

STEP 2. Update the necessary details in the Edit Temporary Role prompt, then click the button

save edit tempo access button

The system will save the updated information.

How to Delete User's Temporary Access Record

Follow the steps below to delete a temporary access record.

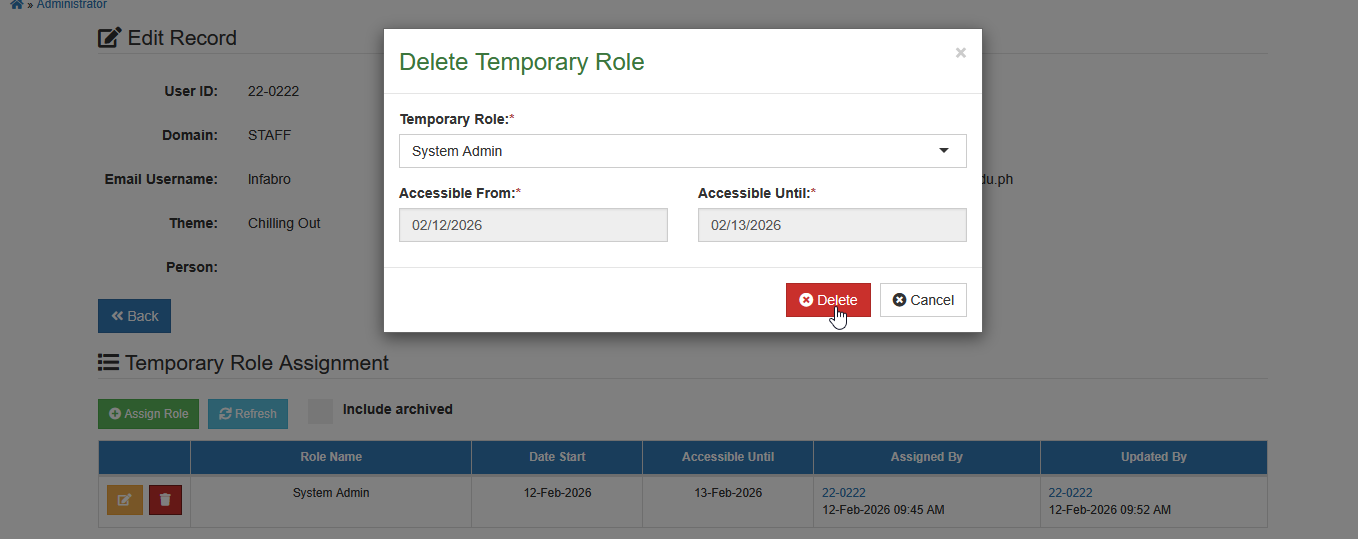
STEP 1 Go to the user's Temporary Access record and click the button. The Delete Temporary Role prompt will appear.

delete tempo access button

STEP 2. Confirm the deletion in the Delete Temporary Role prompt by clicking the button.

confirm delete tempo access button

NOTE
  • Temporary Access does not replace the user’s main role.

  • This feature helps improve security by limiting access to only when it is needed.

Tag School as Duplicate

· One min read
Lester N. Fabro
Technical Associate

Follow the steps below on how to tag a school record as duplicate.

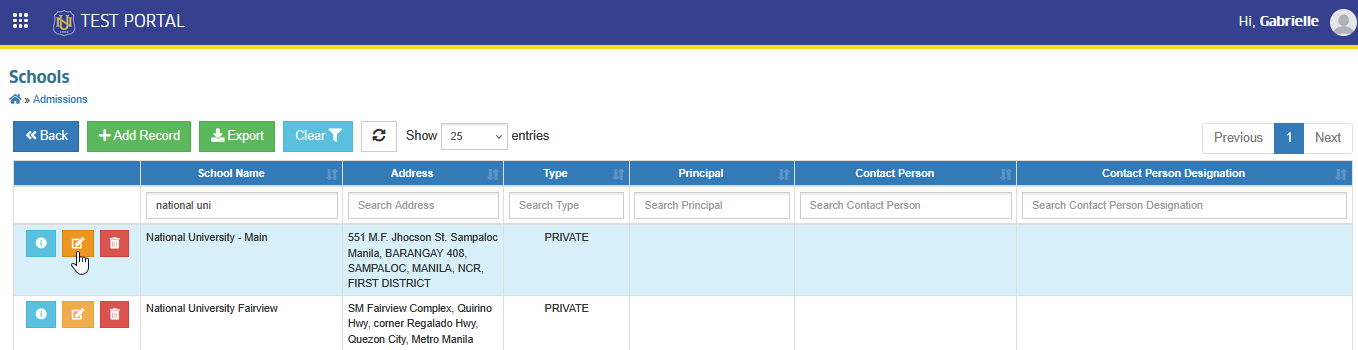
STEP 1. On the Schools list view page, click the corresponding button of the school record you want to update. This will redirect you to the Edit School page.

edit button

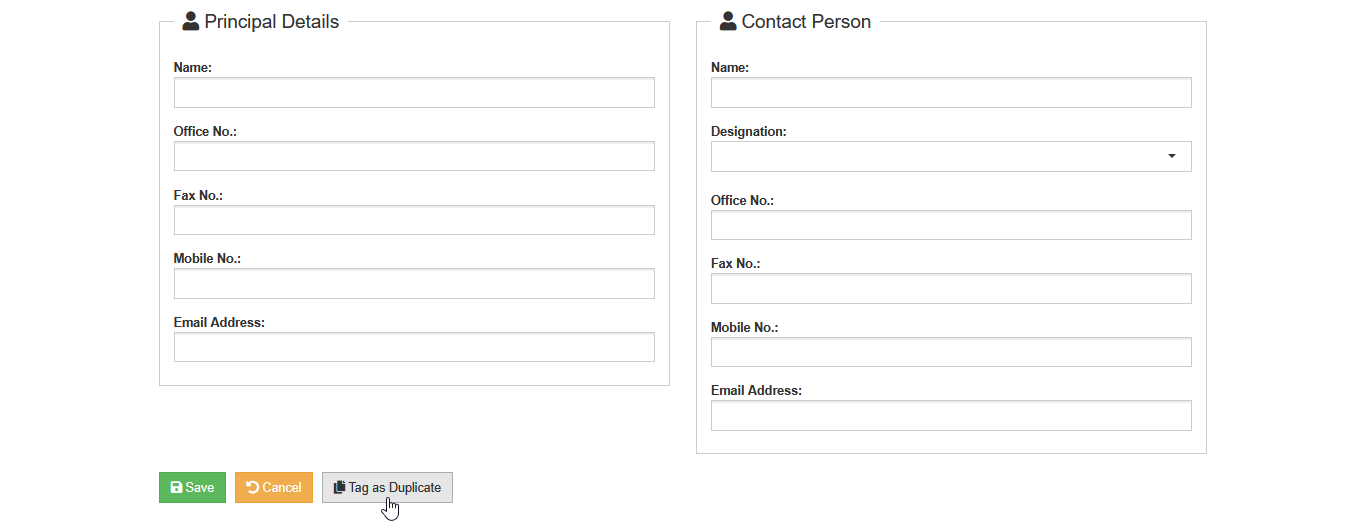
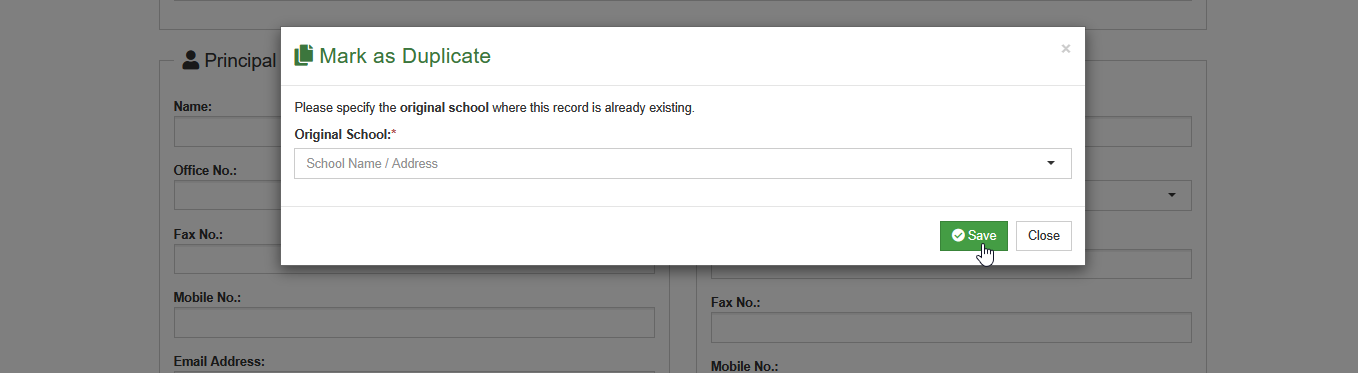
STEP 2. On the Edit School page, click the button located at the bottom of the page. Once clicked, the Mark as Duplicate prompt will appear for confirmation.

tag as duplicate button

STEP 3. On the prompt, select the Original School in the dropdown and click the button.

save tagged as duplicate button

NOTE

The options that will appear in the Original School selection are records with identical or nearly identical names to the current record being tagged.

Internal Audit Preparation

· 11 min read

This document is a living guide for preparing systems, records, and related documentation for an internal audit.

It outlines the initial criteria and the relevant supporting documents to be prepared before the audit. This list is not exhaustive — additional requirements may be added depending on the system’s scope, applicable regulations, and institutional policies.

The ultimate goal is to establish a repeatable and consistent process that ensures audit preparation is carried out efficiently and effectively across all audit cycles.

Manage List of SM Companies

· 3 min read
Lester N. Fabro
Technical Associate

The SM Affiliates module is used to maintain the official master list of SM companies. This list serves as the reference for identifying the specific SM company associated with a student's SM Affiliate Scholarship. It is part of the TMS and supports accurate and consistent scholarship assignment and management.

How to Access TMS

STEP 1. Open your web browser and go to: https://tms.national-u.edu.ph

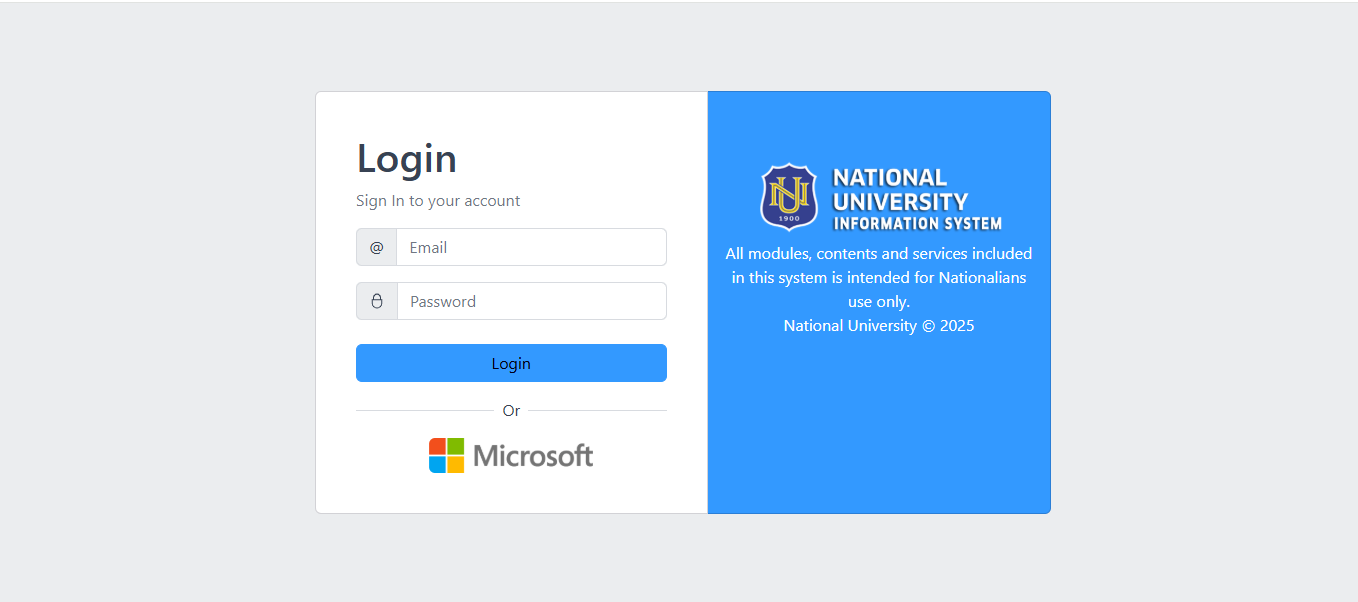
STEP 2. You will be redirected to the TMS login page.

tms login page

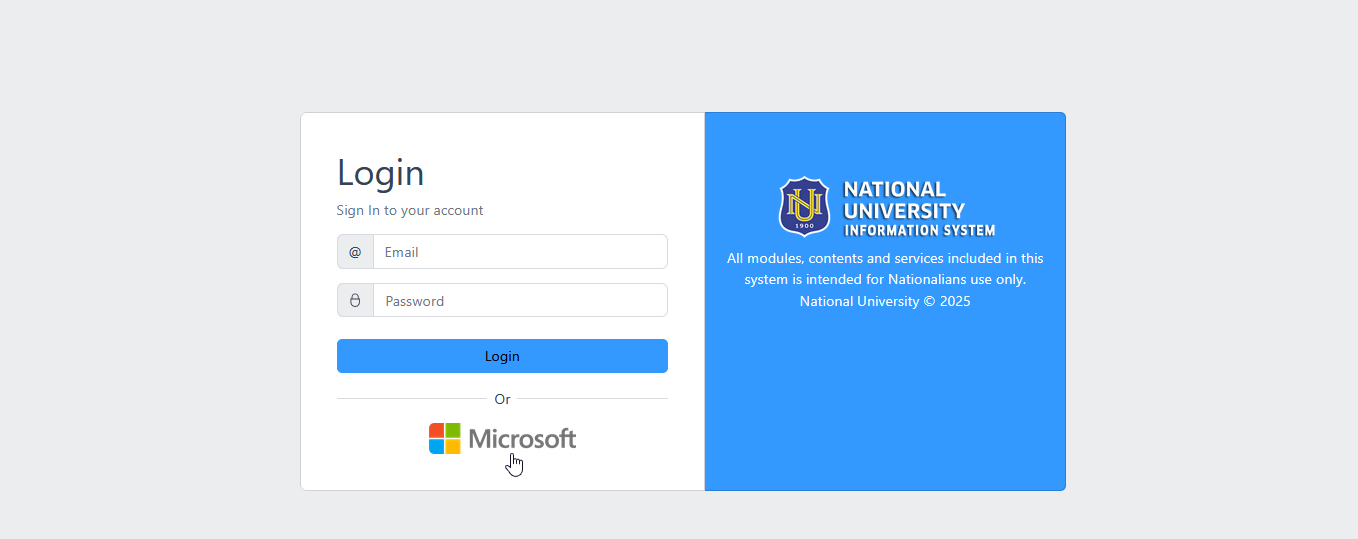
STEP 3. Log in using your email address and password, or sign in using the Microsoft login option.

microsoft login

STEP 4. If using Microsoft login, enter your Microsoft credentials and complete the login process by verifying through Multi-Factor Authentication (MFA).

How to Add SM Company

STEP 1. Login in your TMS portal.

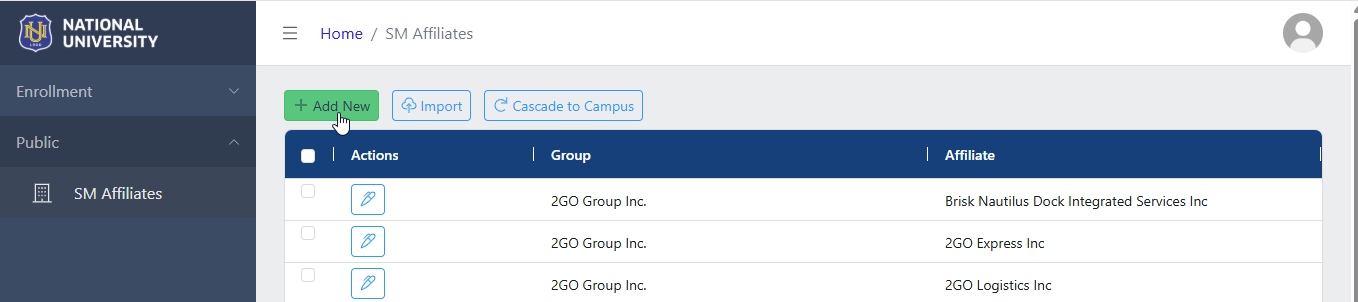
STEP 2. In your TMS portal, Go to Public menu and select SM Affilliates module.

sm affiliates module tab

STEP 3. In the SM Affiliates list view page, click on the button.

add new button

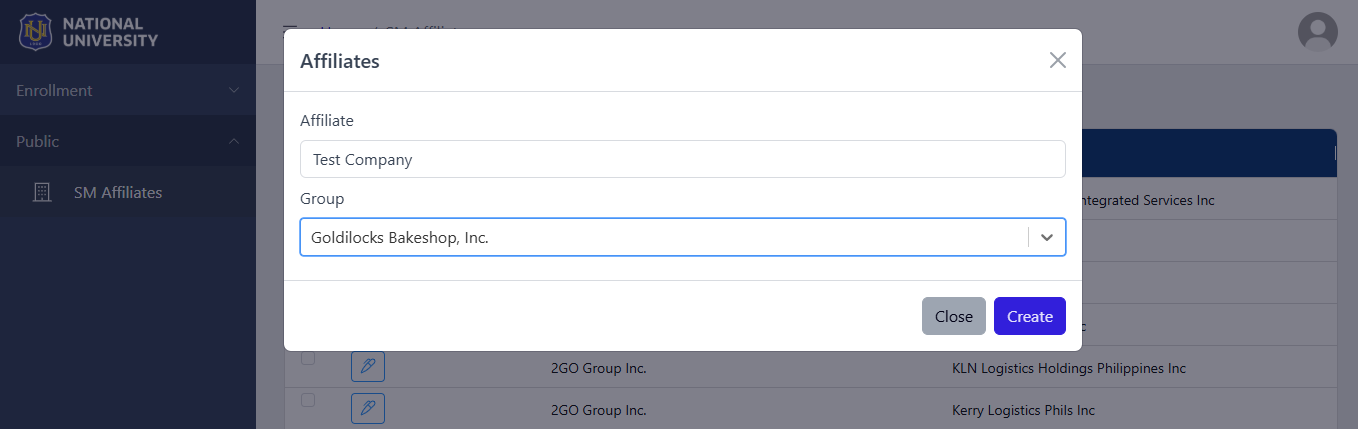
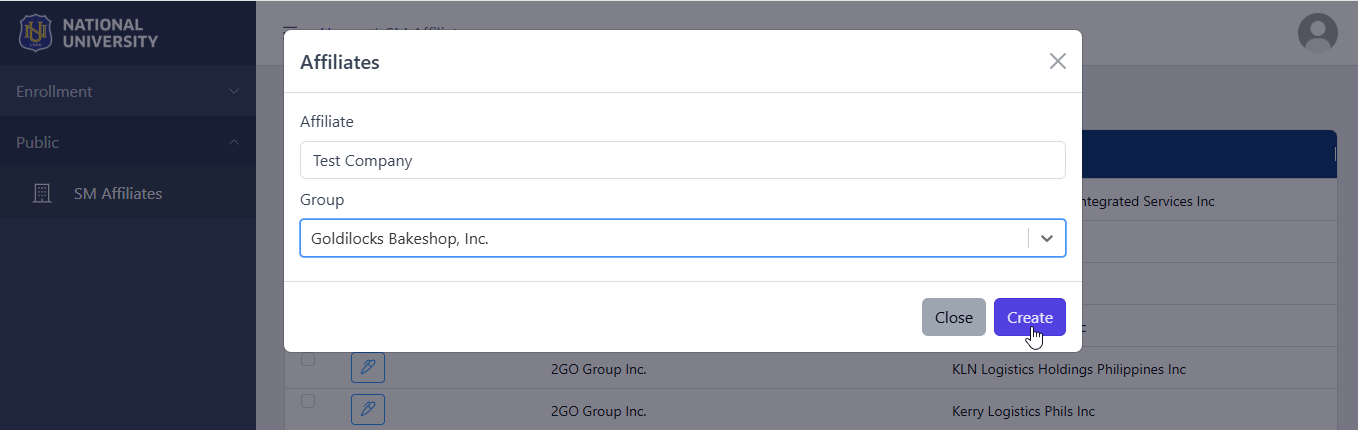
STEP 4. . Enter the affiliate's name in the Affiliates field that appears, then select the appropriate group from the Groups dropdown list.

add affiliate

NOTE

If the appropriate group is not available in the dropdown list, add it by encoding the SM Group name and click Create entry.

STEP 5. Click the button to save the affiliate.

create button

How to Cascade the list of SM Companies to campus?

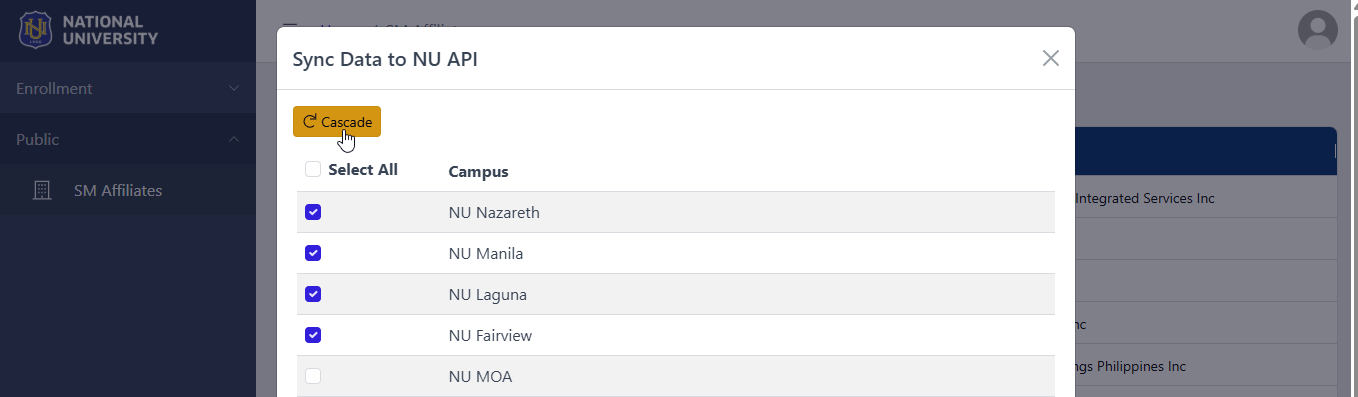
After adding or modifying entries in the SM Affiliates list, it is recommended to cascade the updates to ensure the latest data is sent into campus's NUIS.

STEP 1. To cascade the information, click the button corresponding to the record that has been modified.

cascade to campus

STEP 2. In the prompt that appears, select the target campus or campuses by checking the appropriate boxes, then click the button to proceed.

cascade button

How to Edit Affilliates

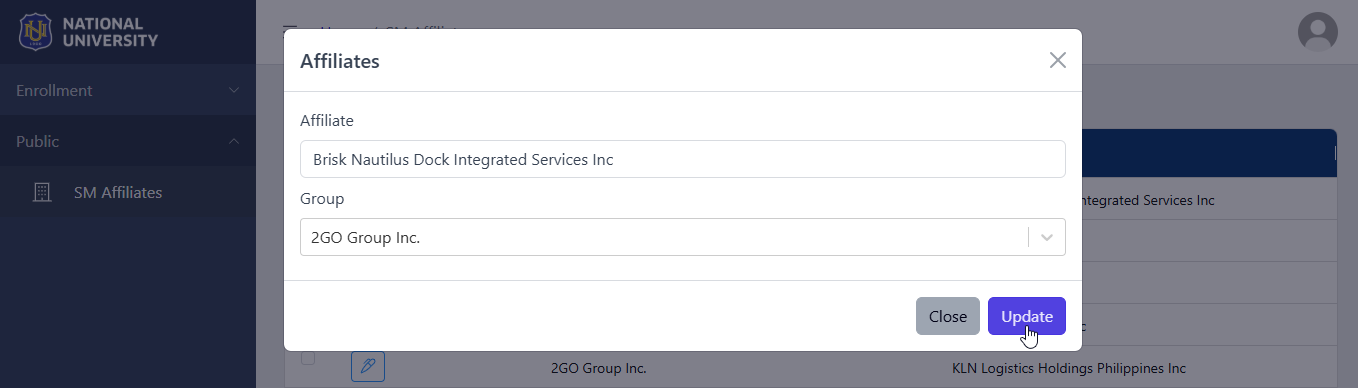
STEP 1. In the SM Affiliates module, click on the corresponding button of the record that needs to be modified.

edit icon

STEP 2. Modify the record in the Affiliates prompt.

STEP 3. Click on the button to save changes.

update

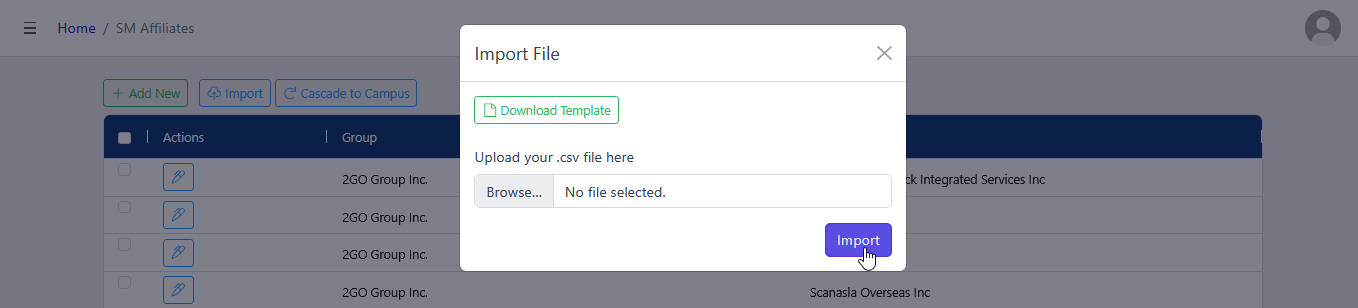
Import File

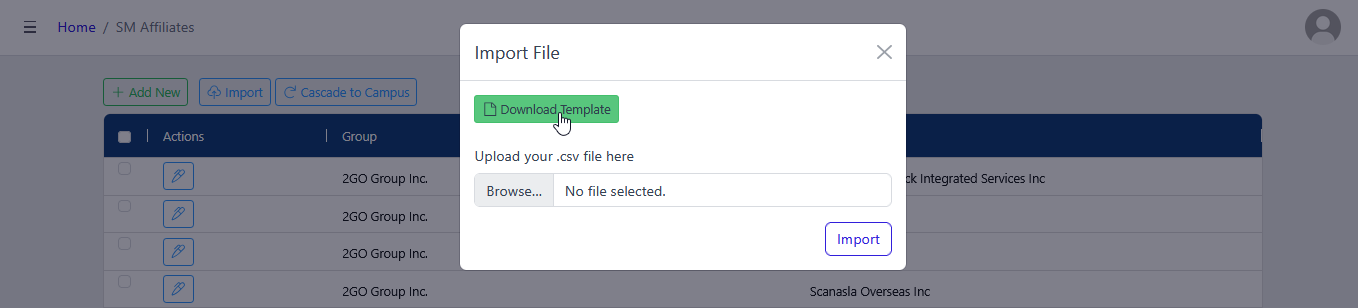
Users may also import a file through this module for faster encoding of multiple SM Affiliates. To do this, download the import template by clicking the button found in the Import File prompt.

download template

Follow the instruction below on how to use this module feature.

STEP 1. In SM Affiliates module, click on the button.

STEP 2. Browse the file to be imported and click the button.

import a file

NOTE

Make sure to import CSV file type only.

INFORMATION

For more questions or concerns, email us at nu-desk@national-u.edu.ph