NUIS - WFH Application Using NUIS

Work From Home (WFH) is a type of leave available within the NUIS Official Business (OB) & Leaves Application module. Users can select the WFH leave type when submitting their leave application. Upon selection, users are required to provide the necessary details and submit attachment(s) based on their work output requirements.
This feature ensures that WFH applications are properly documented, supported with required output attachments, and processed efficiently through the existing leave application workflow in NUIS.
Objective of the WFH Application Module
The WFH leave feature aims to:
-
Provide employees with an organized way to apply for Work From Home arrangements through the OB & Leaves module
-
Ensure required work output attachments are submitted for validation
-
Streamline approval processes for supervisors and administrators
-
Improve transparency in leave monitoring and status tracking
-
Maintain centralized records for WFH leave applications
Who Can Access
The module is accessible to:
-
Employees applying for WFH leave
-
Immediate supervisors or designated approvers
-
HR personnel or administrators for monitoring and reporting
How to Use the Module
This section provides step-by-step guidance on how to apply for WFH leave, submit required attachments, and track application status in the NUIS OB & Leaves Application module.
Employee Application Process
Step-by-step process for employees to submit a Work From Home (WFH) leave application, complete required details, upload necessary attachments, and track approval status.
STEP 1. Log in to your NUIS account.
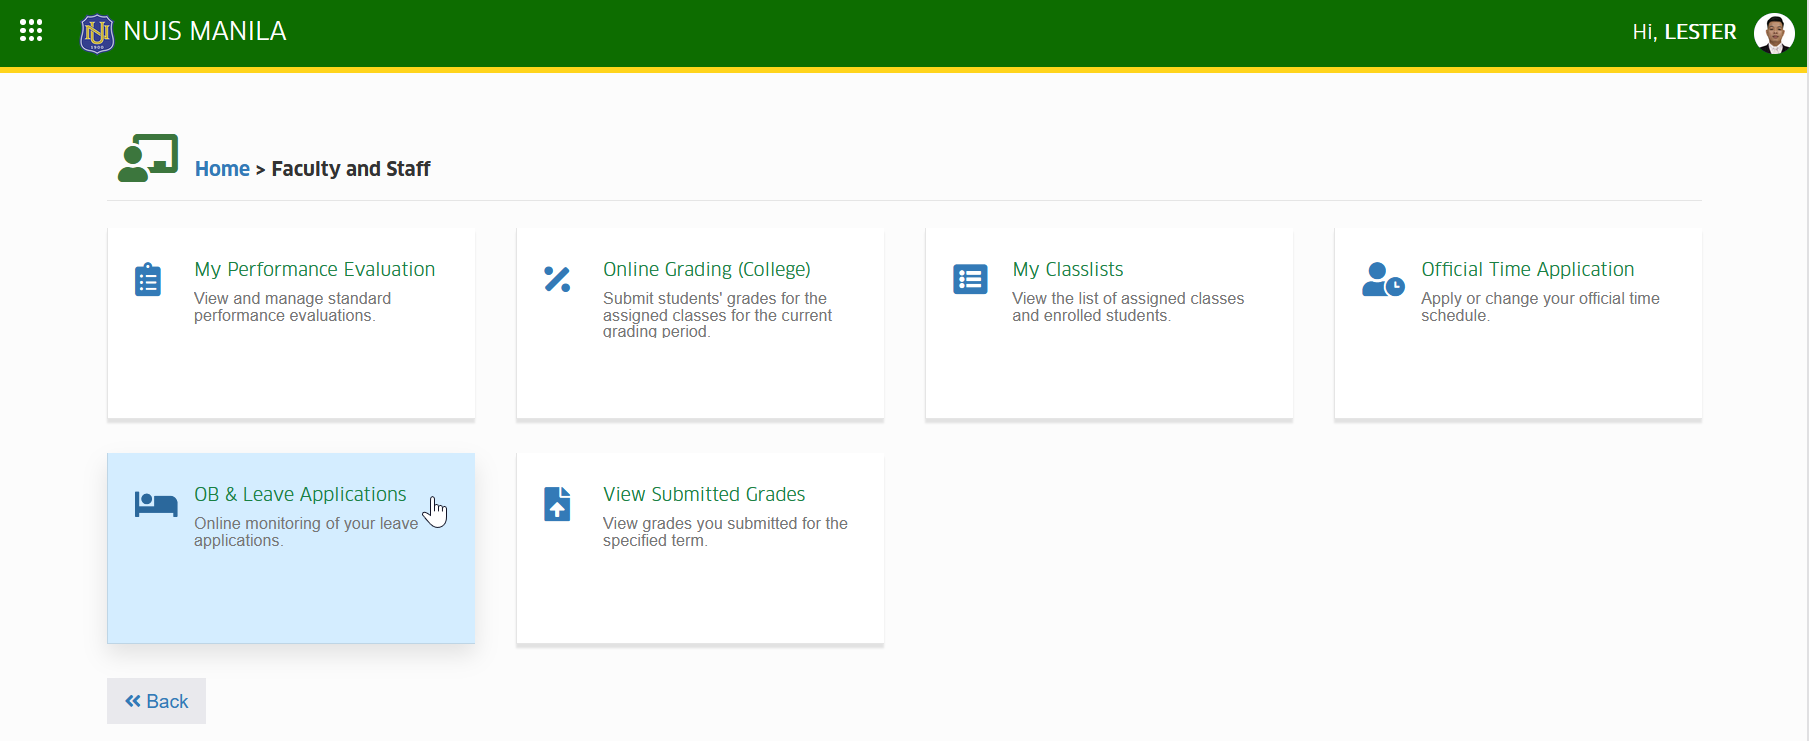
STEP 2. Navigate to the Official Business (OB) & Leave Application module
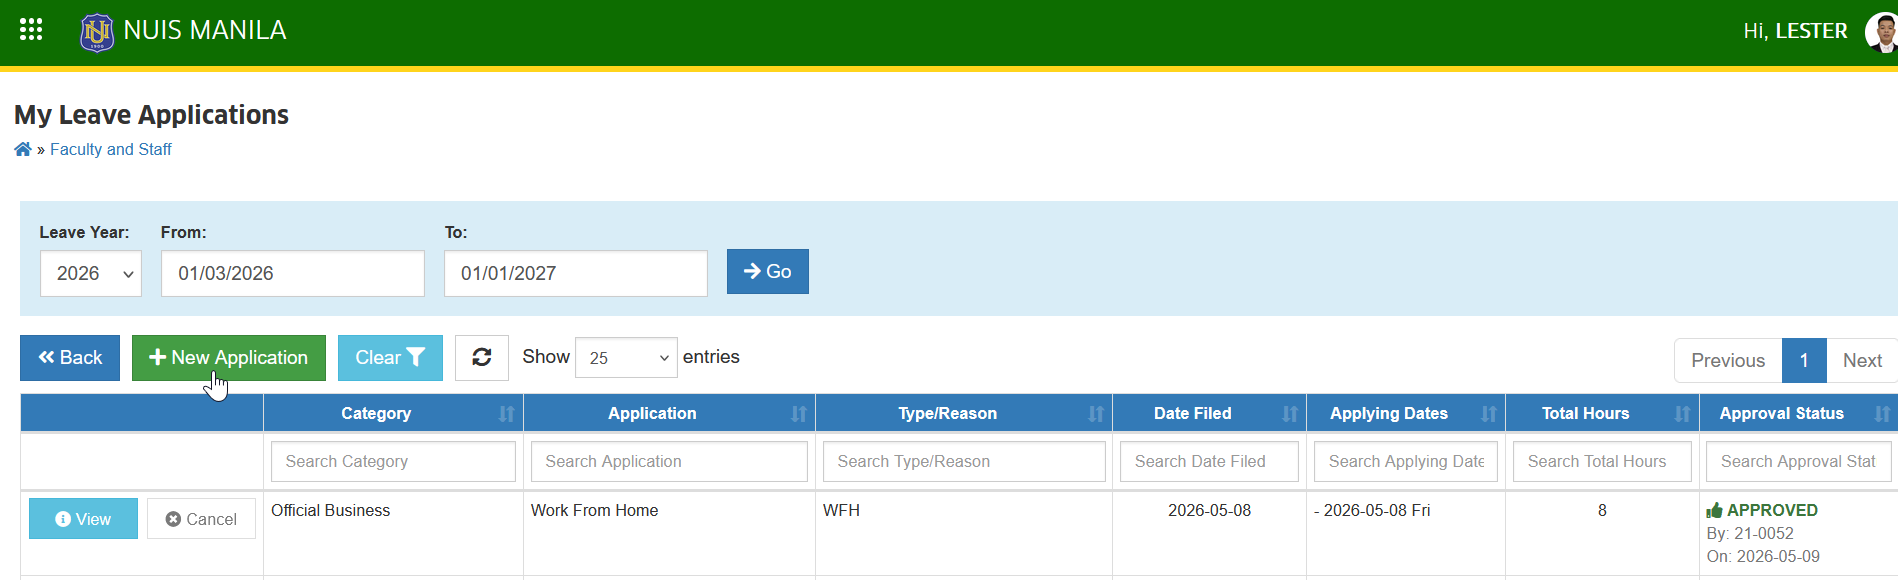
STEP 3. On the My Leave Applications page, locate and click the button.
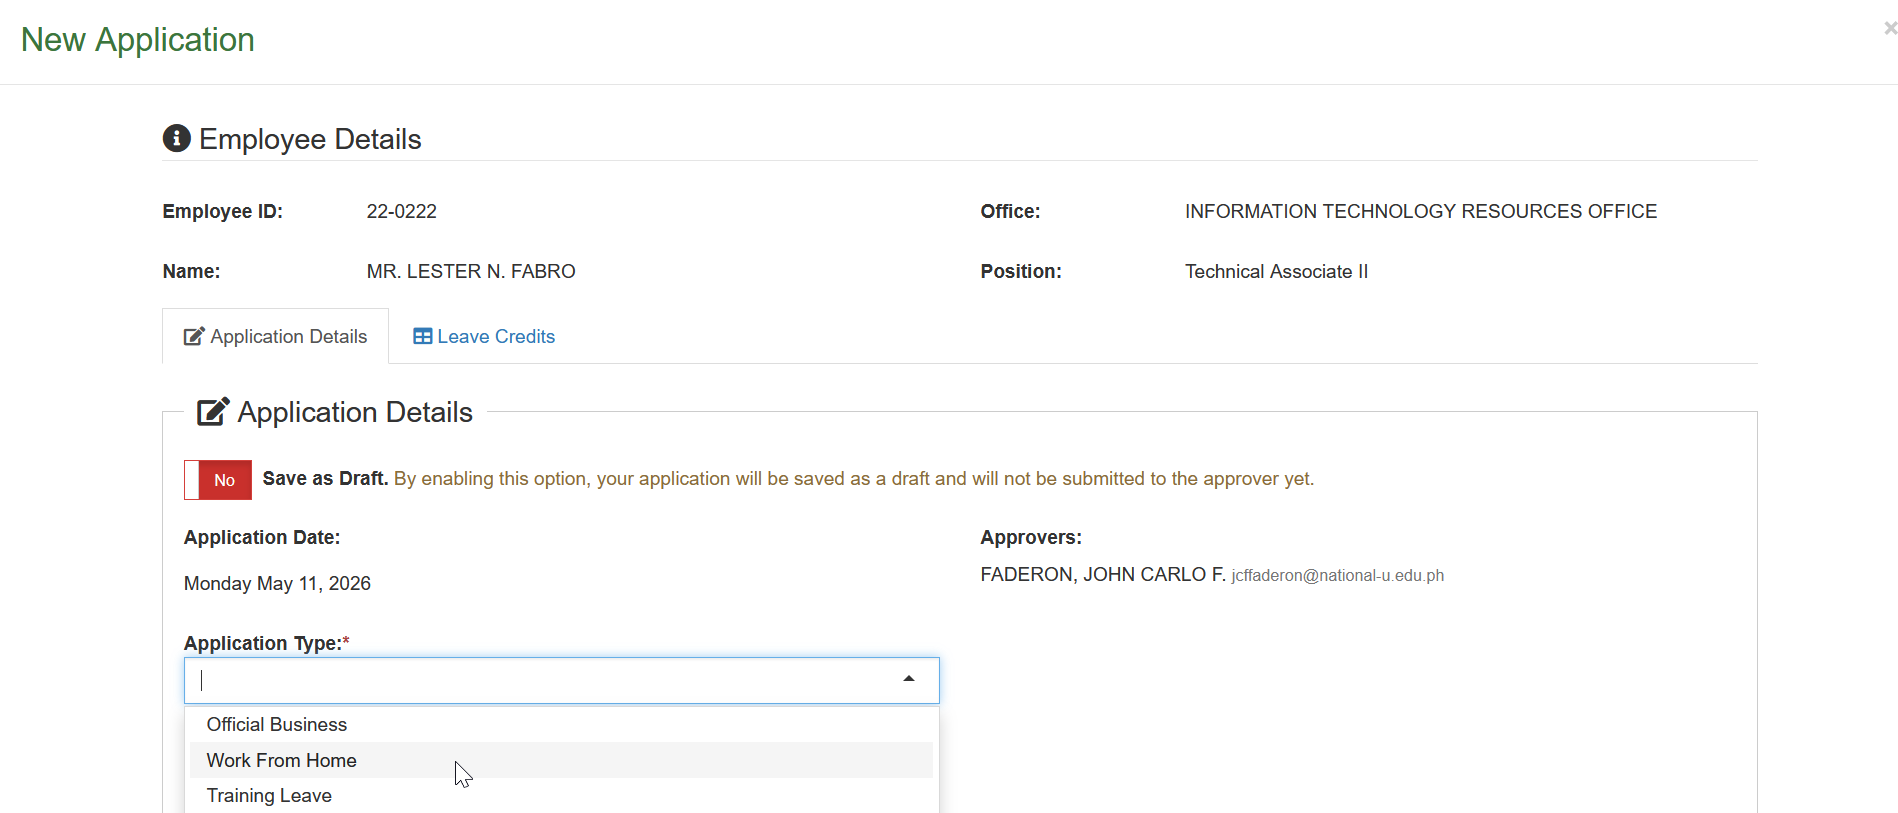
STEP 4. Select WFH as the leave type in the Application Type required field.
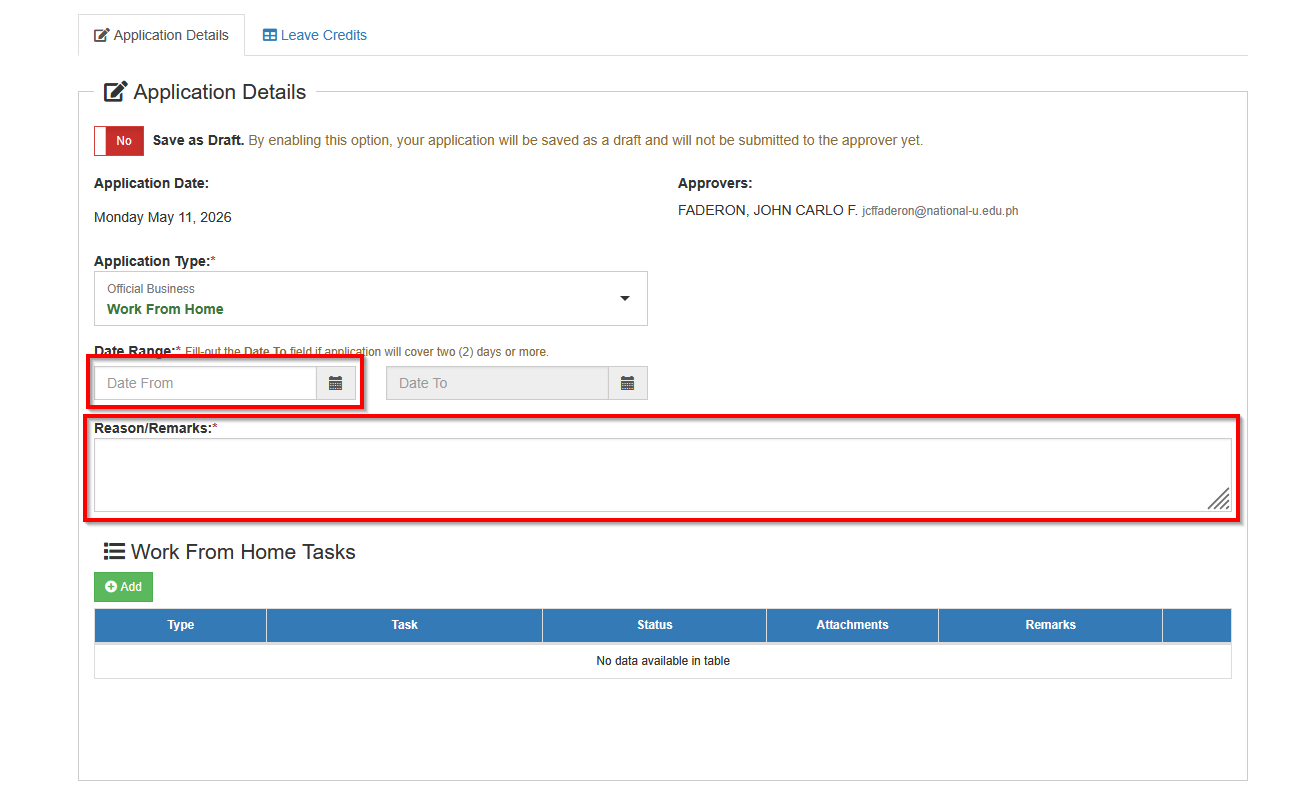
STEP 5. Fill out all the required fields, such as Date Range and the Reason/Remarks.
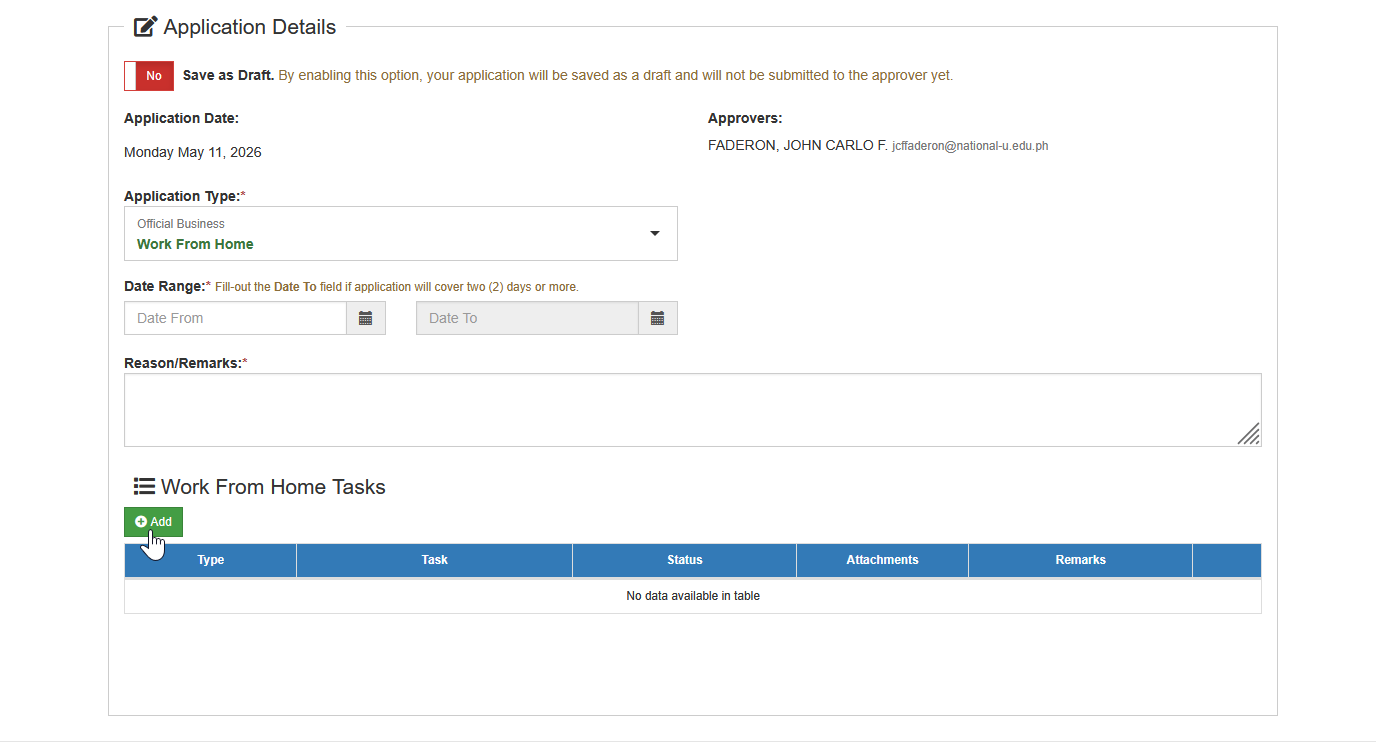
STEP 6. In the Work from Home Tasks section, enter your wfh output and attach supporting documents each entry. To add WFH output, click the button.
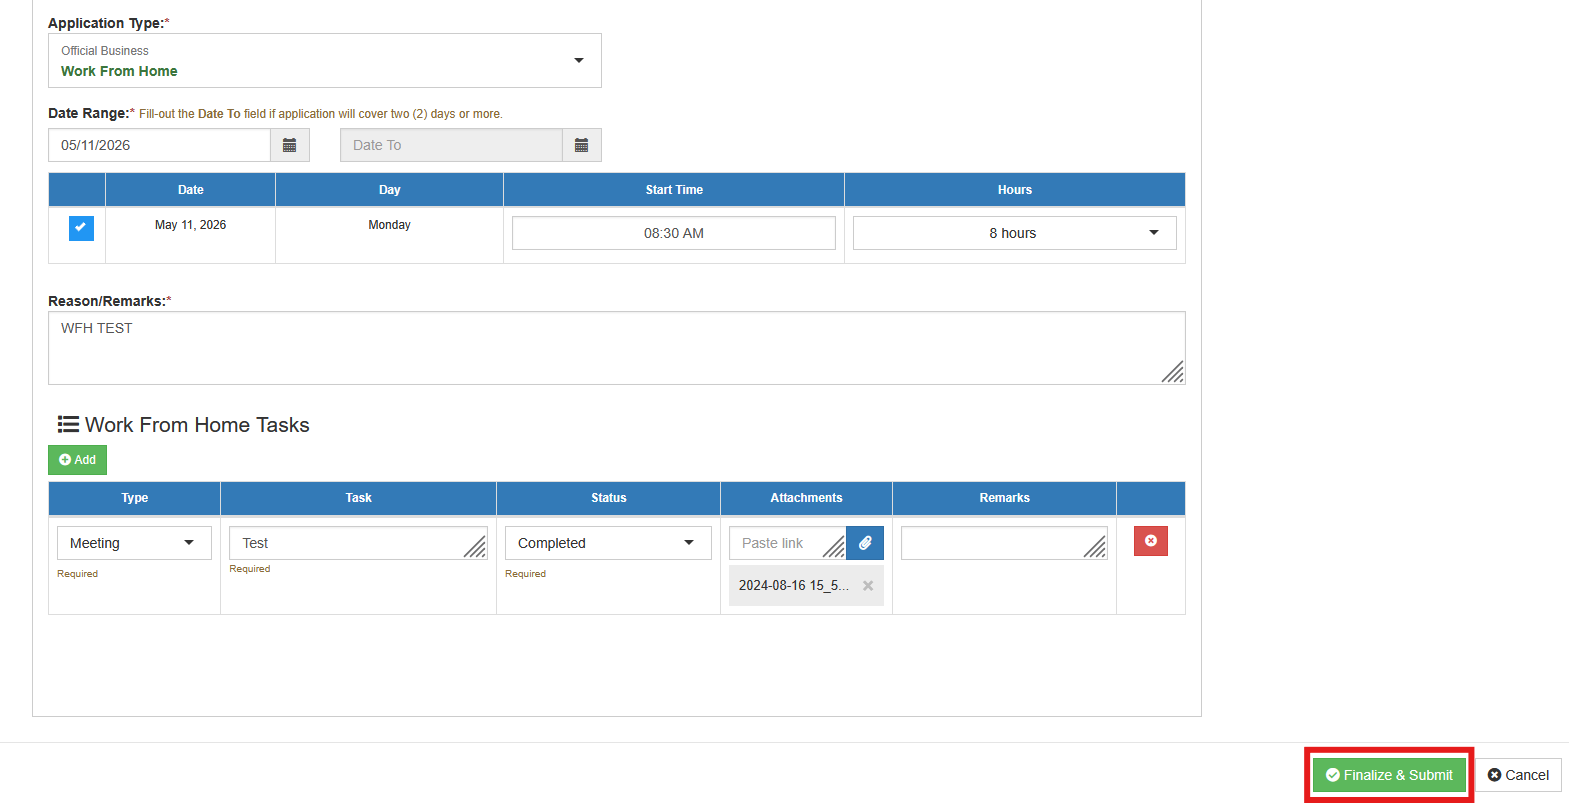
STEP 7. Complete the required fields for each WFH task and upload the necessary attachments.
STEP 8. Click the button to submit your WFH leave application for approval by your immediate superior.
Save as Draft
Allows users to save their WFH leave application as a draft before final submission, so they can review, edit, or complete it later
Follow the steps below to save your tasks before final submission.
STEP 1. On the Application Details section, Enable the Save as Draft feature by clicking the Save as Draft toggle.
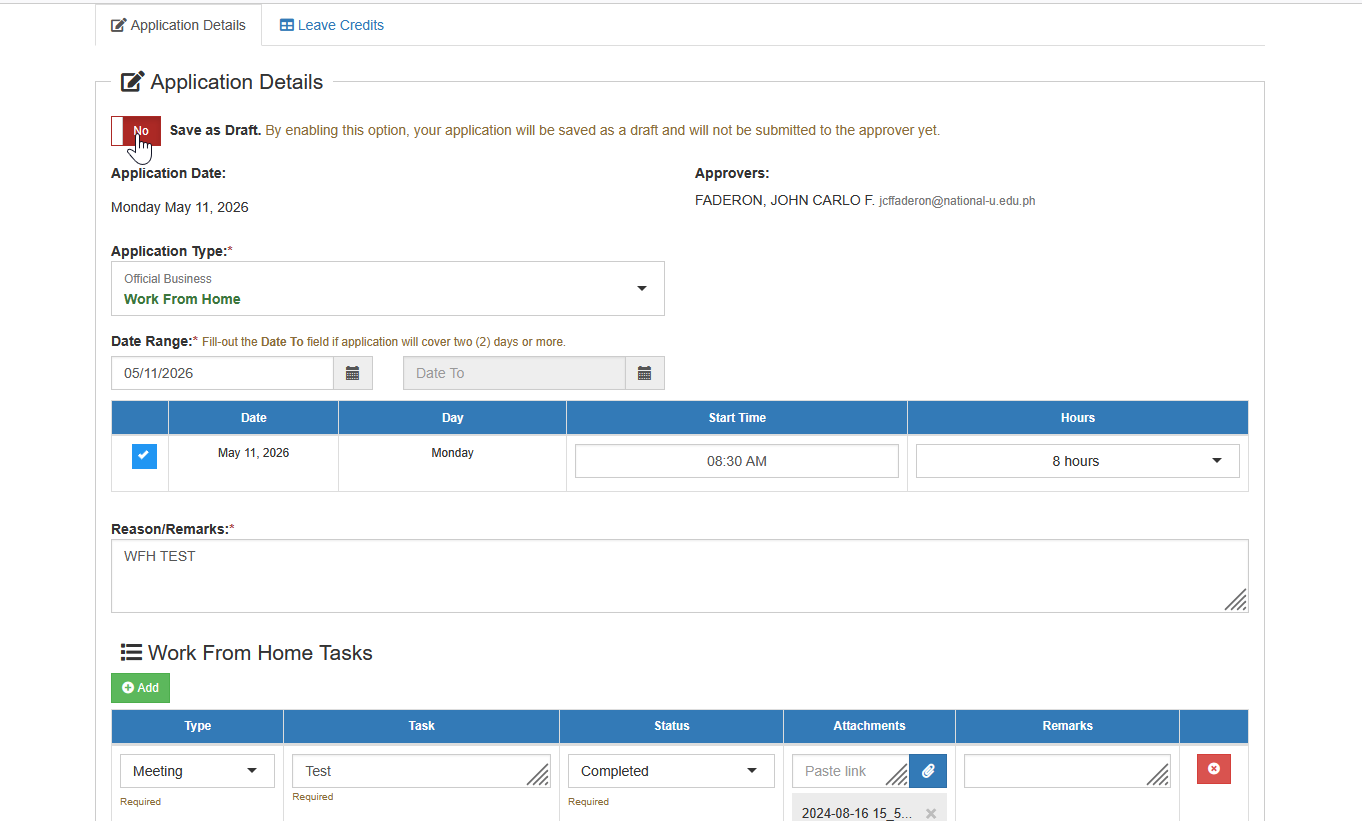
STEP 2. Complete the required fields for each WFH task and upload the necessary attachments.
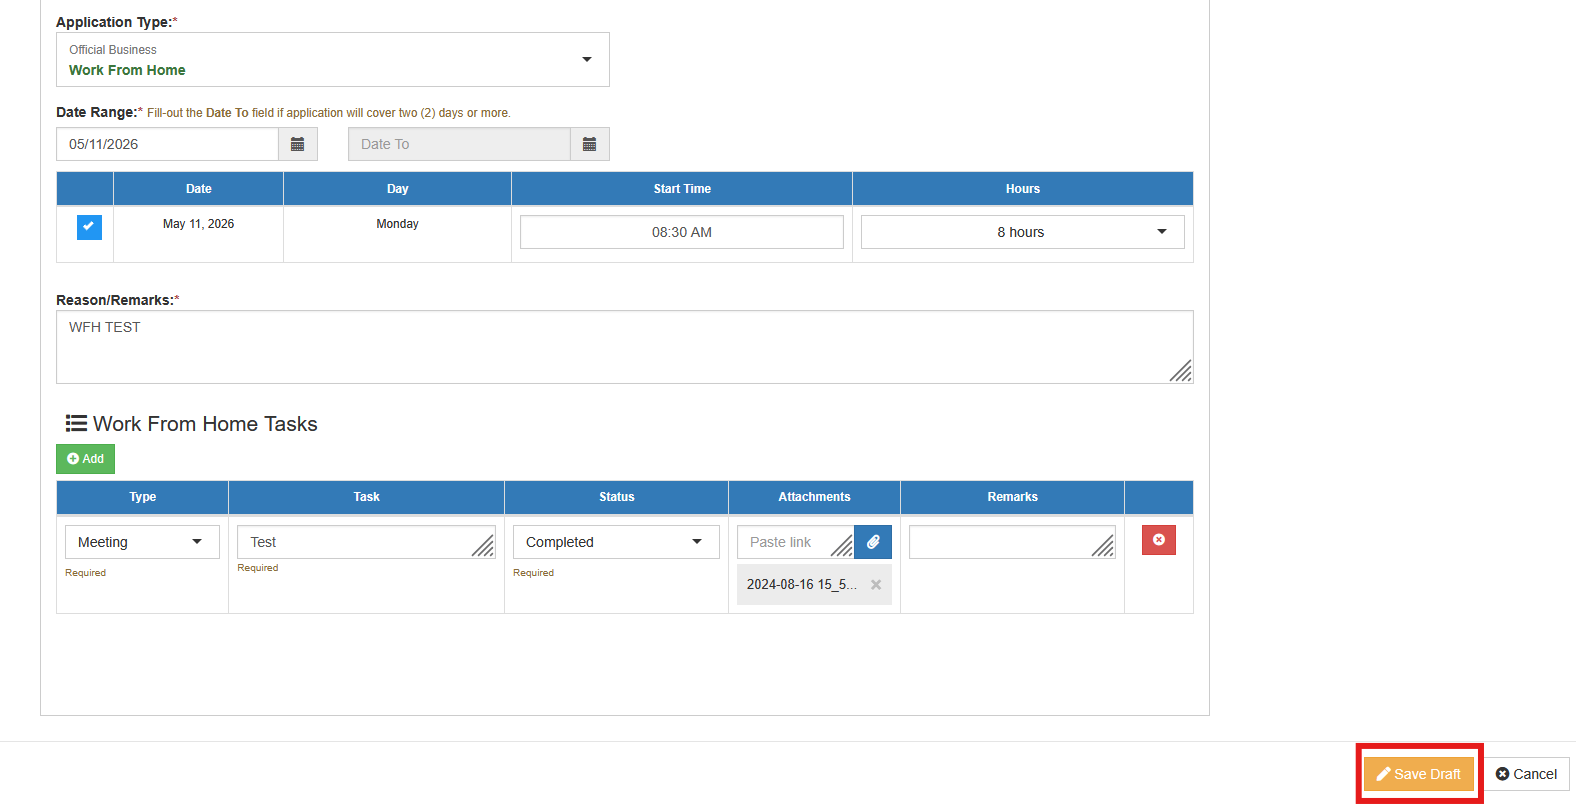
STEP 3. Click the button to save your tasks as draft.
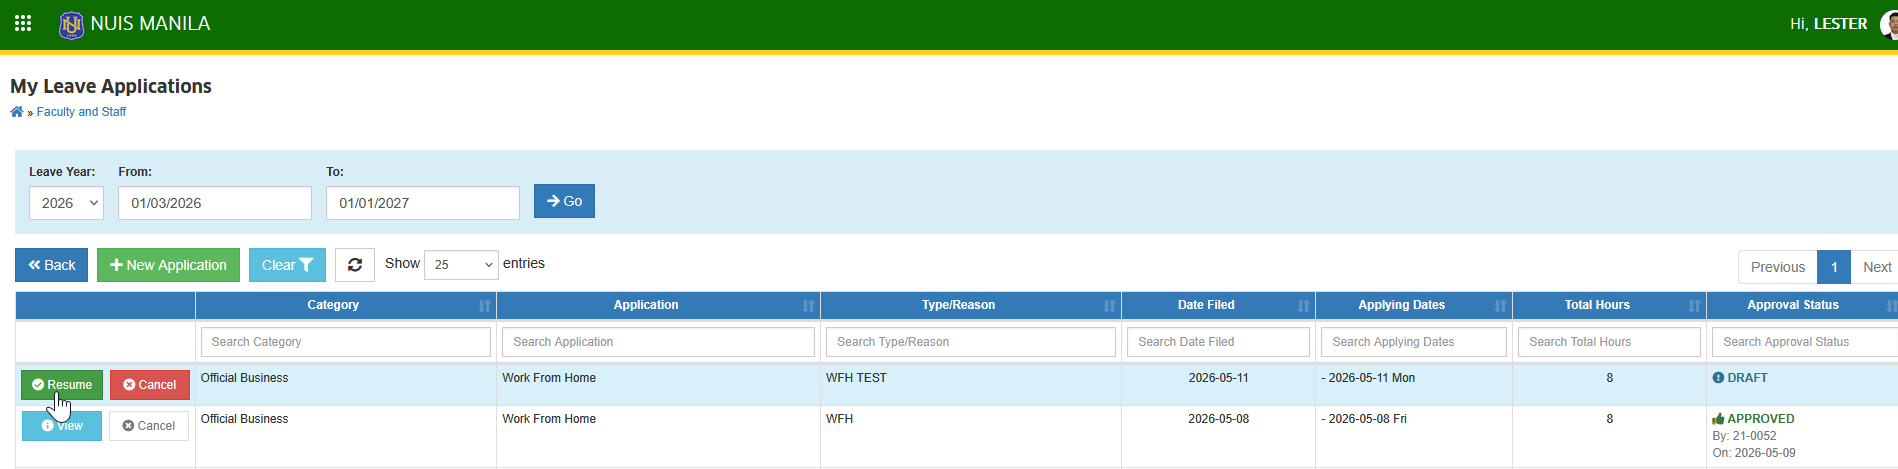
STEP 4. To continue your application later, go to the My Leave Applications page and clicking the button.
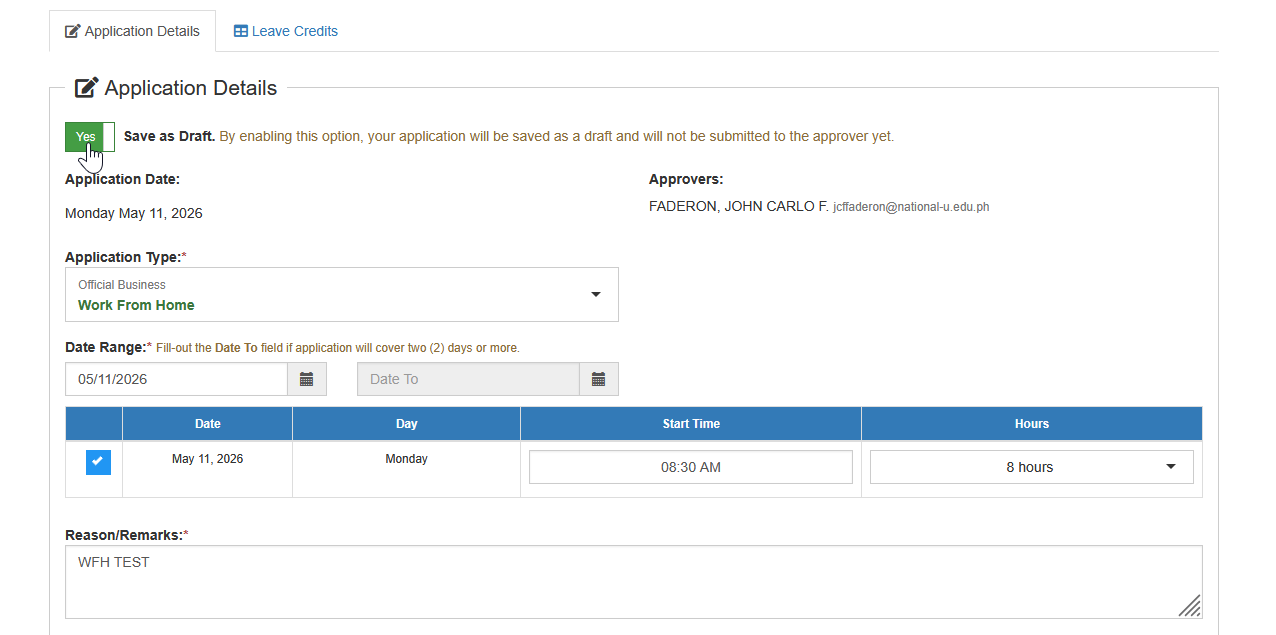
STEP 5. Once all tasks have been completed, disable the Save as Draft toggle.
STEP 6. Click the button to submit your WFH leave application for approval by your immediate superior.
How to Approve WFH Applications
Step-by-step guide for approvers to review, validate, and process submitted Work From Home (WFH) leave applications.
STEP 1. Go to Human Resource > Attendance & Leave Mgmt > Approval of OB & Leave Application
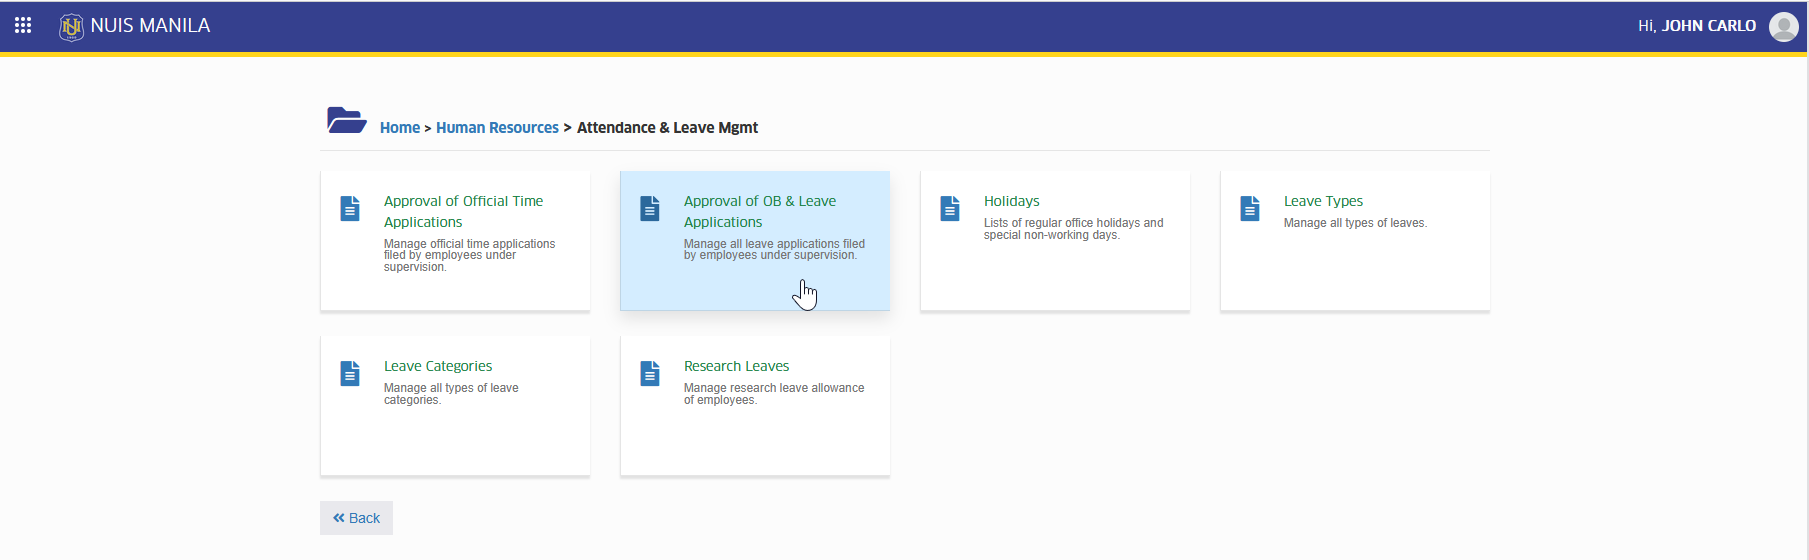
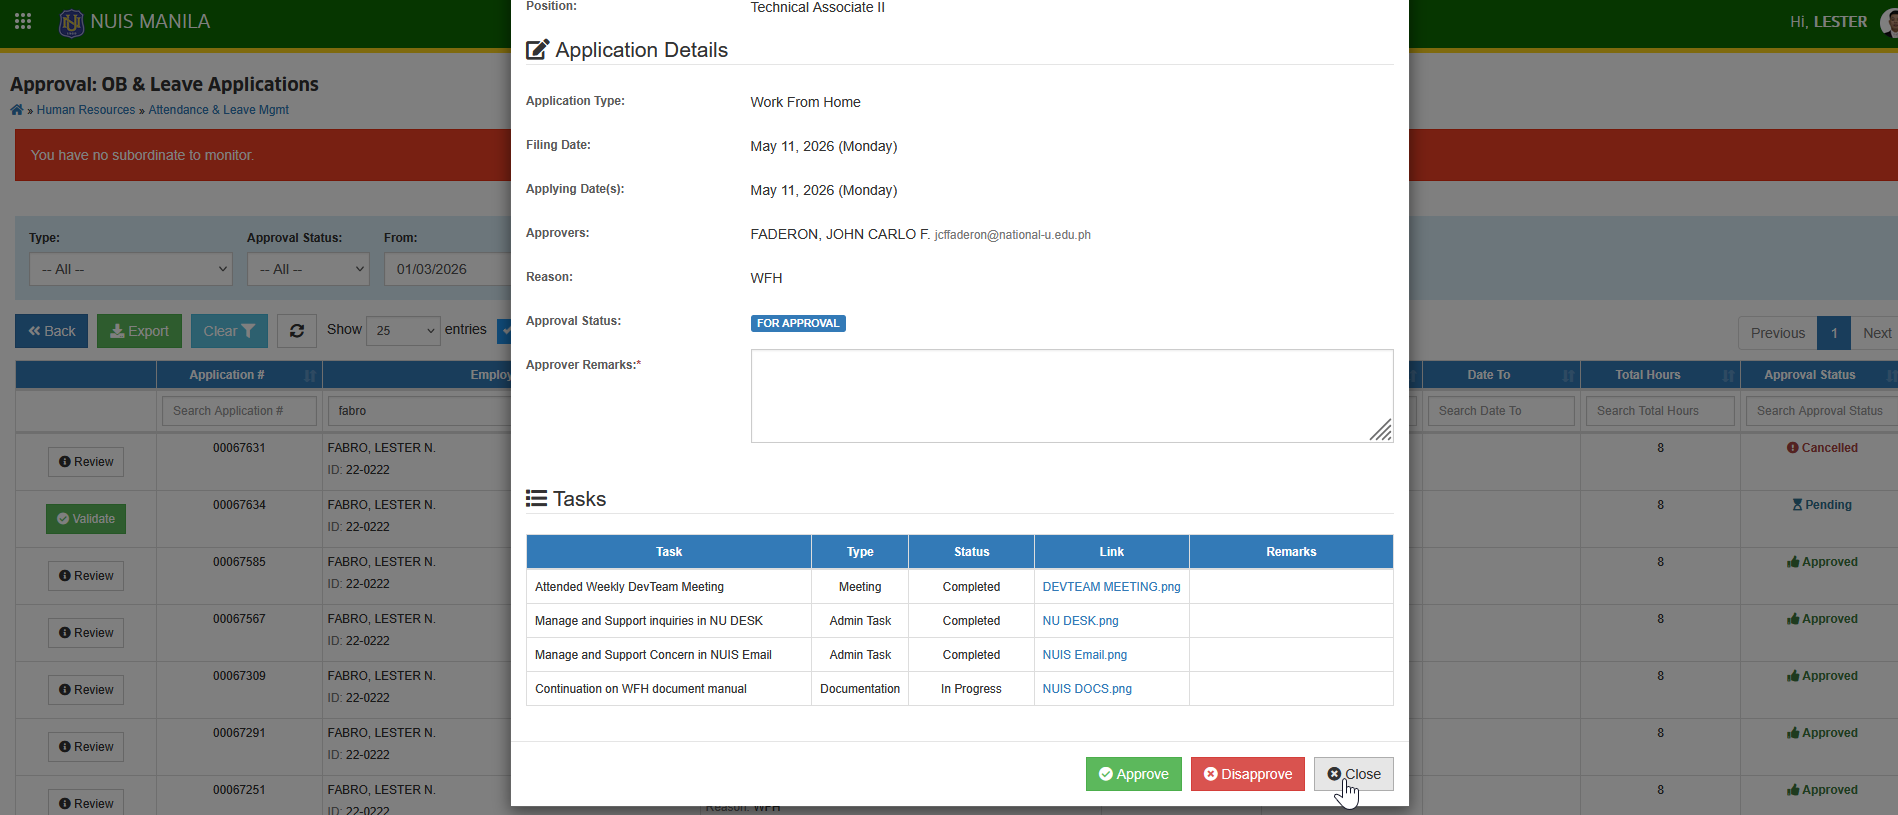
STEP 2. Locate the WFH leave application you want to review, then click the corresponding button.
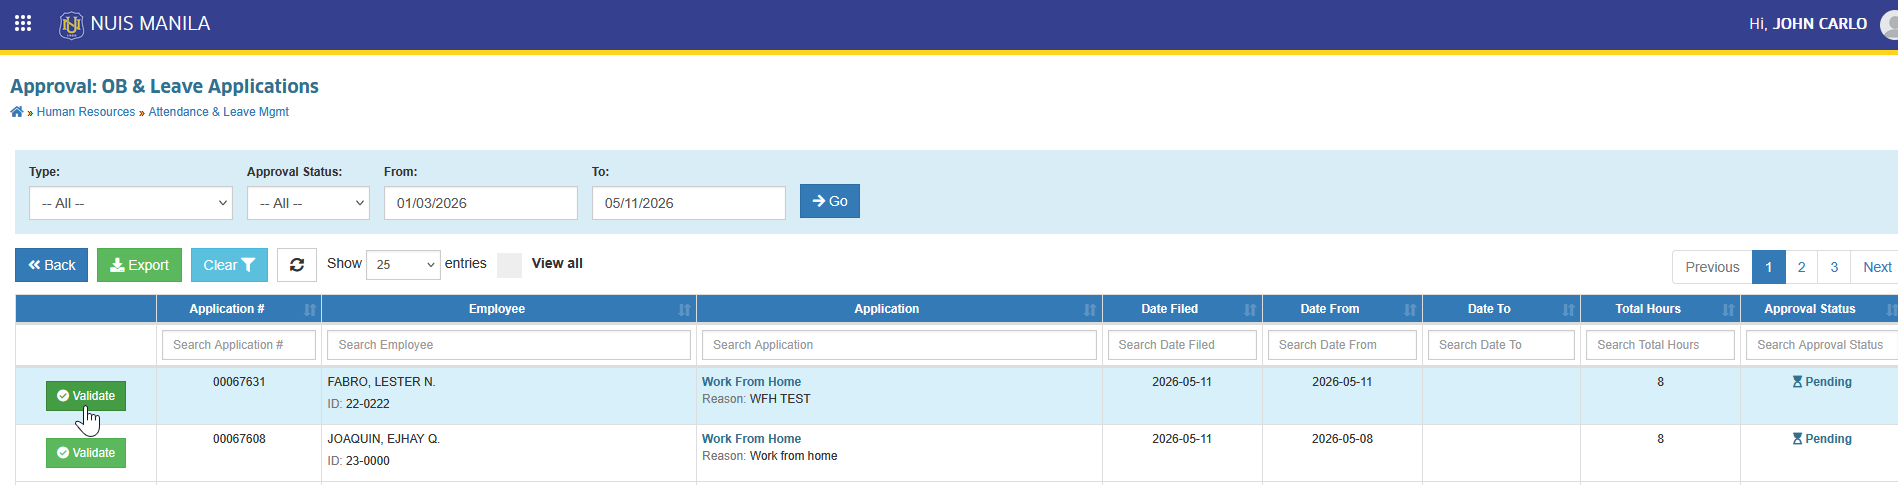
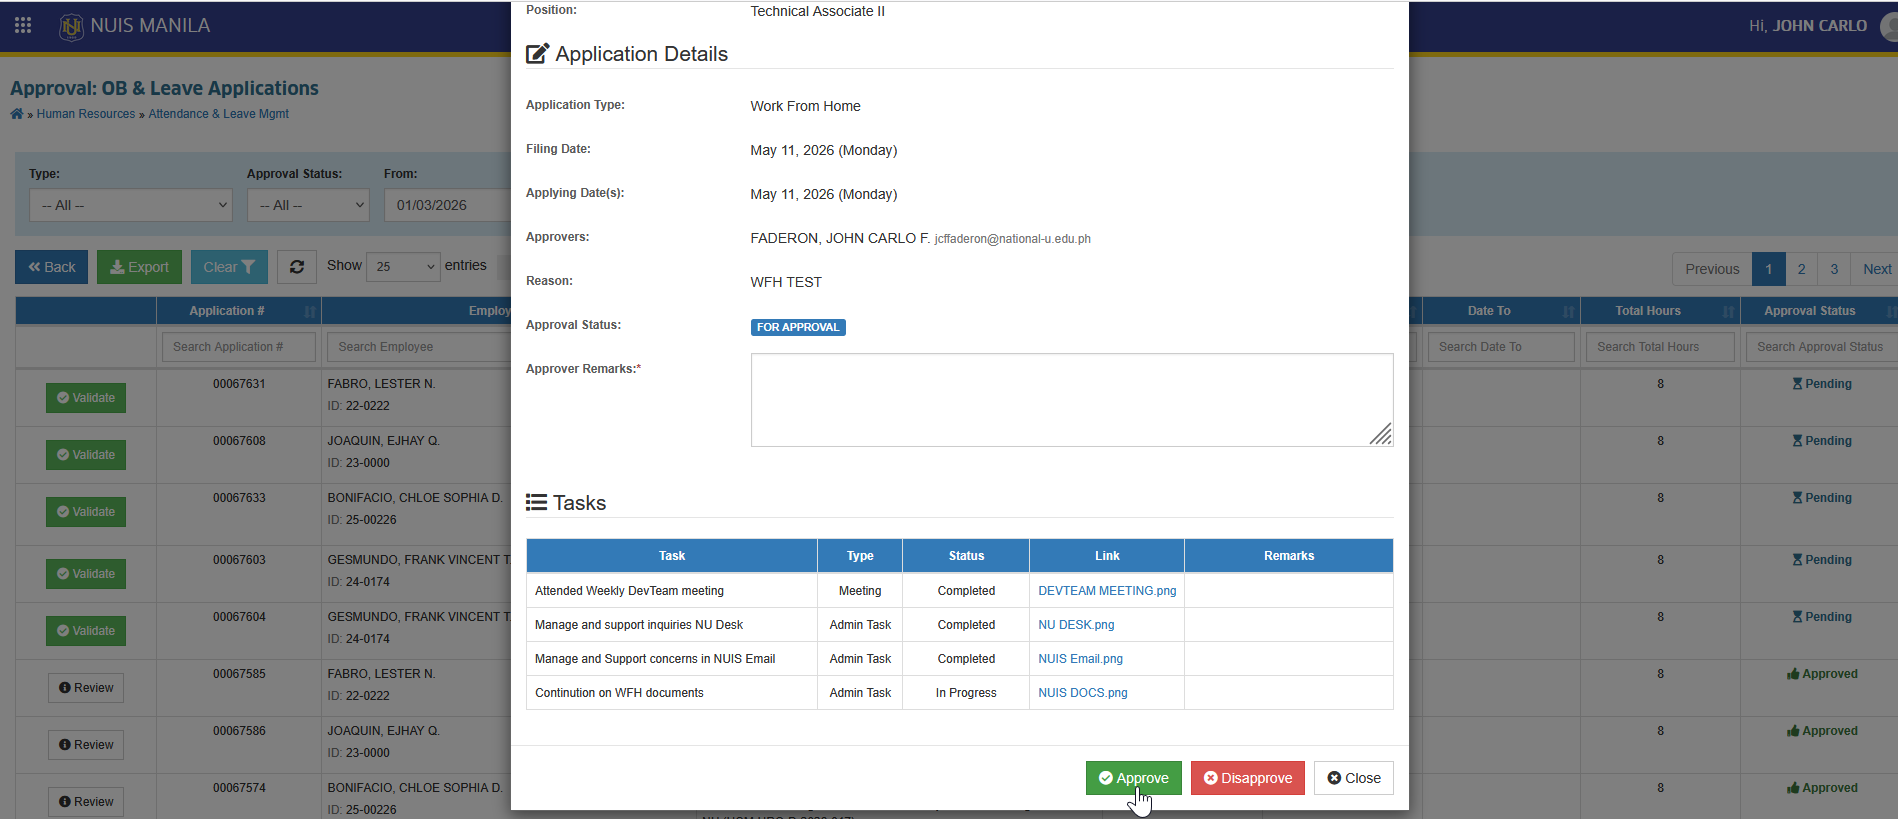
STEP 3. Review the application details, including submitted tasks and attachment. You may click the attachment links to view supporting documents. Enter your remarks and click the button.
HR Monitoring
Step-by-step guide for HR personnel to monitor, review, and manage submitted Work From Home (WFH) leave applications for tracking, compliance, and reporting purposes.
STEP 1. Go to Human Resource > Attendance & Leave Mgmt > Approval of OB & Leave Application
STEP 2. In the Approval: OB & Leave Applications page, enable the View All to display all leave applications.
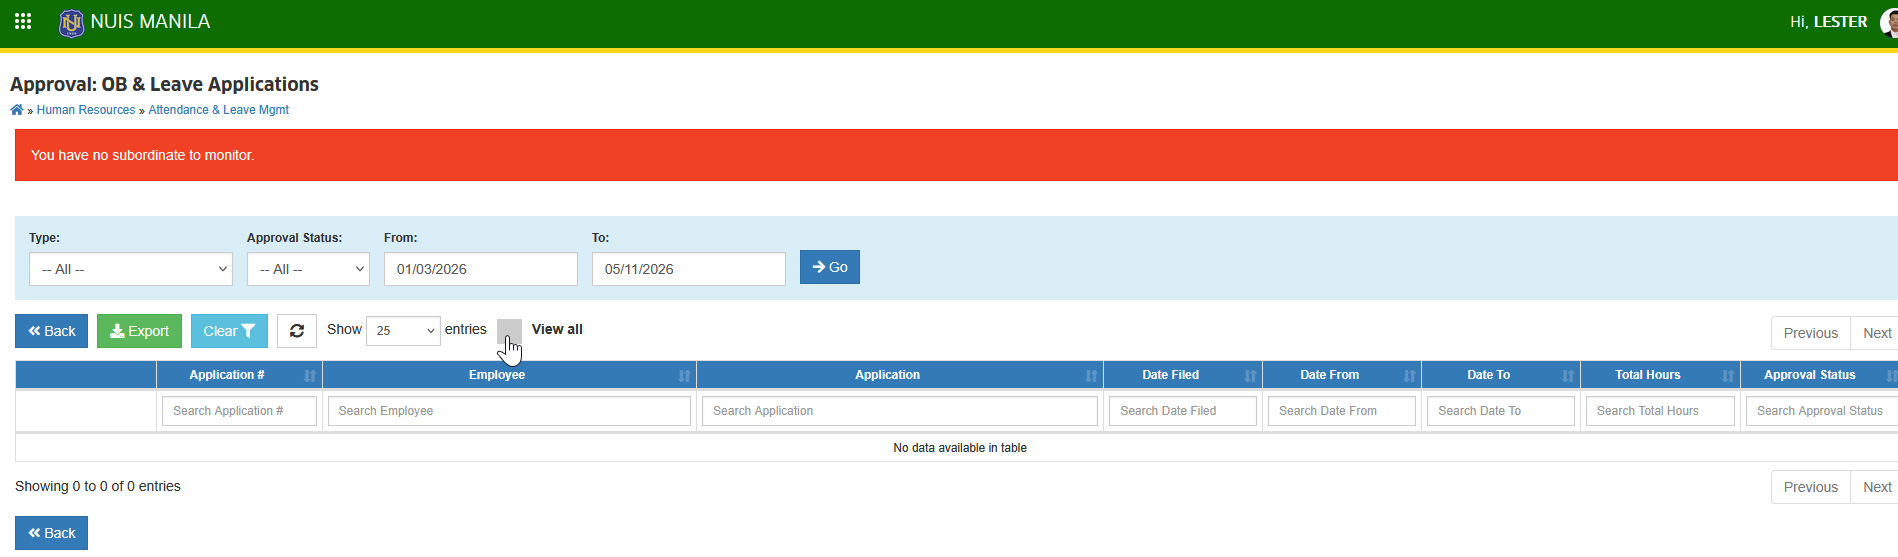
STEP 3. For easier searching, use the filtering feature to quickly locate employees' WFH leave application. Click the corresponding button to view application details, including the WFH Output attachments for verification.
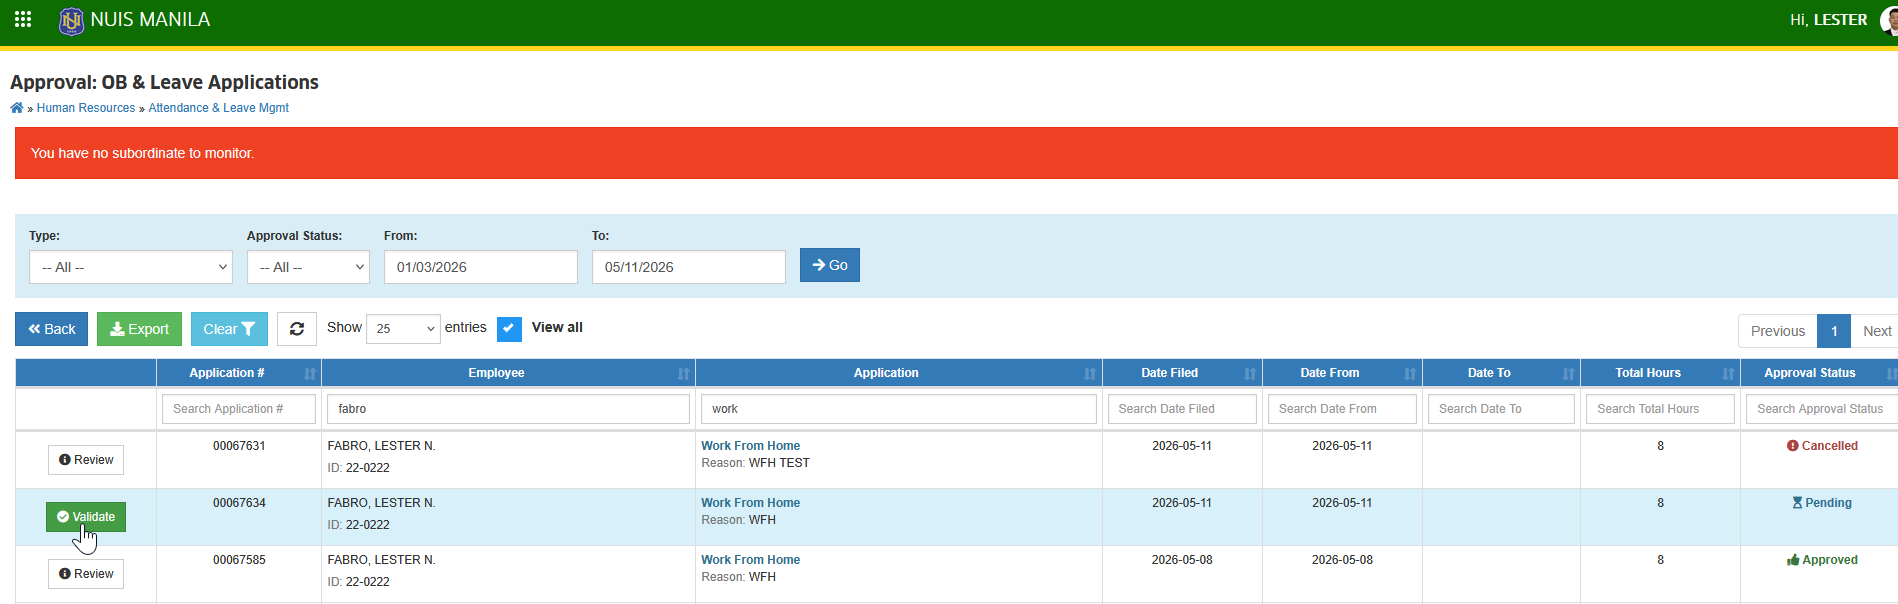
STEP 4. Review all application details, including the WFH file attachments and supporting documents. After reviewing, click the button to exit the details view.