Advising
The Advising module is used to register students into their classes or sections. This module is used also to generate the assessment that will be used by incoming continuing grade 12 students to pay their enrollment fees online.
What You Can Do in This Module
-
Search and select students who need to be advised.
-
Assign students to their designated class or section.
-
Review and confirm the advised list before enrollment.
-
Generate the student's assessment and email it directly to them so they can proceed with online payment through NU Bills.
Required Permission
Advising - This permission allows the user to manage the advising process of the students. With this access, users can assign students to the sections or specific subjects, generate their assessments, and send the assessment via email so students can proceed with online payment through NU Bills and continue with enrollment.
How to Access the Module
To access the module, make sure you have the Advising permission. If it doesn’t appear in your portal, request access from your System Administrator.
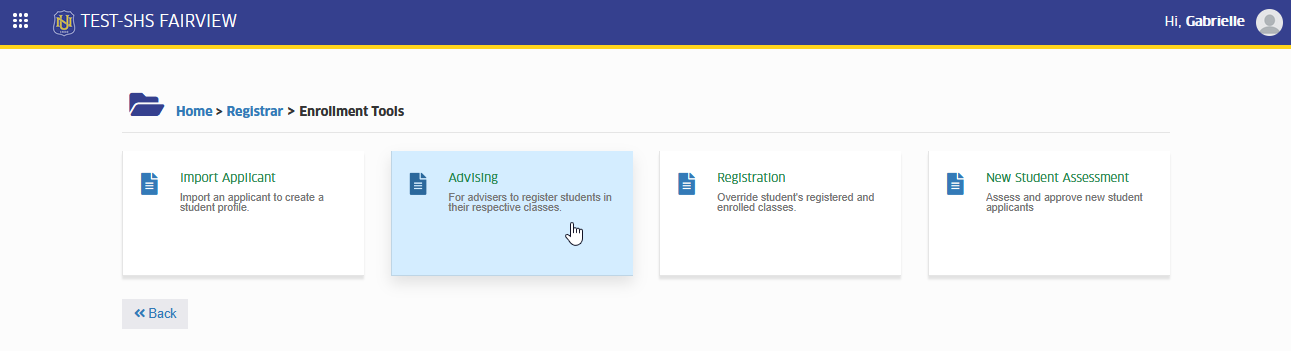
In NUIS-SHS portal, go to Registrar > Enrollment Tools > Advising. Click the module tab to redirect to the Advising for Enrollment page.
How to Use the Module
This section provides step-by-step instruction for the user on how to manage the advising process.
Register Student to Subject
This part of the module lets you register or assign students to their subjects.
Follow the steps below to register a student to the subject.
STEP 1. On the Advising for Enrollment page, enter the Student ID of the student you want to advise.
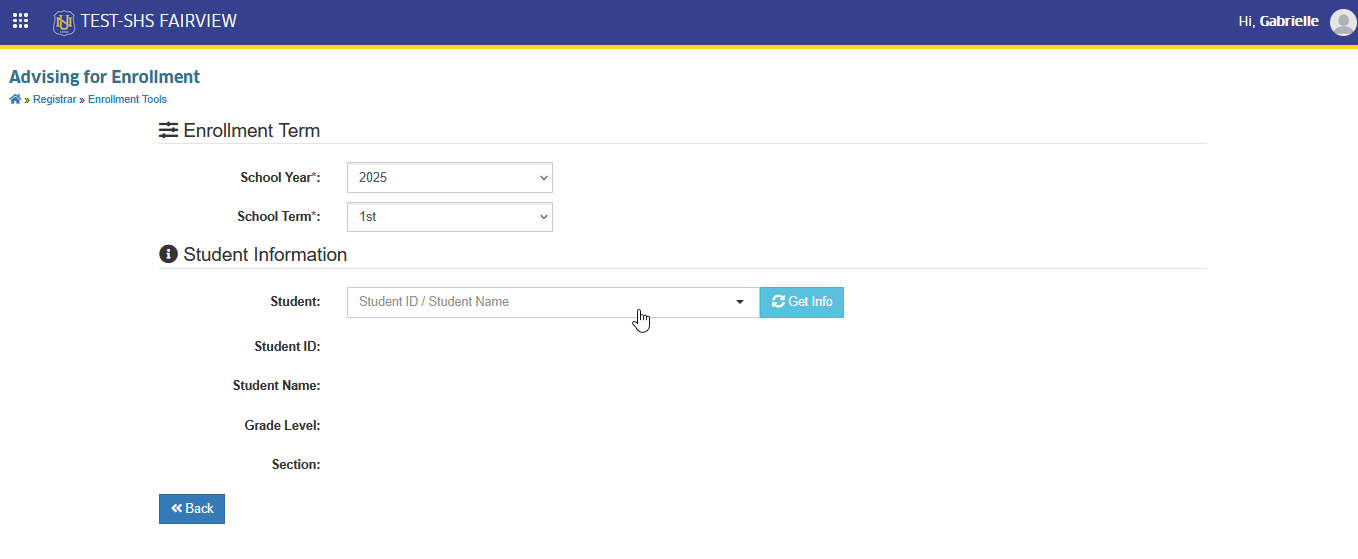
A student with pending clearance issues cannot be advised. Ask the student to settle their clearance concerns with the appropriate office first before proceeding.
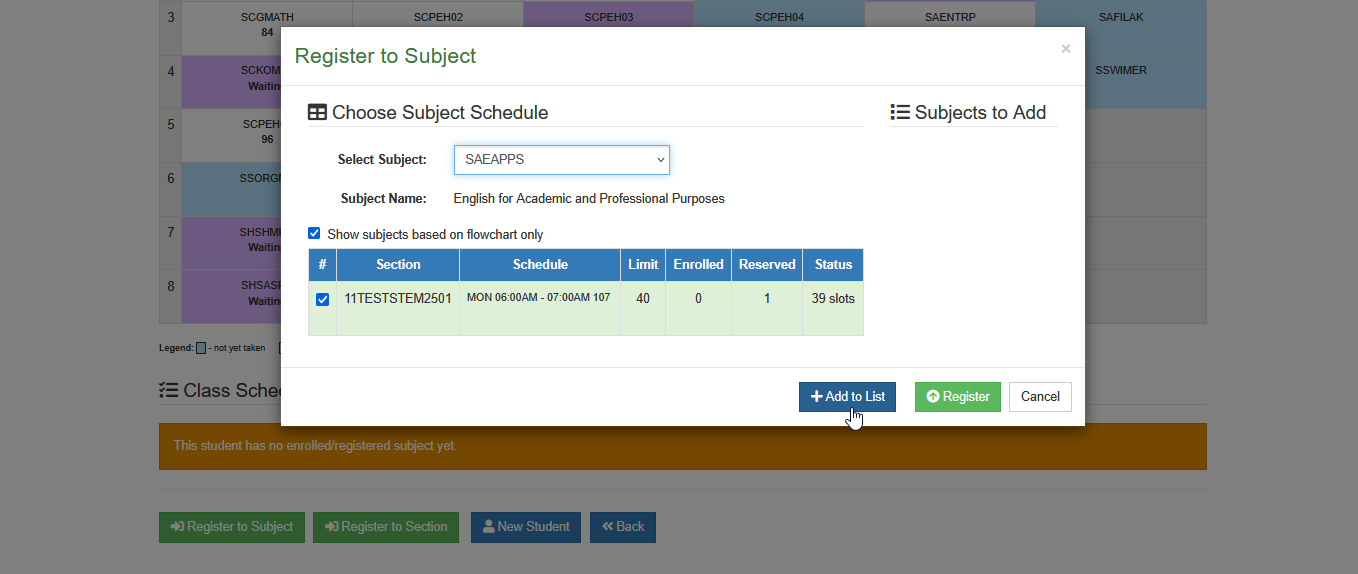
STEP 2. Scroll down to Class Schedule section and click button. This will open the Register to Subject prompt.

STEP 3. In the Register to Subject prompt:
-
Search for the subject to register in the dropdown list.
-
Click the button to add te subject to the list of subjects to be registered.
STEP 4. Once all subjects are selected, click the button to finalize and submit the subjects for registration.
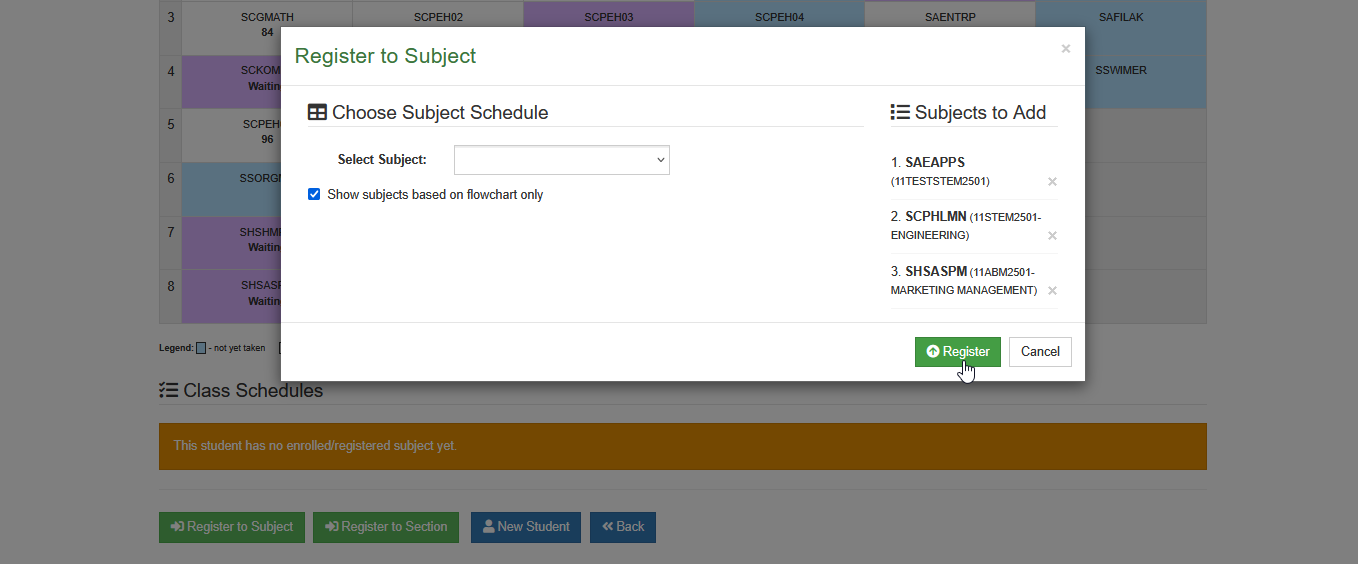
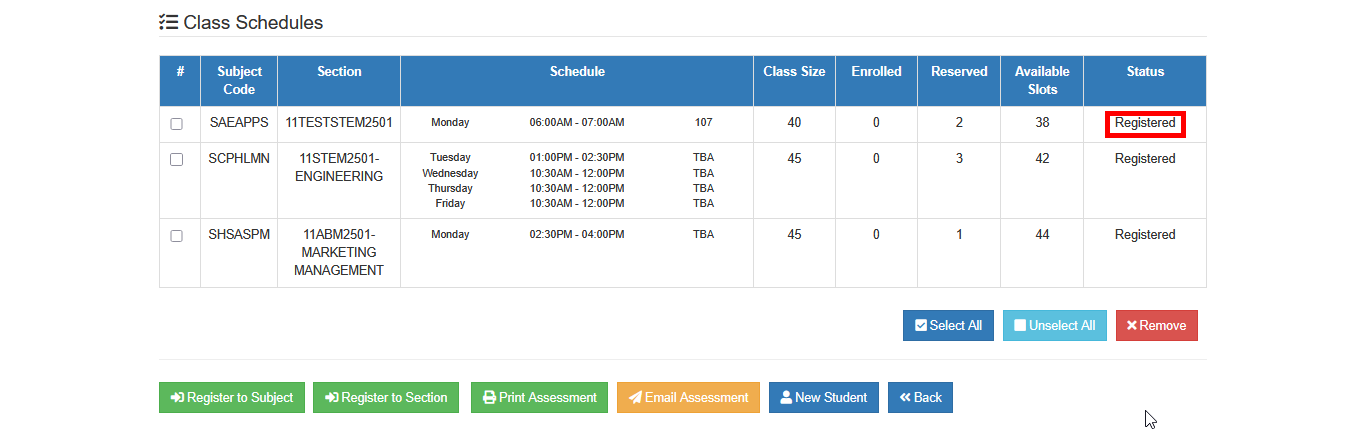
STEP 5. All selected subjects will now appear in the Class Schedules section with the status Registered. You can now proceed to view the assessment and send it to the student via email so they can continue with their enrollment.
Register to Section
The Register to Section feature is used to assign a student to a specific class or section for the next school year.
Follow the steps below to register a student to a section.
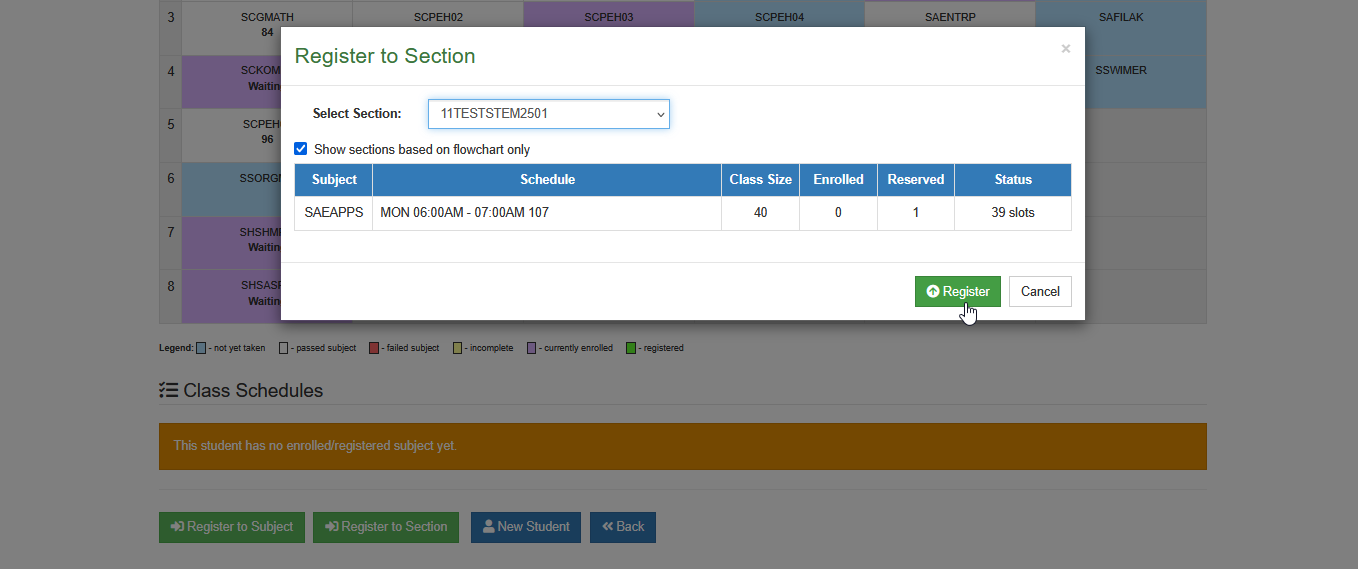
STEP 1. On the Advising for Enrollment page, scrolldown to Class Schedules section. Then, click the button. The Register to Section prompt will appear.

STEP 2. In the prompt, select the section from the dropdown list. All classes for that section will be displayed in the promt. Finalize by clicking the button.
STEP 3. All selected subjects will now appear in the Class Schedules section with the status Registered. You can now proceed to view the assessment and send it to the student via email so they can continue with their enrollment.
Remove Registered Subjects
Follow the steps below on how to remove registered subjects
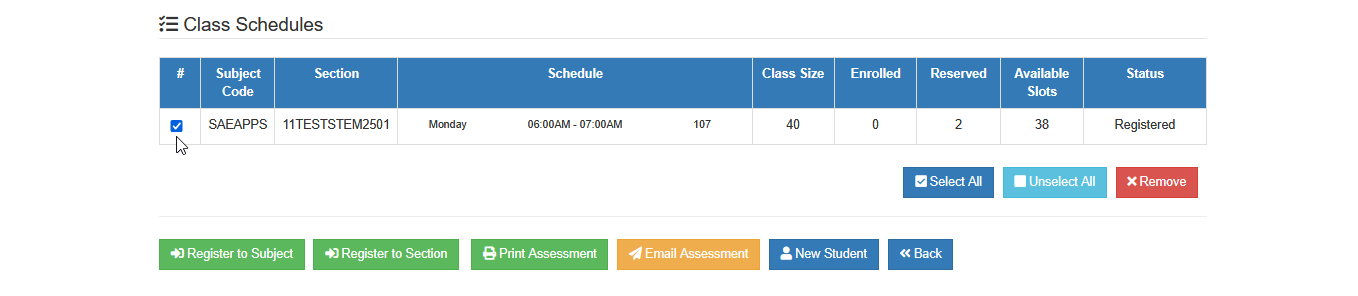
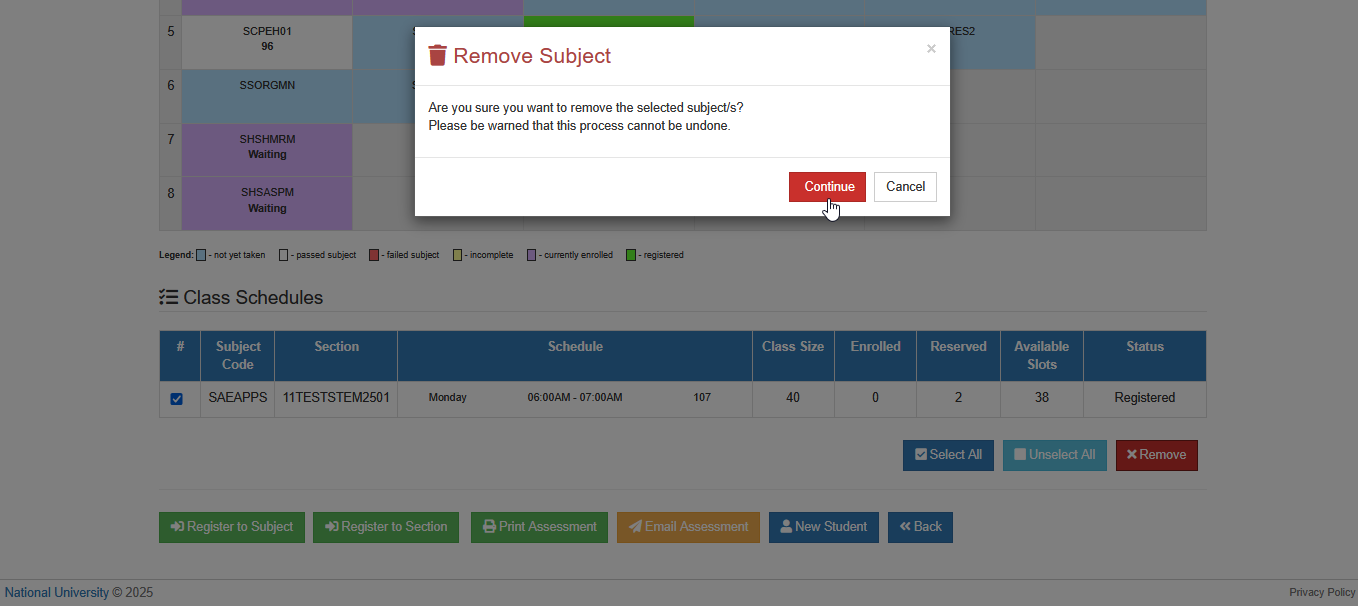
STEP 1. On the Class Schedules section of the Advising for Enrollment page, select the subjects you want to remove by checking the box beside each subject. You can also select all or unselect them using the available buttons.
STEP 2. After selecting the subjects to remove, click the button.
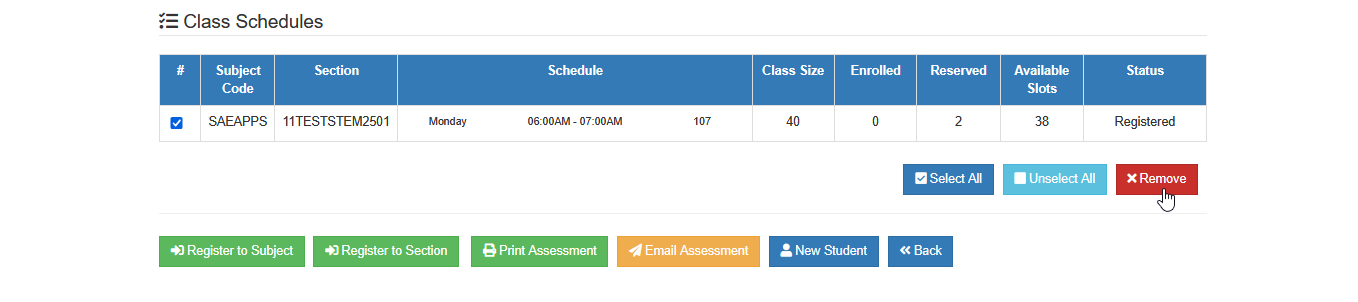
STEP 3. Confirm your action by clicking the button.
Email Assessments
The Email Assessments feature allows you to send the student's official enrollment assessments directly to their official email address.
Follow the steps below to email student's assessment.
STEP 1. Once your done with the registration of classes, click the button.
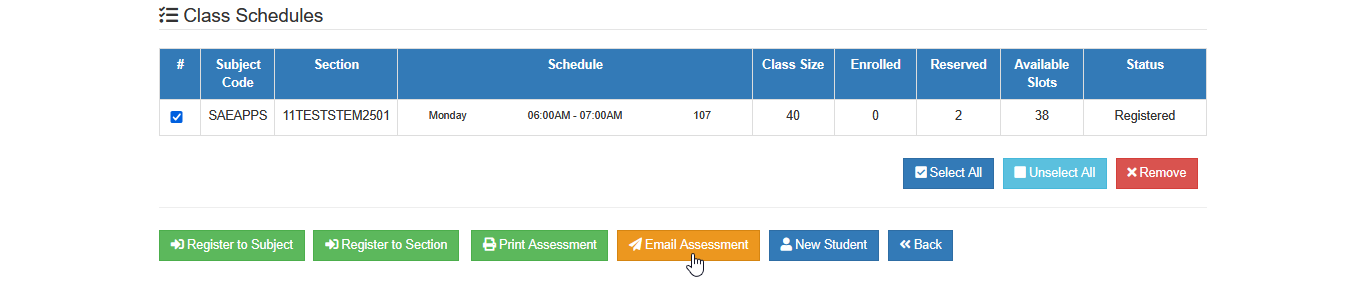
STEP 2. Wait for the system to process your action. A confirmation message will appear once the transaction is successful, as shown in the image below.

For more questions or concerns, email us at nu-desk@national-u.edu.ph