Registration
The Registration module is used only for incoming Grade 12 students. This is where they are officially registered to their assigned class and section, which allows them to proceed with enrollment.
What You Can Do in This Module
-
Register a student to their assigned class and section.
-
Officially Enroll the student for the Term.
-
This module can be used also for Load Revision.
Required Permission
- Registration - This permission allows the user to register a student to a specific class or section and let them proceed with enrollment.
How to access the module?
To access the module, make sure you have the Registration permission. If it doesn’t appear in your portal, request access from your System Administrator.
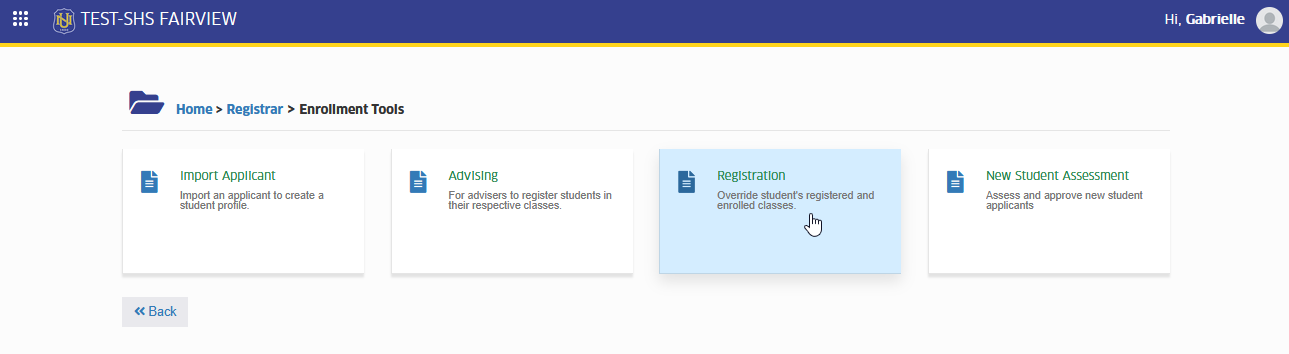
To access the module go to Registrar > Enrollment Tools > Registration
Click the module tab to redirect to Registration for Enrollment page.
How to Use the Module
This section will guide you through the steps on how to register an incoming Grade 12 student to their class and section. Follow these steps carefully to make sure the student is properly registered and can proceed with enrollment.
Register to Subject
Follow the steps below to register a student to a subject.
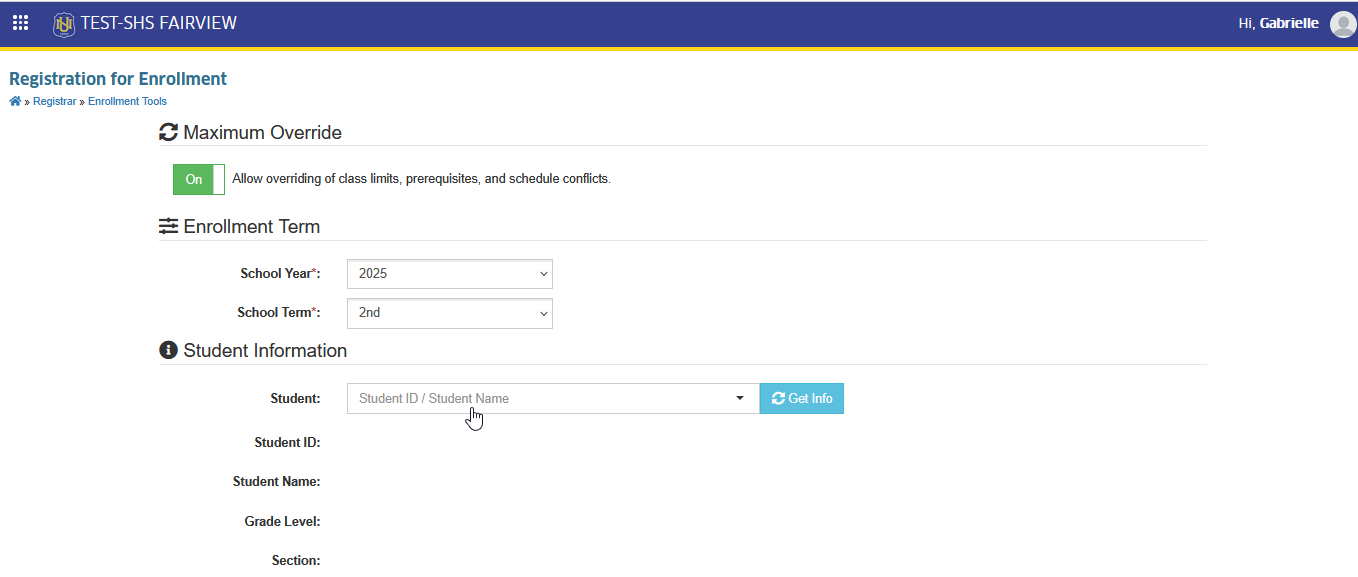
STEP 1. On the Registration for Enrollment page, search for the student to process by entering student ID or name.
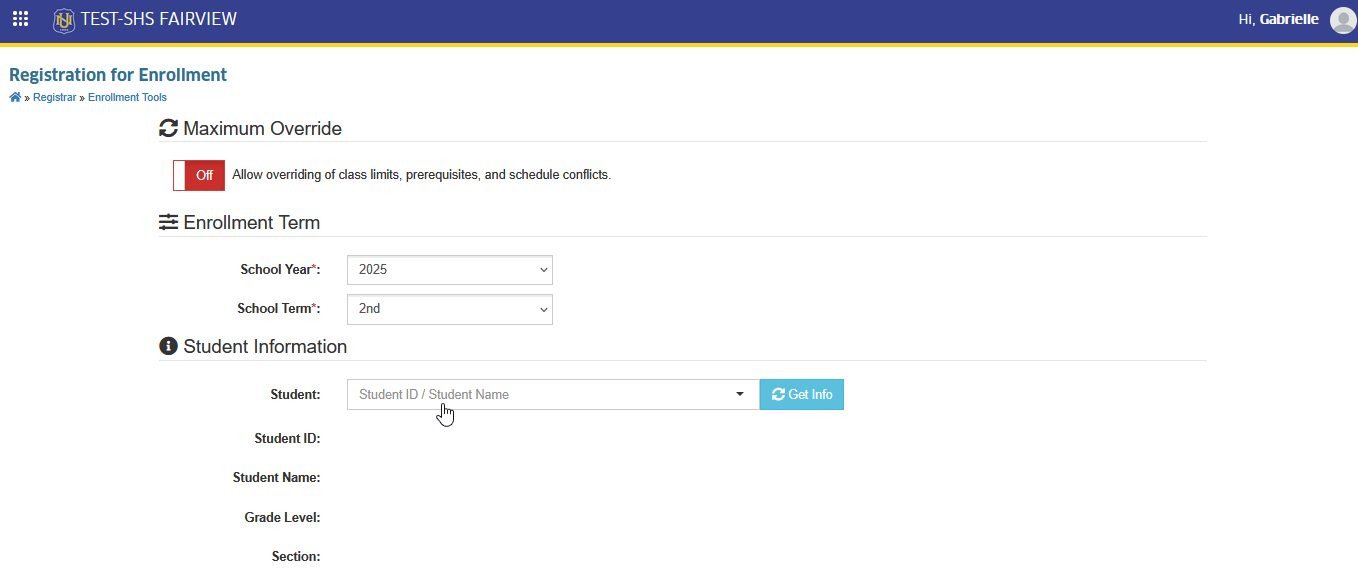
STEP 2. Scroll down to Class Schedules section and click the button button. The Register to Subject prompt will appear.

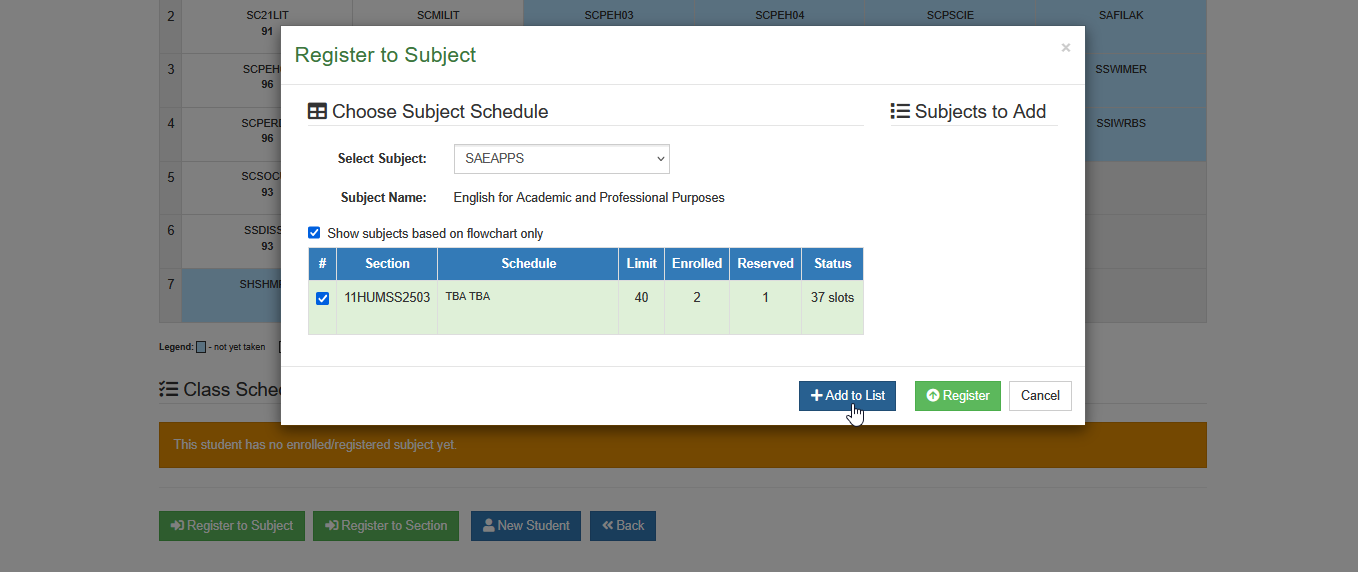
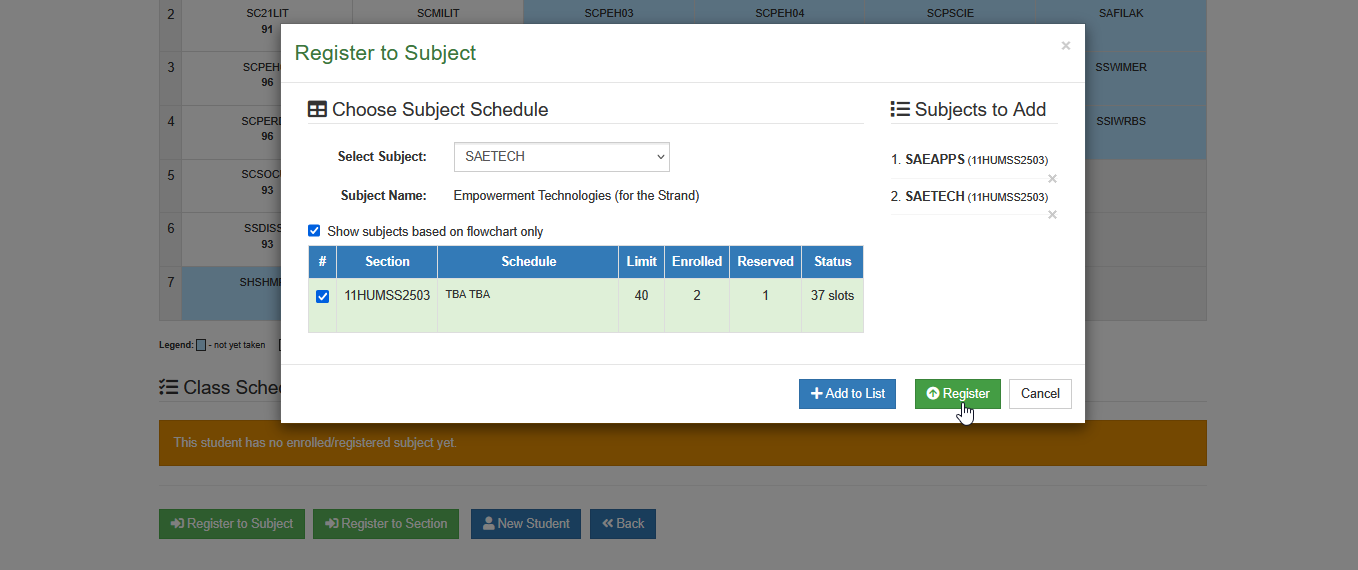
STEP 3. In the Register to Subject prompt, select the subject(s) to register and click the button. The selected subjects will appear under the Subjects to Add section.
STEP 4. Once all subjects to be registered are added, complete the process by clicking the button.
Register to Section
Follow the steps below on how to register the student to a section.
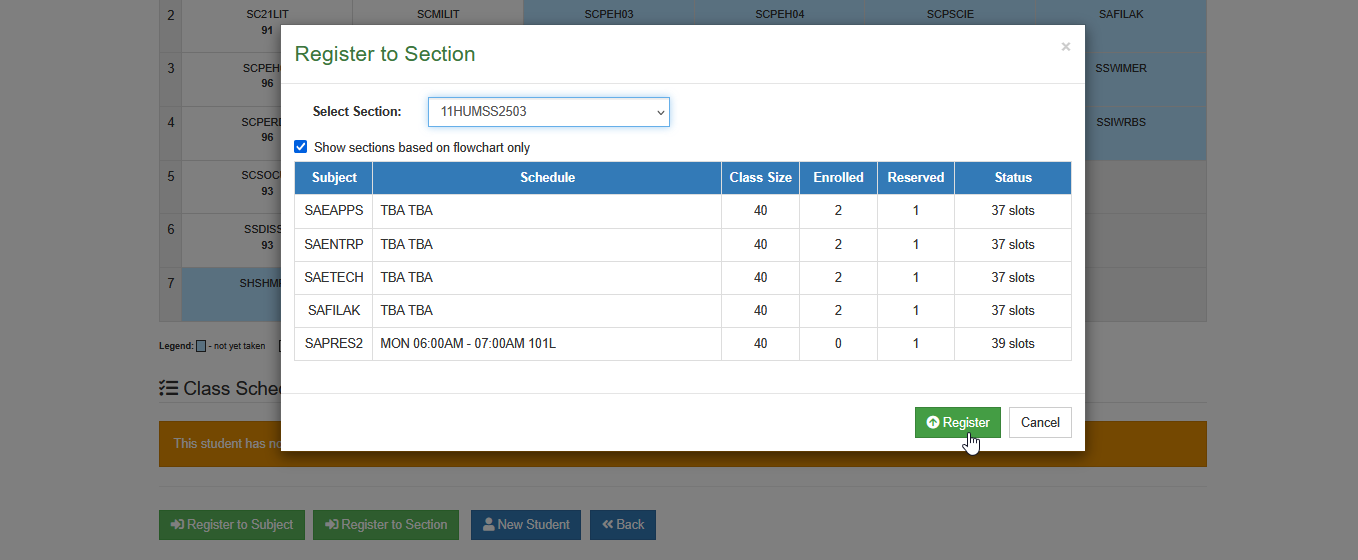
STEP 1. On the Registration for Enrollment page, scroll down to Class Schedules section. Then, click button. The Register to Section prompt will appear.

STEP 2. In the Register to Section prompt, select the section from the dropdown list and click the button.
Remove Registered Subjects
Follow the steps below to remove registered subjects.
STEP 1. In the Class Schedule section, select the subject(s) to remove by clicking the checkbox next to the subject.
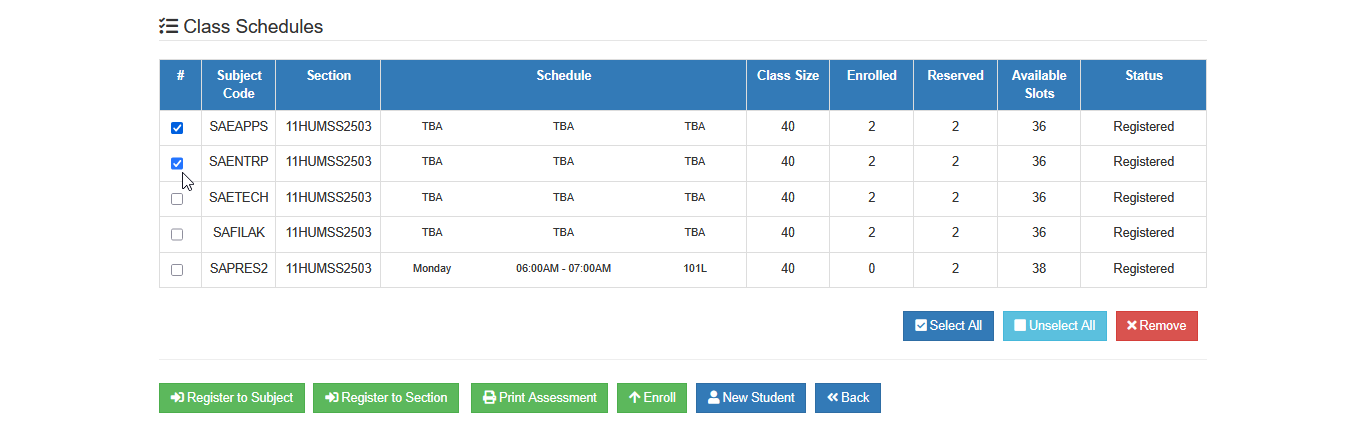
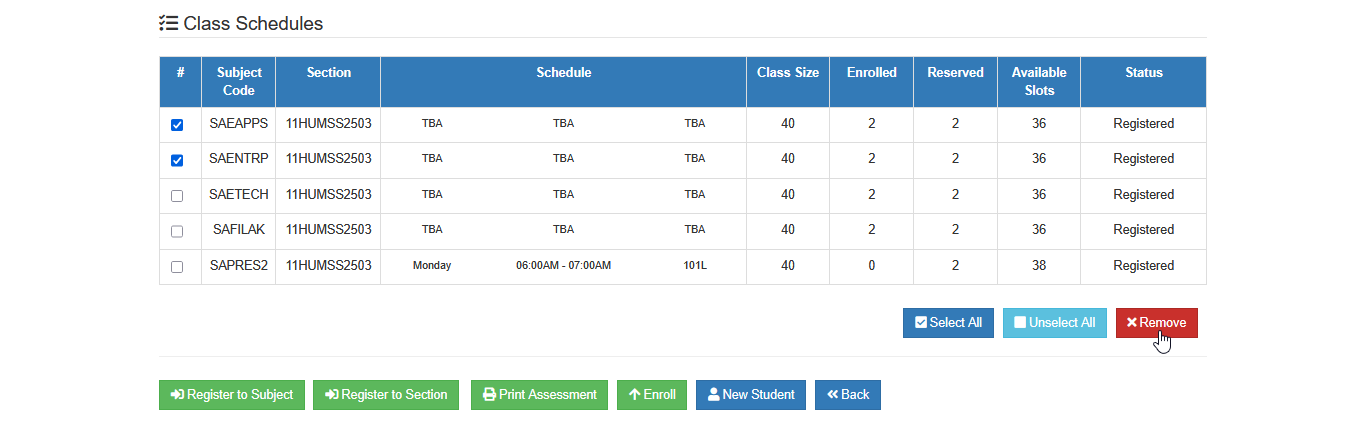
STEP 2. Once all subjects have been selected, click the button.
Enroll the Student
Follow the step below on how to enroll the student manually.
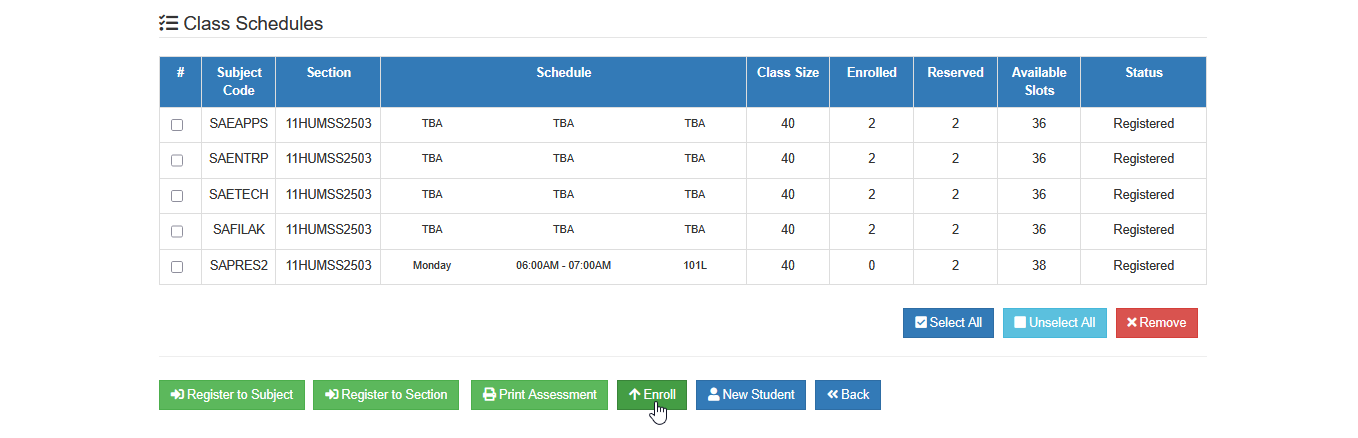
STEP 1. On the Registration for Enrollment page, scroll down to Class Schedules section. All registered subject will be displayed there. Proceed to enrollment by clicking the button.
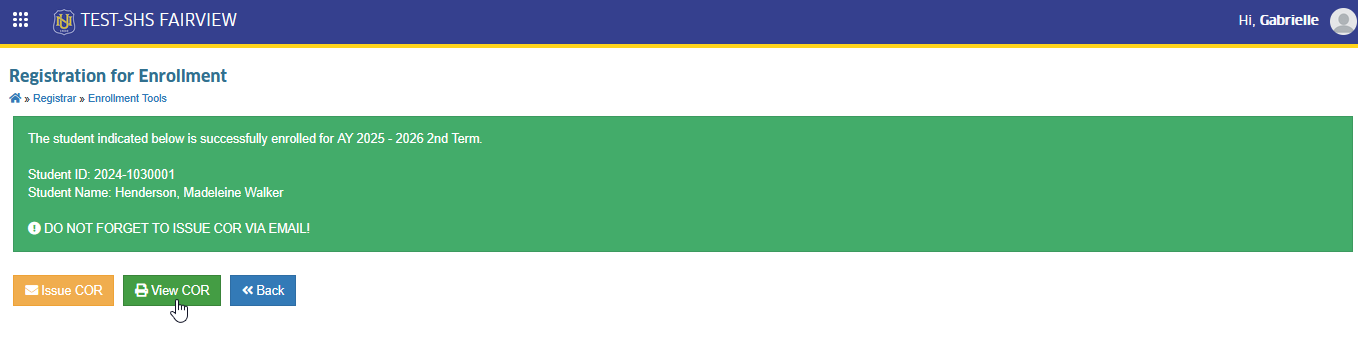
STEP 2. Once the student is officially enrolled, generate the Certificate of Registration (COR) by clicking the button.
Load Revision
Follow the steps below to process a load revision.
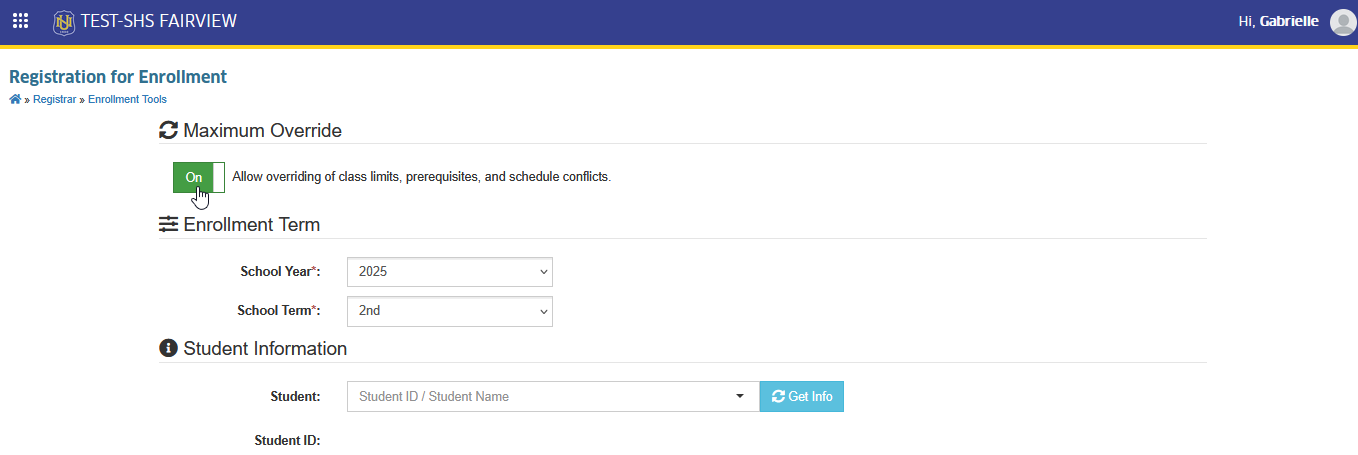
STEP 1. On the Registration for Enrollment page, enable the override feature of the module to allow changes to the student's enrollment information.
STEP 2. Search for the student to process the load revision.
STEP 3. Under the Class Schedule section, select the enrolled subject(s) to remove.
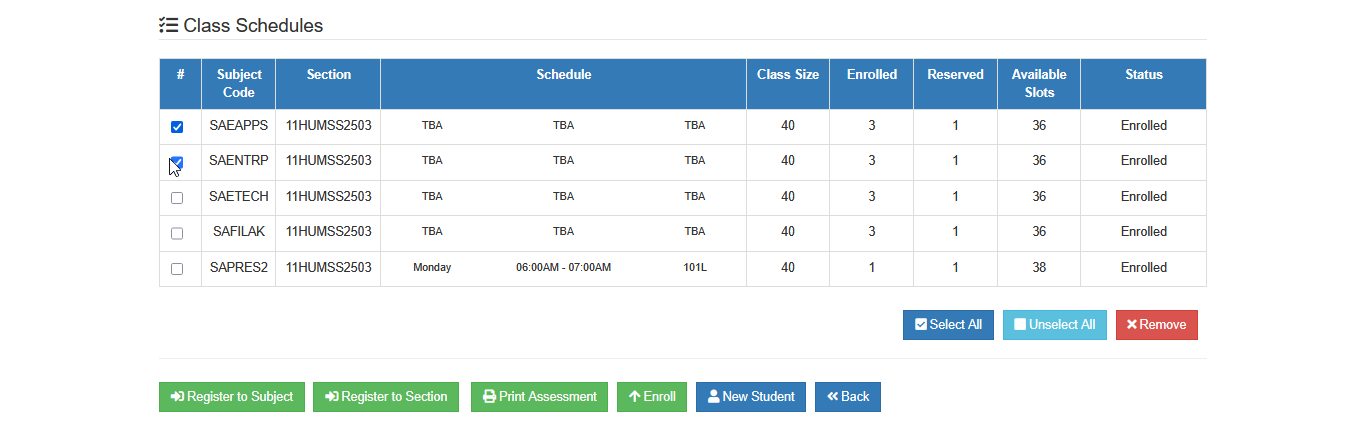
STEP 4. Remove the enrolled subject(s) by clicking the
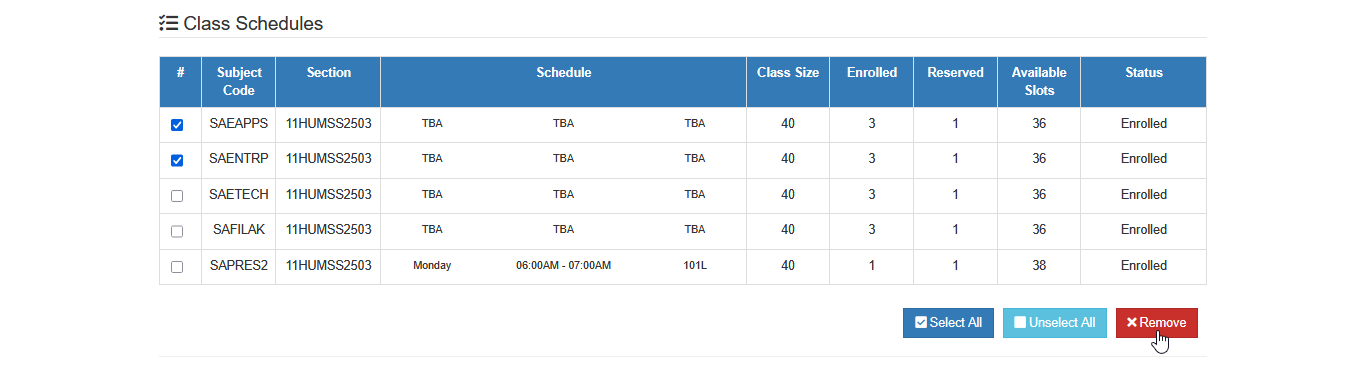
STEP 5. Follow the instruction on how to Register a Subject then proceed with the Enrollment by clicking the button.
For more questions or concerns, email us at nu-desk@national-u.edu.ph