Setup Fee Schedules
This module is used by the Accounting & Registrar Offices in setting up student's fee schedules for enrollment payments.
It is often used during preparation for the next enrollment.
Required Permissions
The following permissions are necessary in managing the Fee Schedules and its items:
- View FeeSchedules - permission to view the list of fee schedules.
- Add FeeSchedules - permission to add fee schedules.
- Edit FeeSchedules - permission to edit existing fee schedules.
- Delete FeeSchedules - permission to delete a fee schedule.
- X-Admin: Setup Fee Schedule - permission to enable modifying past fee schedules.
The following permissions are necessary in managing the Included Students of a specific Fee Schedule.
- View FeeSchedules Students - permission to view the list of included students.
- Add FeeSchedules Students - permission to add a student in the list.
- Delete FeeSchedules Students - permission to delete a student from the list.
- X-Admin: Setup Fee Schedule Students - permission to enable modifying affected students for the past fee schedules.
How to access the module?
To access the module, make sure you have the View FeeSchedules permission assigned to your role by your System Administrator.
If you already have, it will appear in your portal under Accounting > Fee Schedules group.
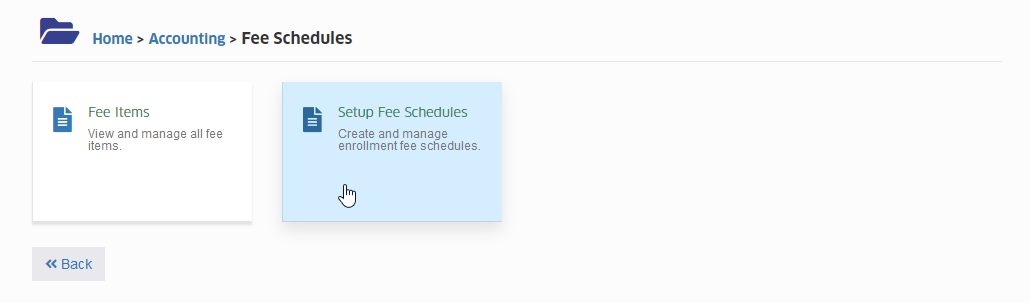
Click the module tab to redirect Setup Fee Schedule page.
How to use the module?
Follow the steps below on how to properly use this module.
STEP 1. Go to Accounting > Fee Schedules > Setup Fee Schedules .
STEP 2. Specify the school year and term ( or you can also include the program) to filter the fee schedules that you will manage.
Then click the button.
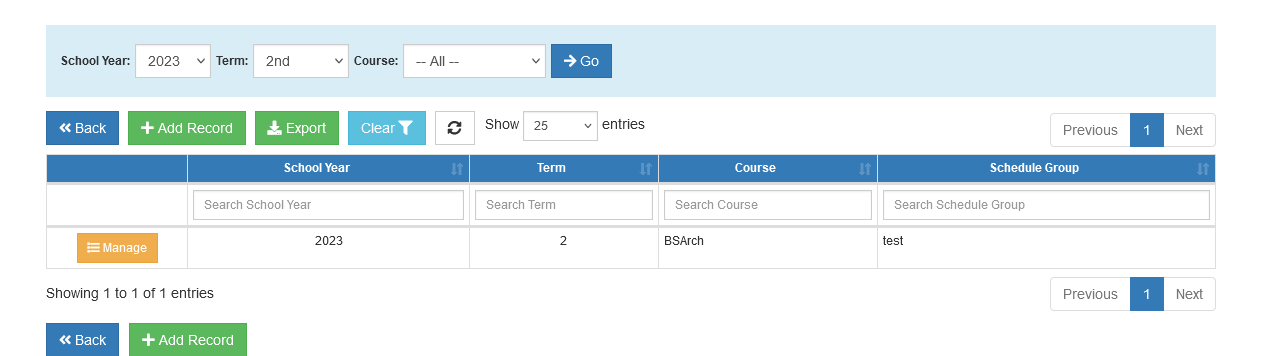
STEP 3. You can either Add a new Fee Schedule group or Manage an existing record.
User's access is limited based on the assigned accessible programs.
If you have no access to a specific or any program, request access from your System Administrator with approval of your immediate superior.
How to Add a New Fee Schedule?
STEP 1. Click the button above the table of fee schedules.
STEP 2. In the Add Fee Schedule form, input the following required details.
| Field | Description | Required |
|---|---|---|
| Course | To which program you want to create | Yes |
| Schedule Group | Name of the fee schedule group. | Yes |
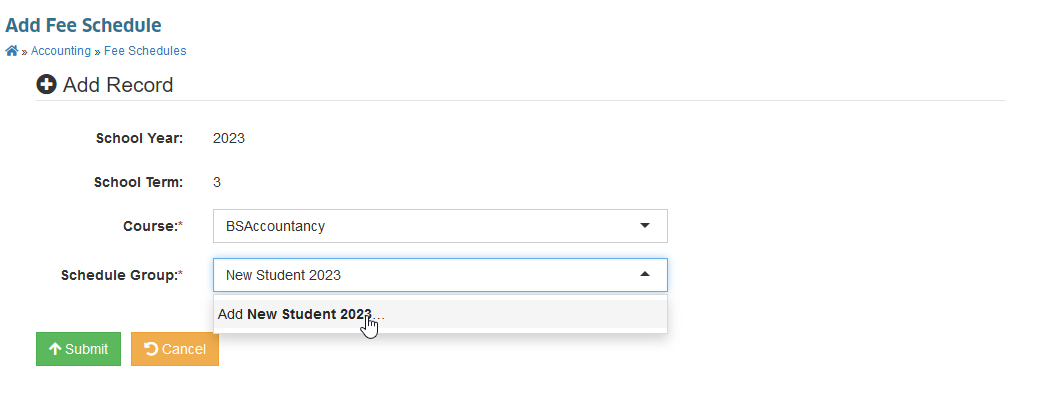
If it is a new name for a fee schedule group, encode the name and click Add ... to be added in the list (refer to image above).
If it is an existing name, just select the name from the choices.
STEP 3. Click the button.
You will be redirected to management of fee schedule details which includes the following:
- Fee Items - manage items to be charged.
- Included Students - manage the students to be included in the schedule group.
How to Manage Fee Schedule Items?
STEP 1. Under the Fee Schedule Details section, click the Fee Items tab.
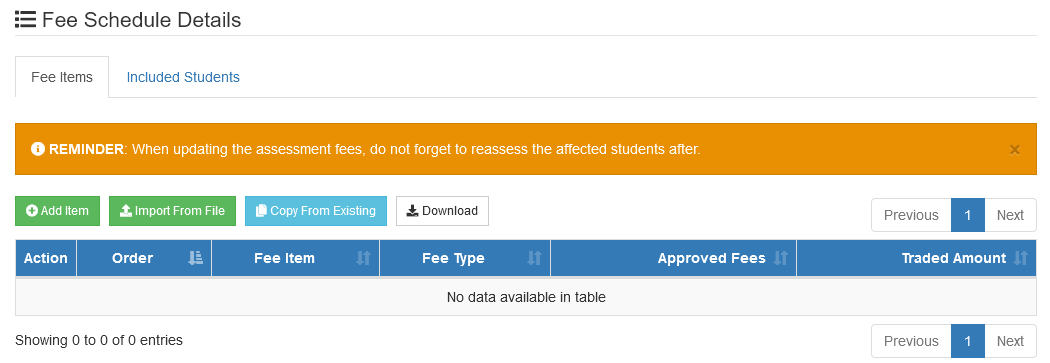
STEP 2. You can do either of the following actions based on the permission assigned to you by your system administrator.
Refer to the Required Permissions section for request and assignment of access.
- Add a single fee item
- Import a list of fee item
- Edit a fee item
- Delete a fee item
- Manage affected subjects of the fee item
- Download list of fee items
Add a Single Fee Item
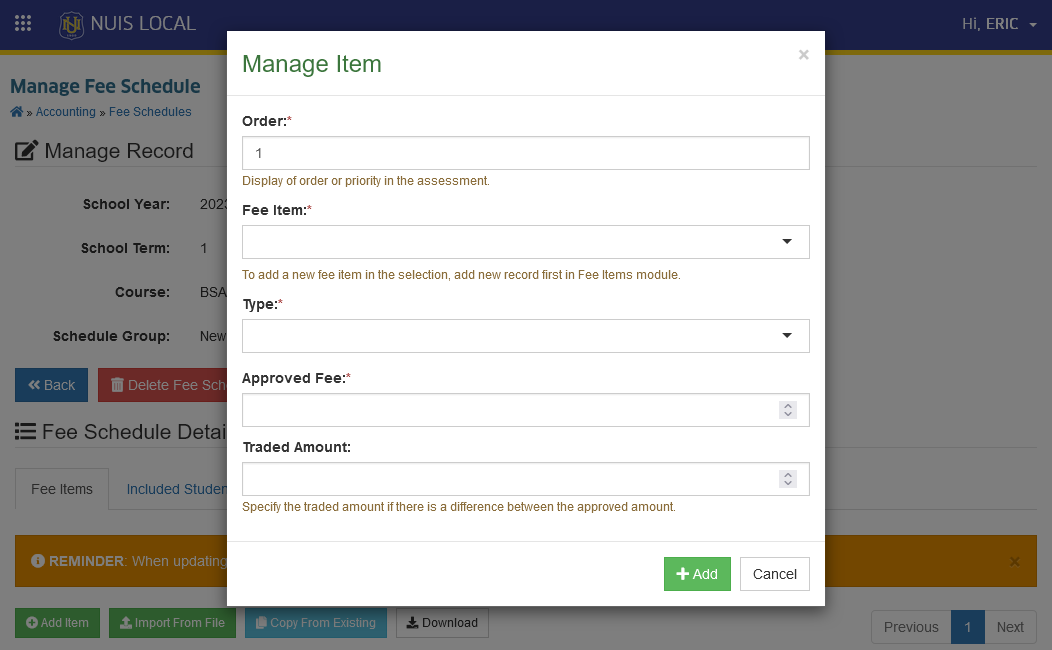
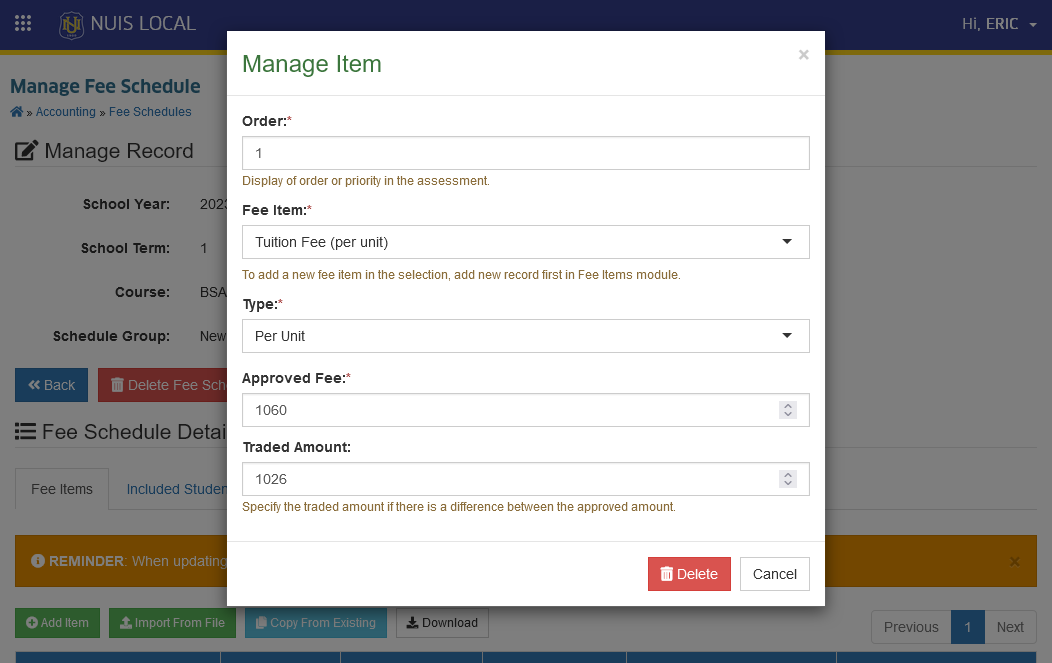
STEP 1. In the Fee items tab, click the button.
STEP 2. Provide the required details of a fee item.
| Field | Description | Required |
|---|---|---|
| Order | The ordering value of the fee item for displaying in Assessment Form. Lowest value will come first. | Yes (auto-populate) |
| Fee Item | Name of the fee item. Note: If fee item is not in the selection, add the new fee item in Fee Items module. | Yes |
| Type | Type of the fee item. Select from the list. | Yes |
| Approved Fees | Amount of the item approved by CHED/DepEd. | Yes |
| Traded Amount | Amount of the item approved by the institution and subject for collection. Specify only if there is a Trade Discount. Traded Amount = Approved Fees - Trade Discount | Optional |
Traded Amount has been added starting A.Y. 2024-2025 to allow the computation of Trade Discounts.
If no Traded Amount given for any item, Student's Assessment will recognize the Approved Fees as the collected amount and no Trade Discount will be computed.
STEP 3. Click the button.
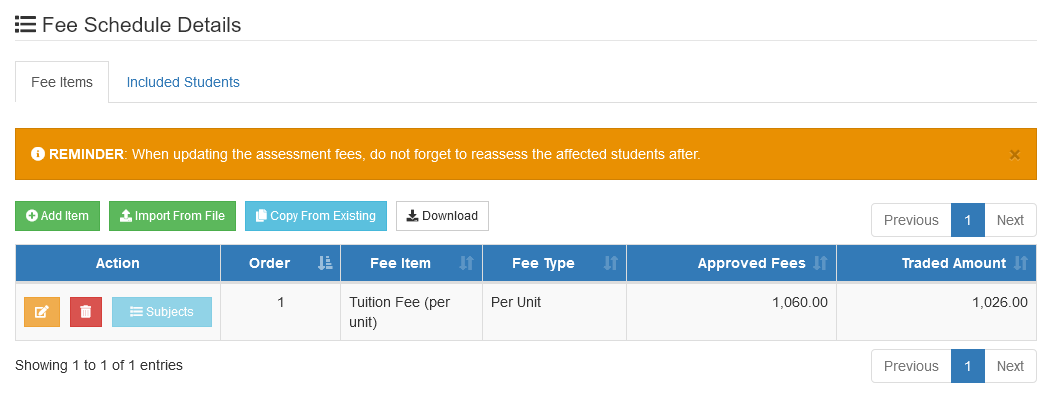
STEP 4. Check if the new item is already included in the table of fee items.
A new fee item has already been added.
Import a List of Fee Items From File
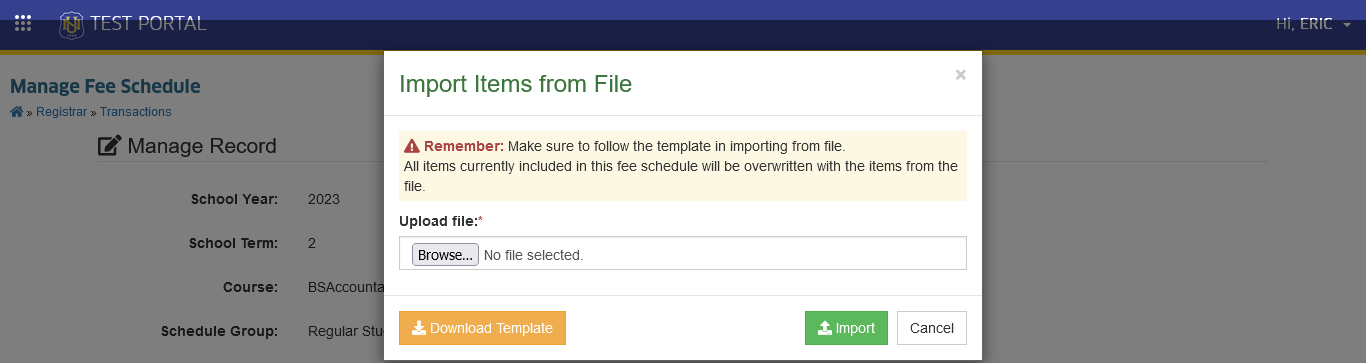
You can use this feature if you want to include multiple items from a file in a single action.
STEP 1. Click the button.
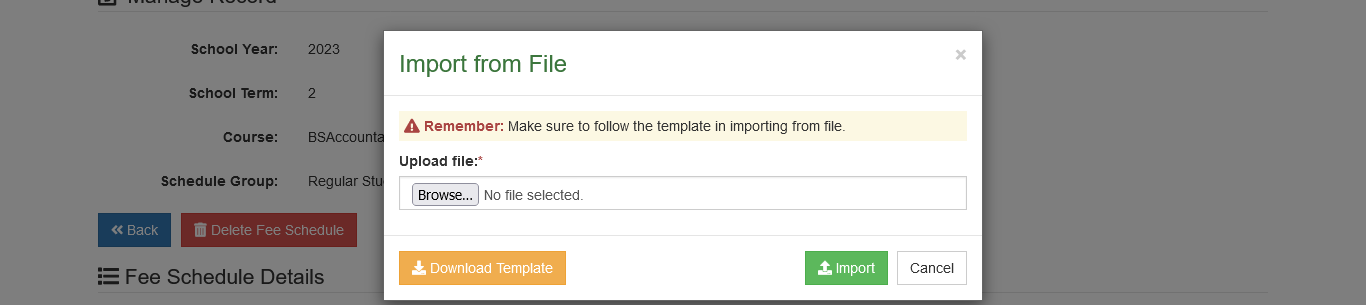
STEP 2. Download the template.
STEP 3. Fill out the downloaded template with the necessary details and save changes.
STEP 4. Upload the file.
STEP 5. Click the button.
STEP 6. Check if the items imported are the same with the records from file.
Make sure to follow the template in importing from file. If the fee schedule has already items included, these items will be removed and overwritten by the new items from the file.
Edit Fee Item
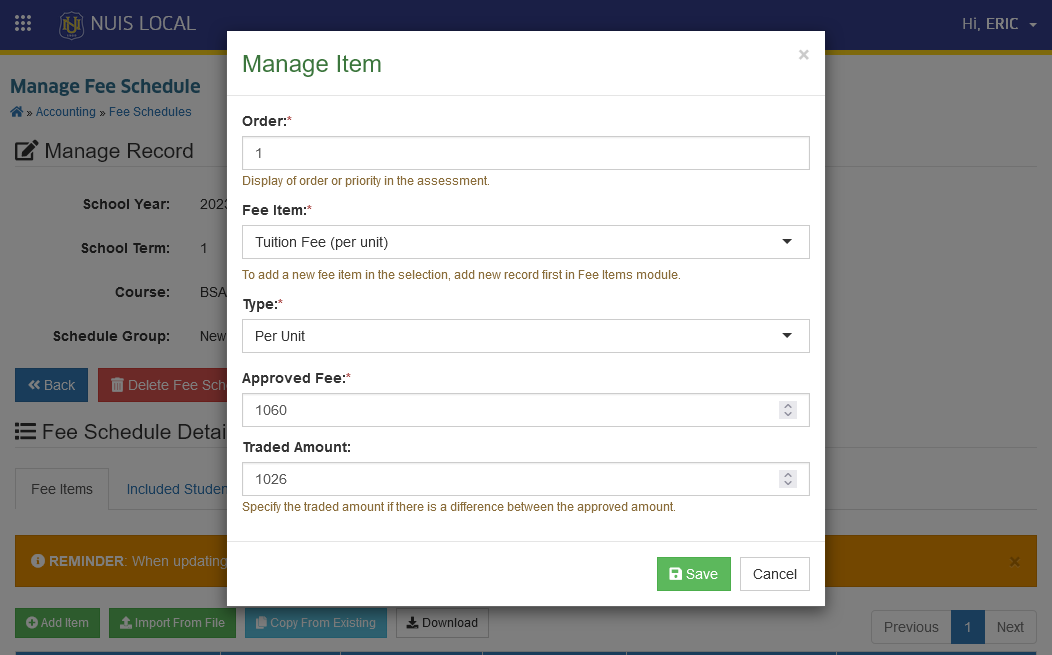
STEP 1. Click the button of the specific record under Actions column of the fee items table.
STEP 2. Make some changes.
STEP 3. Click the button.
Delete a Fee Item
STEP 1. Click the button of a specific record under Actions column of the fee items table.
STEP 2. Click the button again to confirm.
Manage Affected Subjects of the Fee Item
If a fee item is one of the following types, the affected subjects should also be managed.
- Per Subject Affected
- Per Unit Affected
- Once for a Subject Set
STEP 1. Click the button of a specific record under Actions column of the fee items table.
STEP 2. Add an affected subject by manually selecting the subject from the list.
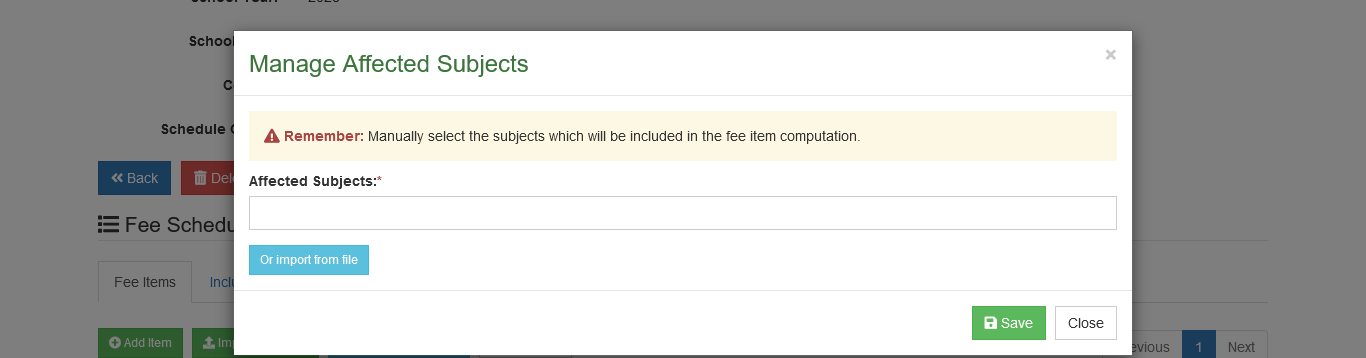
You can also import list of subject codes from file by clicking the button. Always follow the provided template.
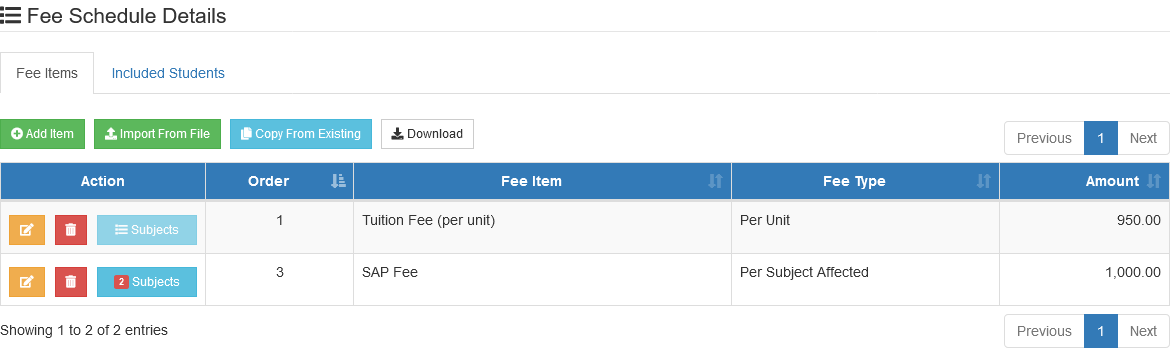
STEP 3. Once subject(s) have been added, click the button. Count of affected subjects will reflect in the button.
Download the List of Fee items
To export the fee items of a fee schedule, click the button above the fee items table.
You can use the downloaded file in importing the fee items to another fee schedule.
How to Manage Included Students?
STEP 1. Under the Fee Schedule Details section, click the Included Students tab.
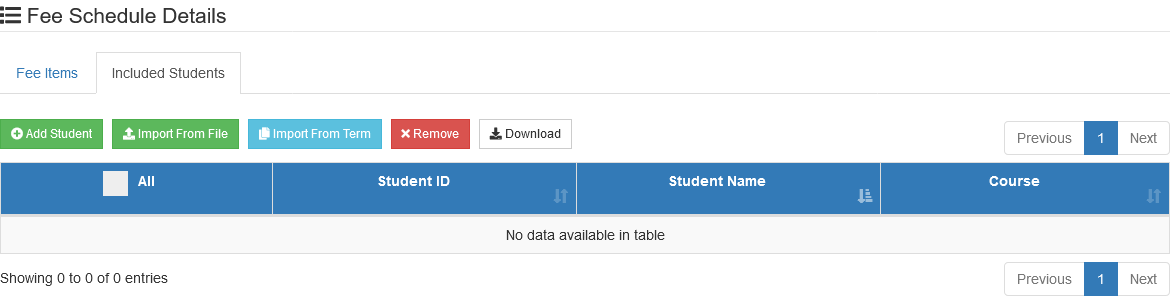
STEP 2. You can do either of the following based on the permissions assigned to you by your system administrator.
- Include a single student
- Import a list of students
- Remove student(s) from the list
- Download list of included students
Include a Single Student
STEP 1. Click the button above the table of students.
STEP 2. Find the student from the list by entering the student name or student ID.
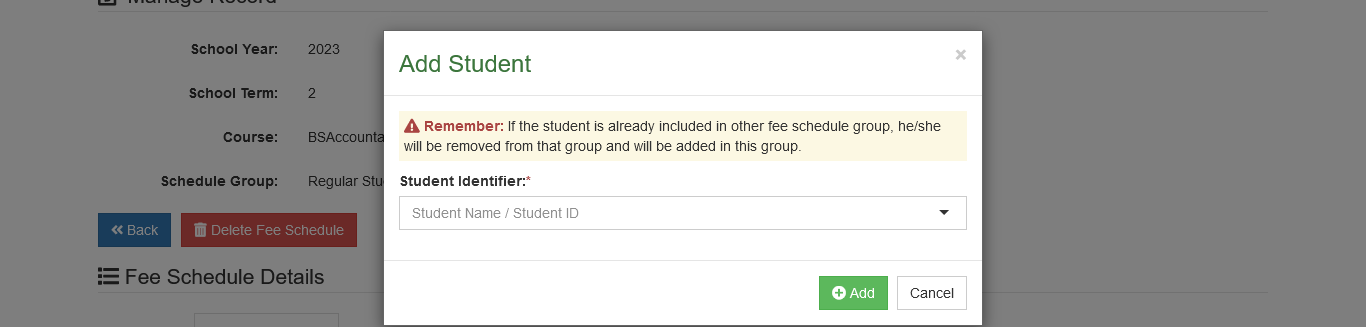
STEP 3. Click the button to add the student to the list.
STEP 4. Check if the student has been successfully added to the table.
Once you add a student to a new fee schedule, he/she will be automatically removed from the previous one. Please review before proceeding.
Import a List of Students
STEP 1. Click the button above the table of the included students.
STEP 2. Download the template.
STEP 3. Fill-out the template with the necessary details and save changes.
STEP 4. Upload the file.
STEP 5. Click the button.
STEP 6. Check if the items imported are added to the table of students.
Remove Student(s) from the List
STEP 1. Check the students to be removed.
STEP 2. Click the button above the table.
STEP 3. Confirm removal of record.
Download List of Included Students
To export the list of students included in the fee schedule, click the button above the students table under Included Students tab.
You can use the downloaded file in importing the students to another fee schedule.
How to Delete the Whole Fee Schedule?
STEP 1. Click the button.
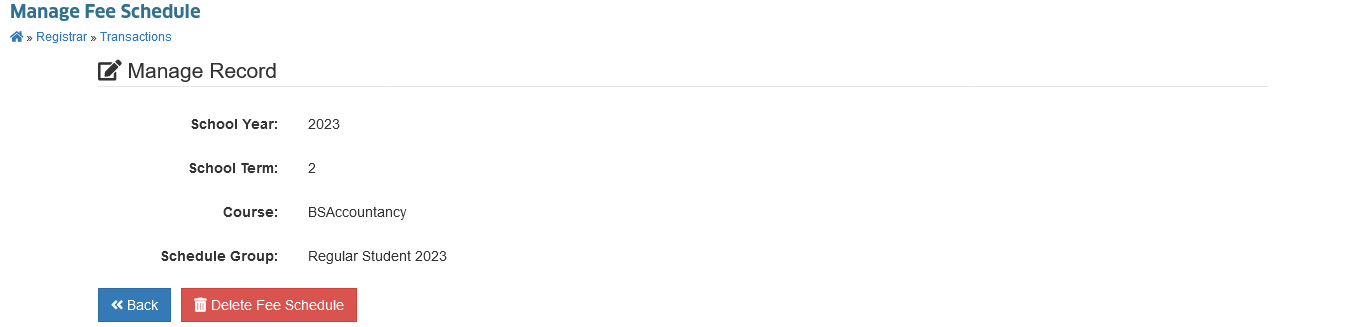
STEP 2. Confirm the deletion of fee schedule.
If fee schedule contains students, deletion of fee schedule will not be allowed.