Subject Substitution
The Subject Substitution module allows Registrar Personnel to view and manage students’ substituted subjects based on their program flowchart.
This module has two main features:
1. Subject Substitution per Student – for managing substitutions one student at a time.
2. Batch Substitution – for applying the same substitution to multiple students at once.
Required permissions
- Subject Substitution - Grants access to manage student subject substitutions, including viewing, updating, and applying substitutions individually or in batches.
Who Can Use This Module
This module is exclusive to Registrar Personnel only. They are responsible for managing and updating official subject substitutions in the system.
How to Access the Module
To access the module, make sure you have the Subject Substitution permission. If it doesn’t appear in your portal, request access from your System Administrator.
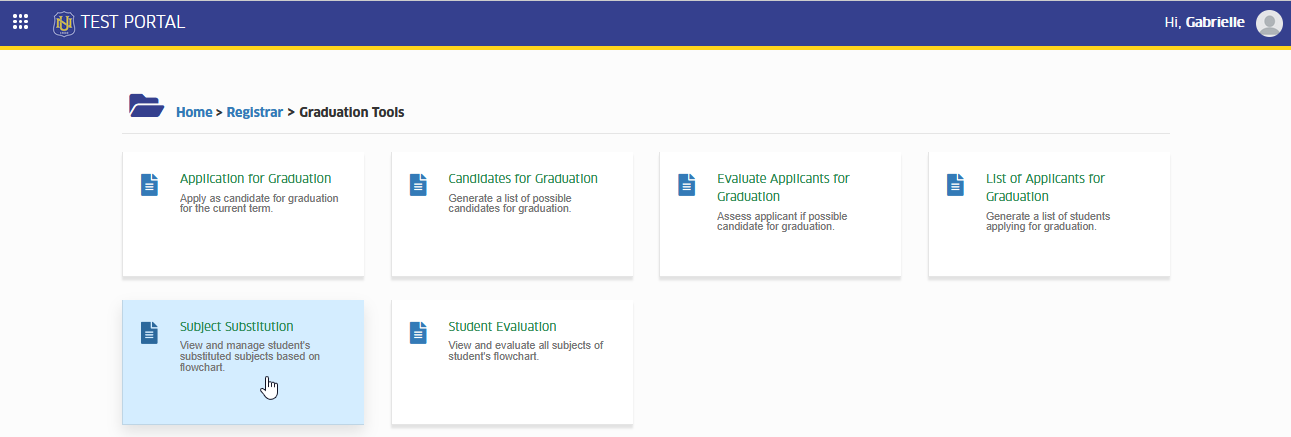
In NUIS portal, go to Registrar > Graduation Tools > Subject Substitution. Click the module tab to redirect to the Subject Substitution page.
Subject Substitution per Student
This feature is used when you need to update or manage subject substitutions for a specific student.
What You Can Do
-
View all substituted subjects for a student
-
Add new subject substitution entries
-
Delete incorrect entries
How to Substitute a Subject
This section explains the step-by-step process for selecting an original subject, choosing its replacement, and saving the substitution in the student’s record.
Follow the instruction below to substitute a subject.
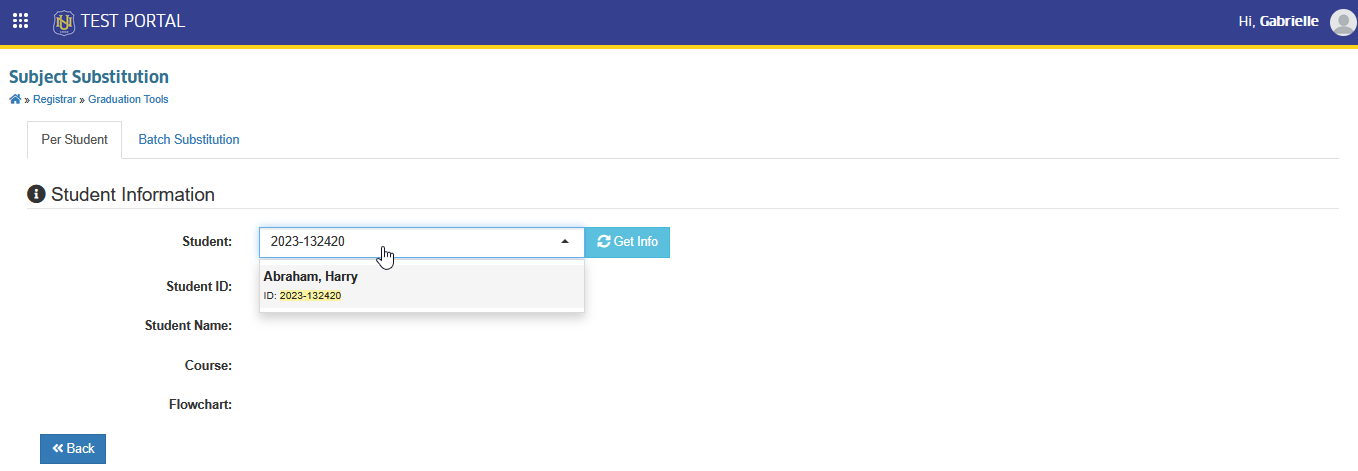
STEP 1. On the Subject Substitution page, enter the student ID in the entry field.
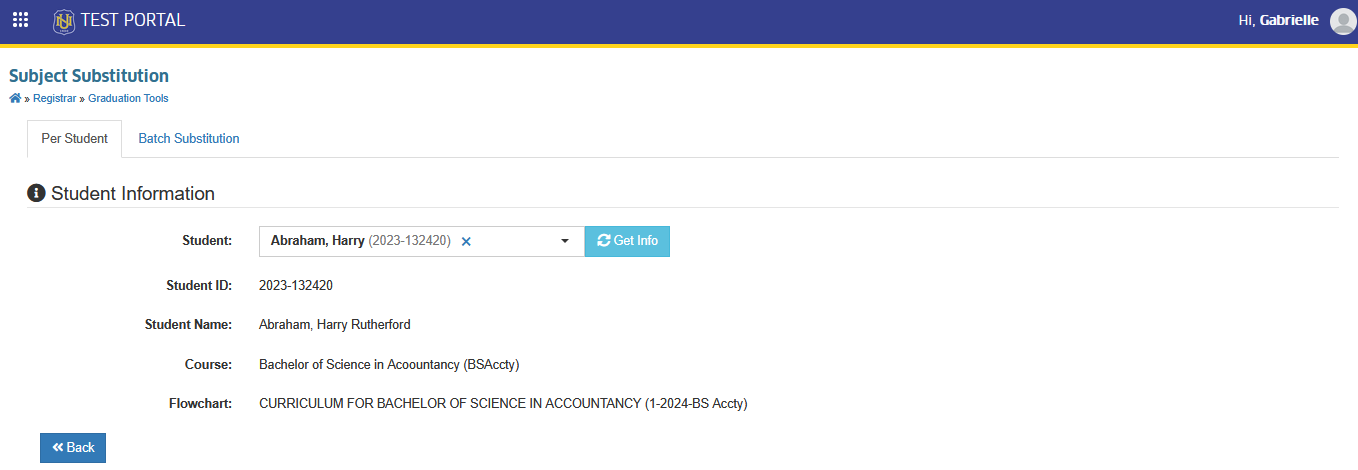
STEP 2. The student's information will be displayed in the page, inlcuding the student's course and flowchart.
STEP 3. Scroll down to the Substitute Subject section. Select the Original Subject to be subtituted in the Original Subject entry field. This dropdown contains all subjects from the student's current flowchart.
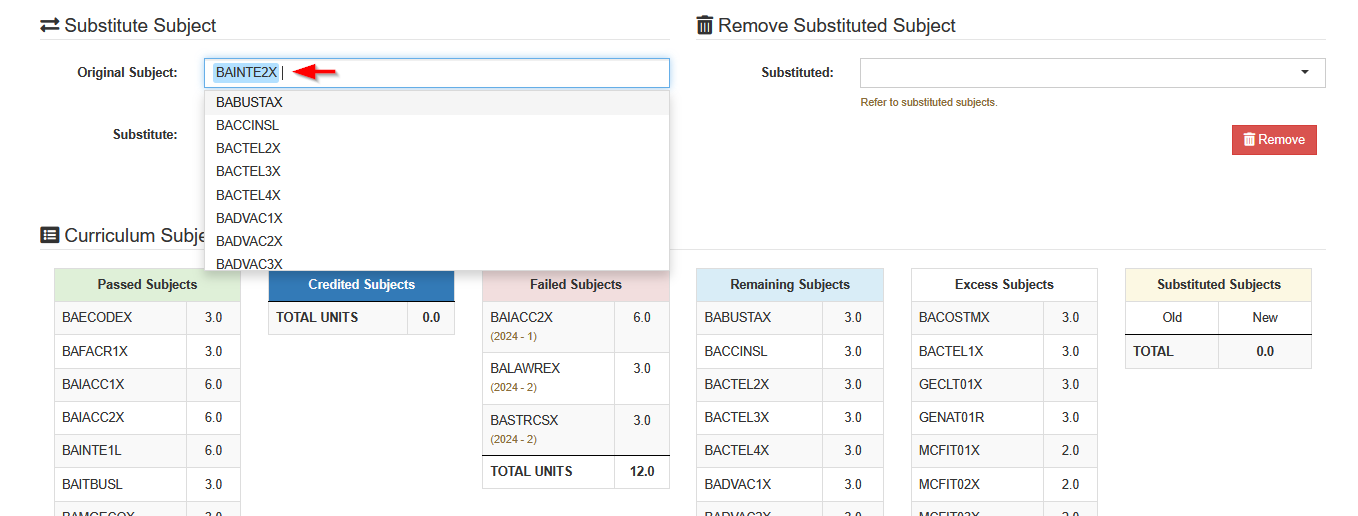
STEP 4. Select the subjects taken that will serve as the substitution in the Substitute entry field. This dropdow contains all excess subjects.
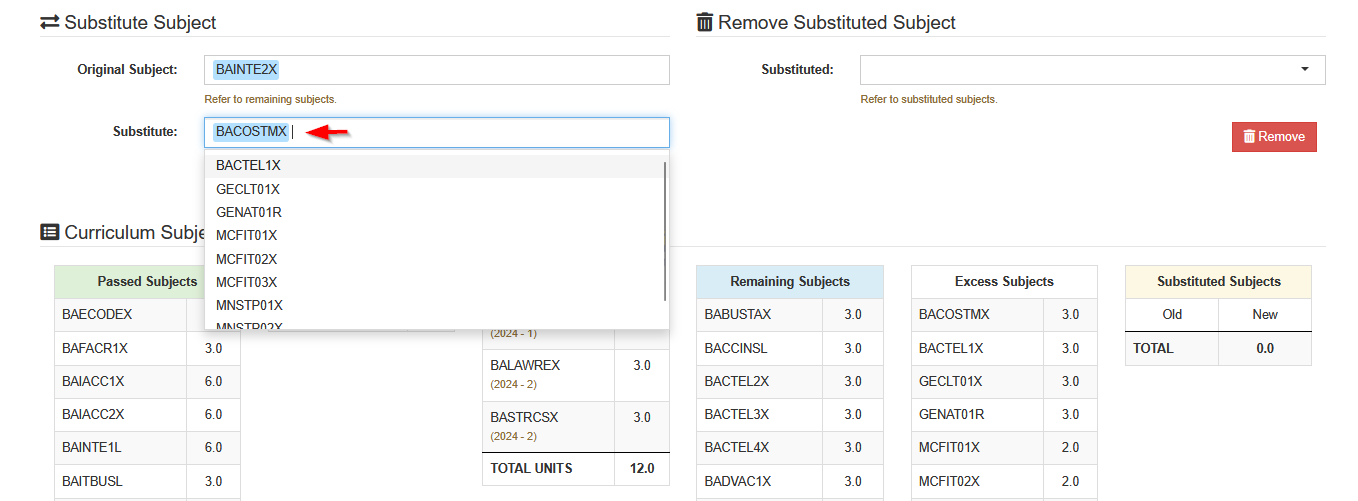
STEP 5. After selecting the subjects, review them first, then click the button.
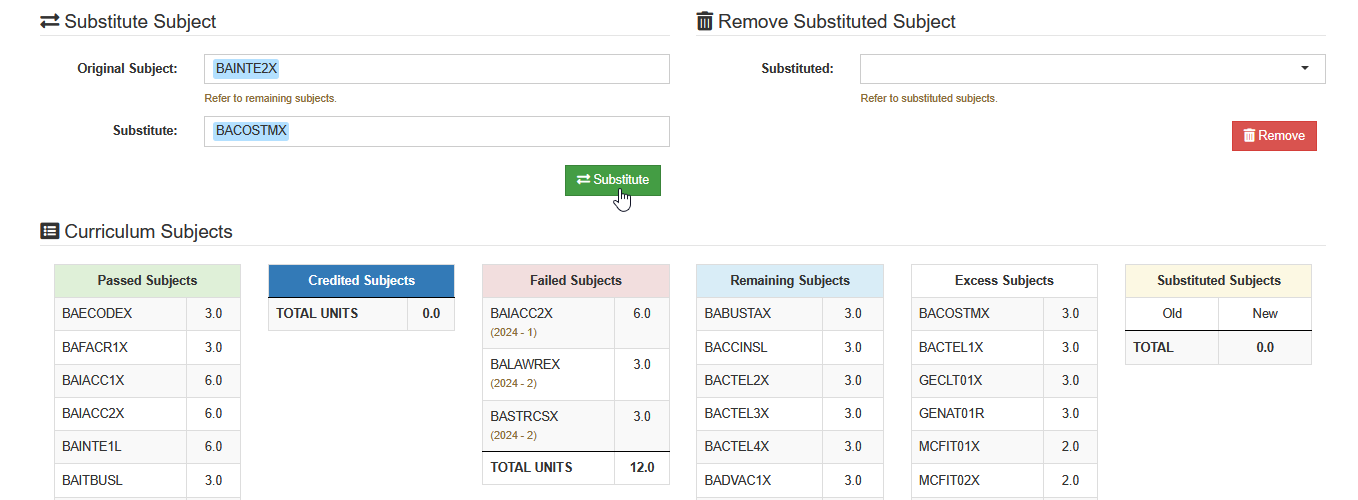
STEP 6. Once submitted, the substitution record will be appear under Substituted Subject column.
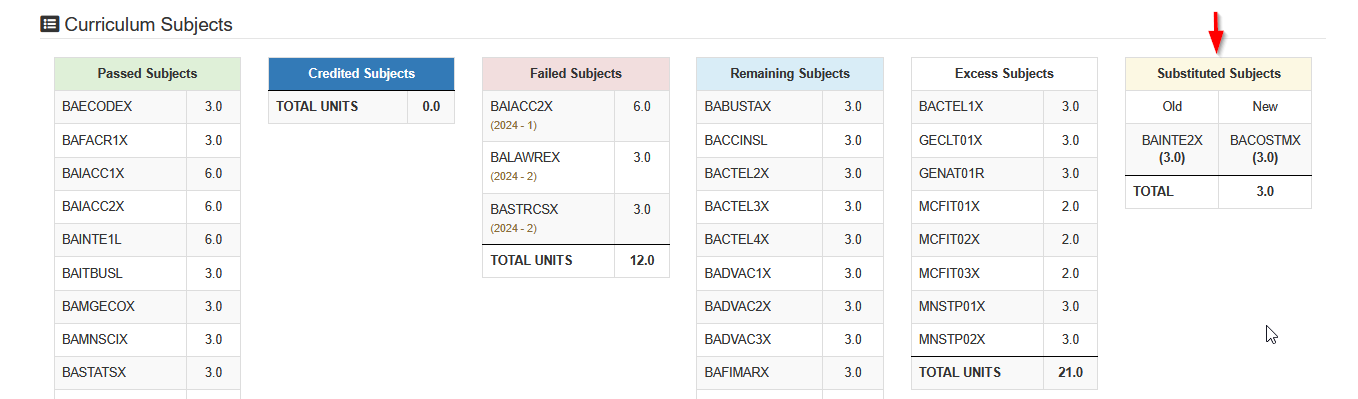
The substituted subject will no be reflected in student's flowchart including its corresponding grades.
-
Make sure subjects being substituted for the original subject meet the required number of units.
-
Two subjects may be substituted for one original subject as long as their total units are sufficient.
-
Wait for the student to be officially enrolled for the updated flowchart to reflect in this module.
How to Remove Substituted Subjects
This section explains the steps for deleting or clearing an existing substituted subject from a student’s record.
STEP 1. On the Subject Substitution page, go to Remove Substituted Subject section.
STEP 2. Select the subject from the dropdown. The dropdown contains all substituted subjects in the student's record.
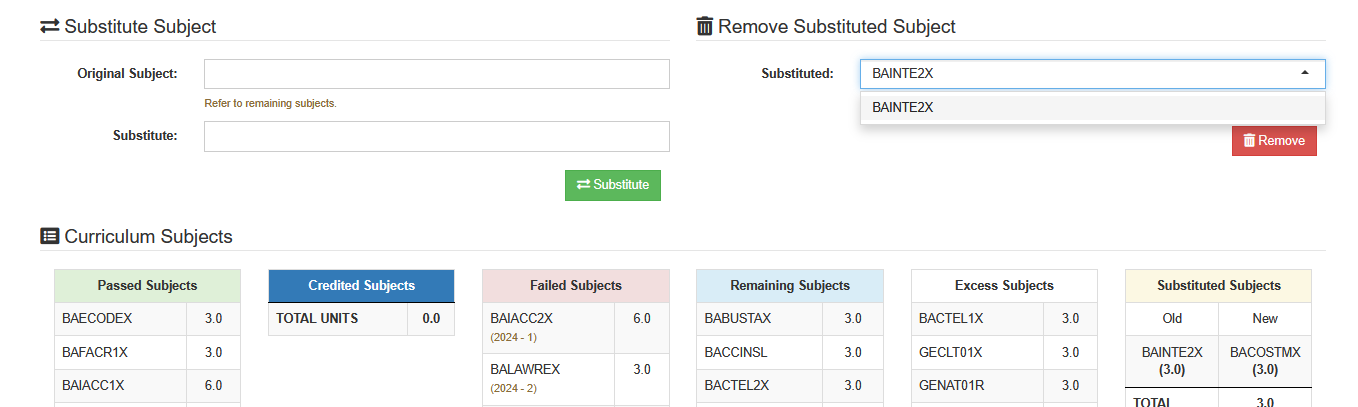
STEP 3. Once the subject is selected, click the button.
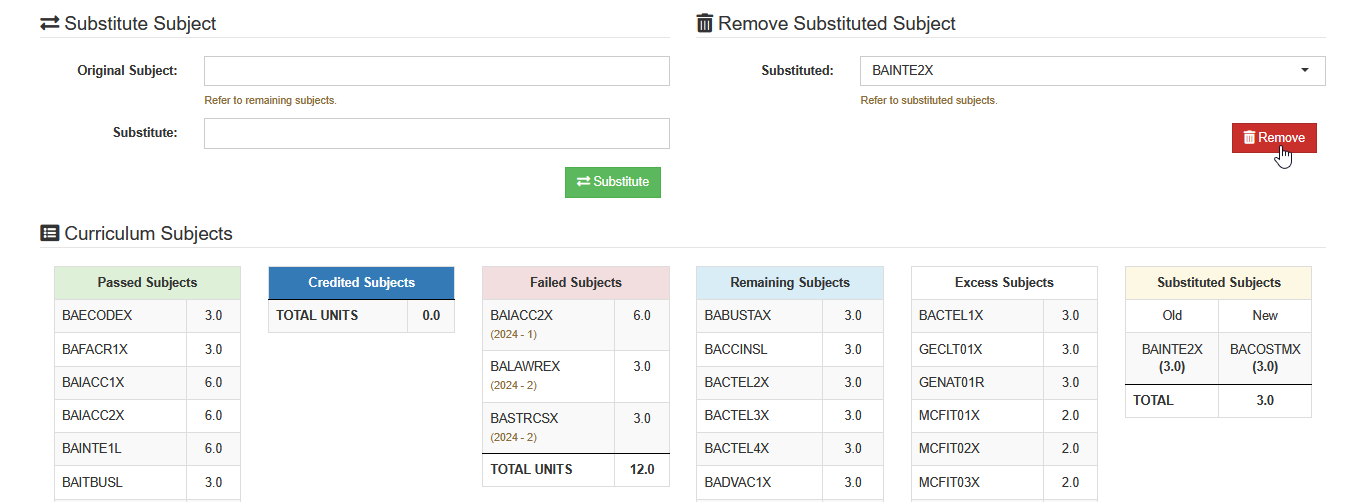
Once submitted, the substituted subject will be removed from the Substituted Subject column.
Batch Substitution
This section explains how to apply a single subject substitution to multiple students at once, allowing Registrar Personnel to efficiently update records for groups of students based on curriculum changes or program requirements.
What You Can Do
-
Select one or multiple students to include in the batch substitution.
-
Apply the substitution to all selected students at once.
-
Remove substituted subjects in batch.
Batch Subject Substitution Procedure
This section provides a quick guide for applying subject substitutions to multiple students at once. Follow the steps below to process batch substitution.
STEP 1. On the Subject Substitution page, go to the Batch Substitution tab.
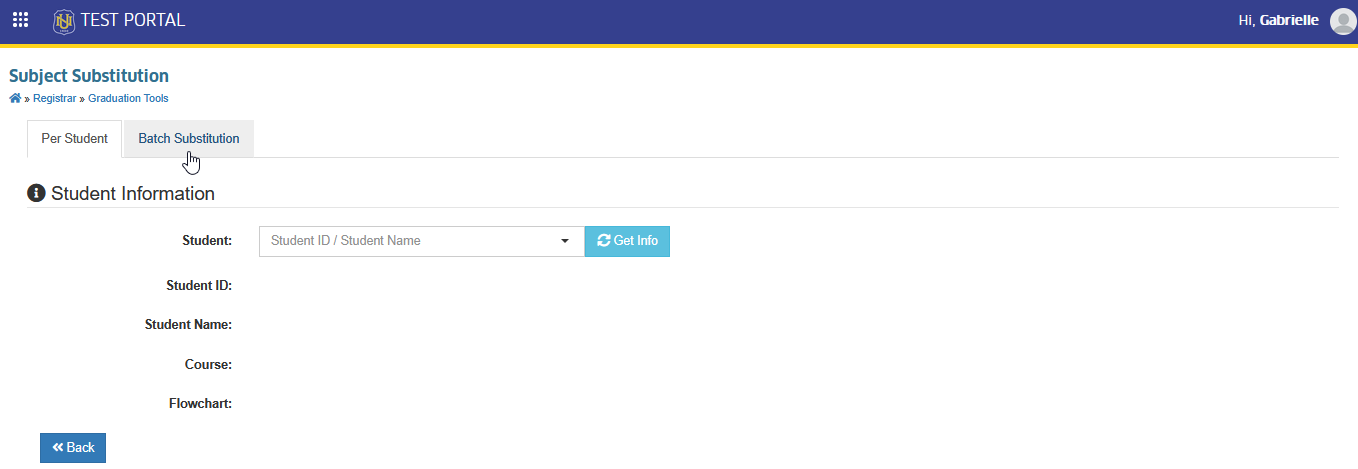
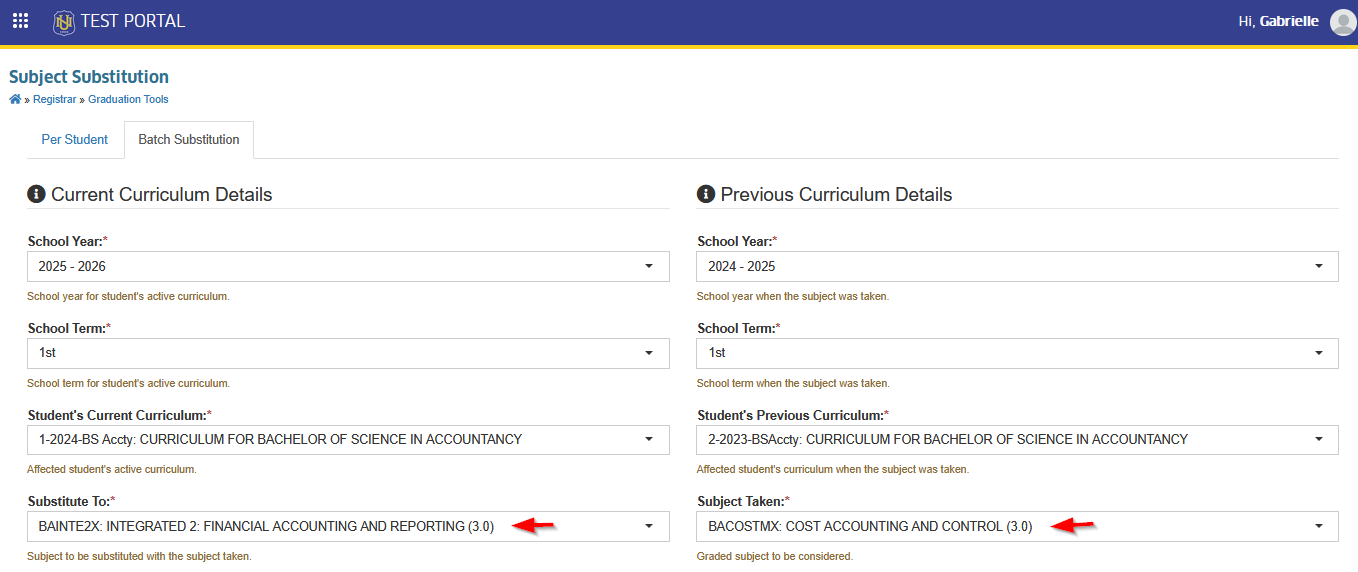
STEP 2. Enter the required information in the entry fields. Then select the subject(s) taken from the previous curriculum that will be substituted for the original subject in the current curriculum.
STEP 3. All affected students will be displayed under the Affected Students section. Select the student(s) to include in the batch substitution by clicking the box beside each student, or select all by clicking the button.
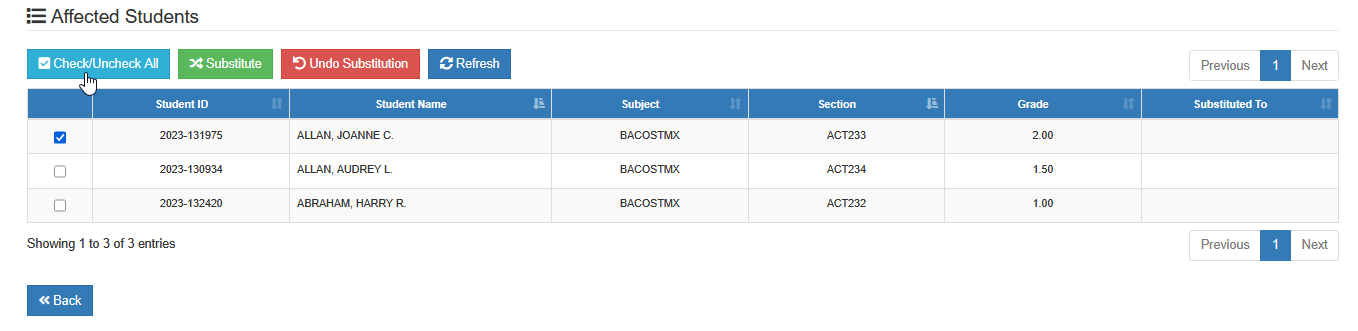
STEP 4. Once the affected students have been identified and selected, click the button to proceed with the substitution.
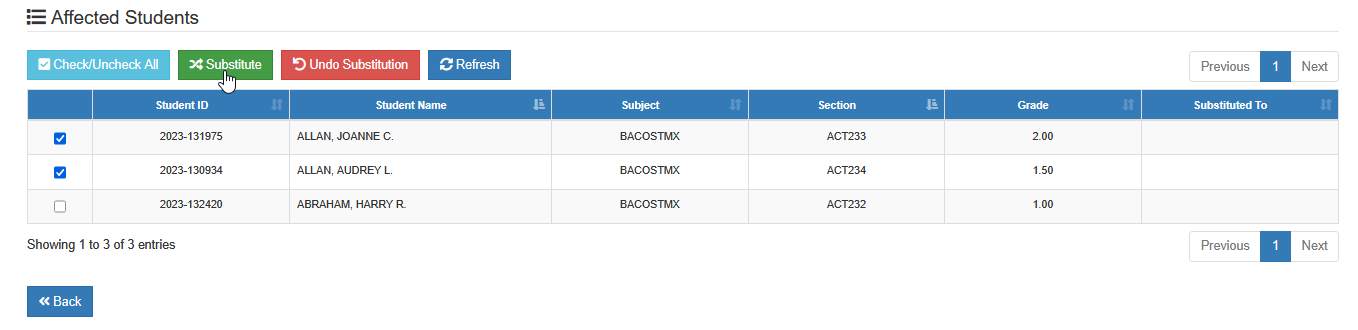
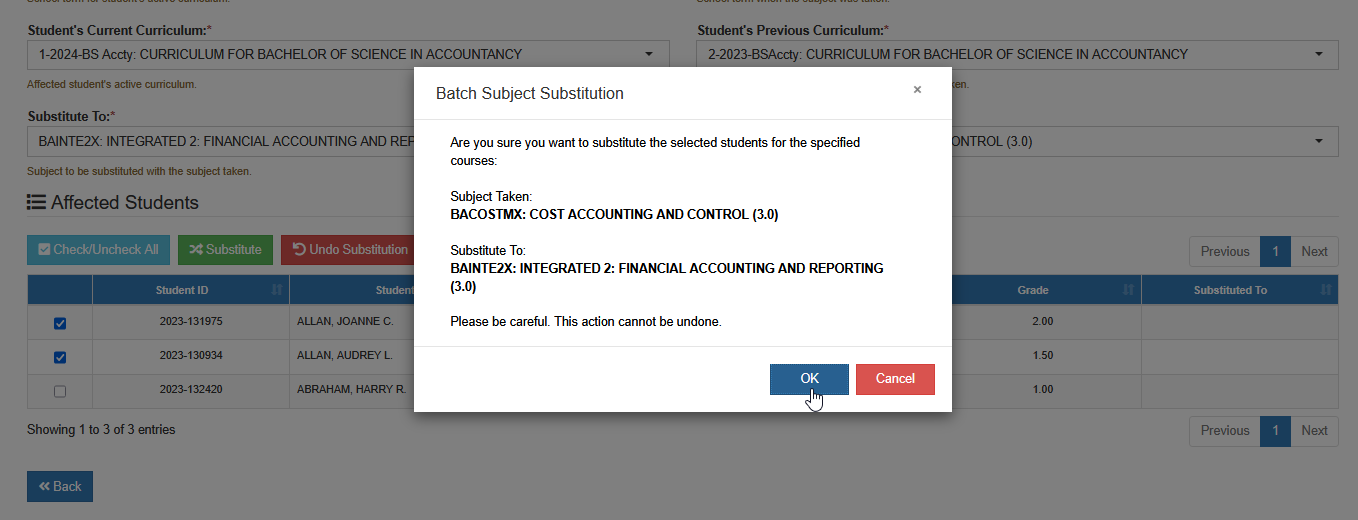
STEP 5. Confirm your action by clickiing the button.
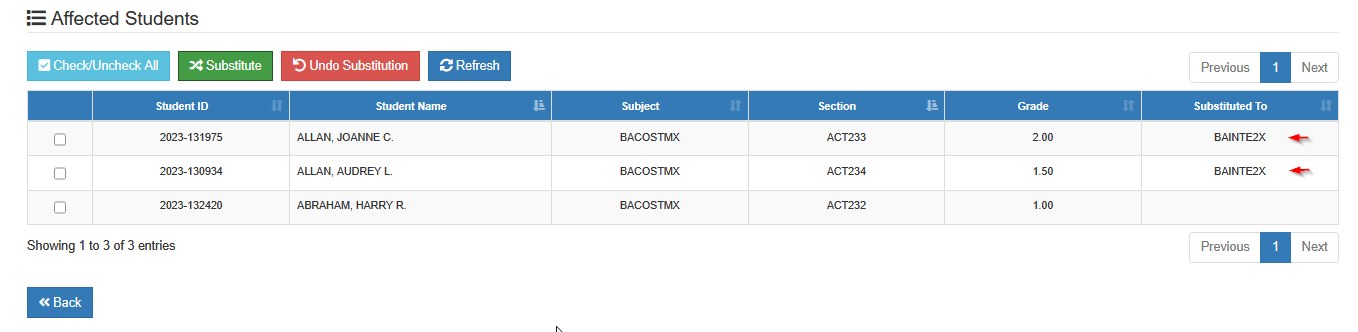
The substituted subjects will be recorded under the Subtituted To column for the selected students.
Undo Batch Substitution
This section explains how to reverse a previously applied batch substitution, allowing Registrar Personnel to restore the original subjects for selected students.
STEP 1. On the Batch Substitution tab, scroll down to Affected Students section.
STEP 2. Select the student(s) to process.
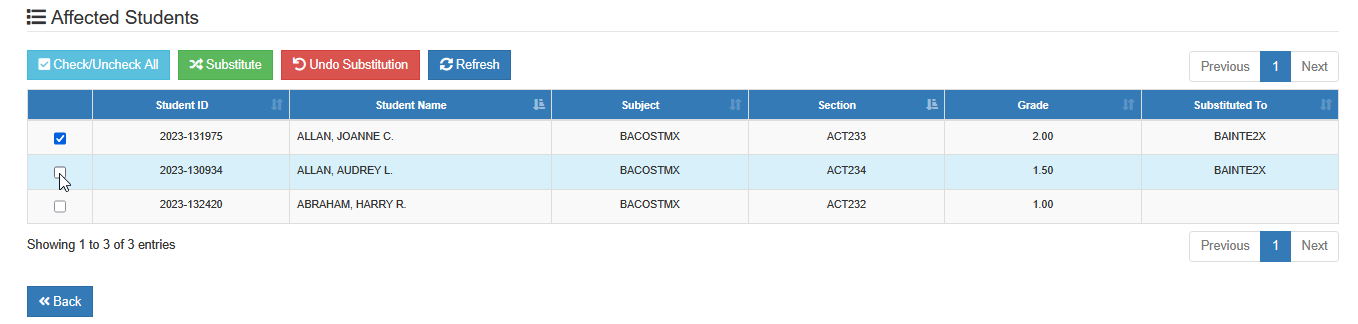
STEP 3. Click the button.
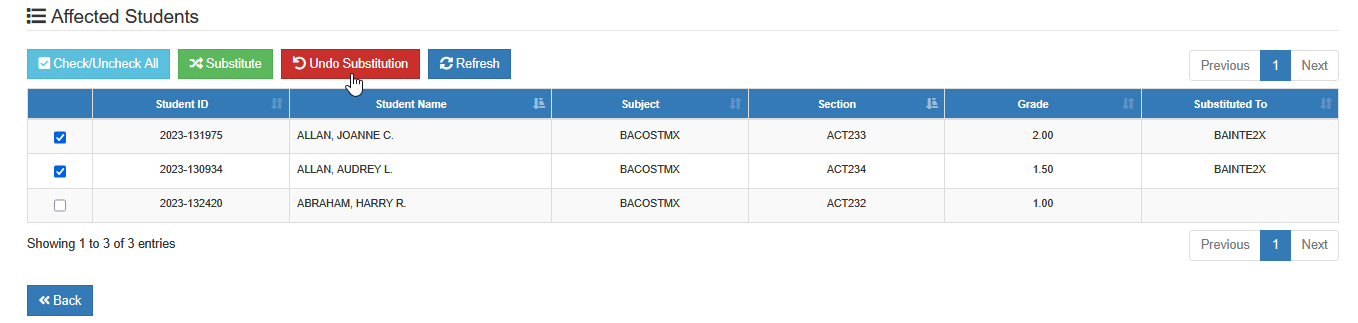
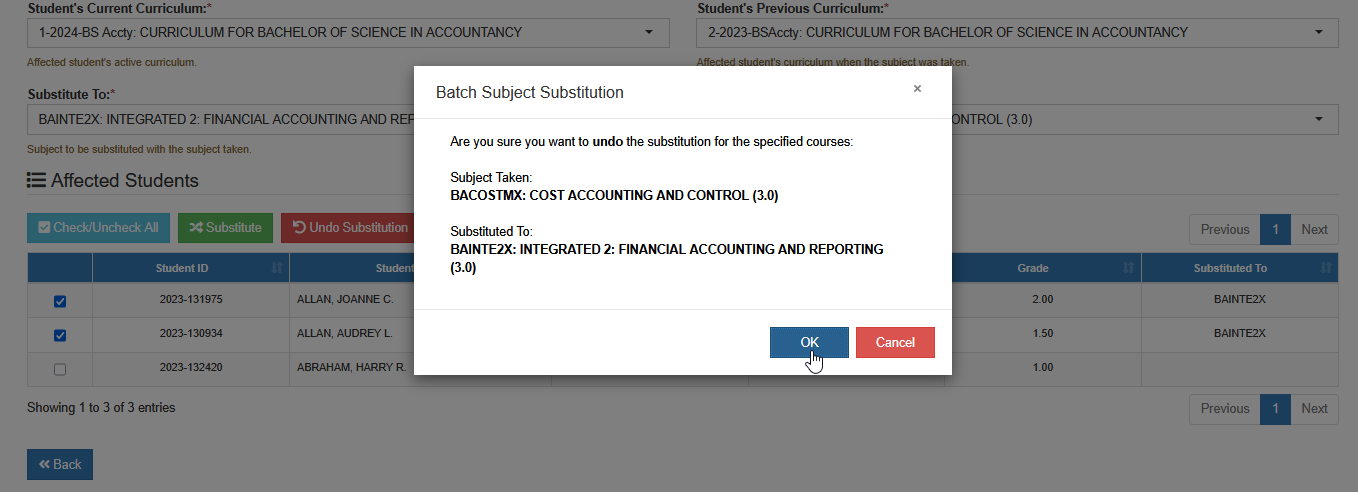
STEP 4. Confirm your action to proceed with the undo of subject substitution by clicking the button.
For more questions or concerns, email us at nu-desk@national-u.edu.ph