Manage Submitted Requirements
The Manage Submitted Requirements module is used by Admission and Registrar personnel to view, track, and organize student requirements. This module helps users easily identify submitted and lacking requirements, record submission details, and upload copies of documents for reference.
Required Permission
- Manage Submitted Requirements - Allows the user to view and manage student requirements, including marking submitted or lacking documents and uploading copies.
Module Users
-
Registrar Personnel
-
Admission Personnel
Purpose of the Module
This module allows users to:
-
Monitor student requirements in one place
-
Check which requirements are already submitted or still lacking
-
Record submission details such as document type and submission date
-
Upload and store copies of submitted documents (original or e-copy)
How to Access the Module
To access the module, make sure you have the Manage Submitted Requirements permission. If it doesn’t appear in your portal, request access from your System Administrator.
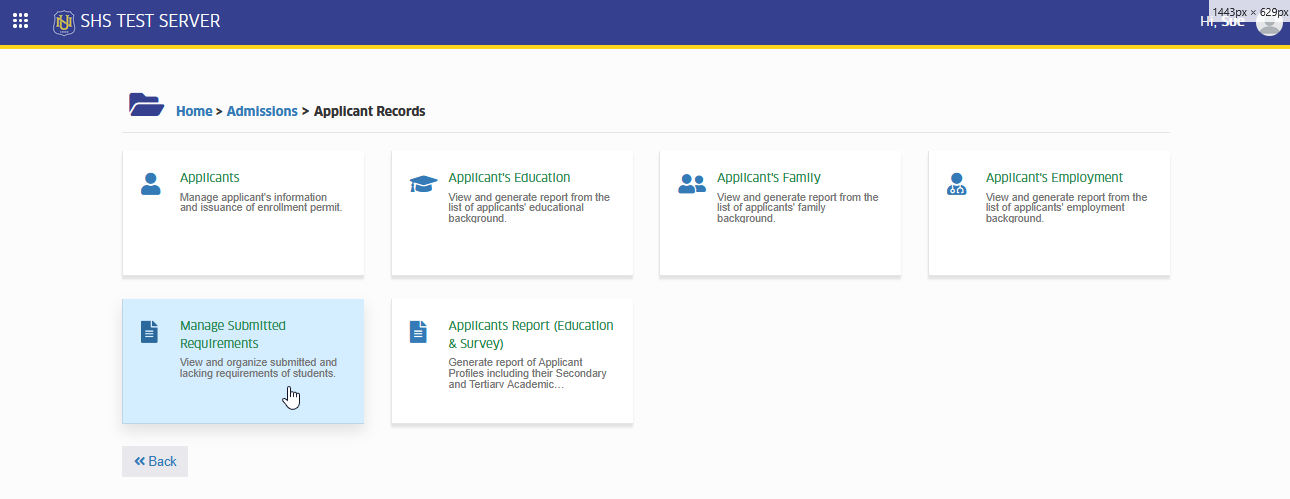
In NUIS-SHS portal, go to Admission > Applicant Records > Manage Submitted Requirements. Click the module tab to redirect to the SHS Manage Submitted Requirements page.
How to Use the Module
This section guides users on how to check student requirements, add submission details, and upload document copies
View Student Requirements
This guides users in viewing student requirements and monitoring their submission status.
STEP 1. Open the Manage Submitted Requirements module.
STEP 2. Select or search for the student you want to review.
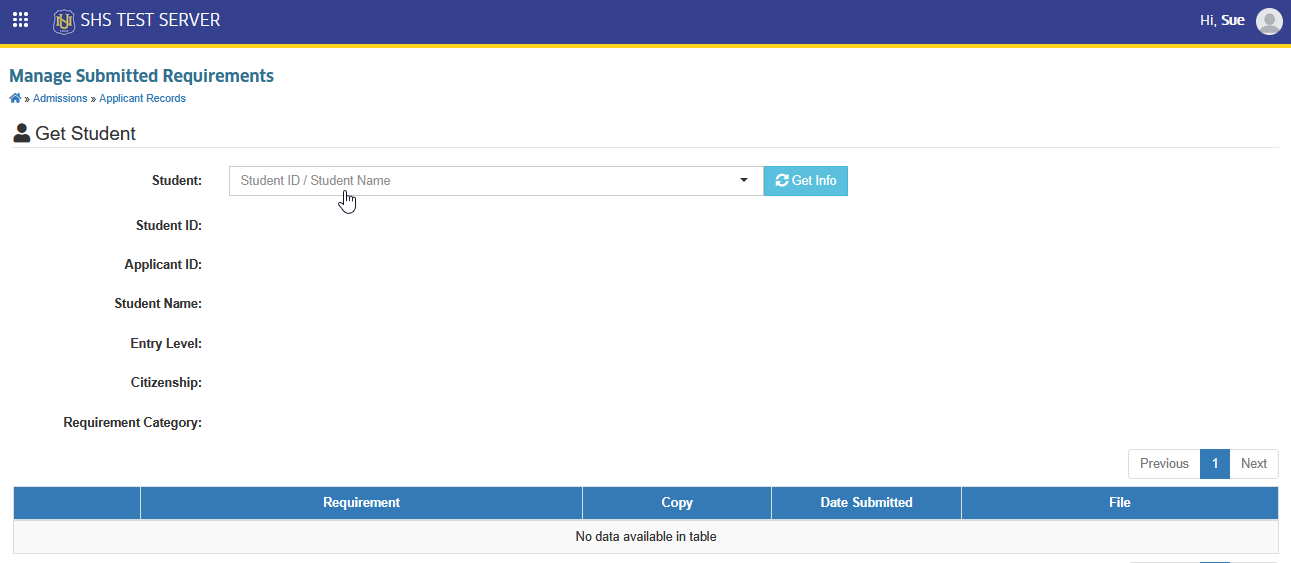
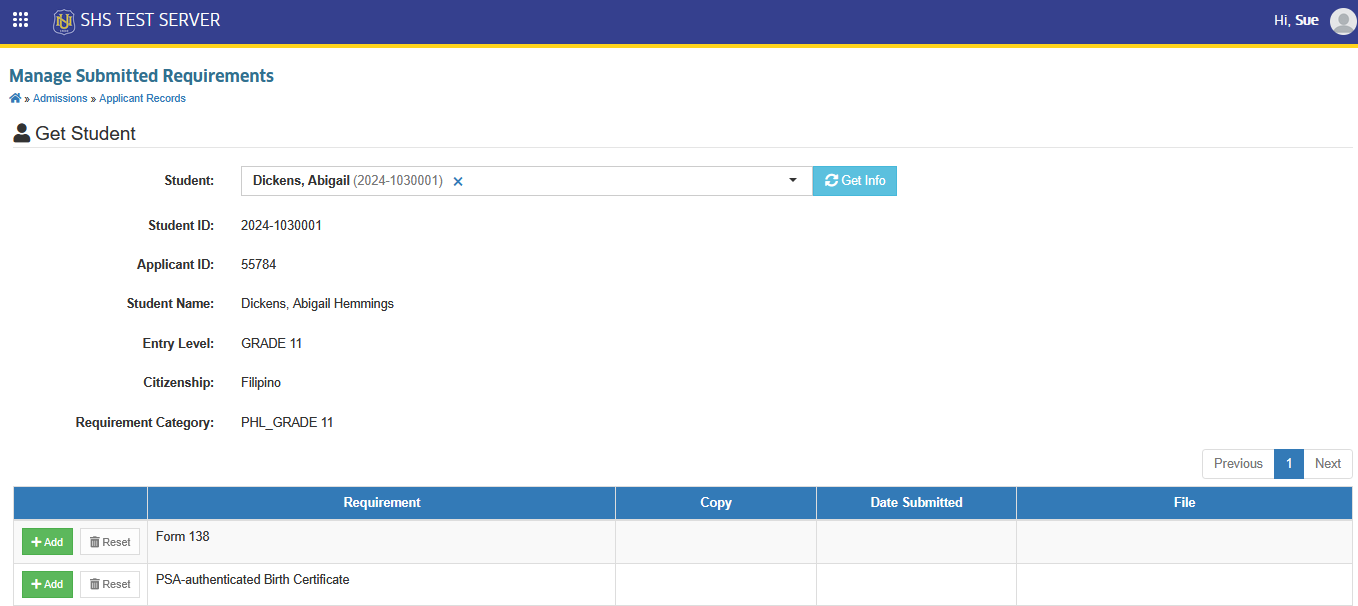
STEP 3. The system will display the list of required documents, including their current status:
-
Submitted
-
Lacking
This allows you to quickly see which requirements are already complete and which are still missing.
Add Submitted Requirement Details
This lets users add information for a submitted requirement and upload the document for reference.
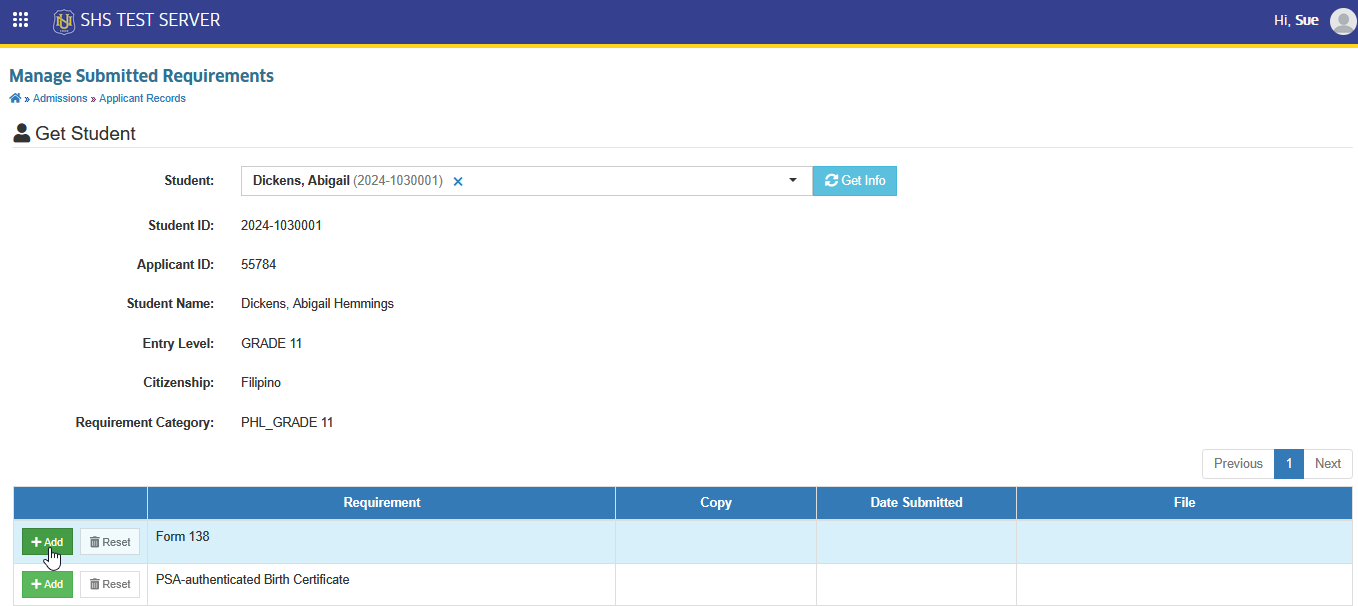
STEP 1. From the student’s requirement list, click the button for the corresponding requirement.
STEP 2. Fill in the required information:
| Field Name | Description |
|---|---|
| Requirement | Select the name of the requirement from the list sourced from the Requirement Types module. |
| Requirement Copy | Select whether the submitted requirement is Original, Photocopy, or E-Copy. |
| Date Submitted | Enter the date when the document was submitted. |
| Upload File | Upload a copy of the submitted document, if available. |
STEP 3. Click button to record the submission details.
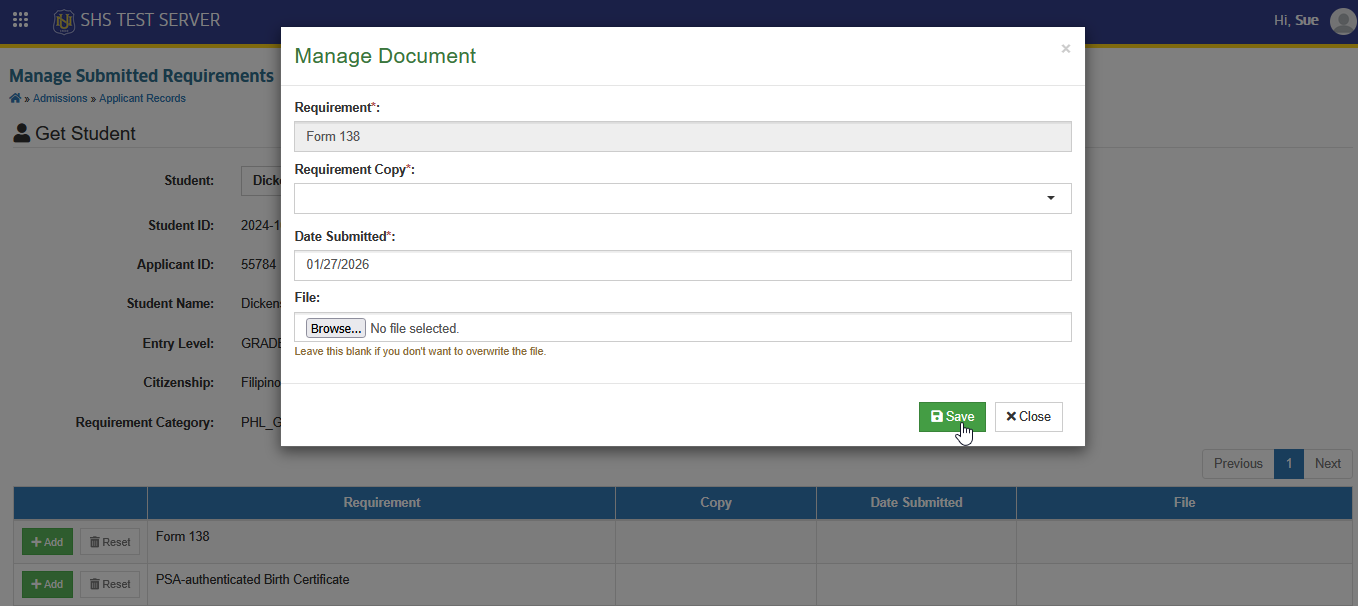
Once saved, the requirement will be marked as Submitted and updated in the list.
Update Document Copy
This lets users upload a new document copy for an existing submitted requirement.
STEP 1. Locate the submitted requirement in the list.
STEP 2. Click the button of the specific requirement.
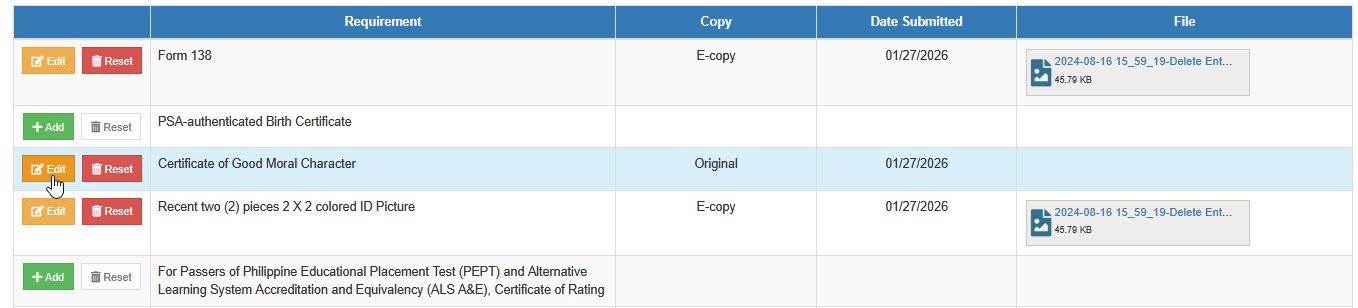
STEP 3. Upload the document file or update existing details as needed.
STEP 4. Click button to apply the changes.
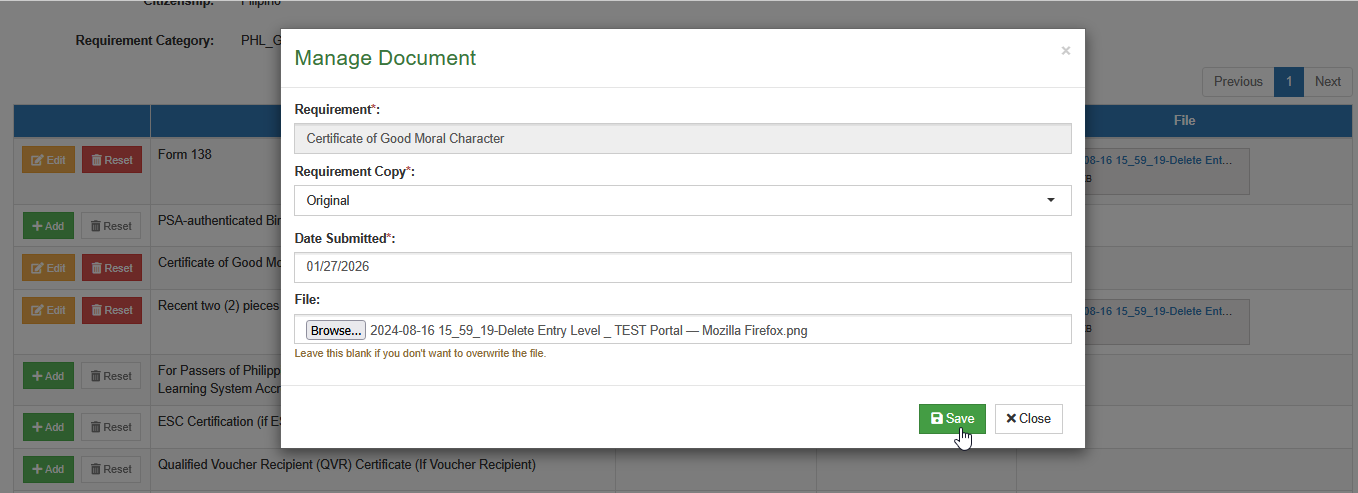
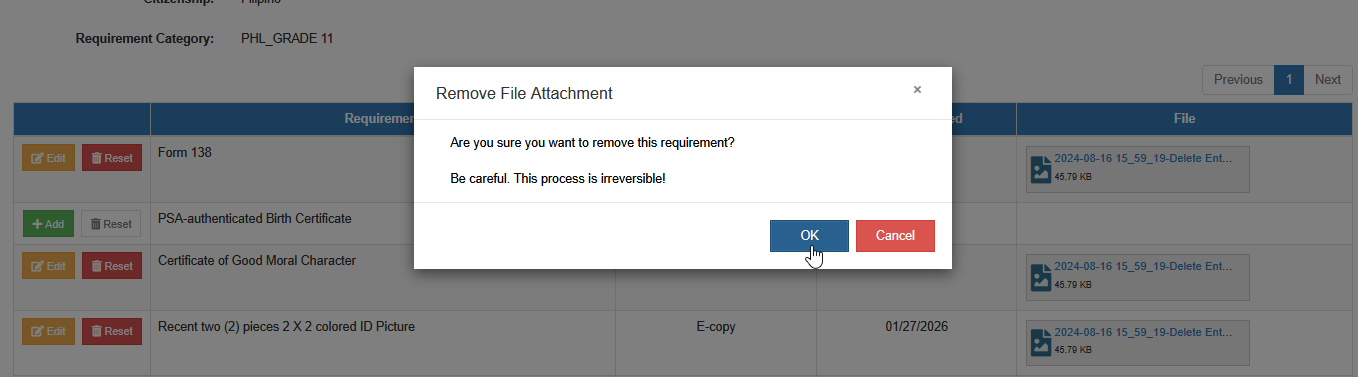
Reset Submitted Requirement
This is used to delete submitted requirement information and reset the requirement status.
STEP 1. Locate the submitted requirement you want to reset.
STEP 2. Click the button.
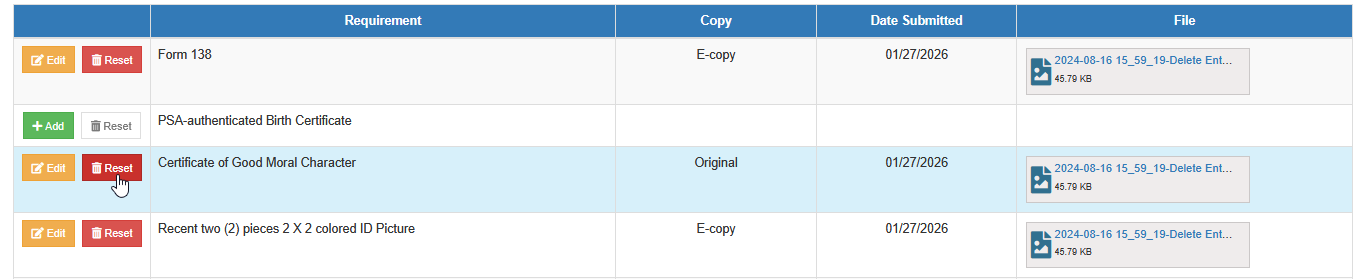
STEP 3. Confirm the action when prompted.
-
Uploaded documents are for reference and record-keeping purposes.
-
Ensure the document type (original or e-copy) is selected correctly.
-
Always verify the uploaded file matches the submitted requirement.
For more questions or concerns, email us at nu-desk@national-u.edu.ph