Initial Evaluation of Applicant's Transfer Credentials
Initial Evaluation of Transfer Credentials is the process of evaluating applicant's earned units from previous school whether to be credited or not in the University.
It is applicable only for the following type of applicants:
- Transferees,
- Second-Degree Takers, and
- Graduate Studies.
Process Overview
Every applicant who wishes to credit their previous courses are required to undergo with the following stages of the initial evaluation process.

Stage 1. Submission of Grades
The applicant is required to encode his/her previous courses based on the submitted requirements.
For more detailed instructions, refer to this guide NU Quest: Evaluation of Grades.
Stage 2. Endorsement
Upon successful submission of requirements and previous credentials of the applicant, the Admission's Office must endorse the application to the Program Evaluator.
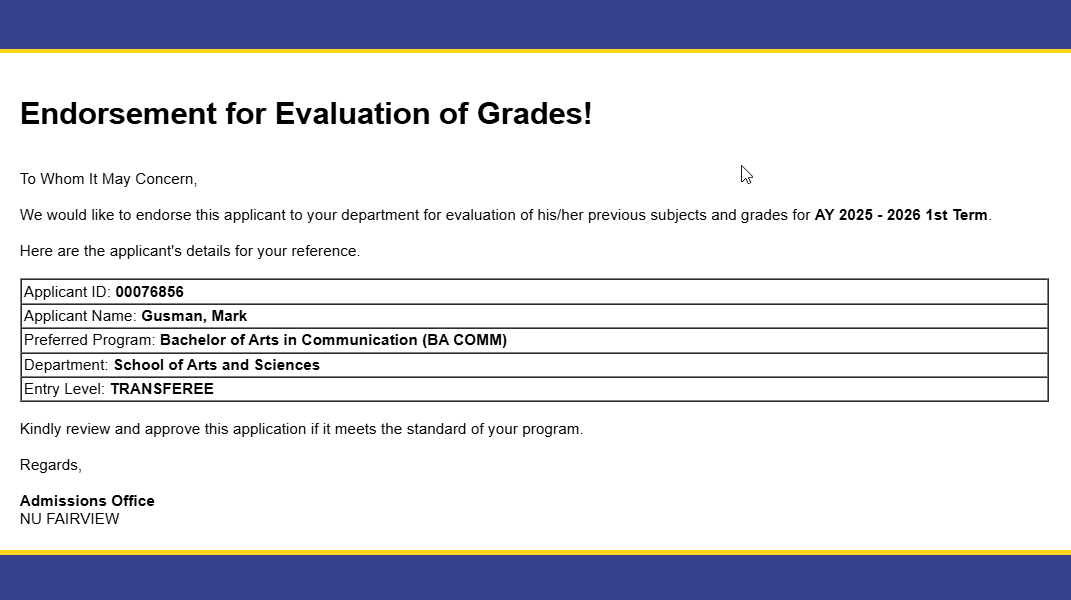
Below is a sample email of endorsement letter that the evaluator will receive from the Admission's Office.
Stage 3. Evaluation
The Program Evaluators are assigned in validating and evaluating the submitted credentials whether subject for crediting or not.
Follow the guides below on how to use the module and how to properly evaluate the applicant's transfer credentials.
Required Permissions
- Initial Evaluation - permission to access the module.
- Initial Evaluation Admin - permission to override the updating of curriculum. This should only be assigned to a Registrar personnel.
How to access the Initial Evaluation module?
To access the module, make sure you have the Initial Evaluation permission. If it doesn’t appear in your portal, request access from your System Administrator.
Also ensure that you have access to your specific program. Accessible programs are assigned by your system administror. Granting of access should be properly coordinated and approved by the requestor's immediate superior.
STEP 1. Under Director module group, click the module tab to redirect to Initial Evaluation page.
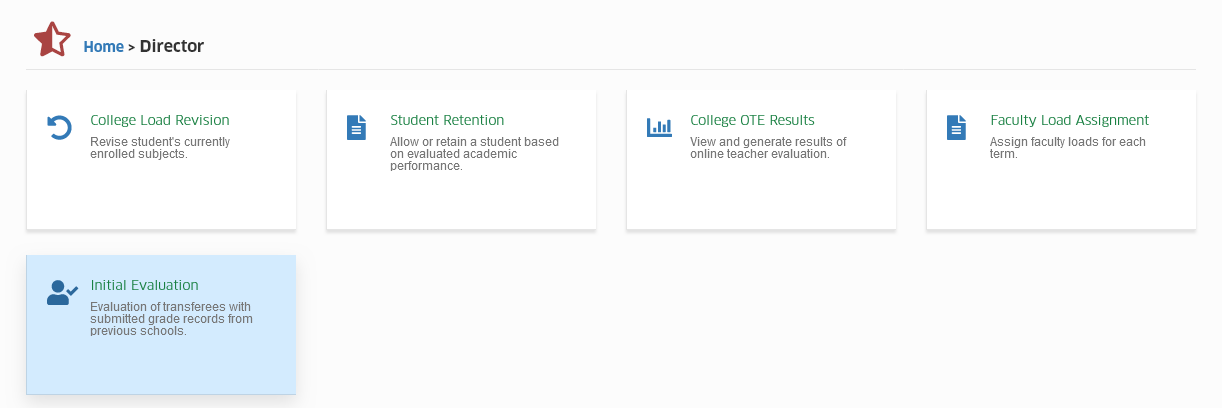
In the listview page, the evaluator can view the list of applicants that have been endorsed by the Admission's Office.
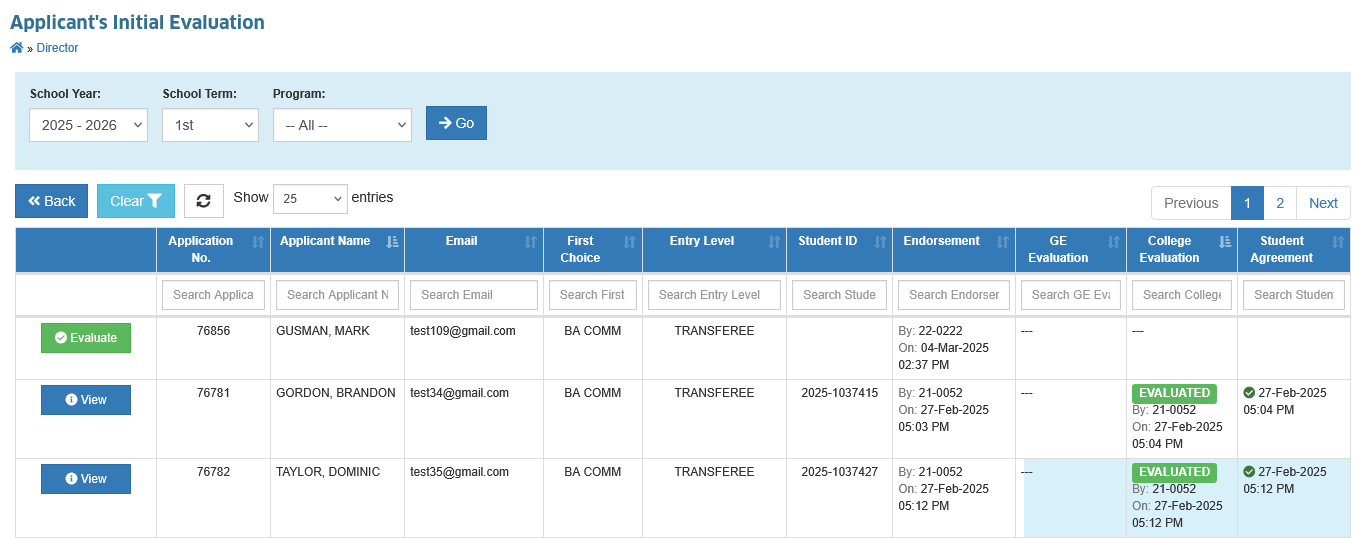
By default, the listview is filtered by the current active term set by the Admission's Office. Use the filtering fields to look for a specific applicant.
STEP 2. To start evaluating, click the corresponding button of the specific applicant record.
You may easily check the status of the application by referring to the Status column.
- ENDORSED - if the application has been endorsed by the Admission's Office and subject for evaluation.
- EVALUATED - if the application has been evaluated already.
- AGREED - if the applicant already agreed to the evaluation.
- DENIED - if the application has been disapproved.
How to add a subject for crediting?
Based on the established process, the applicant should be the one encoding all the course entries to be evaluated.
But in few cases when the evaluator wants to add entries to the application, he/she may do so by following the steps below:
STEP 1. Under the Applicant Details section, click the corresponding Add button of the subject to be matched.
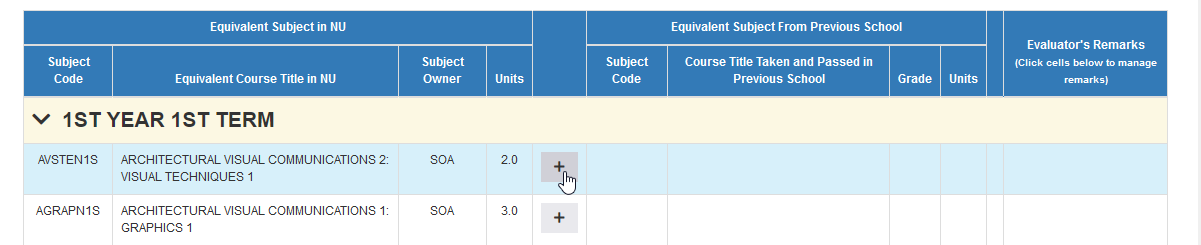
STEP 2. Specify the following fields:
| Field | Description | Required |
|---|---|---|
| Equivalent Subject(s) | The corresponding subject in the University to be credited. The applicant or evaluator may specify two or more subjects if it is what it takes be equivalent. | Yes |
| Subject Code | Subject code used in the previous institution for the specified subject course. | Yes |
| Subject Name | Subject name as defined in the applicant's submitted documents. | Yes |
| Grade | Previous grade as indicated in the applicant's submitted documents. | Yes |
| Units | Course units as indicated in the applicant's submitted documents. | Yes |
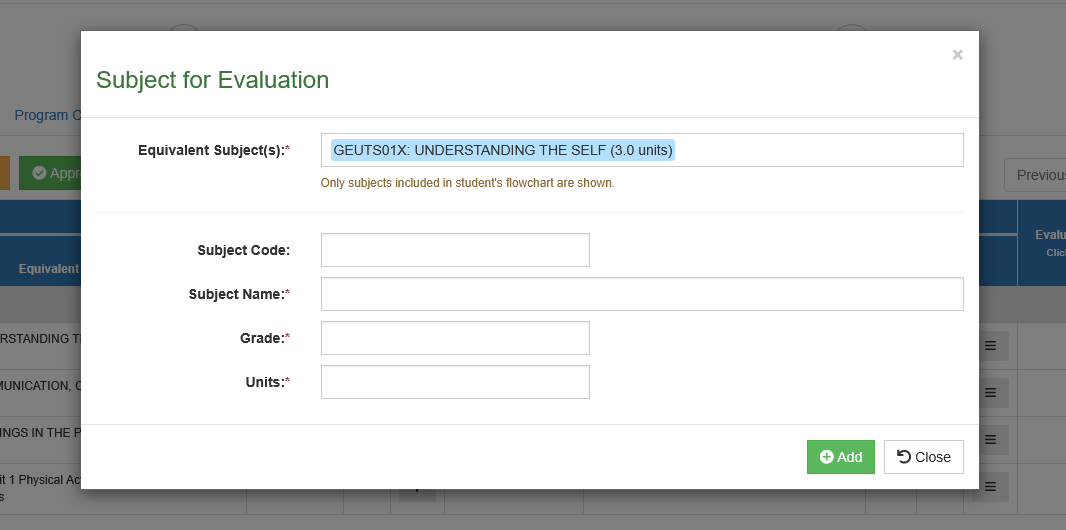
STEP 3. Click the button once the fields have been specified.
How to edit an existing entry?
To edit or modify an existing entry:
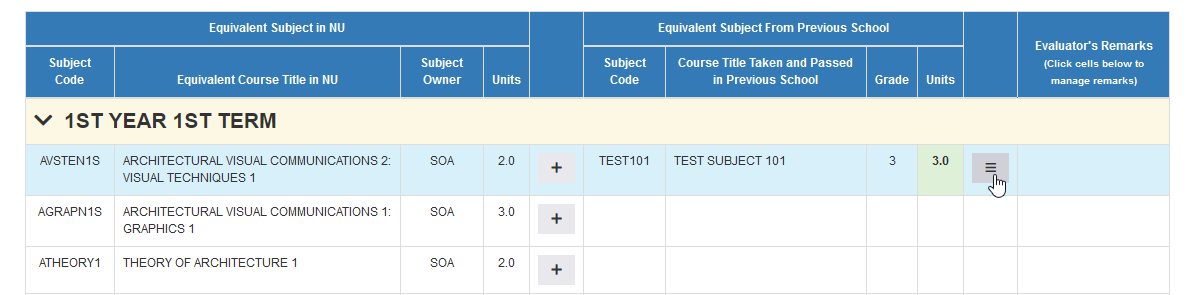
STEP 1. Click the corresponding Manage button of that specific record.
STEP 2. In the Editing form, update the necessary fields.
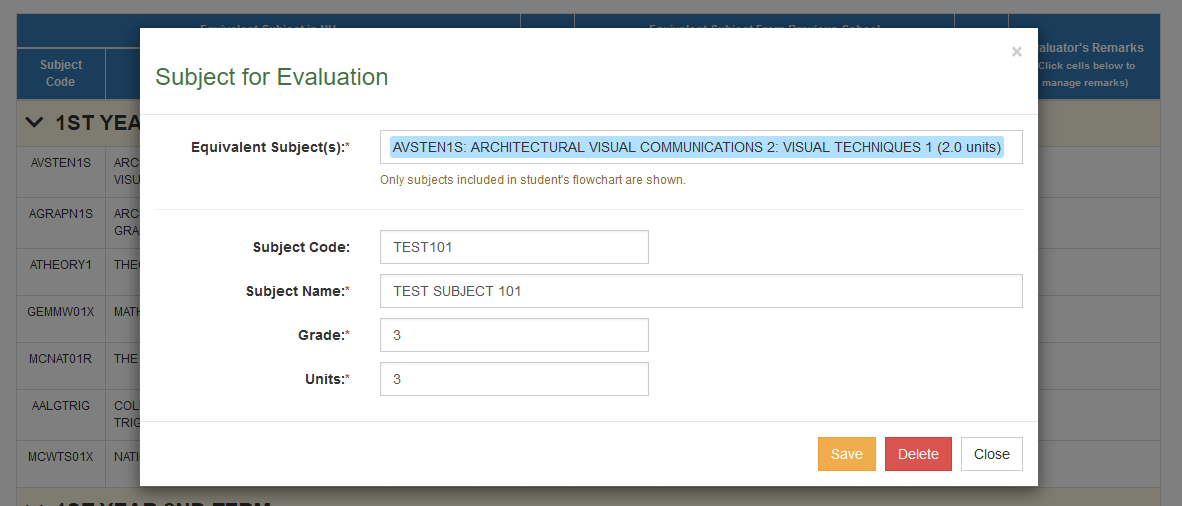
STEP 3. Click the button to apply the changes.
How to delete an existing entry?
To remove an existing record:
STEP 1. Click the corresponding Manage button of that specific record.
STEP 2. Click the button to confirm your action.
How to view the requirements?
STEP 1. Under Applicant Details section, click the Requirements tab.
This tab displays the waiver information and submitted requirements of the applicant.
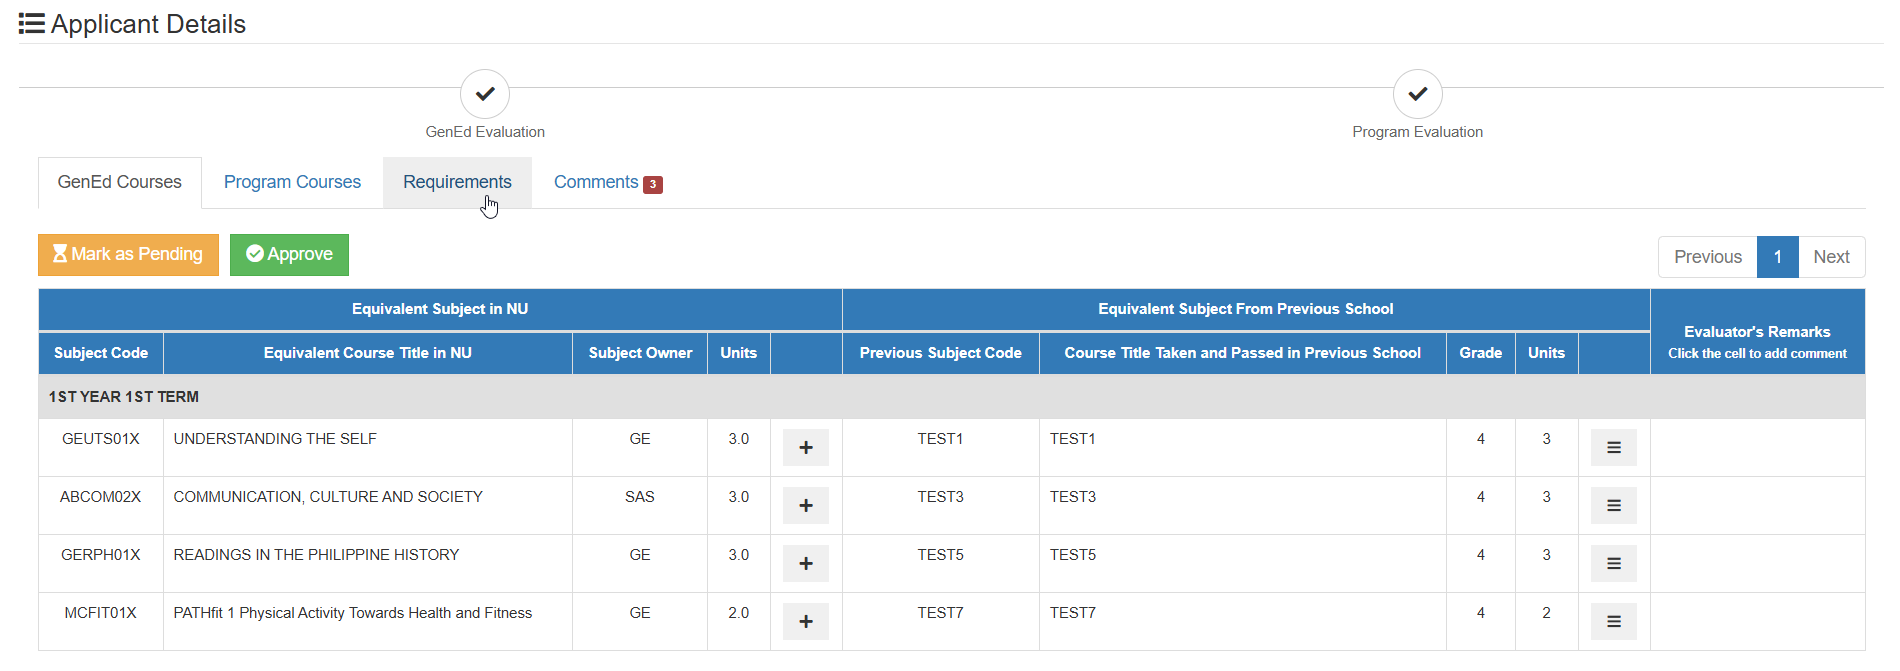
STEP 2. View or download the requirement by clicking the requirement name which serves as the link to the file itself.
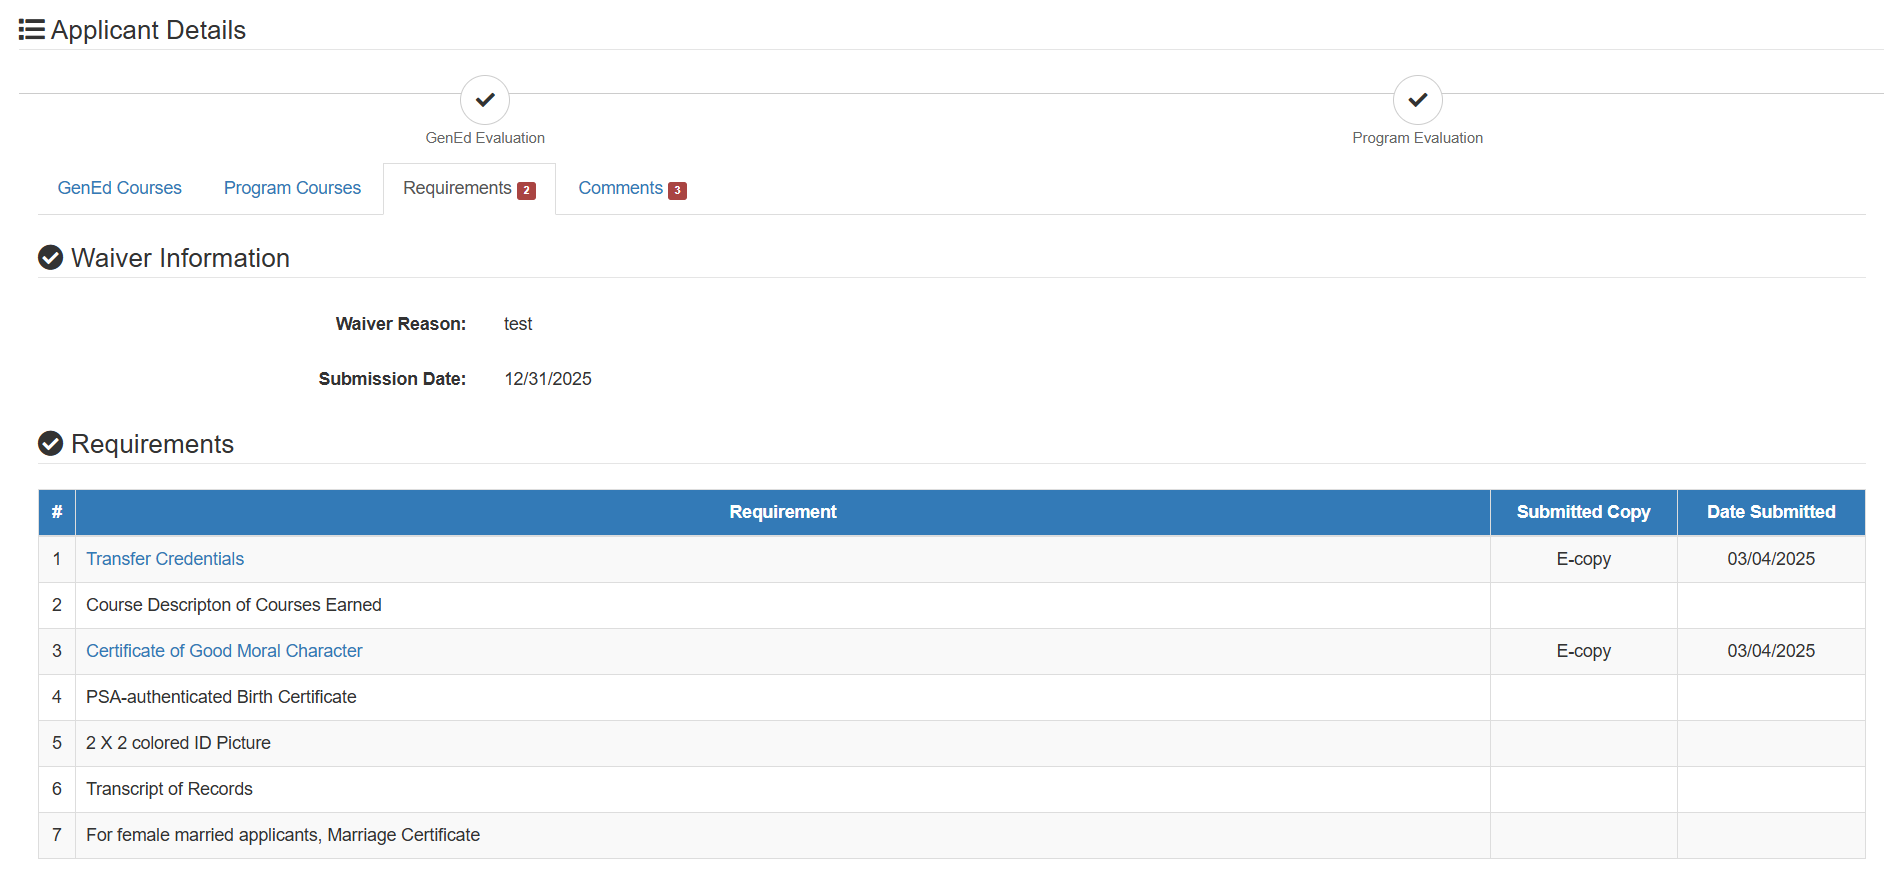
If the applicant has no submitted requirement, follow-up the applicant or Admission's Office thru this guide:
How to follow-up the applicant?
OPTION 1. COMMENTS SECTION
In cases where the evaluator needs to follow-up the applicant or the Admission's Office, use the Comments section to detail the conversations and transaction status.
STEP 1. Under Applicant Details section, click the Comments tab.
This tab displays all the notifications that the applicant has received throughout his/her application.
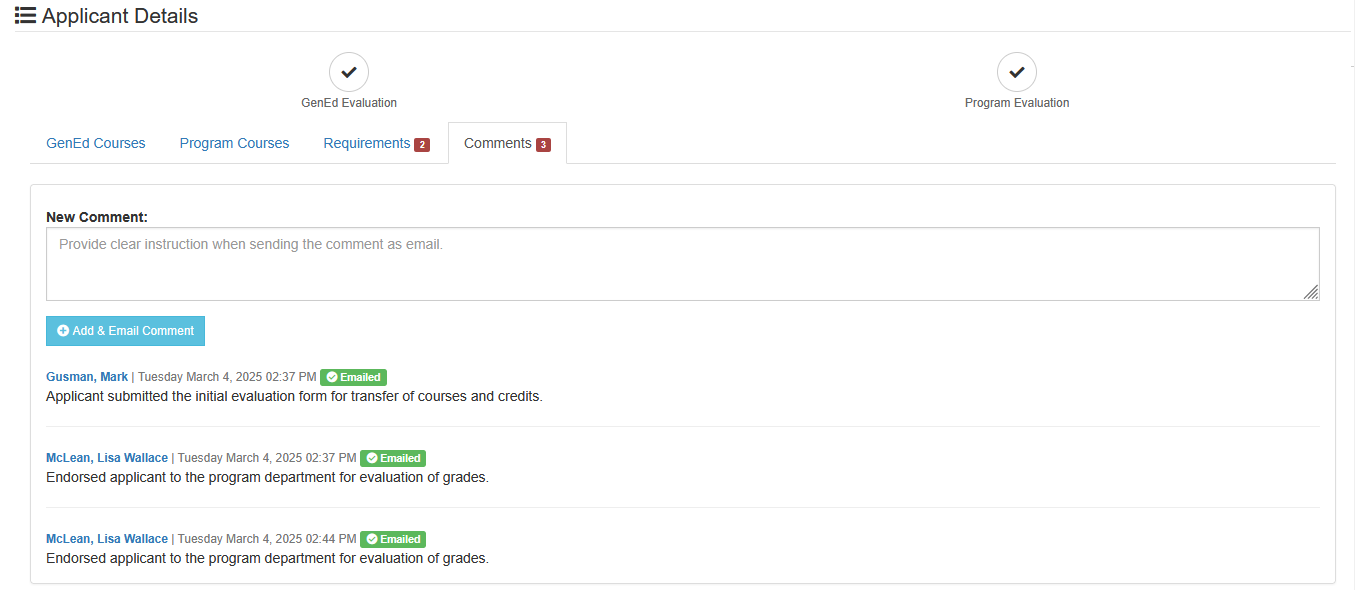
STEP 2. In the New Comment field, provide clear instructions or comments as much as possible to avoid misunderstandings and redundant concern.
STEP 3. Click the to send the comment.
OPTION 2. REMARKS SECTION
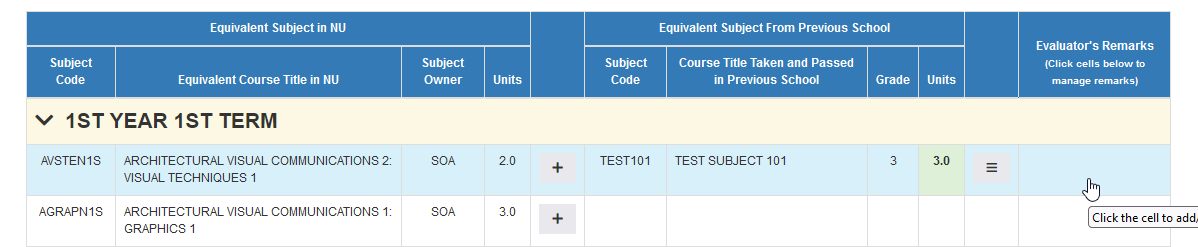
If the evaluator's comment refers only to a specific entry or specific subject in the curriculum flowchart, use the Evaluator's Remarks column.
STEP 1. Under Applicant Details section, click the Grades tab where the curriculum flowchart is laid-out.
STEP 2. In the Evaluator's Remarks column, click the corresponding cell of the subject where remarks are necessary.
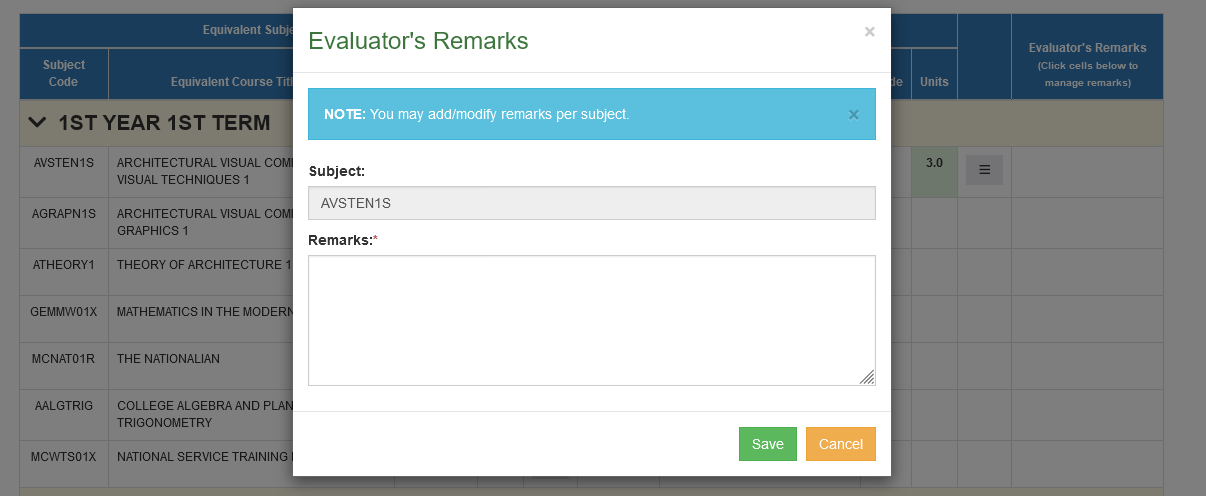
STEP 3. Specify/Modify the remarks and click the button.
How to change the curriculum flowchart?
By default, the curriculum flowchart assigned to the applicant is the latest curriculum recorded in the system.
In cases that the applicant must use the previous curriculum, the evaluator needs to request from the Registrar's Office to change the assigned curriculum to the applicant.
There are also cases that Evaluation of Applicants is already on-going, and there will be a new curriculum to be implemented which hasn't been added by the Registrar's Office yet. Urgent and proper coordination with the Registrar's Office is highly advised.
As Evaluator, follow the steps below to request in changing the flowchart.
STEP 1. In the Applicant's Initial Evaluation page, click the button.
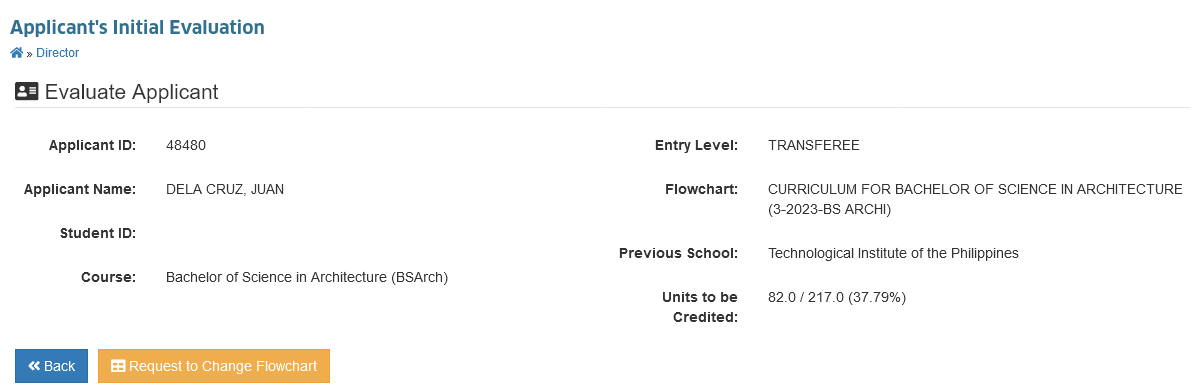
STEP 2. In the Request to Change Flowchart prompt, specify the curriculum flowchart to be assigned to the applicant.
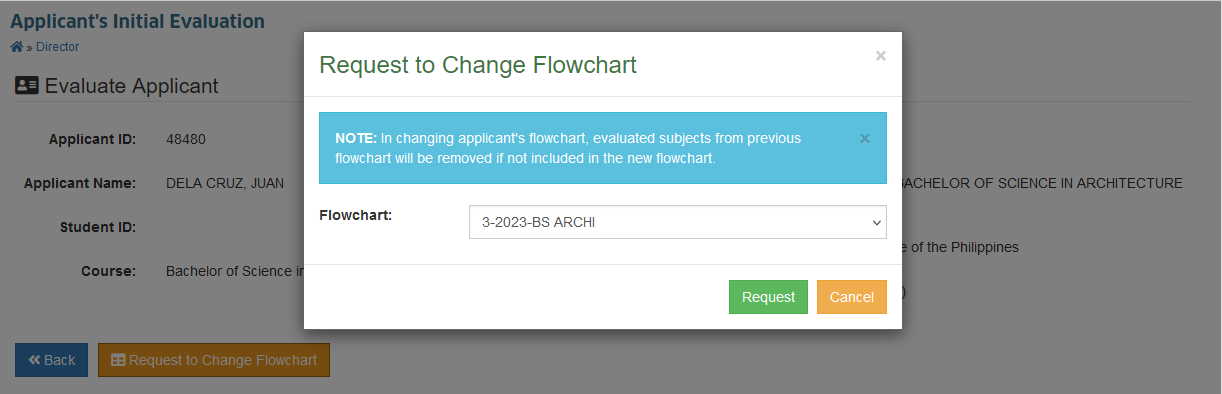
STEP 3. Click the button to proceed with the request.
An email like the sample below will be sent to the Registrar's Office upon request.
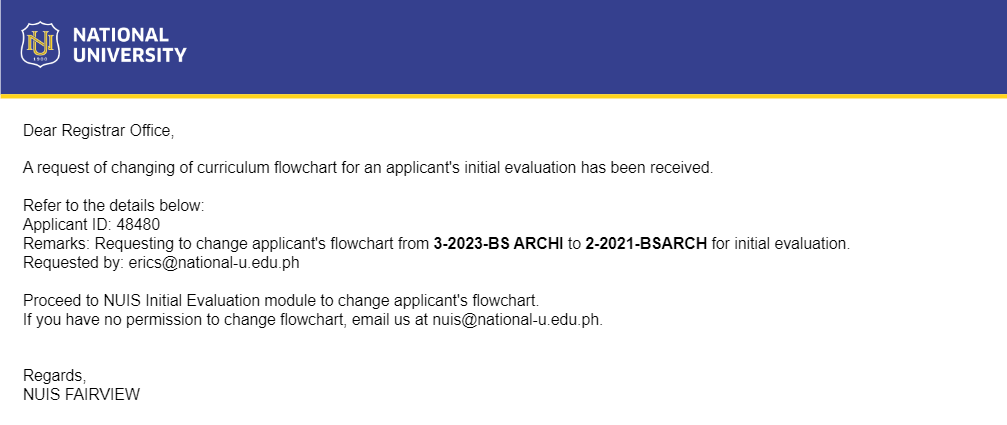
As Registrar personnel with Initial Evaluation Admin permission, follow the steps below to approve the request of changing flowchart:
STEP 1. In the Initial Evaluation module, look for the Applicant Number stated in the email request.
STEP 2. Click the Evaluate button to proceed to the evaluation page.
STEP 3. In the Applicant's Initial Evaluation page, click the button.
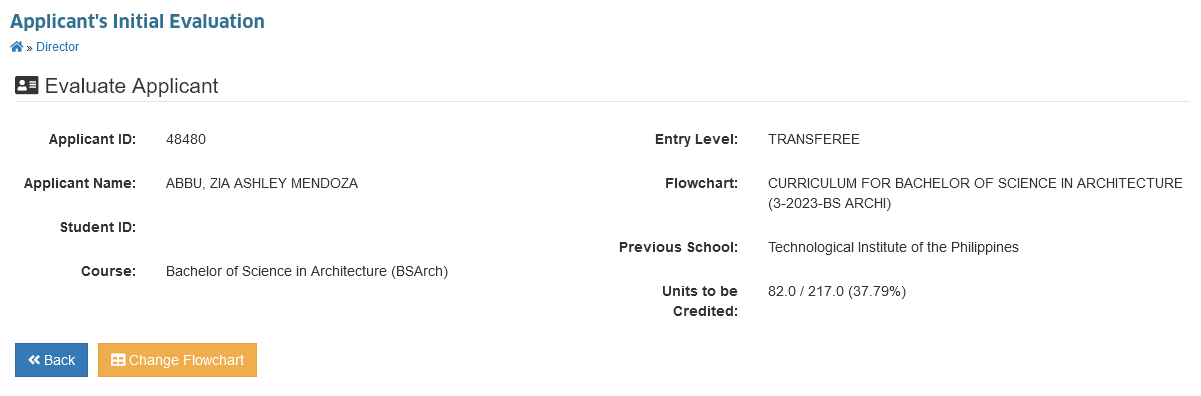
STEP 4. In the Change Flowchart prompt, replace the flowchart of the applicant as stated in the request.
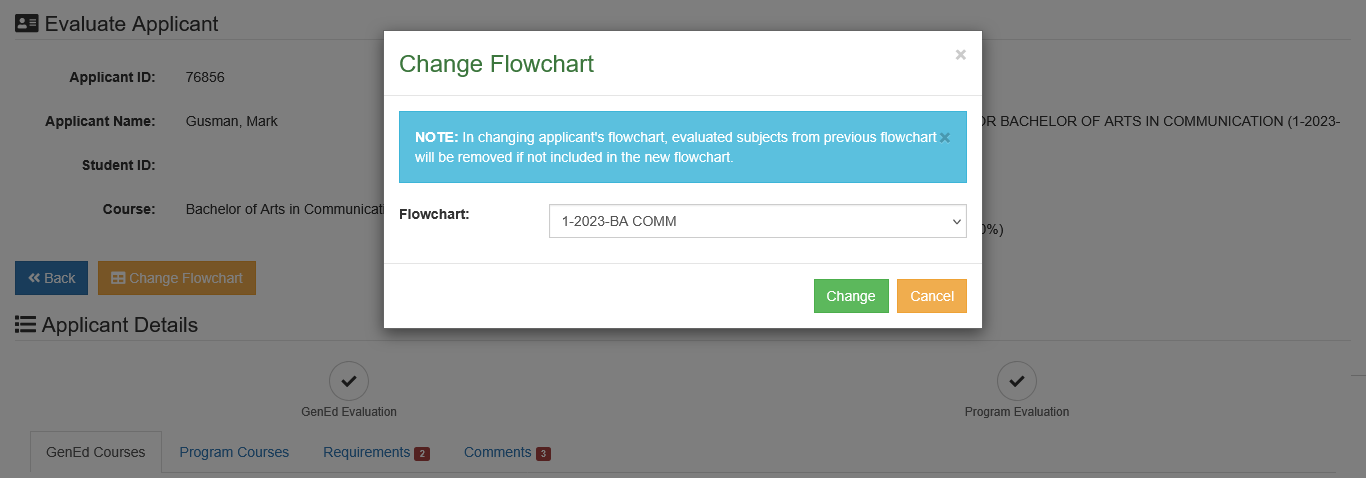
STEP 5. Click the button to approve the request. The new assigned flowchart will reflect in the evaluation page once approved.
When to set the application as PENDING?
The evaluator can mark the application as PENDING if there are pending follow-ups from the Admission's Office or from the applicant.
By setting the application as pending, the evaluator allows the applicant to revise his/her entries in the evaluation form.
To set as pending:
STEP 1. Click the button.
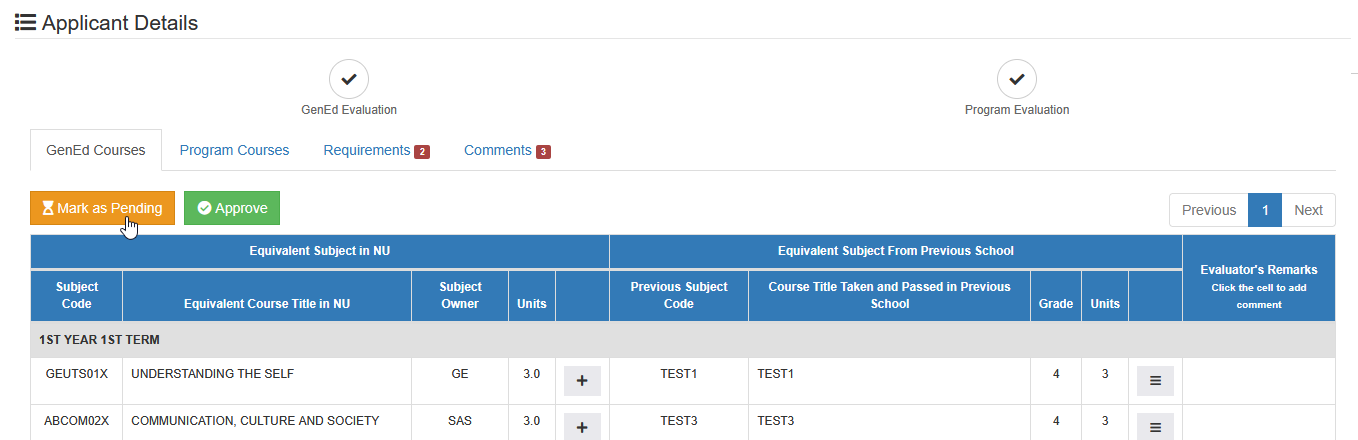
STEP 2. Click to confirm your action.
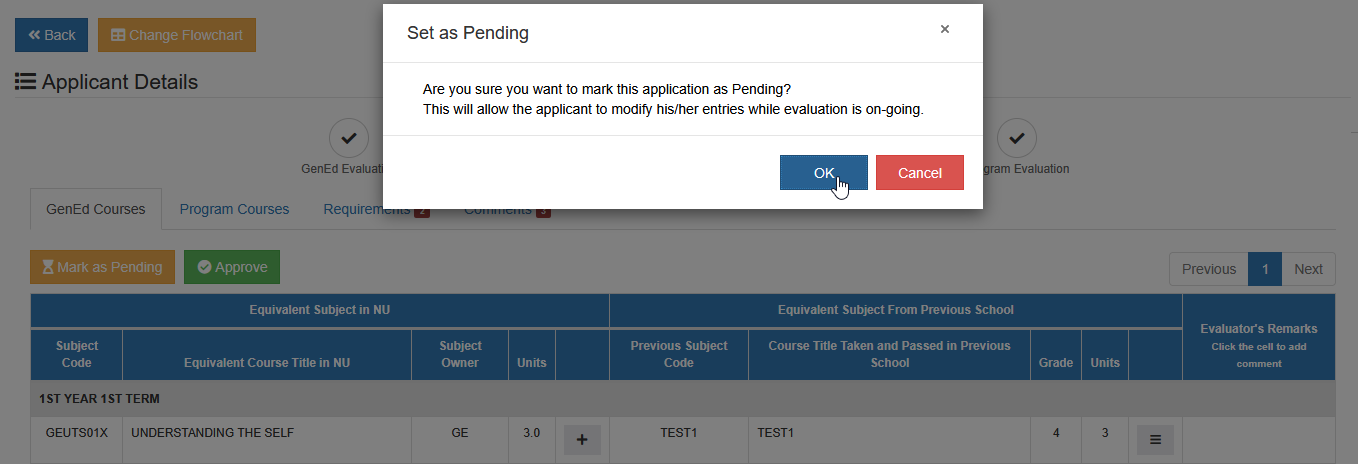
The applicant will receive a notification once the application is set to pending.

When to set the application as ONGOING?
Once the application has been endorsed by the Admission's Office to the evaluator, the evaluation is already set as ON-GOING.
If the application is in Pending status, the evaluator needs to:
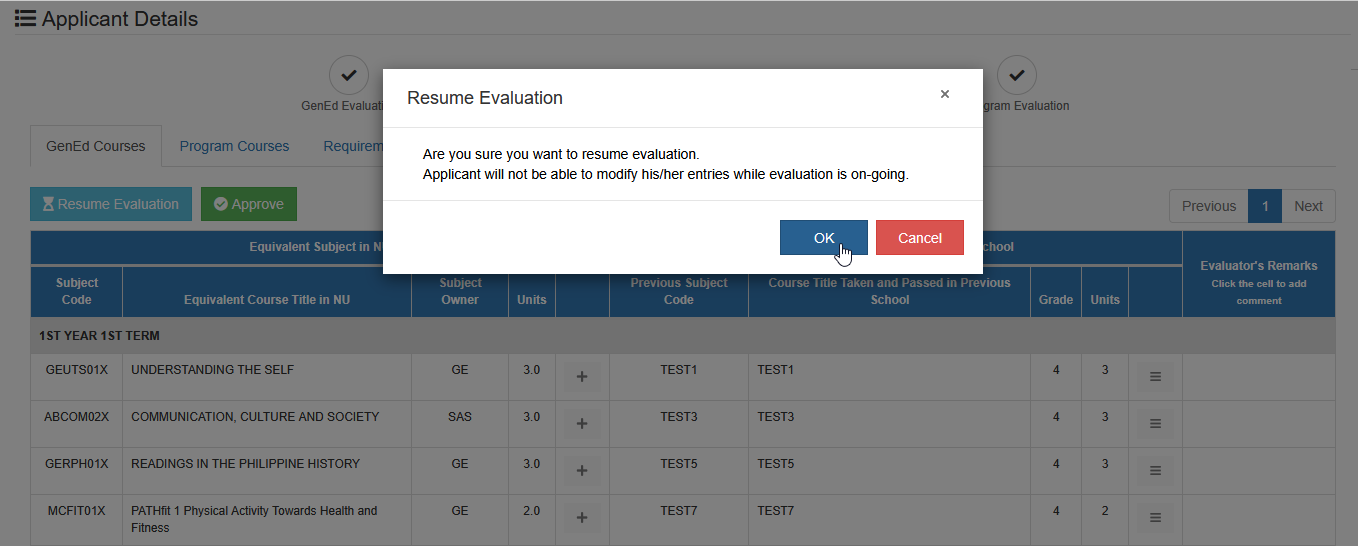
STEP 1. Click the button to resume the evaluation and prevent the applicant in making any changes while evaluation is on-going.
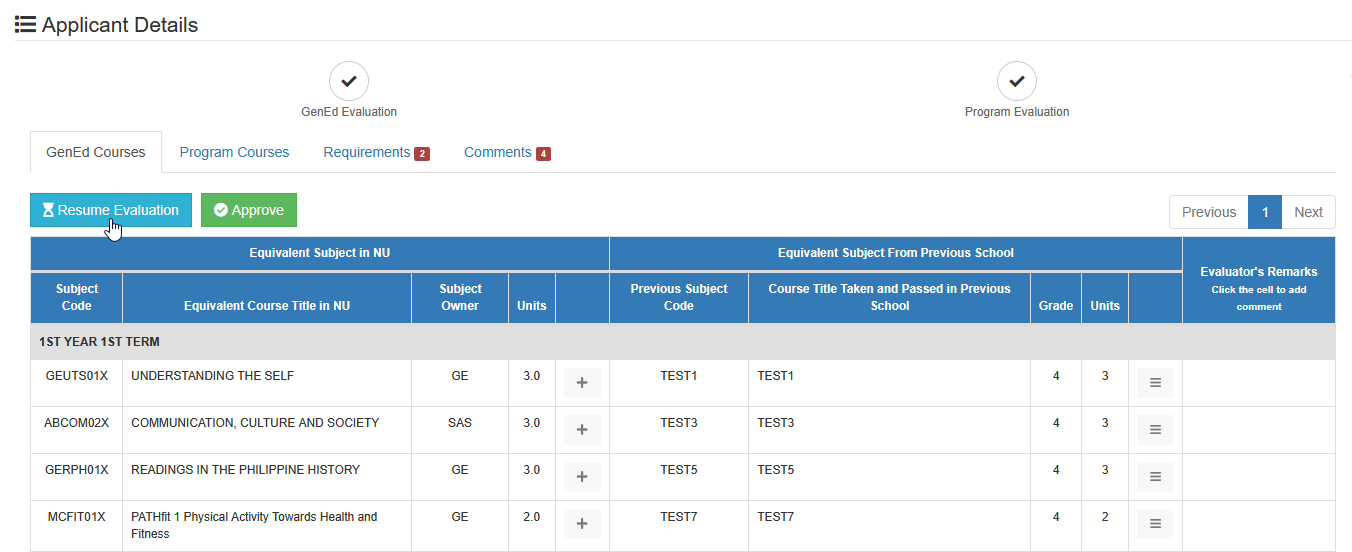
STEP 2. Click to confirm your action.
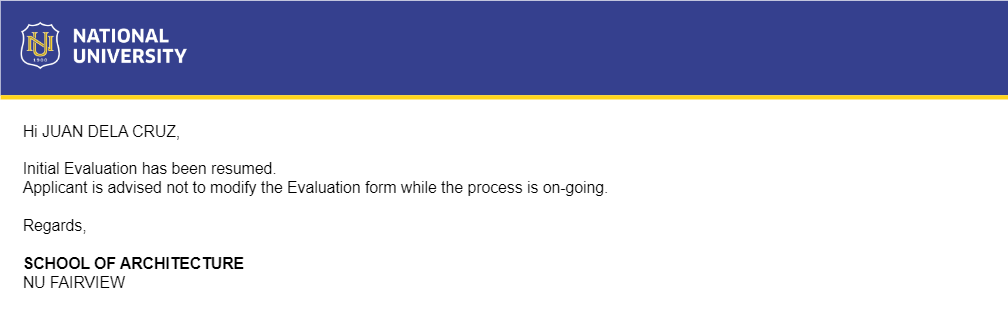
The applicant will receive a notification once the evaluation has been resumed.
When to set the application as DONE?
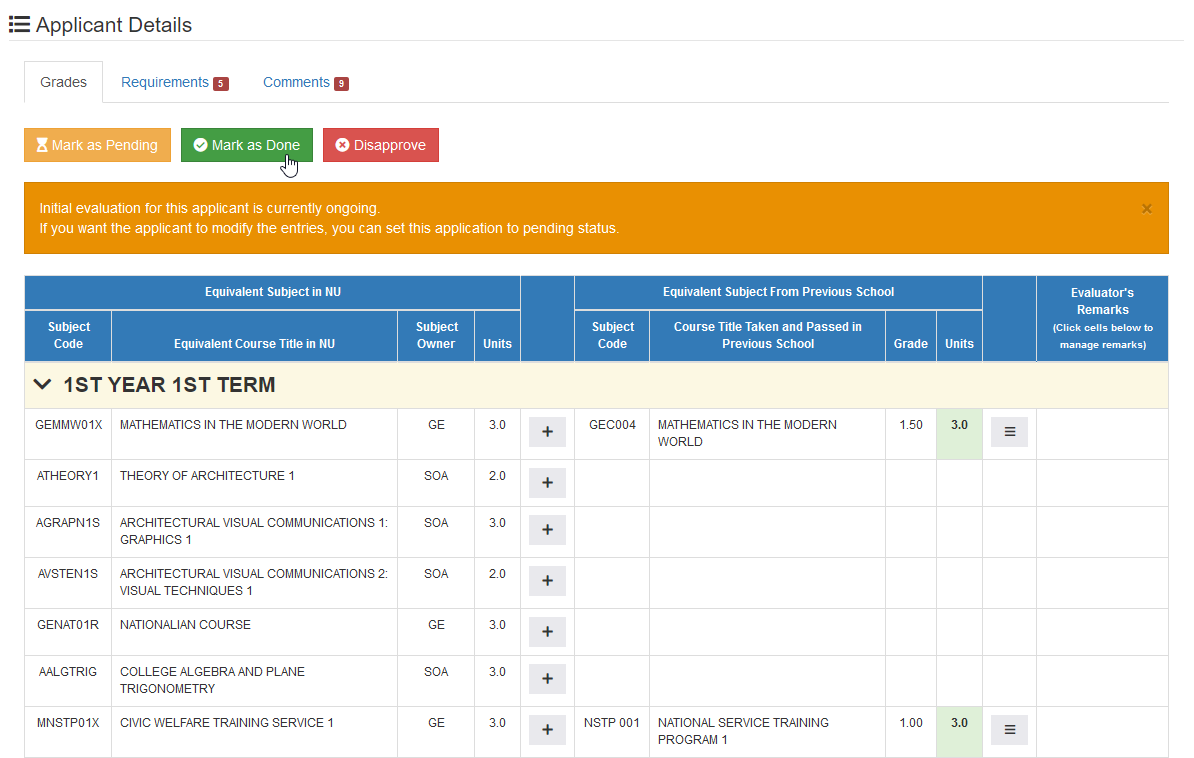
By setting the application as DONE, it means that the evaluator approves to all the entries specified in the evaluation form and all entries are subject for crediting.
If all entries have been properly validated and evaluated, it is safe for the Evaluator to approve the application.
STEP 1. In the Evaluation Form page, click the button.
STEP 2. Click to confirm your action.
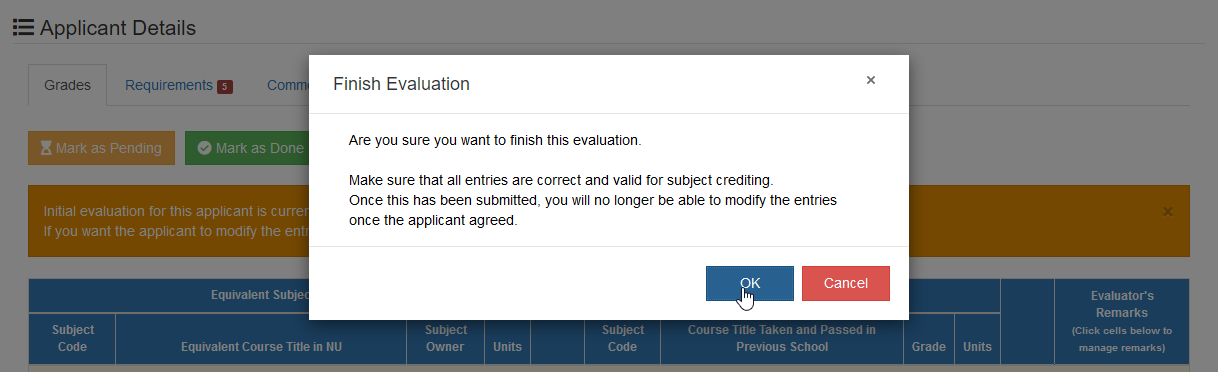
Make sure that all entries are correct and valid for subject crediting. Once application has been marked as Done and applicant agreed to the result of evaluation, the applicant nor the evaluator is no longer allowed to make any changes to the evaluation.
When to disapprove an application?
If there are invalid entries in the evaluation form, or applicant's submitted requirements are somehow tampered or suspicious, the Evaluator has the capability to deny the application if it deems necessary.
By disapproving an application, the applicant is no longer allowed to resume his/her application to the selected program.
To disapprove an application:
STEP 1. In the Evaluation Form page, click the button.
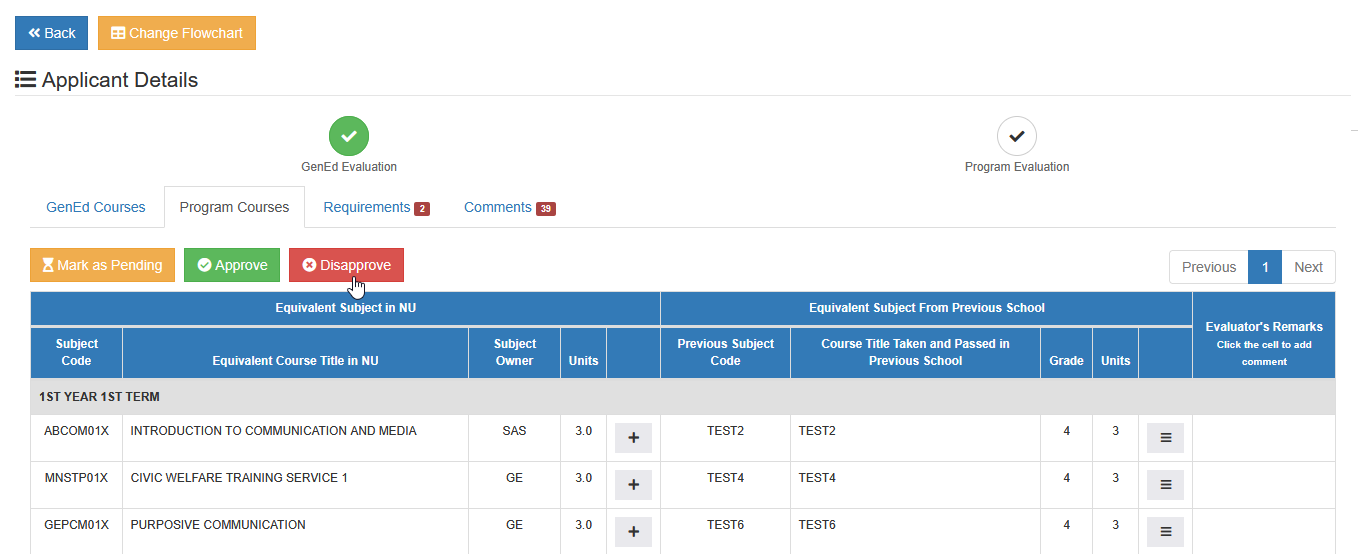
STEP 2. Specify the reason of disapproval.
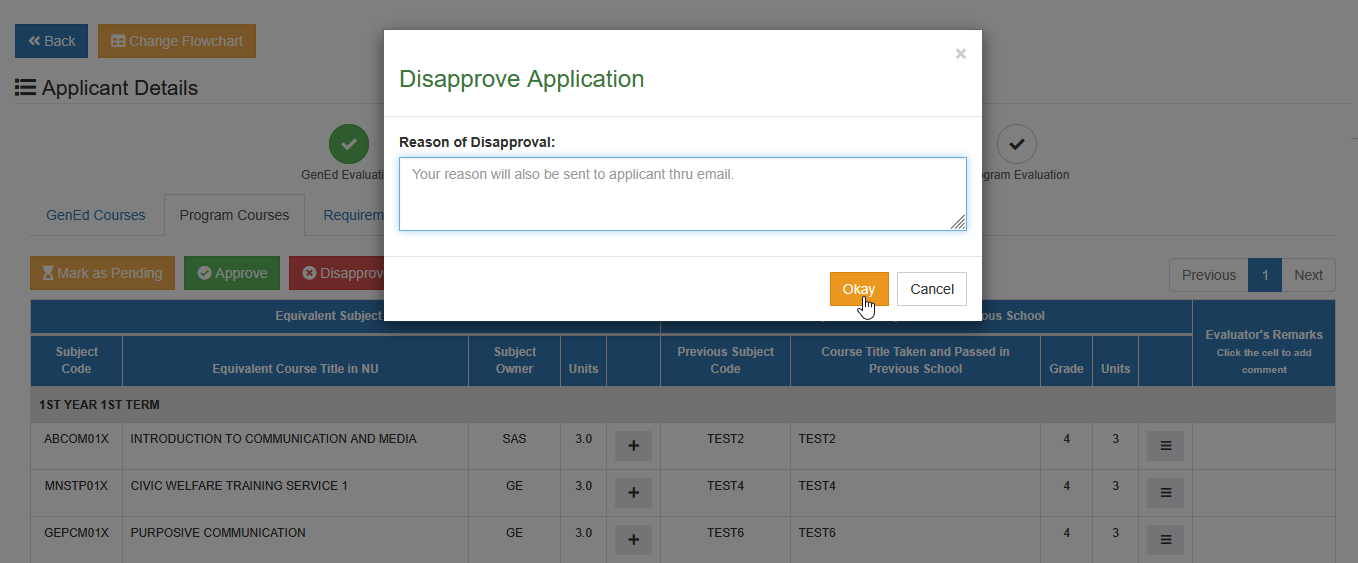
STEP 3. Click to confirm your action.
Disapproval of application is Final. Although the evaluator may undo this action if accidentally disapproved, avoid disapproving an application if concerns are only about incorrect entries in the evaluation form.
Utilize the Comments section as much as possible if you wish to correct the applicant's evaluation.
Stage 4. Agreement
The final step of evaluation form is the Agreement part. Once the applicant agreed to the result of the evaluation, the Admission's Office can already proceed with the approval and endorsement for enrollment.
To review and agree with the evaluation, advise the applicant to:
STEP 1. Login to NU Quest portal.
STEP 2. Go to Evaluation of Grades menu.
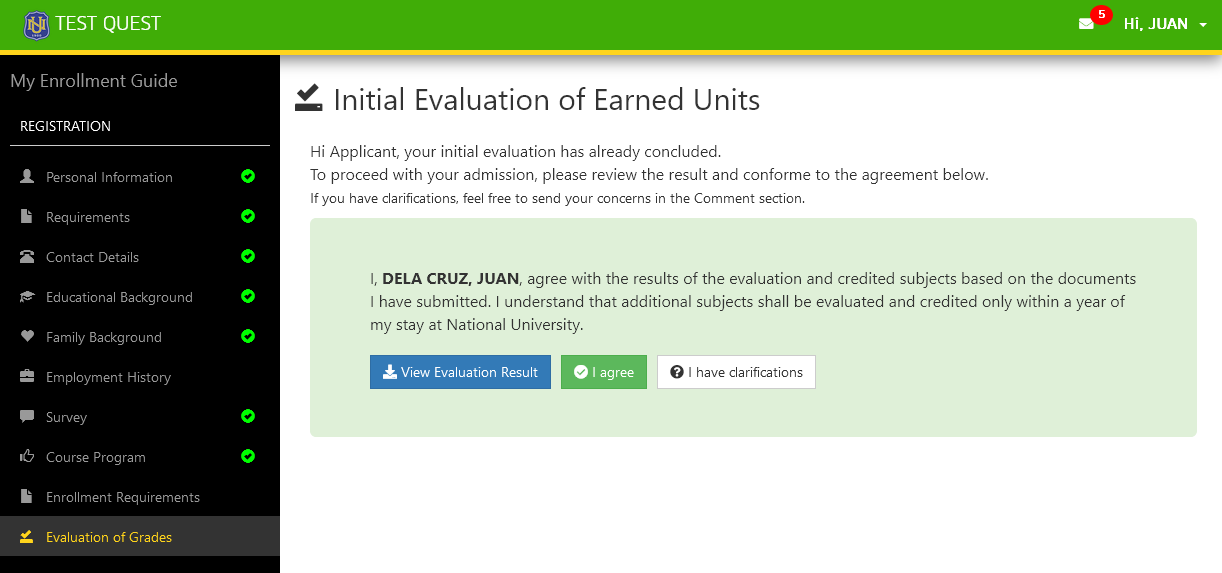
STEP 3. Click the button.
Receipt of agreement is also sent to applicant and Admission's Office as proof that the applicant has agreed to the result of the evaluation.