Advising
This module is used by advisers to register students in their respective classes.
-
Registrar office is responsible for assigning classes for Freshmen.
-
Deans/Program Chairs is responsible for assigning of classes for Transferee and Graduate Studies.
-
Advising for Continuing Students is open from Registration to Load Revision period.
Required Permission
- Advising - Permission to access the module.
- Advising Override - Permission to override pre requisite validation for class registration.
How to access the module?
To access the module, make sure you have the Advising permission. If it doesn’t appear in your portal, request access from your System Administrator.
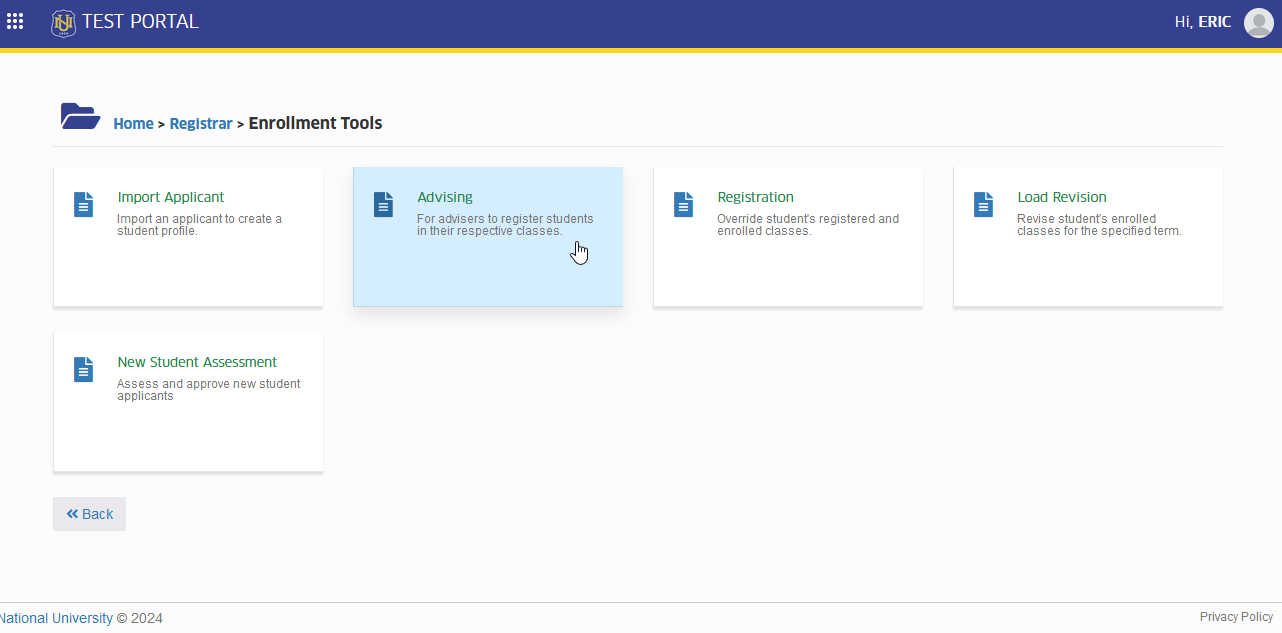
To access the module go to Registrar > Enrollment Tools > Advising
Click the module tab to redirect to Advising for Enrollment page.
How to register students to classes?
Follow the steps below on how to register the student to classes
STEP 1. Go to Registrar > Enrollment Tools > Advising.
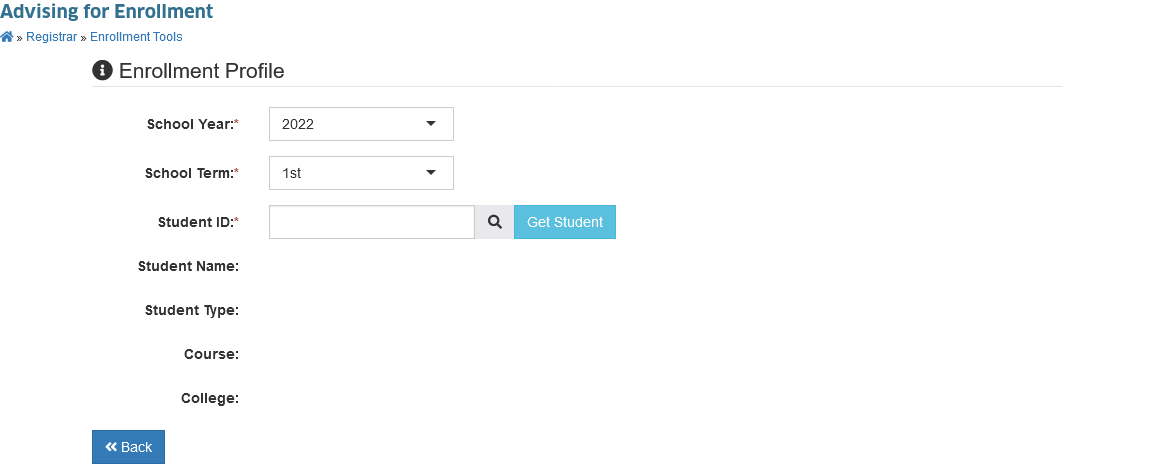
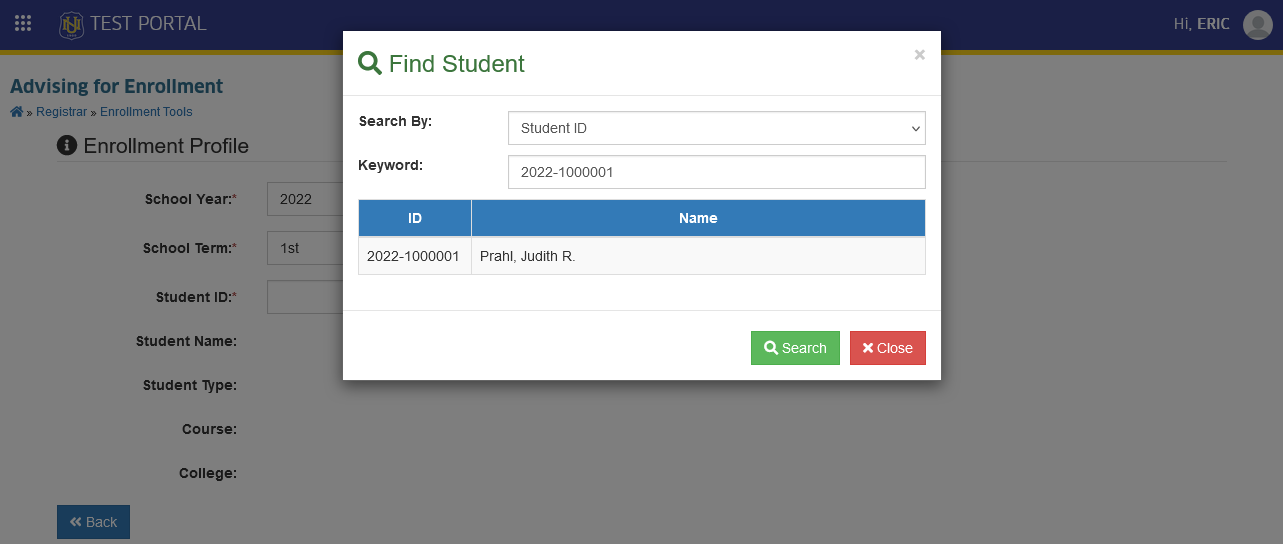
STEP 2. In Advising for Enrollment page, search for the student you want to advise by clicking the button and enter the search keyword.
STEP 3. In Advising for Enrollment page, under Enrollment Evaluation section click Register tab.
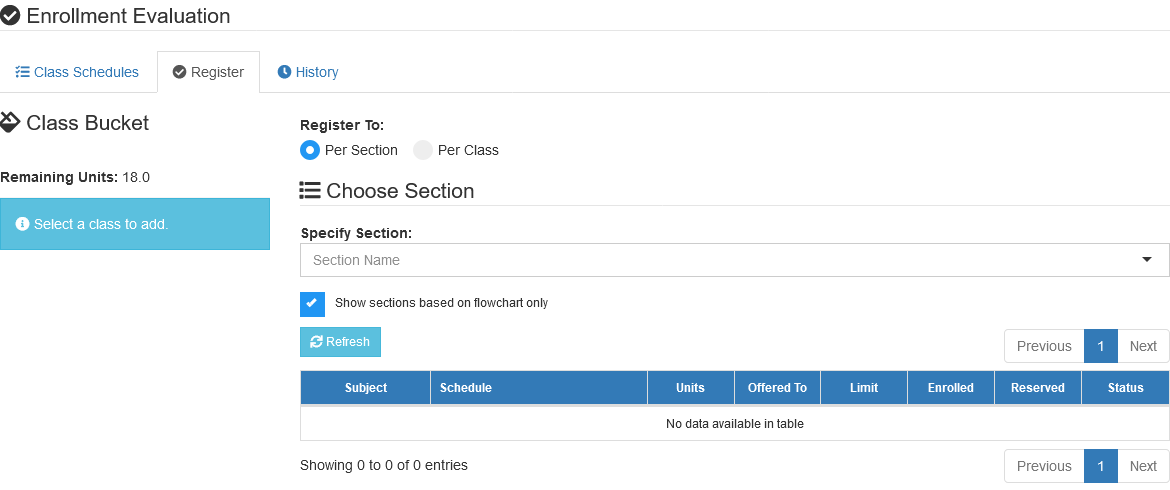
Adviser have the option to register the students by Per Section or Per Class.
- Use the Student Retention module to change student allowable units to take for the term.
How to register the student per section option?
STEP 1. In Enrollment Evaluation section, Tick the Per Section option.
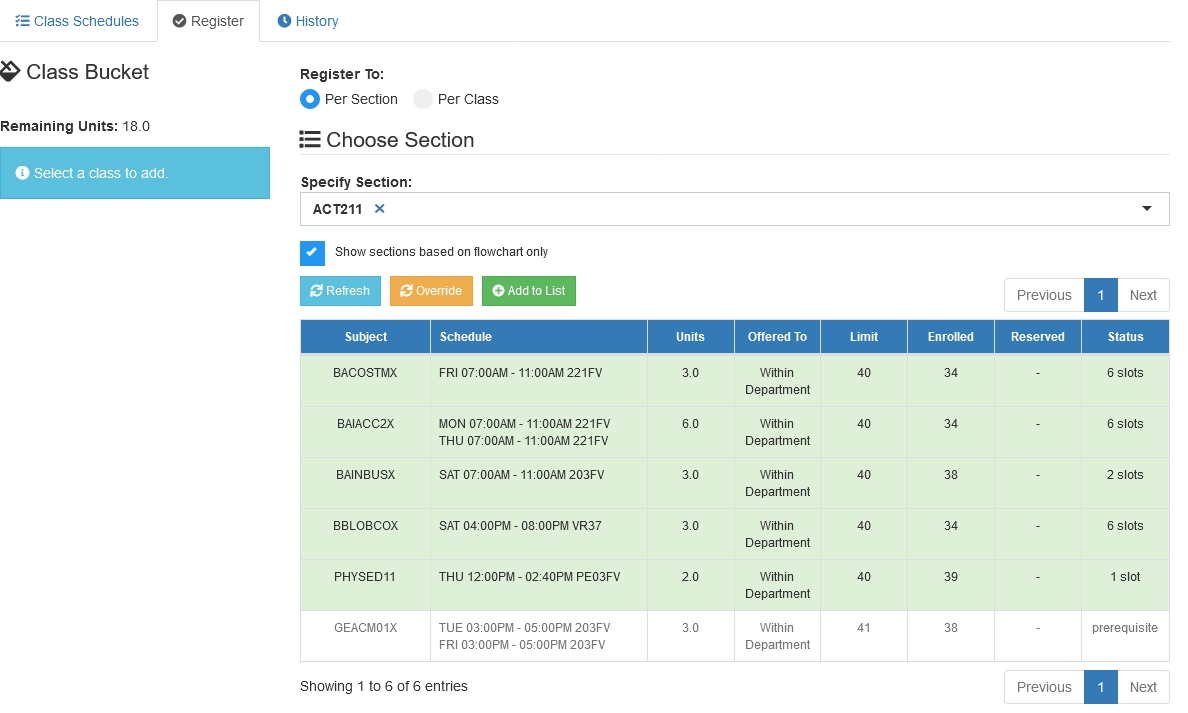
STEP 2. Specify the section by selecting from the the section dropdown list. All subjects for that specific section will be displayed, click the button.
-
Make sure all the class from selected sections are included in students flowchart.
-
You can add the list of subject for specific section when its availabel (colored background).
STEP 3. The sections classlist, will now be moved to Class Bucket, click the button and confirm the action to submit the registration.
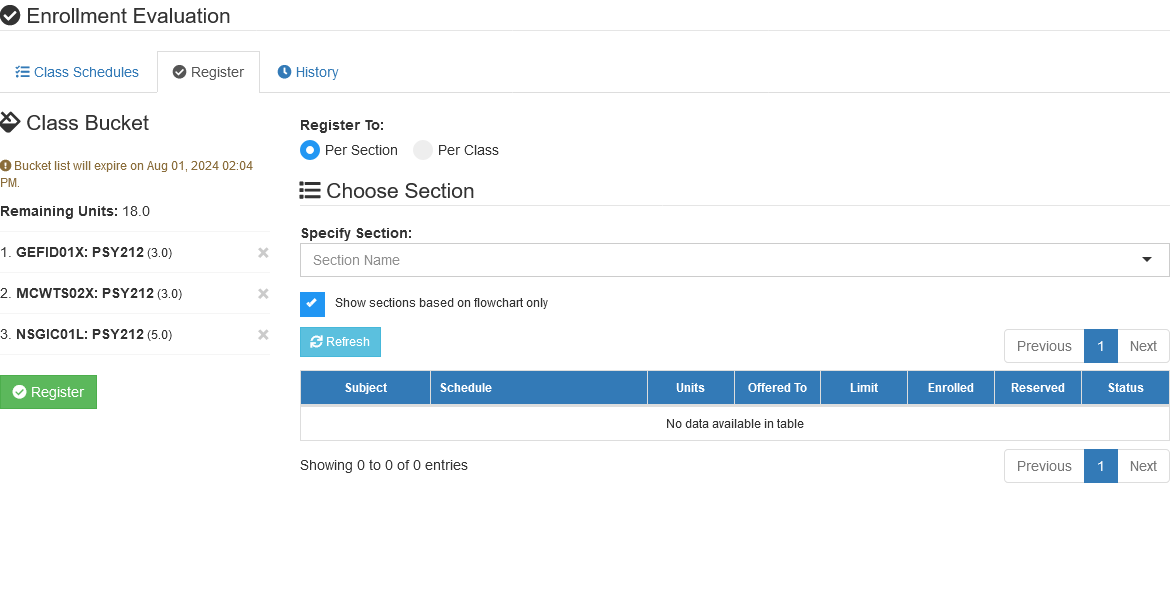
Student has been successfully registered to Class.
How to register student per class option?
STEP 1. In Enrollment Evaluation section, Tick the Per Class option.
STEP 2. Specify the subject by selecting from the the subject dropdown list, click the button.
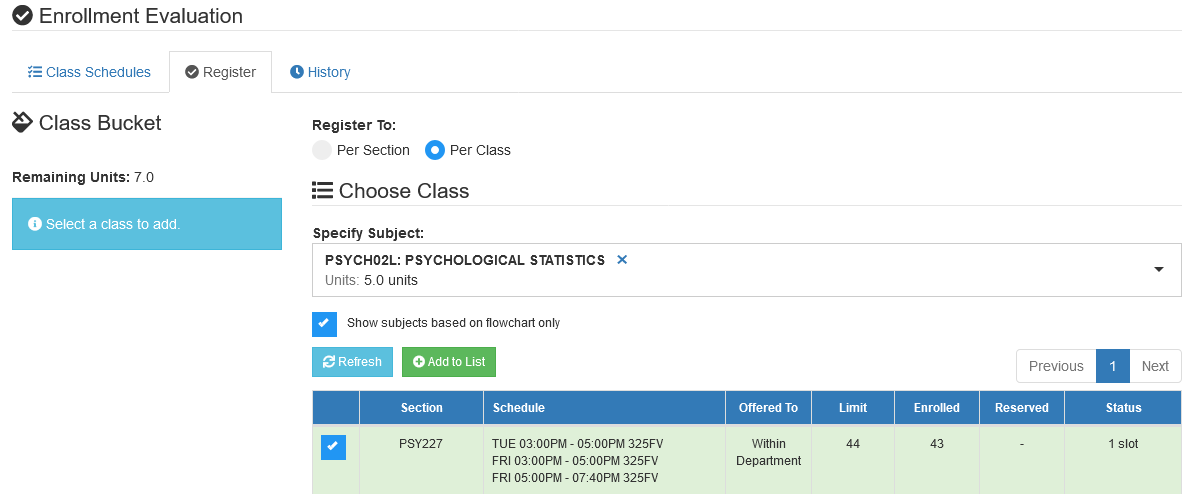
STEP 3. The selected subjects, will now be moved to Class Bucket, click the button and confirm the action to submit the registration.
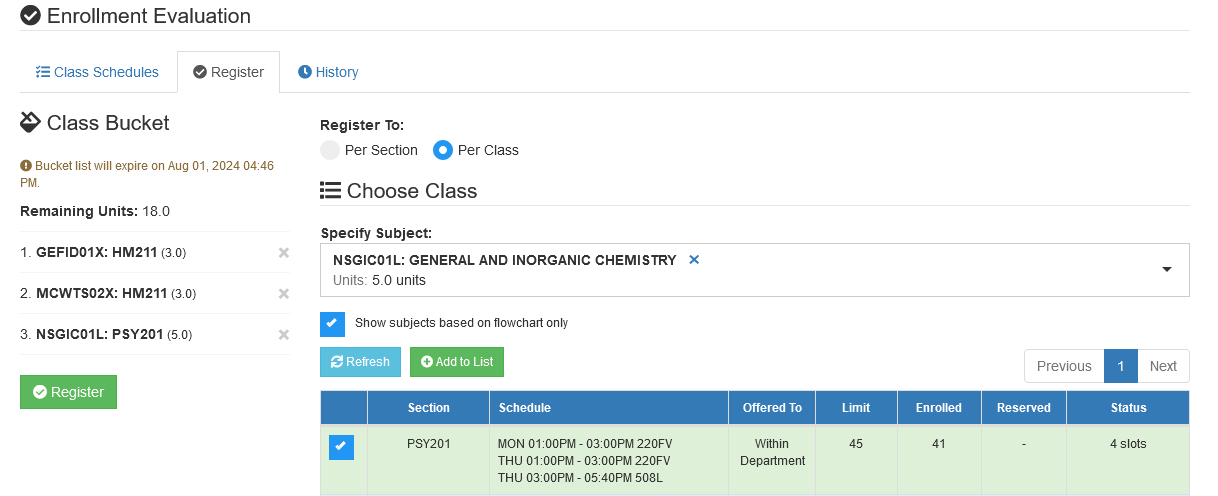
Student has been successfully registered to Class.
How to remove registered class?
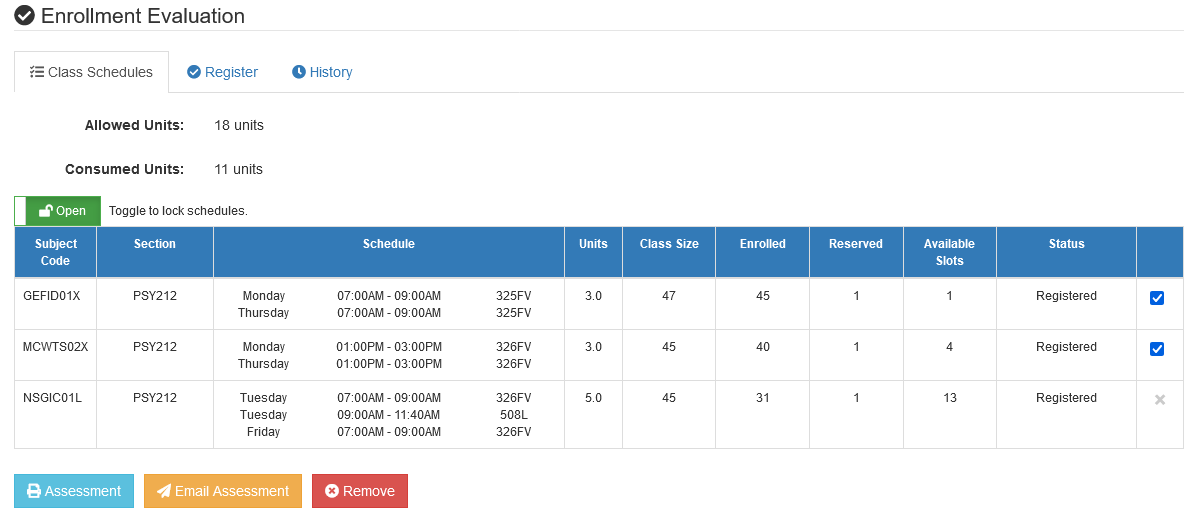
In Advising for Enrollment module, advisers can remove registered subjects. Follow the steps below on how to remove registered subjects.
STEP 1. Go to Advising module, then search for the student using the search feature of the module.
STEP 2. You will be redirected to Advising for Enrollment page. Under Enrollment Evaluation section, in Class Schedule tab, select the subject you want to remove and click the button.
How to issue student's assesment?
After the registration of student's classes, the adviser can issue student's assessment by:
- Printed Assessment
- Email Assessment
To issue printed assessment, click the button under the Enrollment Evaluation section.
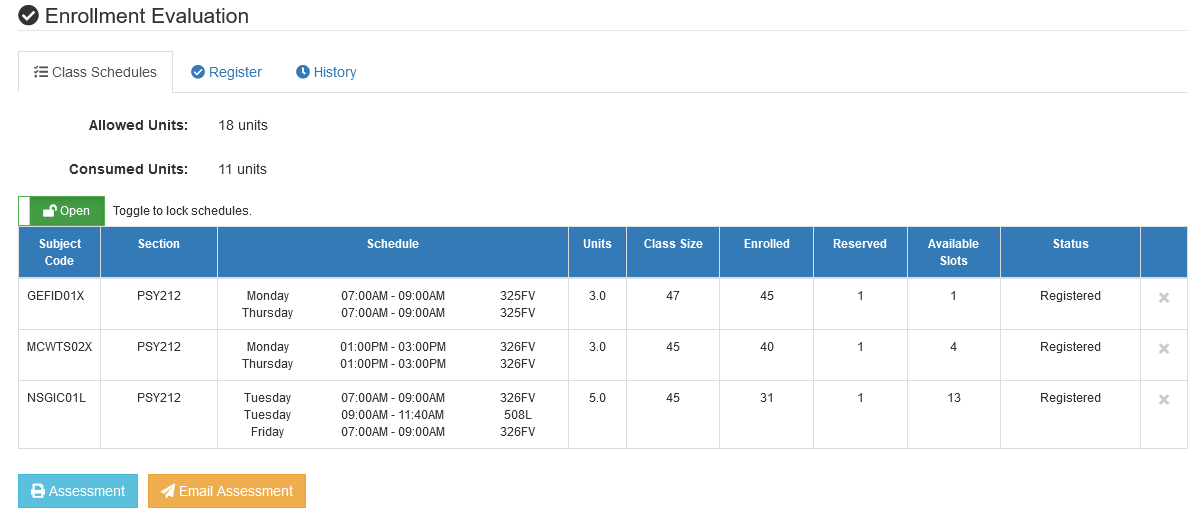
To email the student's assesment, click the button under the Enrollment Evaluation section.
Adviser can lock the registration so other adviser cannot modify the list by clicking the button.