Import Applicant
This module is used by Registrar Office in importing an approved applicant to create student profile.
In this module the Registrar personnel can assign a Student ID, Student's Fee Schedule group and Student's Flowchart.
-
Make sure to assign the student in his/her correct fee schedule group to avoid conflicts in fees.
-
Assign the latest curriculum flowchart to students.
Required Permissions
- Import Applicant - Permission to access the import applicant module.
How to access the module?
To access the module, make sure you have the Import Applicant permission. If it doesn’t appear in your portal, request access from your System Administrator.
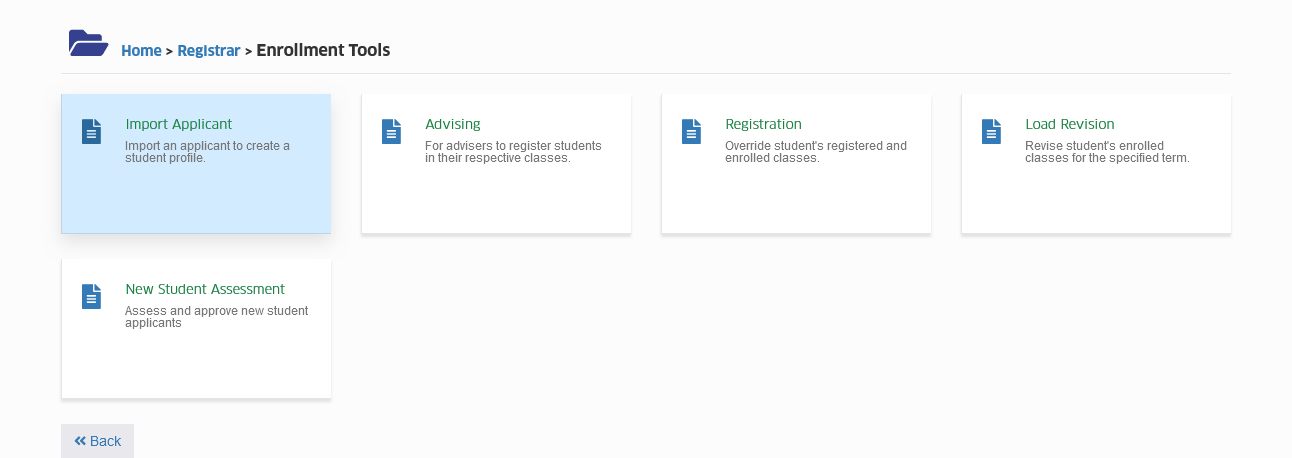
To access the module go to Registrar > Enrollment Tools > Import Applicant
Click the module tab to redirect to Import Applicant page.
How to use the module?
Follow the steps below on how to properly use the module.
STEP 1. Go to Registrar > Enrollment Tools > Import Applicant.
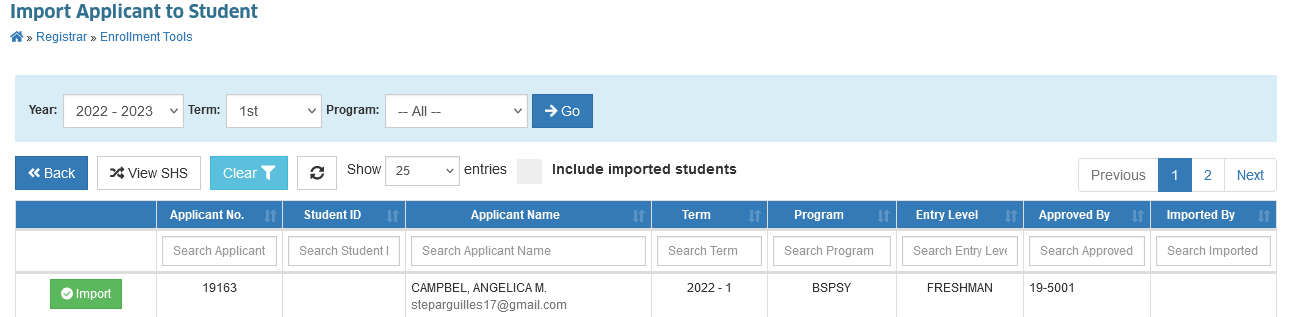
STEP 2. In Import Applicant to Student list view page, click the corresponding button of the applicant you want to import. You will be redirected to Import Applicant page.
How to assign student ID number?
Click the button in Import Applicant page to generate a student ID number.
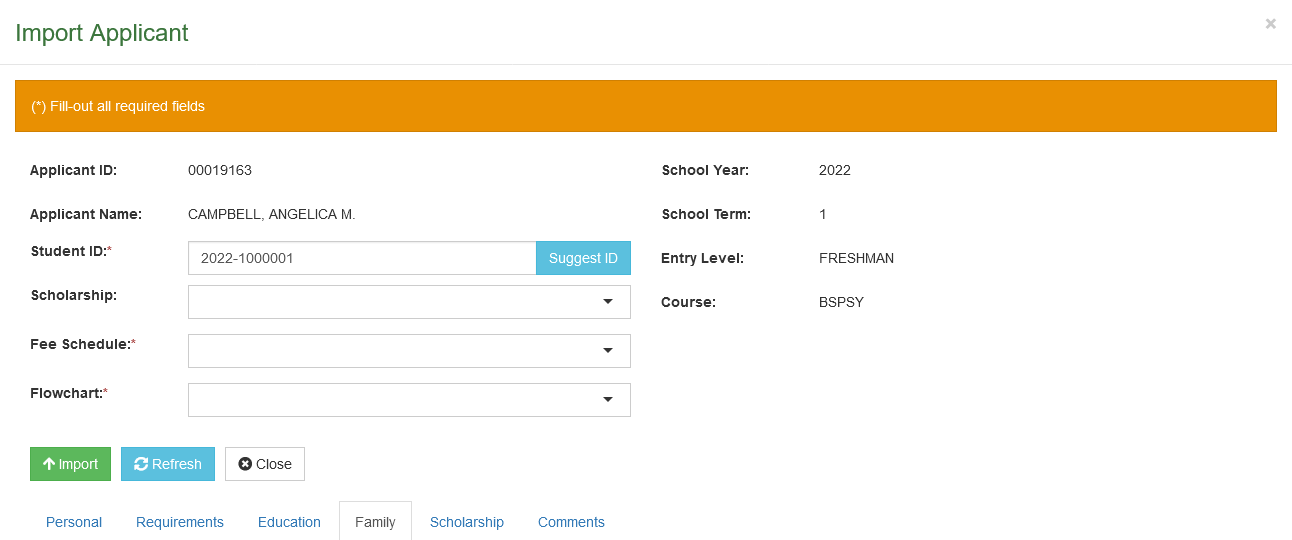
- Make sure to check first the students personal information before importing.
How to assign Student's Fee Schedule?
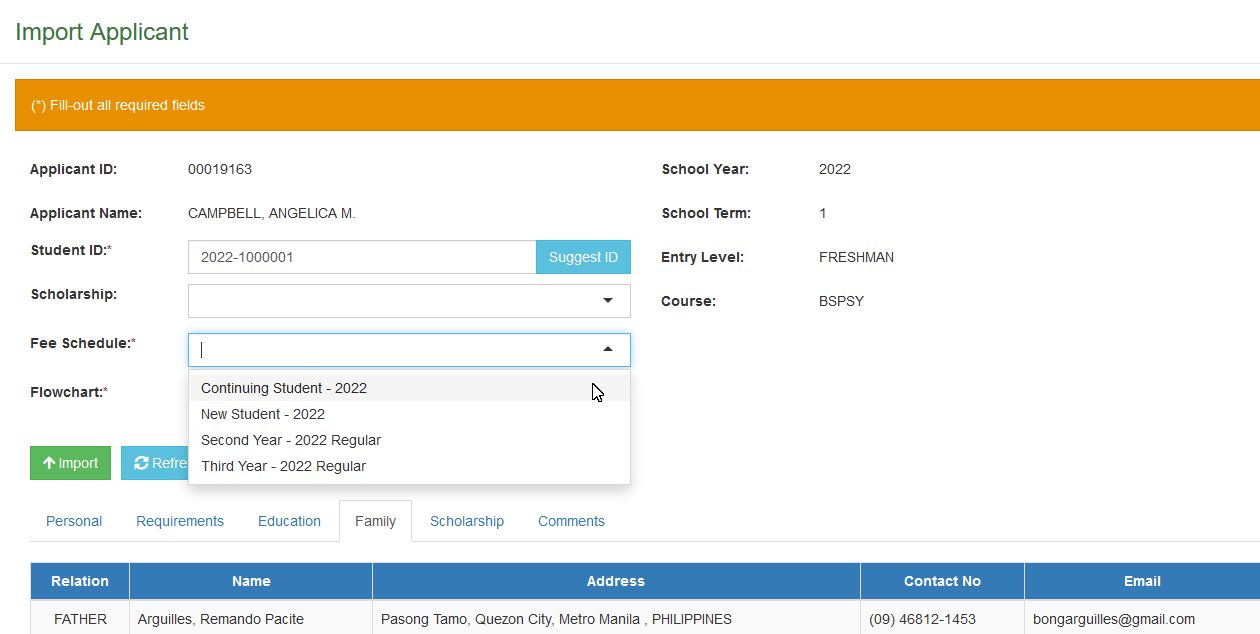
In Import Applicant page, assign the fee schedule of the student from the available fee schedule in the Fee Schedule dropdown list.
How to assign Student's flowchart?
In Import Applicant page, assign the latest curriculum flowchart available to the students in Flowchart input field.
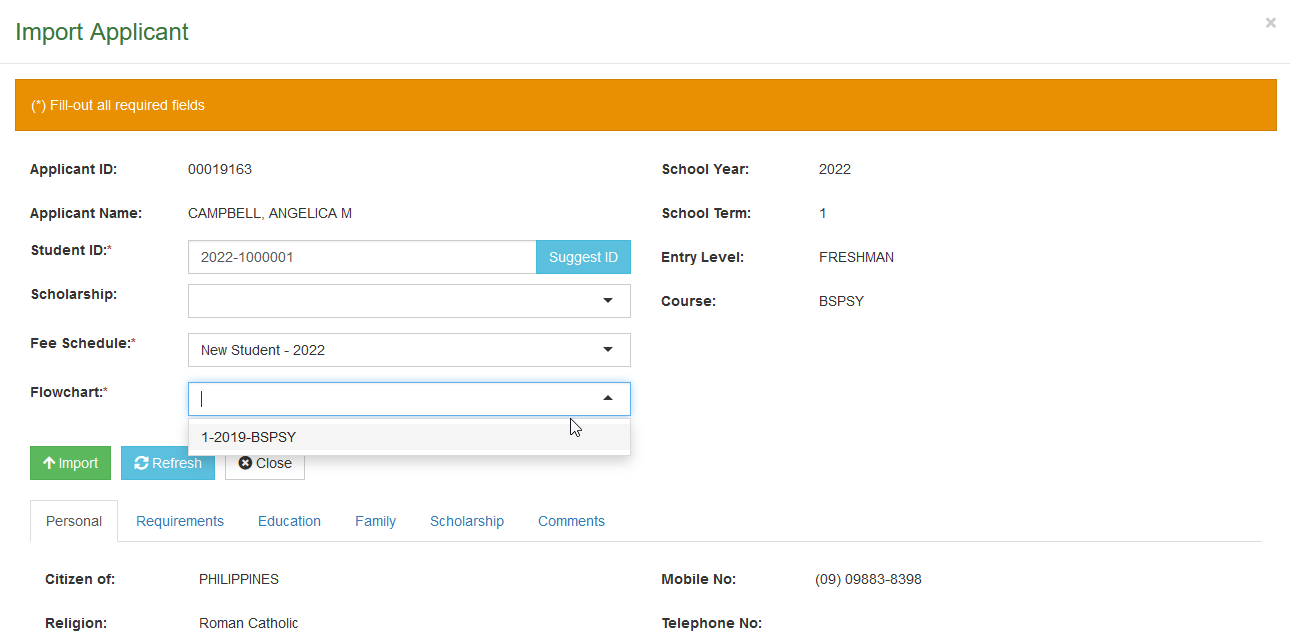
How to import student?
If you have already assigned the students ID number, Fee Schedule, Flowchart click the button to import applicant to student.
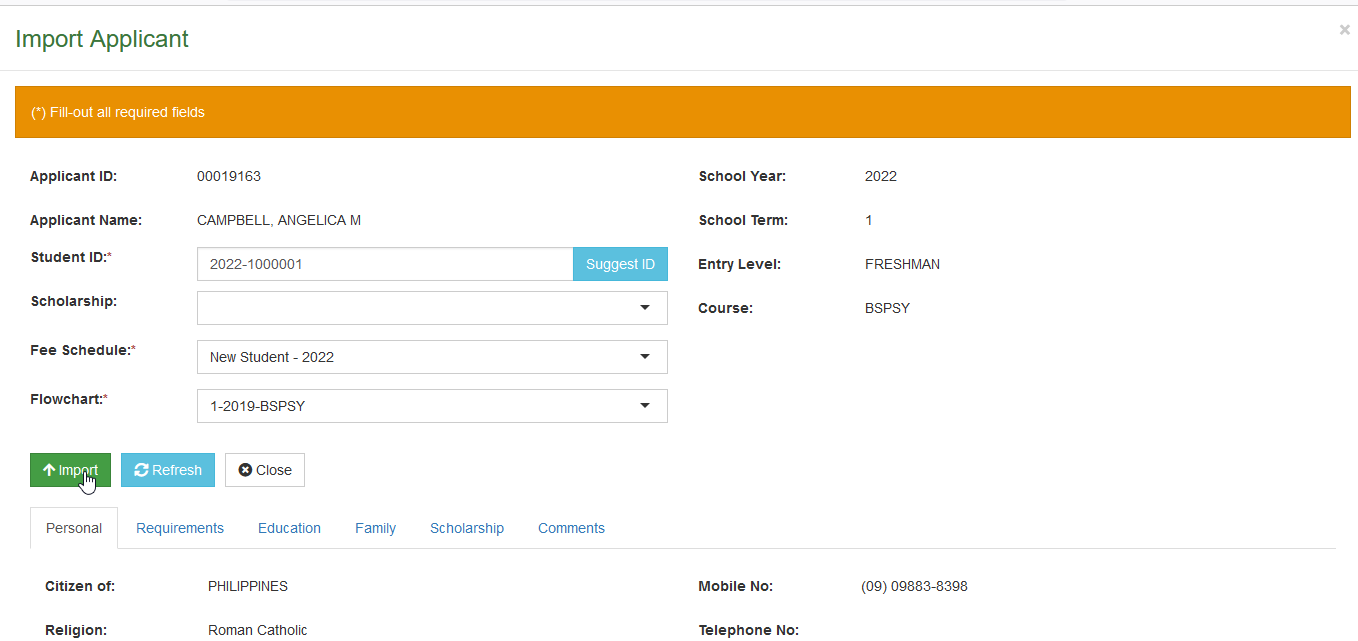
The applicant has been successfully imported as student.
How to unimport student?
Follow the steps below on how to unimport the student.
STEP 1. Go to Registrar > Enrollment tools > Import Applicant.
STEP 2. In Import Applicant to Student list view page, click the Include Imported Student checkbox to show the list of imported applicants. Use the filtering features to search for specified student.
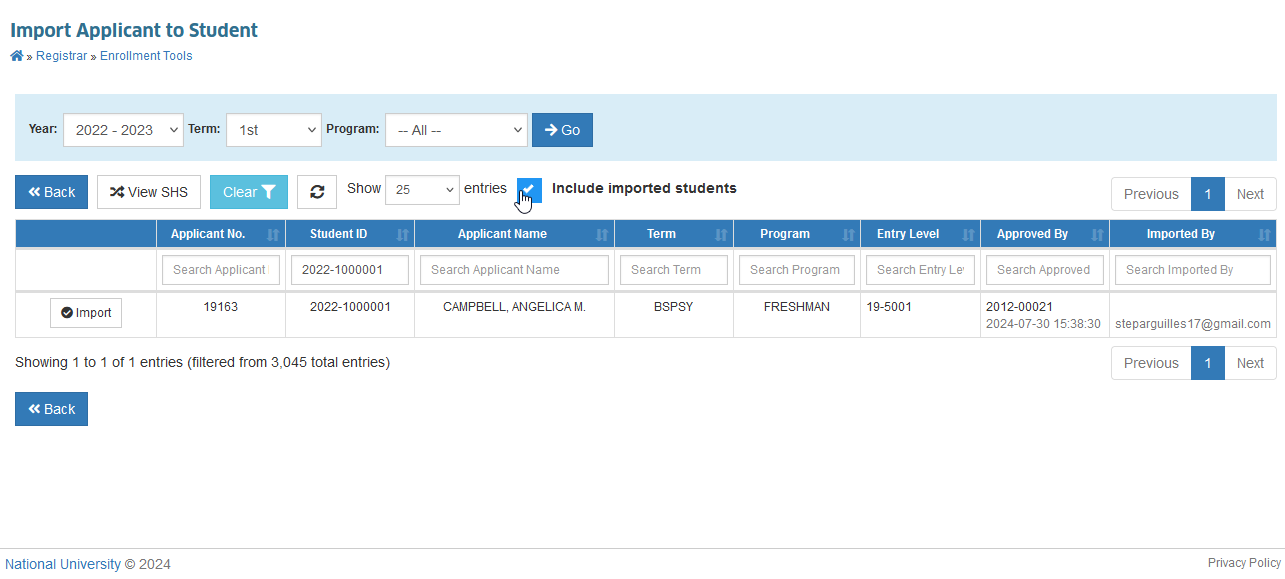
STEP 3. Click the corresponding button to redirect to Import Applicant page.
STEP 4. In Import Applicant page, click the button to unimport student information.
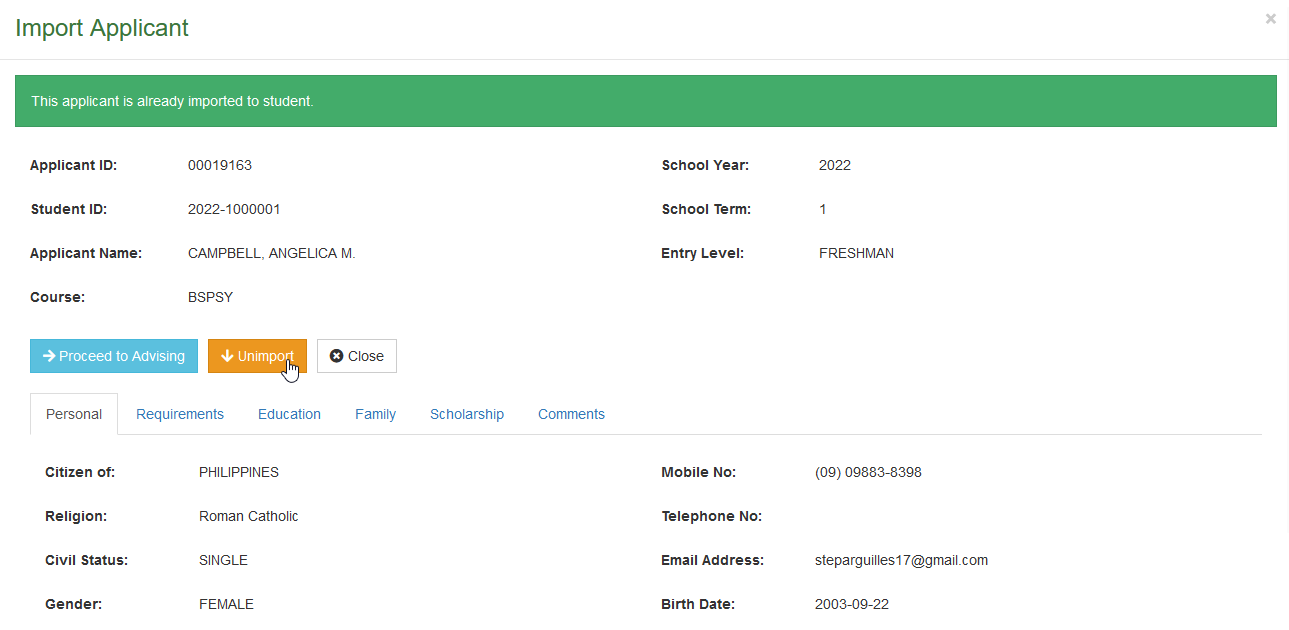
Unimporting of student is not possible when the student has already enrolled subjects for the term.