Class Schedules
The Class Schedules module is where you set up and manage subject schedules for each term. It’s also where you can assign faculty loads and check or export class lists when needed.
What You Can Do in This Module
1. Create or Manage Subject Offerings
-
Add a new class schedule for a subject.
-
Edit existing schedules (update time, room, or faculty).
-
Remove schedules that are no longer needed.
2. Assign Faculty Load
-
Tag or assign a faculty member to handle a subject.
-
Check faculty loads across different subjects and schedules.
3. View or Export Class List
-
View the list of enrolled students per class.
-
Export the class list (for reports, records, or printing).
Required Permissions
Under Class Schedules module permissions.
-
Add refSubjectOfferingHdr - Allows the user to create or add a new subject offering (set up a new class schedule with details like subject code, time, room, and faculty).
-
Delete refSubjectOfferingHdr - Allows the user to remove an existing subject offering from the schedule list, but only if the class list is empty (no enrolled students).
-
Edit refSubjectOfferingHdr - Allows the user to update or change the details of an existing subject offering (e.g., adjust schedule, change room, or reassign faculty).
-
Export ClassList - Allows the user to download the class list of enrolled students for a specific subject offering.
-
PrintView ClassList - Allows the user to generate and print the class list of enrolled students.
-
View refSubjectOfferingHdr - Allows the user to access and view the list of subject offerings without making changes.
Under Manage Faculty Loading module permissions
-
Add FacultyLoad - Allows the user to assign a faculty member to a subject offering.
-
Delete FacultyLoad – Allows the user to remove a faculty member from a subject offering.
-
Reassign FacultyLoad -llows the user to transfer or reassign a subject offering from one faculty member to another.
-
View FacultyLoad - Allows the user to see assigned faculty member without making changes.
How to Access the Module
To access the module, make sure you have the View refSubjectOfferingHdr permission. If it doesn’t appear in your portal, request access from your System Administrator.
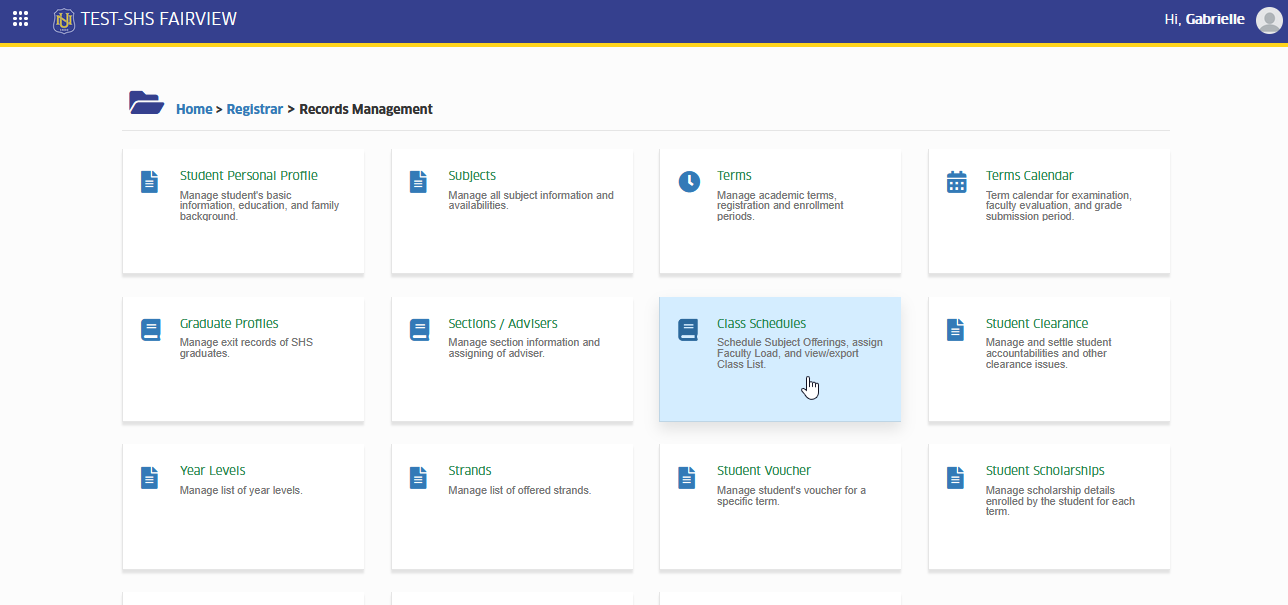
Go to Registrar > Records Management > Class Schedules. Click the module tab to redirect to the Term's Class Scheduling page.
Required Fields
| Field Name | Description | Required |
|---|---|---|
| Section | Select the section from the dropdown list. Once the record is saved, the subject will be assigned to that specific section. | Yes |
| Subject | Unique subject code that identifies the specific course offering. | Yes |
| Classification | Select if the subject is classified as Regular, Petition, or Tutorial. | Yes |
| Class Limit | Maximum number of students allowed to enroll in the course. | Yes |
| Offer To | Select whether the subject will be offered to all students or not. | Yes |
| Day | Day of the week when the class is scheduled. | Yes |
| Time Start | Start time of the class. | Yes |
| Time End | End time of the class. | Yes |
| Room Type | Type of classroom: Lecture or Laboratory. | Yes |
| Room | Assigned classroom for the course, selected from the available list. | Yes |
How to Use the Module
This section will guide you step by step on how to manage class schedules using the Class Schedules module.
Add New Class Offering
This feature lets you create a new subject schedule for the term. You’ll need to provide the subject code, section, classification, class limit, schedule (day and time), and room details. Once saved, the new class offering will be available in the schedule list and ready for faculty assignment and student enrollment.
Follow the steps below to add a new class offering.
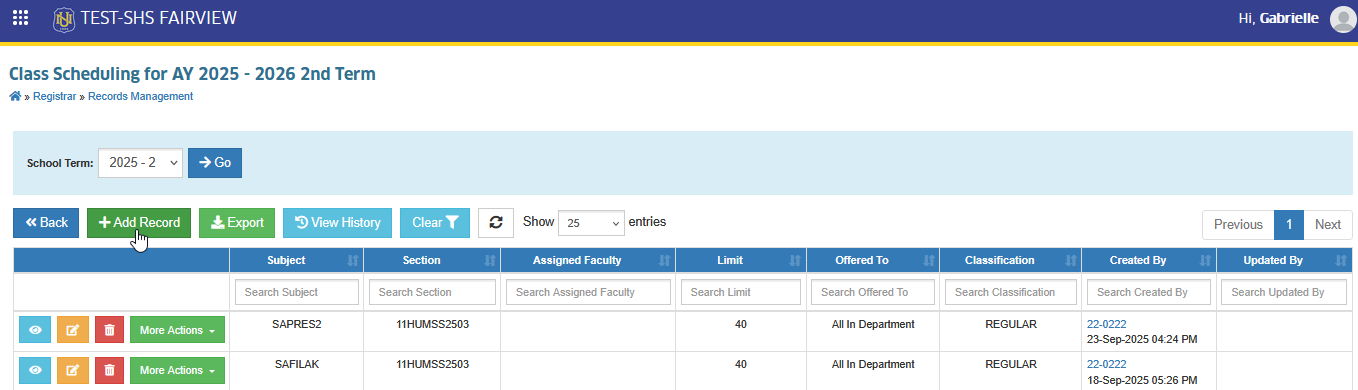
STEP 1. On the Class Schedules page, click the button. You will be redirected to the Add Class Offering page.
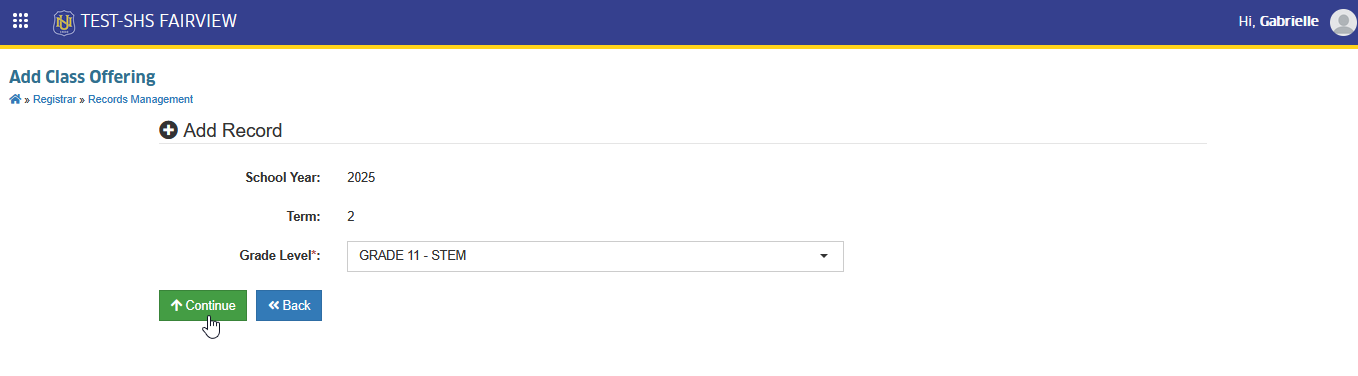
STEP 2. On the Add Class Offering page, select the grade level where the subject will be offered. Then, click the button to proceed.
STEP 3. Still on the Add Class Offering page, enter all the required information. Refer to the Required fields for guidance. Review the details carefully to ensure accuracy and completeness. Once done, click the button to save the new record.
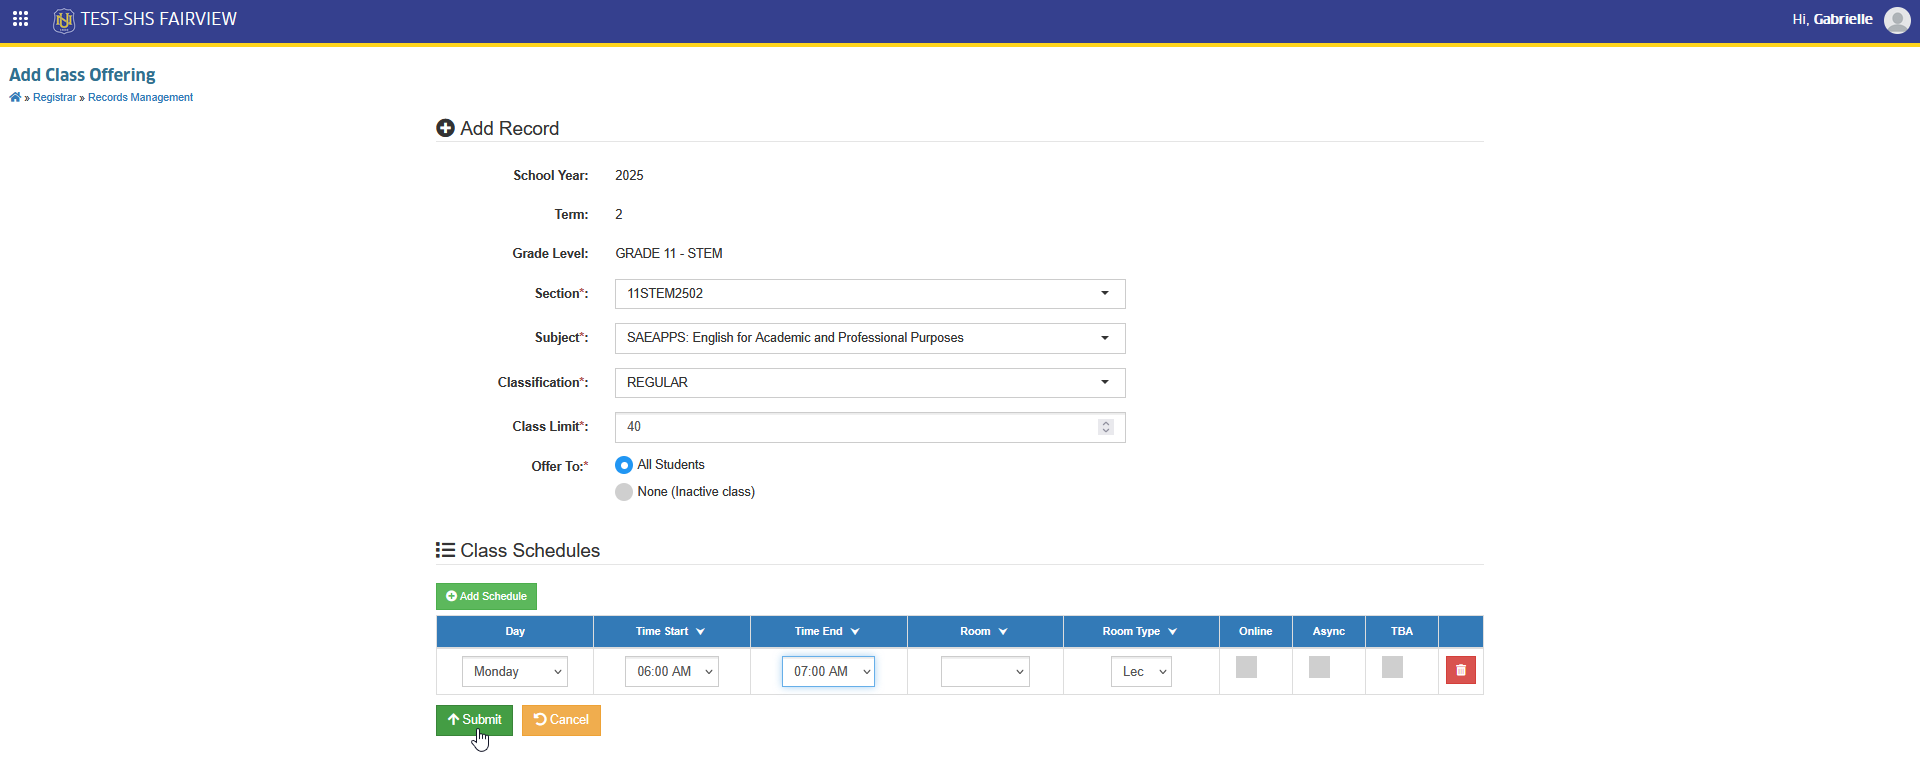
You can remove an incorrect schedule by clicking the corresponding button next to it.

Edit Class Offering Information
This feature lets you update the details of an existing subject offering. You can modify information such as the class details, schedule, and other required fields.
Follow the steps below to edit class schedules.
STEP 1. On the Class Schedules page, locate the subject offering you want to update and click the button. You will be redirected to the Edit Class Offering page.
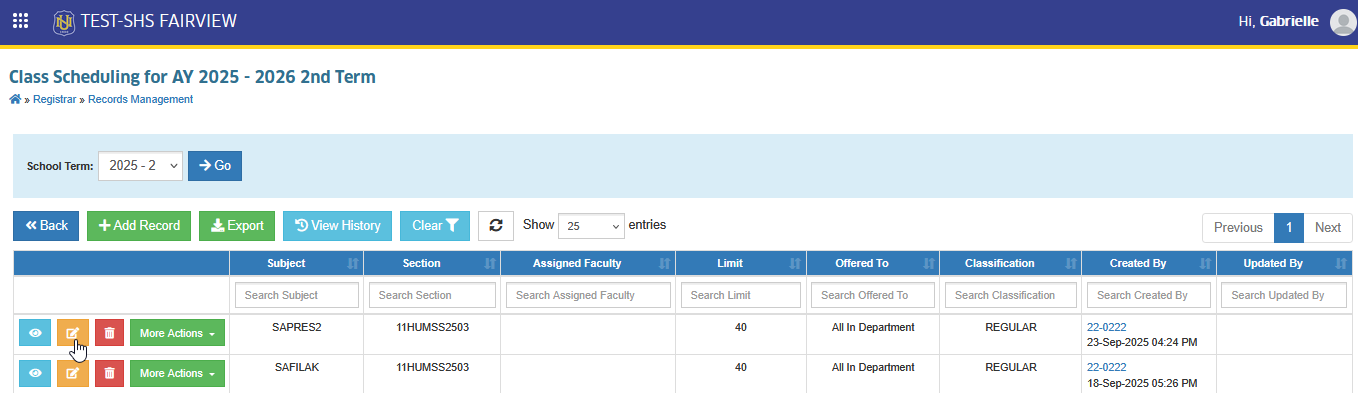
STEP 2. On the Edit Class Offering page, update the necessary fields (e.g., schedule, room, or classification). Refer to the Required Fields section if needed.
STEP 3. Review the changes carefully to ensure accuracy. Once done, scroll down to Class Schedule section and click the button to save the updates.

Delete Subject Offering (Empty Class List)
This feature allows you to remove a subject offering from the schedule list. Deletion is only possible if the class list is empty, meaning no students are currently enrolled or registered. This ensures that active or ongoing classes are not accidentally removed from the system.
Follow the steps below to delete class schedule.
STEP 1. On the Class Schedules page, locate the subject offering you want to delete and click the button. This will redirect you to Delete Class Offering page.
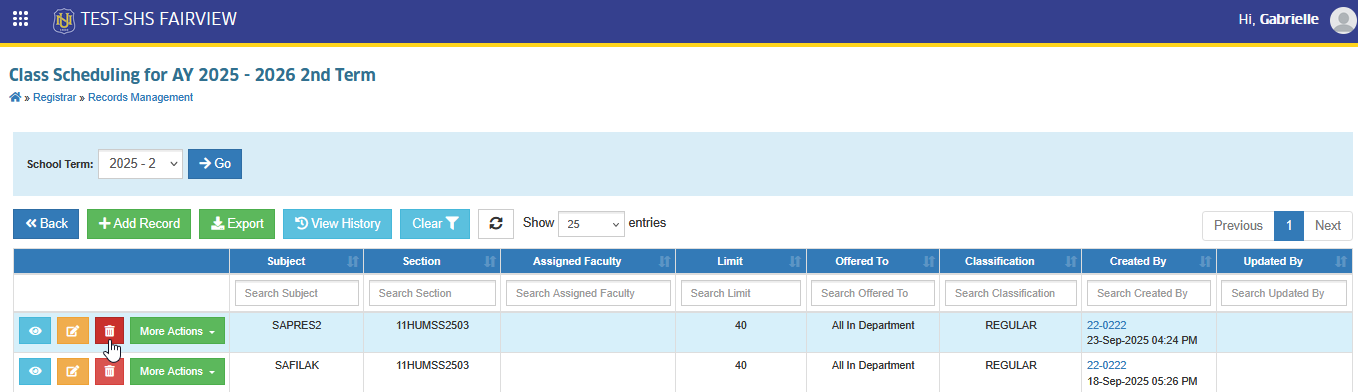
STEP 3. On the Delete Class Offering page, click the button to remove the record.

Assign Faculty
This feature allows you to assign a faculty member to a subject offering. Once assigned, the subject becomes part of the faculty member’s official teaching load, ensuring that the class is properly linked to its instructor.
Follow the steps below to assign faculty to a class.
STEP 1. On the Class Schedules page, locate the subject offering you want to assign.
STEP 2. Click the button, then select the button. You will be redirected to the Assign Faculty page.
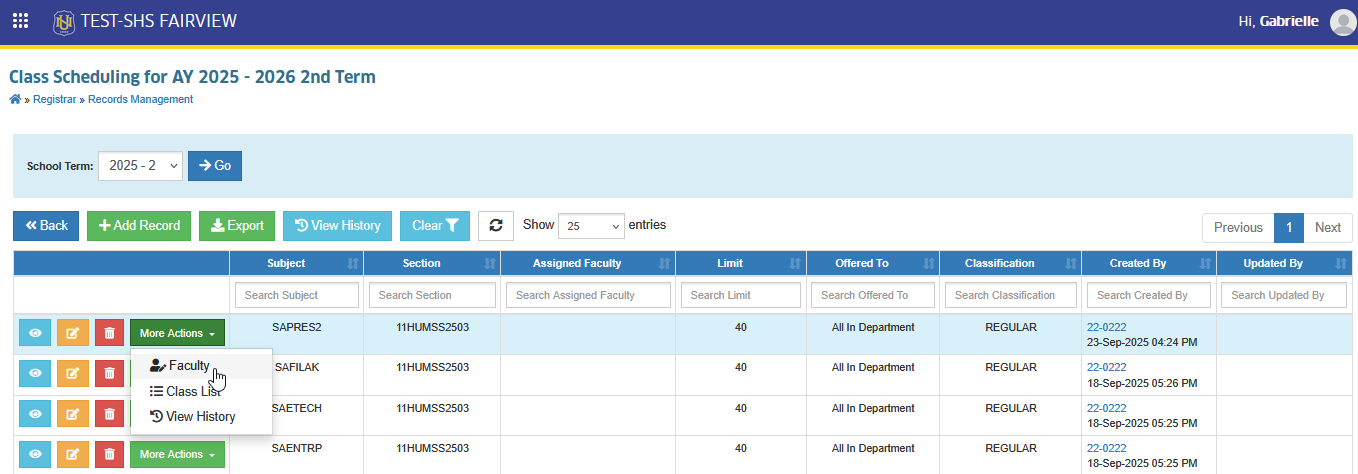
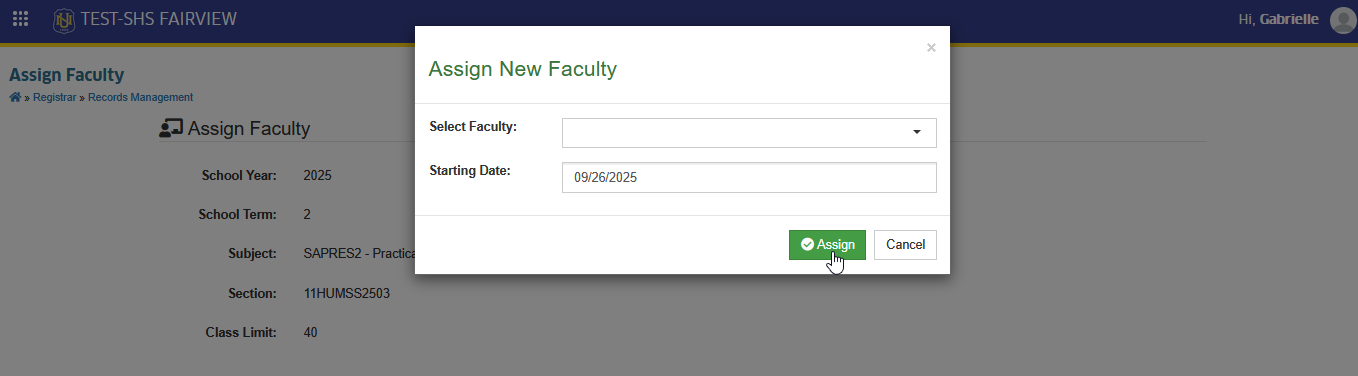
STEP 3. On the Assign Faculty page, click the button. Then, select the faculty member from the available list.

STEP 4. Once the faculty member was selected and the starting date was specified, click the button to save.
Remove Faculty
This feature allows you to unassign a faculty member from a subject offering. It is used when the faculty will no longer handle the class, making the schedule available for reassignment to another instructor if needed.
Follow the steps below to remove an assigned faculty.
STEP 1. On the Class Schedules page, locate the subject offering with an assigned faculty. Click the button, then select the button. You will be redirected to the Assign Faculty page.
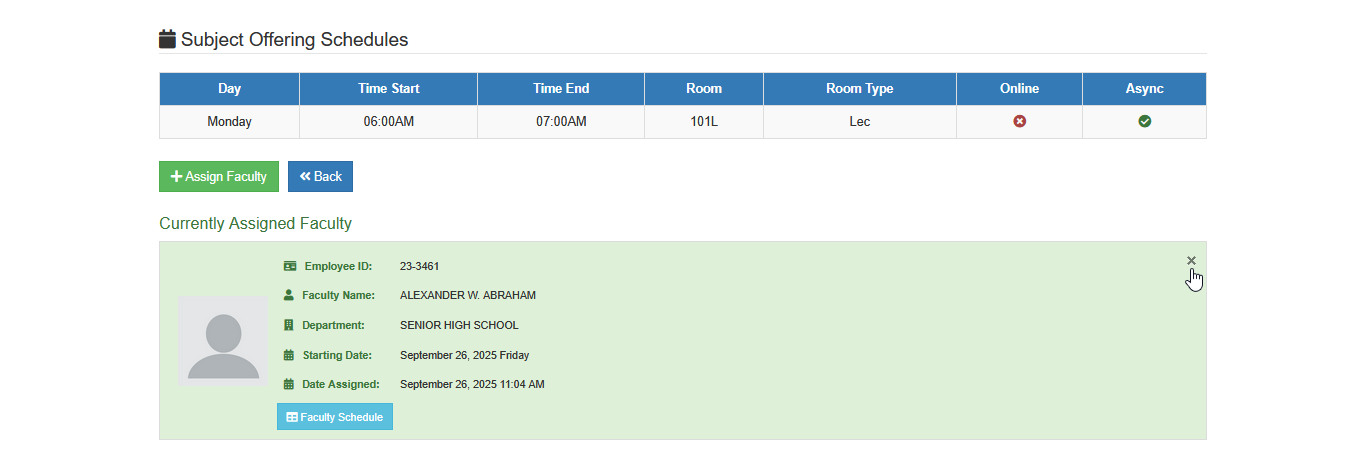
STEP 2. In the Assign Faculty page, scroll down to assigned faculty information. Click the remove X button on the faculty information. The Remove Faculty prompt will appear.
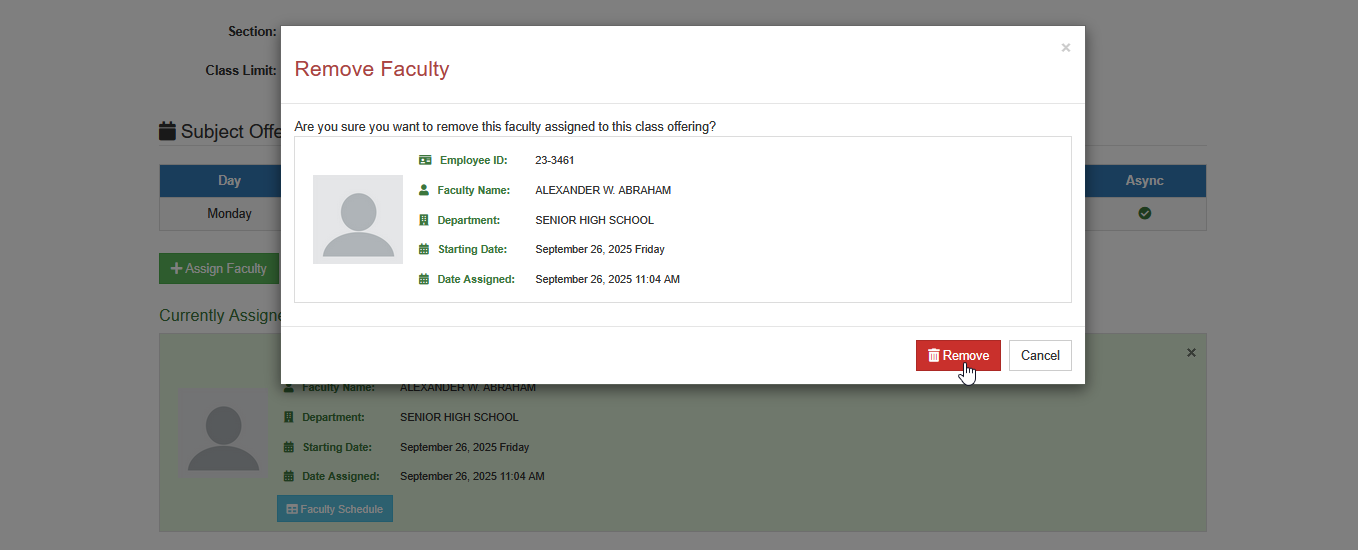
STEP 3. Confirm the action in the prompt to unassign the faculty member from the subject offering by clicking the button.
View or Download Class List
This feature lets you access the list of students enrolled or registered in a subject offering. You can view the class list directly in the system or download it in a file format (such as Excel or PDF) for reporting, printing, or recordkeeping purposes.
Follow the steps below on how to view or download the list.
STEP 1. On the Class Schedules page, locate the subject offering you want to check.
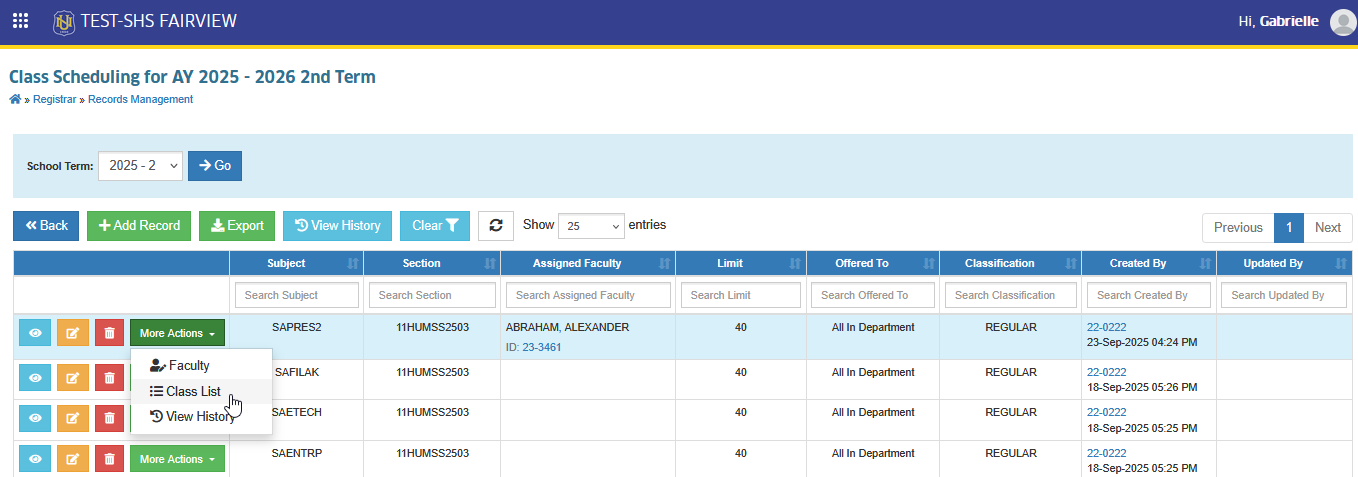
STEP 2. Click the button, then select the button. You will be redirected to the View Official Classlist page.
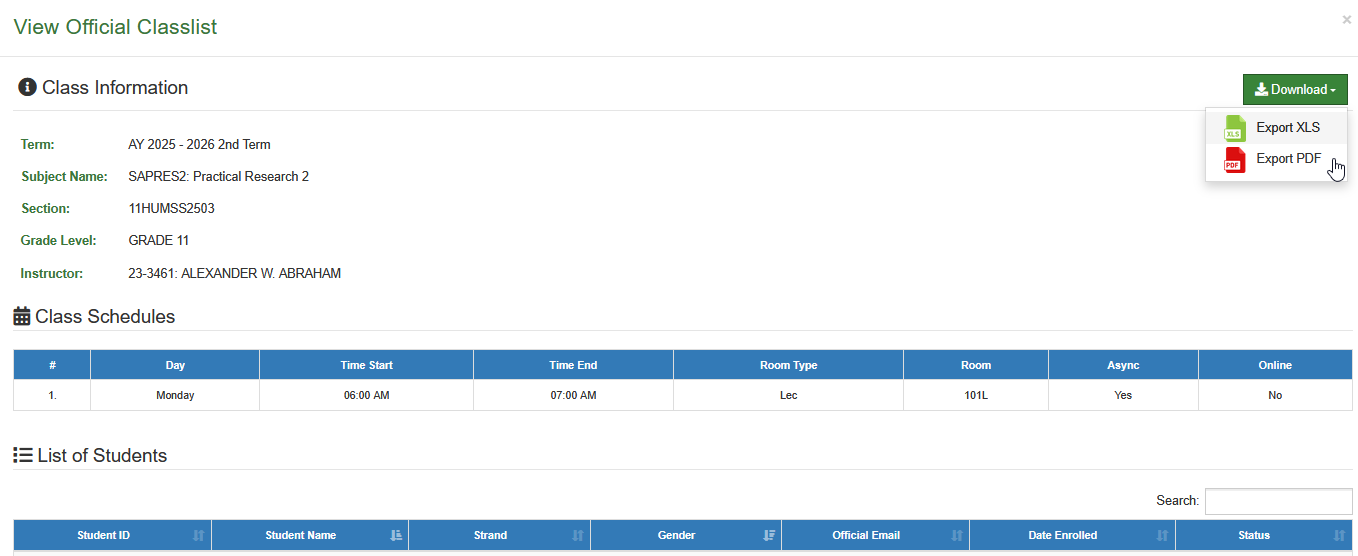
STEP 3. If you need a copy, click the button and choose your preferred format (Excel or PDF).
View Log History of Class Record
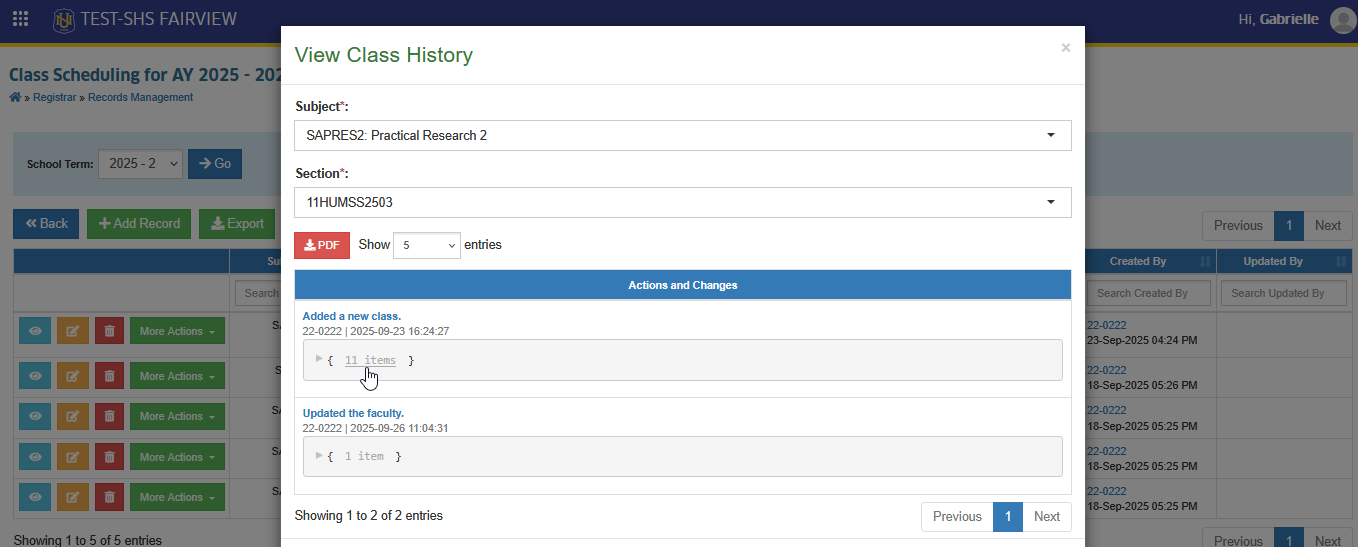
This feature allows you to track all changes made to a subject offering. The log history shows details such as the type of update, the date and time it was made, and the user who performed the action. This helps maintain transparency and ensures accurate recordkeeping.
Follow the steps below oh how to check the subject's log history.
STEP 1. On the Class Schedules page, locate the subject offering you want to review.
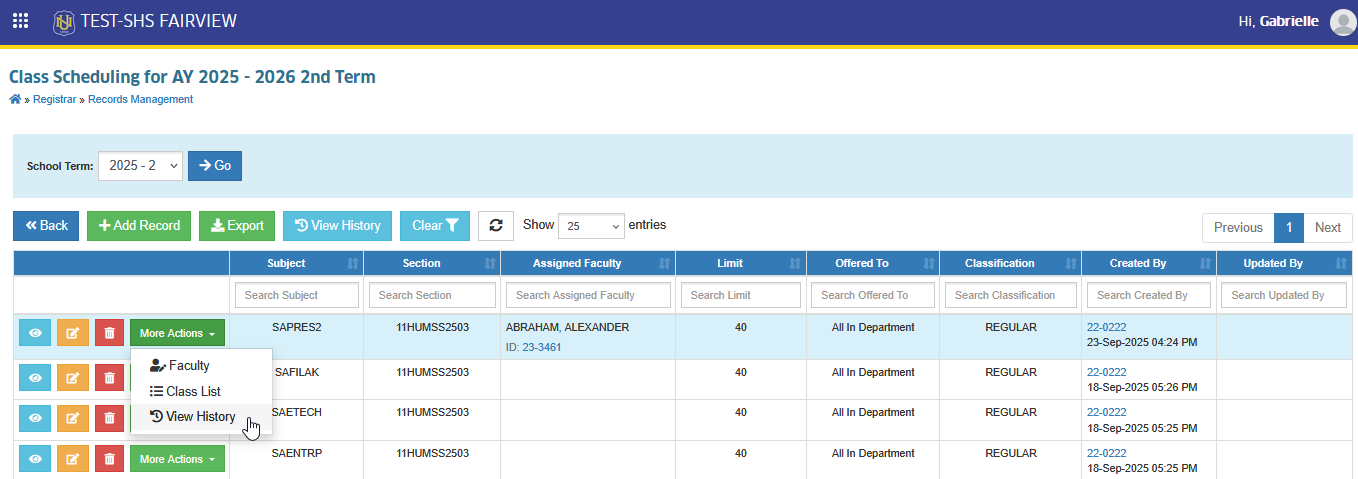
STEP 2. Click the button, then select the button. The View Class History prompt will appear.
STEP 3. In the View Class History prompt, the system will display a detailed record of changes made to the class offering, including the date, time, and user who made the updates. Click on an item to view its details.
For more questions or concerns, email us at nu-desk@national-u.edu.ph