Manage Subjects
This module allows the user to create and manage academic subjects, including their codes, names, descriptions, categories, and computation rules. Subjects may also be grouped or paired depending on the curriculum design.
Module Features
- Create and manage subject records.
- Define subject codes, names, descriptions, and categories.
- Specify GPA computation flag to determine inclusion in grading.
- Organize subjects into groups and pairs for cluster-based or strand-based curricula.
- Set subject priorities for ordered display in documents and forms.
- Activate or deactivate subject records without deleting them.
Required Permissions
- Add Subject – Allows the user to create new subject records with all required fields.
- Edit Subject – Allows the user to update subject details such as name, code, category, GPA flag, and grouping.
- Delete Subject – Allows the user to remove an existing subject record.
- View Subject – Allows the user to view subject details without the ability to edit or delete.
A subject can only be deleted if it is not referenced by other records such as curricula, classes, or student grades.
How to access the module
To access the module, make sure you have the View Subject permission in NUIS-SHS.
- Navigate to Registrar > Records Management > Subjects.
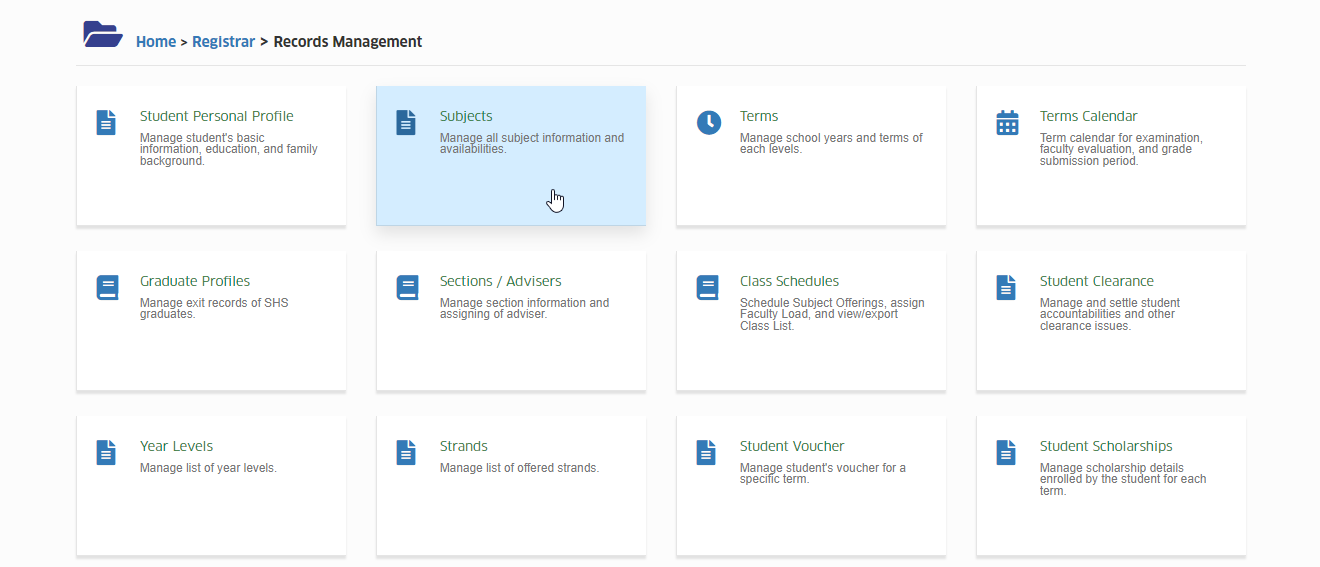
- Click the module tab to redirect to Manage Subjects page.
Required Fields
| Field Name | Description | Required |
|---|---|---|
| Subject Code | Unique code identifier for the subject (e.g., ENG101, MATH201). | Yes |
| Subject Name | Official name of the subject (e.g., Effective Communication 1, General Mathematics 1). | Yes |
| Subject Description | Brief description or overview of the subject’s coverage. | Yes |
| Category | Defines the type of subject (e.g., Core, Elective, Applied, Specialized). | Yes |
| Compute GPA | Indicates if the subject should be included in GPA computation. Select Yes or No. | Yes |
| Is Active | Flag to mark the subject as Active or Inactive. Inactive subjects cannot be assigned to new curricula but remain in records. | Yes |
| No. of Hours | Total contact hours for the subject within the term. | Yes |
| Subject Group | Group identifier used for cluster-based curricula, where subjects span across multiple terms but need to be grouped together. | No |
| Subject Pair | Links subjects within the same term for component-based grading. Their grades are averaged first before inclusion in GPA or final computation. | No |
| Priority | Defines the order of subjects in forms and documents. Higher values indicate higher priority in display and listing. | No |
How to Add Subject Record
To add a new subject record in the system, follow the steps below:
STEP 1. Access the Subjects module via Registrar > Records Management > Subjects. User will be redirected to Manage Subjects page.
STEP 2. Click the Add Subject option under button to begin creating a new subject record.
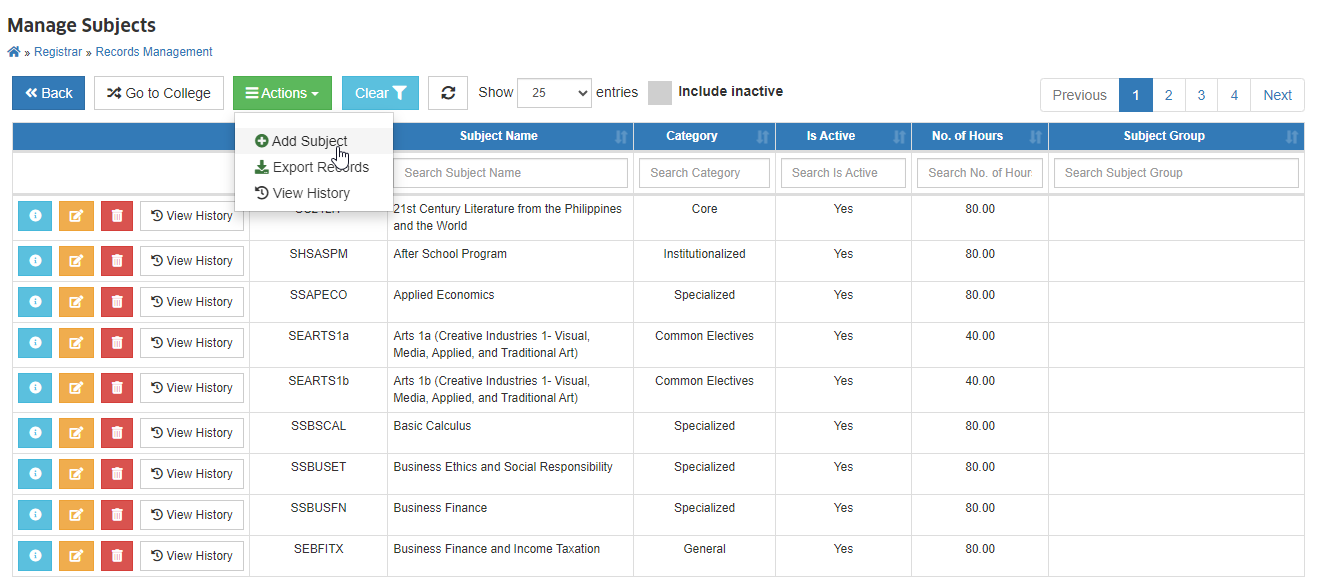
STEP 3. Fill in all the required fields. See the Required Fields section for reference.
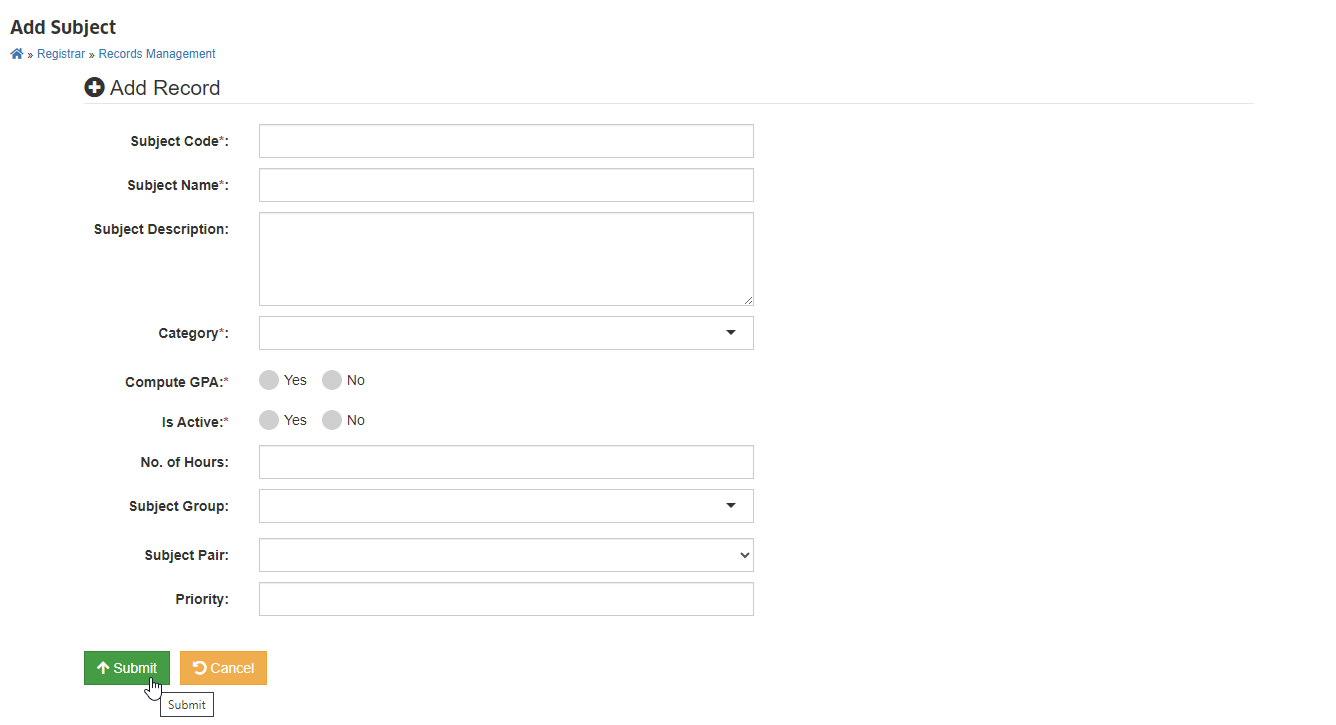
STEP 4. Double-check all information and click the button to save the record.
New subject record has been successfully added.
How to Edit Subject
Follow the steps below to modify subject details:
STEP 1. In Manage Subjects page, click the corresponding button of the record you want to modify.
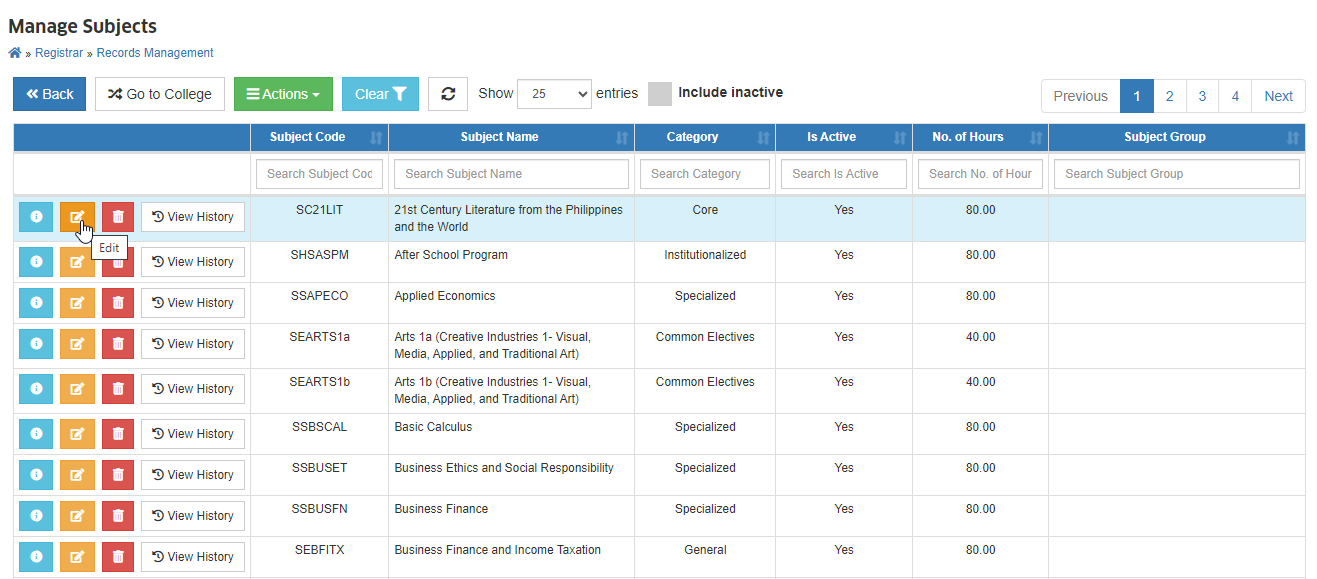
STEP 2. Update the subject information as needed.
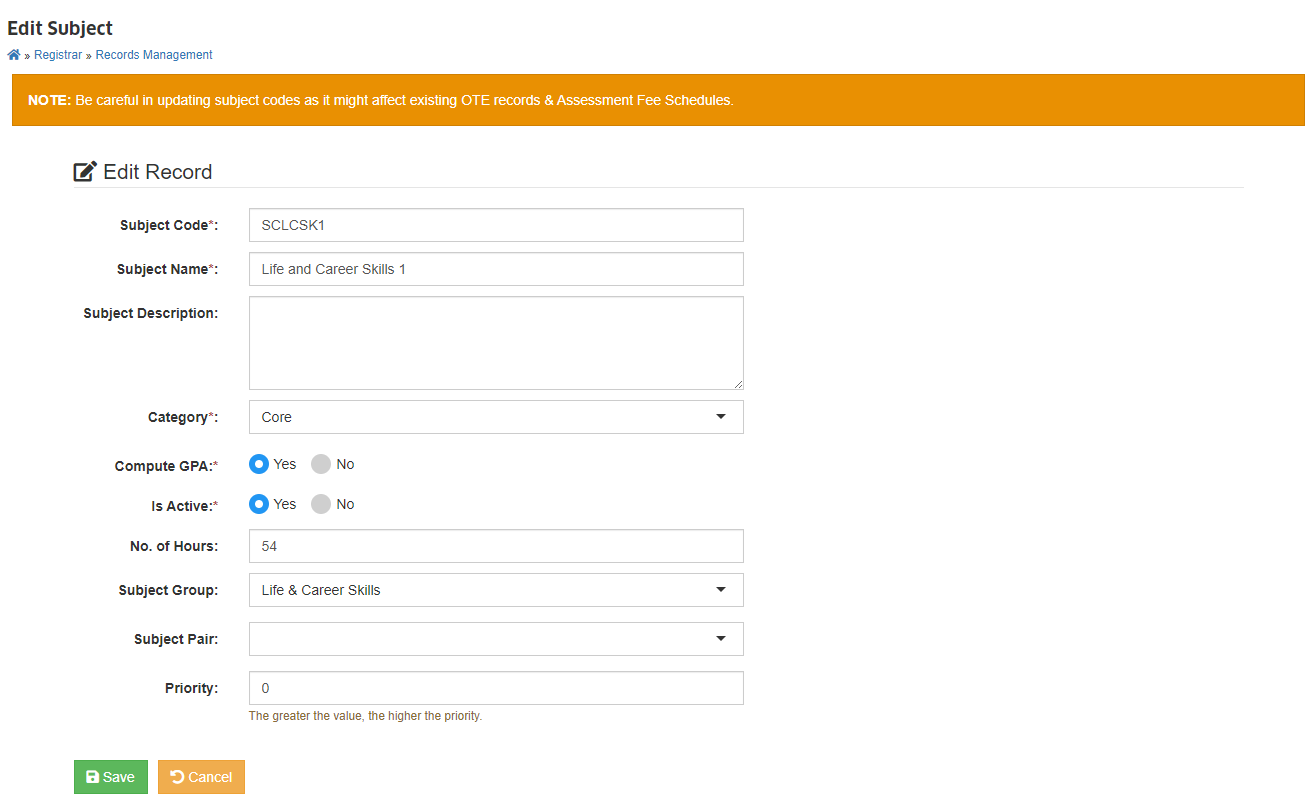
STEP 3. Review all modifications for accuracy and click the button to apply your changes.
Be careful in updating subject codes as it might affect existing OTE records & Assessment Fee Schedules.
We recommend minimizing changes to subject records once they are linked to curricula or student records to preserve data integrity.
How to Delete Subject
Follow the steps below to remove a subject record:
STEP 1. In Manage Subjects page, click the corresponding button of the subject record.
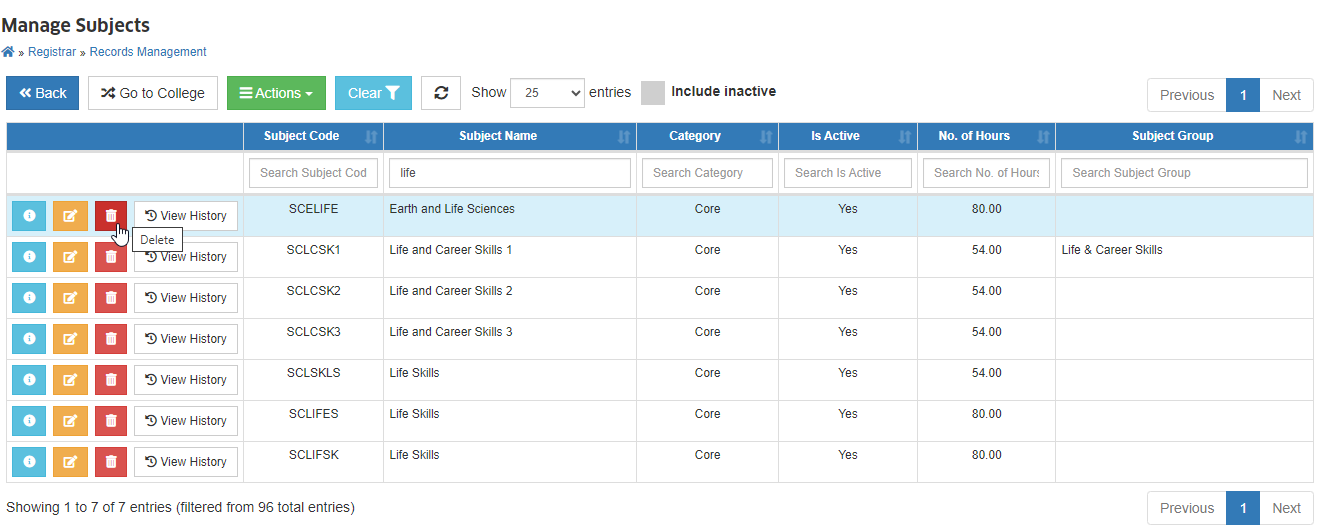
STEP 2. Confirm the deletion by clicking the button.
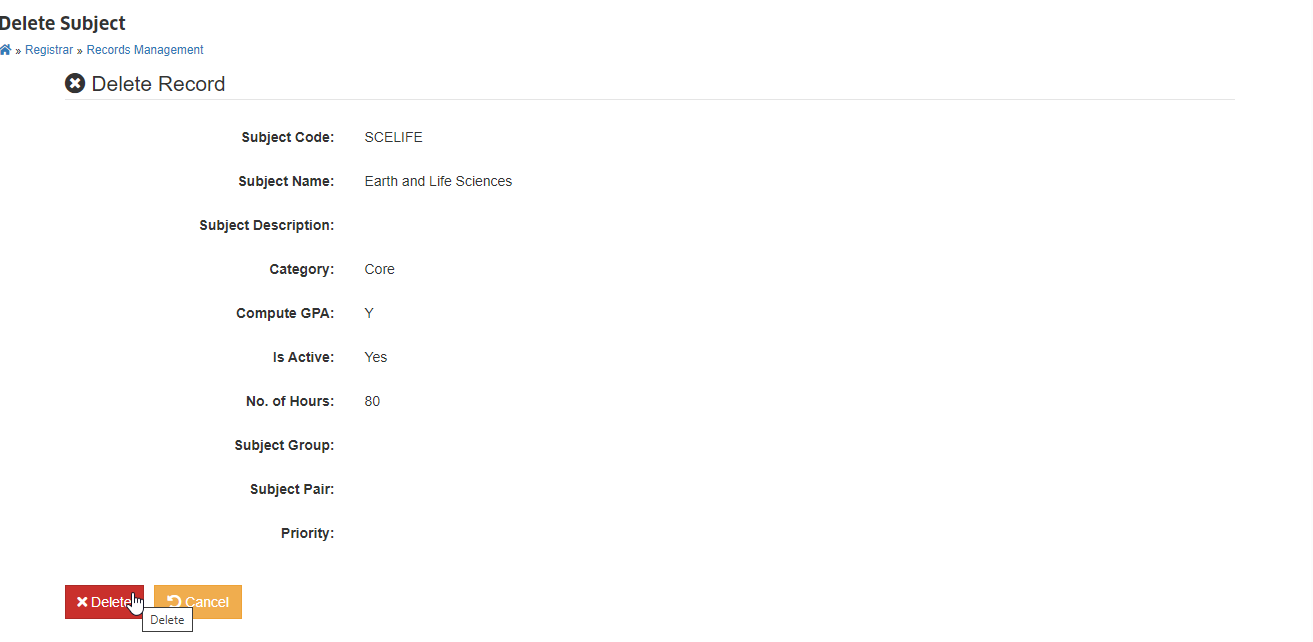
- Deleting a subject is irreversible.
- Deletion is only allowed if the subject is not referenced by other records (e.g., curricula, schedules, student grades).
- For inactive or obsolete subjects, it is recommended to use the Is Active flag instead of deletion.
How to Export Subjects
The system provides an option to export the list of subjects for backup, reporting, or offline reference. Exported data is available in CSV Format.
Follow the steps below to export subject records:
STEP 1. In the Manage Subjects page, locate the Export Records option under button.
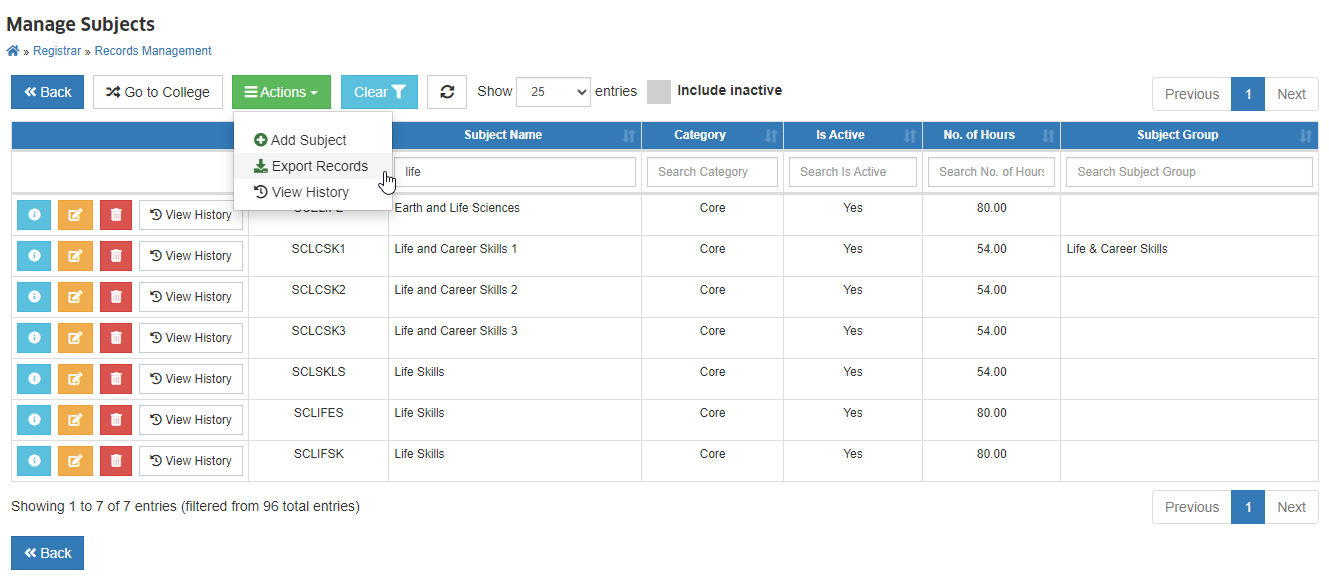
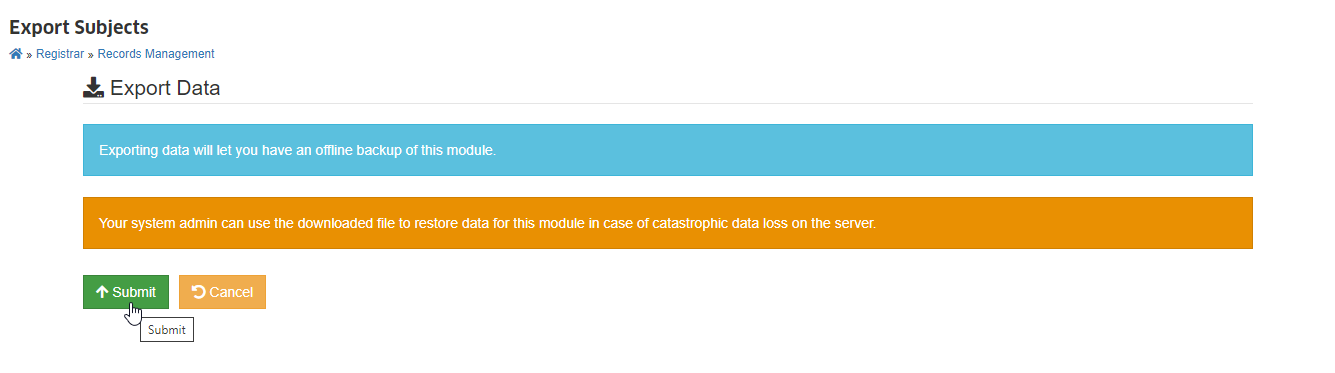
STEP 2. In the Export Subjects page, click the button to begin generating the data for export.
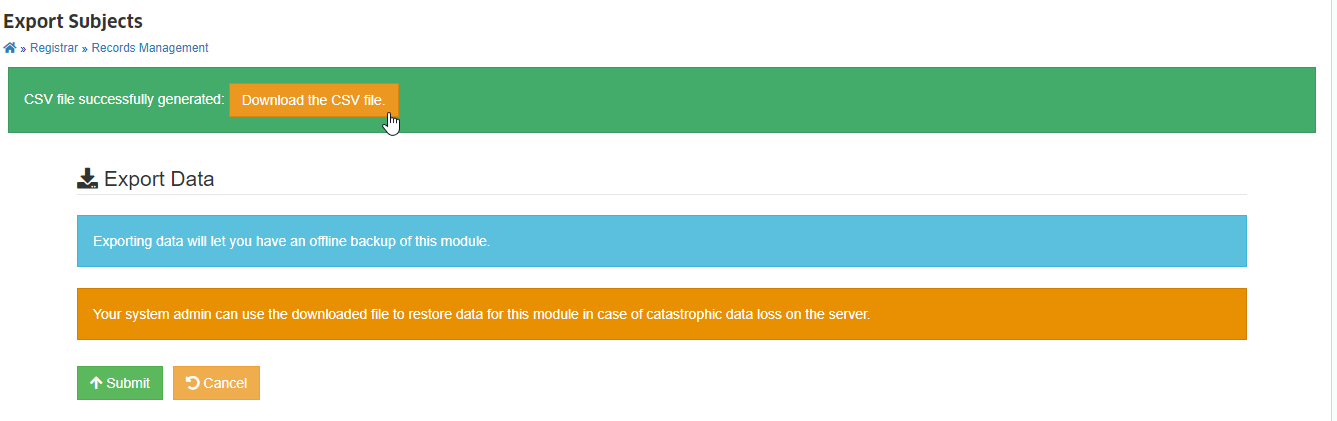
STEP 3. The system will generate and download the subject list. Click the to export the file for offline backups.
- Exported subject data includes all the fields such as subject code, name, description, category, hours, GPA flag, and grouping information.
- For consistency, ensure your subject list is updated before exporting to avoid outdated records.