Sections / Advisers
The Sections / Advisers module is used to manage SHS sections information and to assign advisers to them. Through this module, student groups are kept organized and each section is ensured to have the appropriate faculty adviser.
What You Can Do in This Module
-
Add and update sections - Create new SHS sections and edit their details when needed.
-
View list of sections - See all available sections for SHS in one place.
-
Assign adviser - Assign a faculty member to a specific section.
-
Remove sections or adviser assignments - Clean up outdated or unused entries.
-
Mass enrolling students - Students included in a section for the 1st term can be mass enrolled into the same section for the 2nd and 3rd terms.
-
Resection of Students - Students can be reassigned from one section to another when resectioning is required.
Required Permissions
-
Add Section - This permissions is required so new SHS sections can be created in the module.
-
Delete Section - THis permission is required so existing sections can be removed when they are no longer needed.
-
Edit Section - This permission is required so the details of an existing section can be updated or modified.
-
Mass Enrollment - This permission is required so students from a 1st term section can be mass enrolled into the same section for the 2nd and 3rd terms. It also allows the resection of students into another section when needed.
-
View Section - This permission is required so the list of sections and their assigned advisers can be accessed.
How to Access the Module
To access the module, make sure you have the View Section permission. If it doesn’t appear in your portal, request access from your System Administrator.
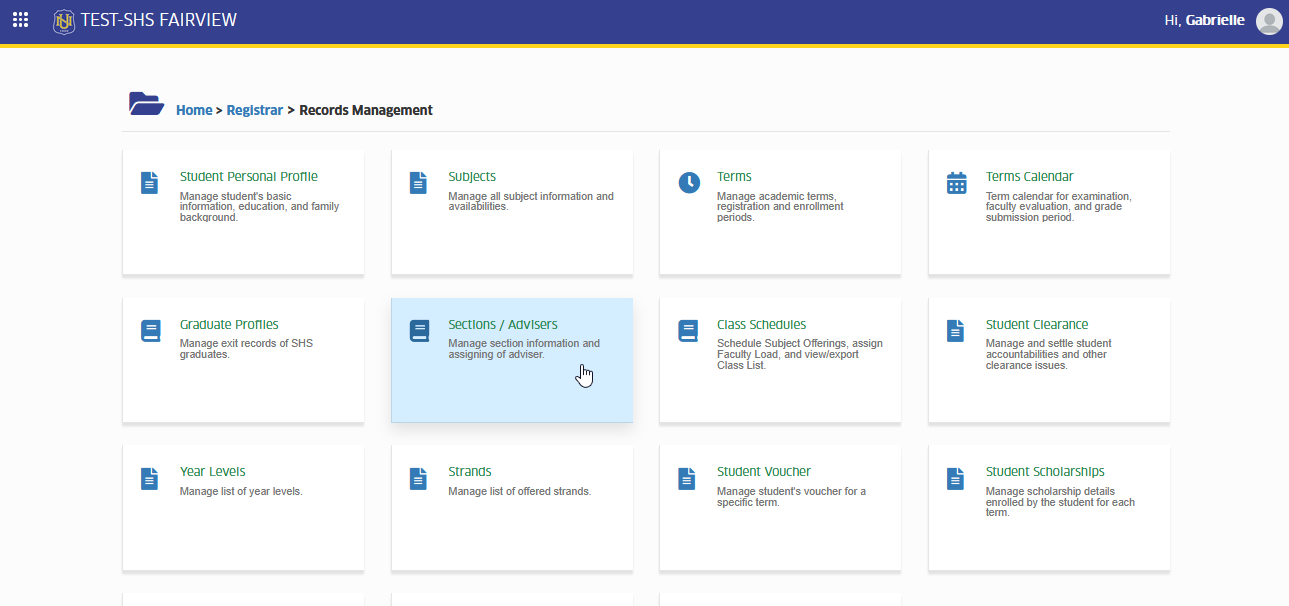
Go to Registrar > Records Management > Sections / Advisers. Click the module tab to redirect to Manage Sections page.
How to Use the Module?
This section provides the step-by-step procedures for performing different tasks in the module, such as viewing, adding, editing or removing sections, assigning advisers and mass enrolling students.
How to Add a section
This section explains the steps to create a new SHS section in the Section / Advisers module.
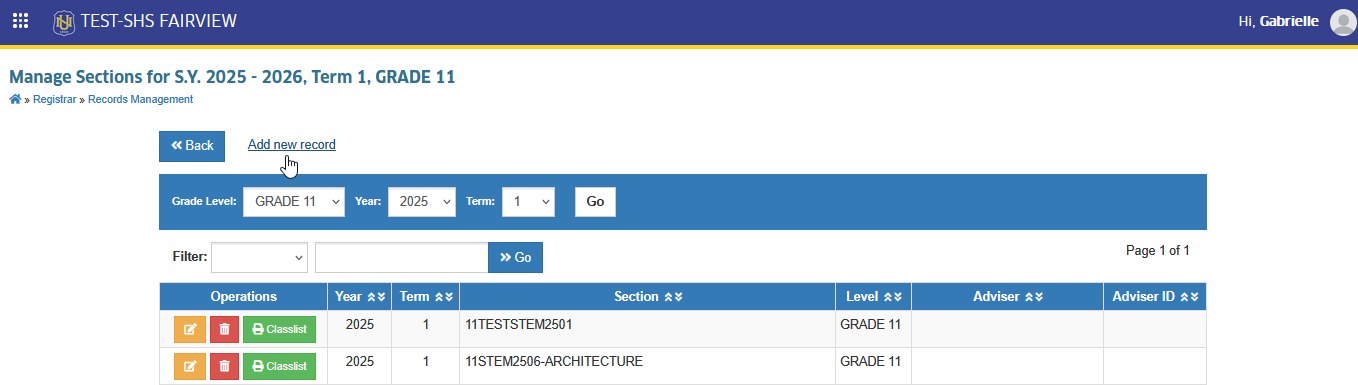
STEP 1. In Manage Section page, click the button. You will be redirected to Add Section page.
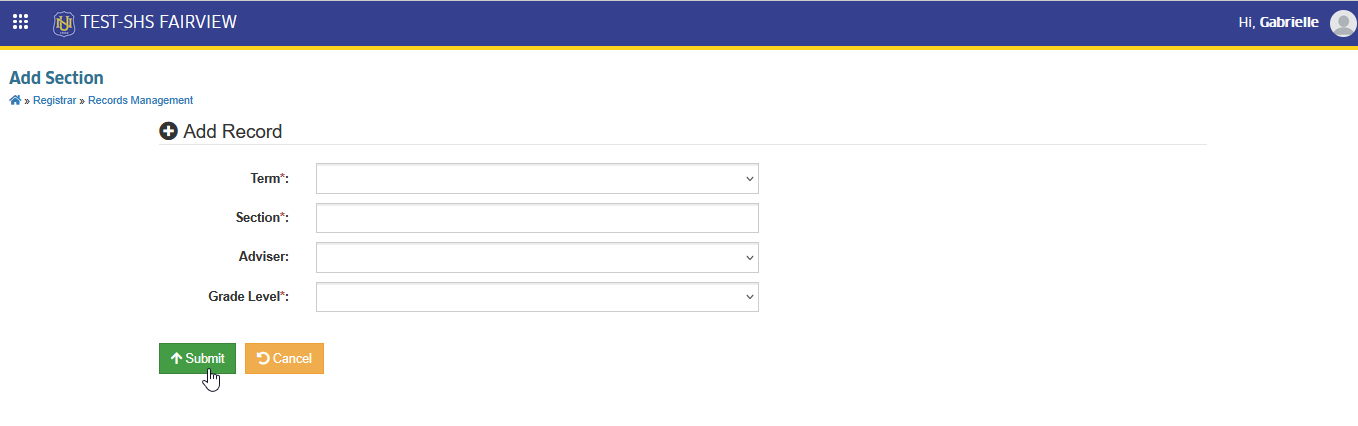
STEP 2. Enter all the required information on the page.
STEP 3. Click the button to save the new section.
How to Assign an Adviser
This section explains how a faculty member can be assigned as an adviser to a section.
An adviser may already be assigned when a section is created, since an optional field for adviser is included in the Add Section page. If an adviser has not yet been decided during the creation of the section, the following steps can be performed to assign one afterward:
STEP 1. On the Manage Sections page, click the button of the section you want to manage. You will be redirected to Edit Section page.
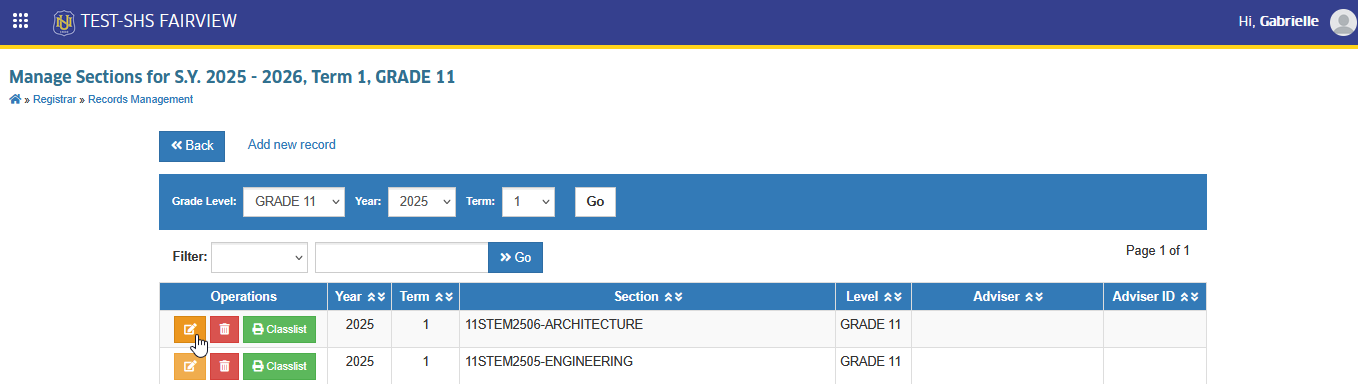
STEP 2. On the Edit Section page, assign the adviser by selecting a faculty member from the dropdown list in the Adviser field.
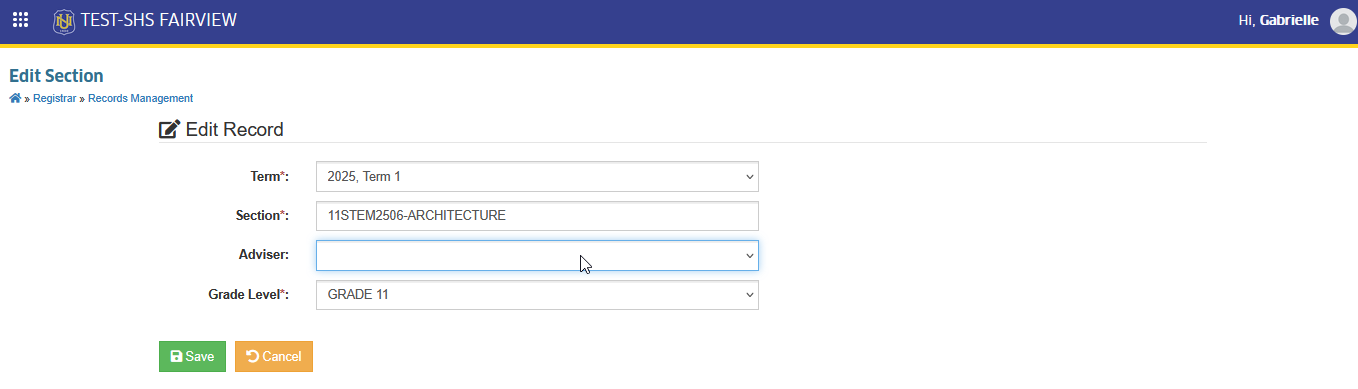
STEP 3. Once the adviser is selected, click the button to save the updates.
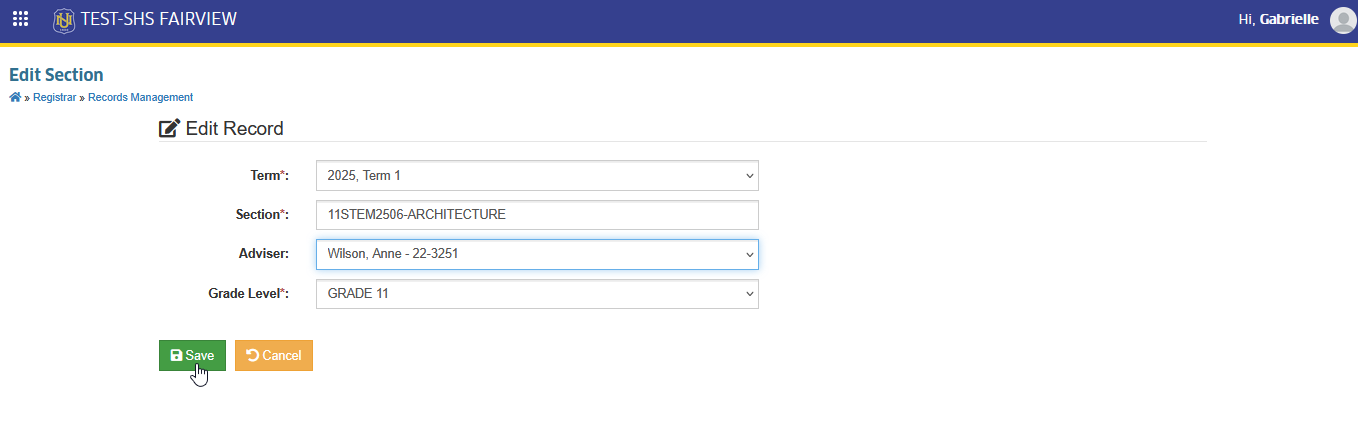
How to Edit Section Information
This section explains how details of a section or its assigned adviser can be updated.
STEP 1. On the Manage Sections page, click the button of the section you want to manage. You will be redirected to Edit Section page.
STEP 2. On the Edit Section page, update the necessary fields as needed.
STEP 3. Once the record has been modified, click the button to apply and save the updates.
How to Remove a Section
This section explains the steps for deleting an existing section from the system.
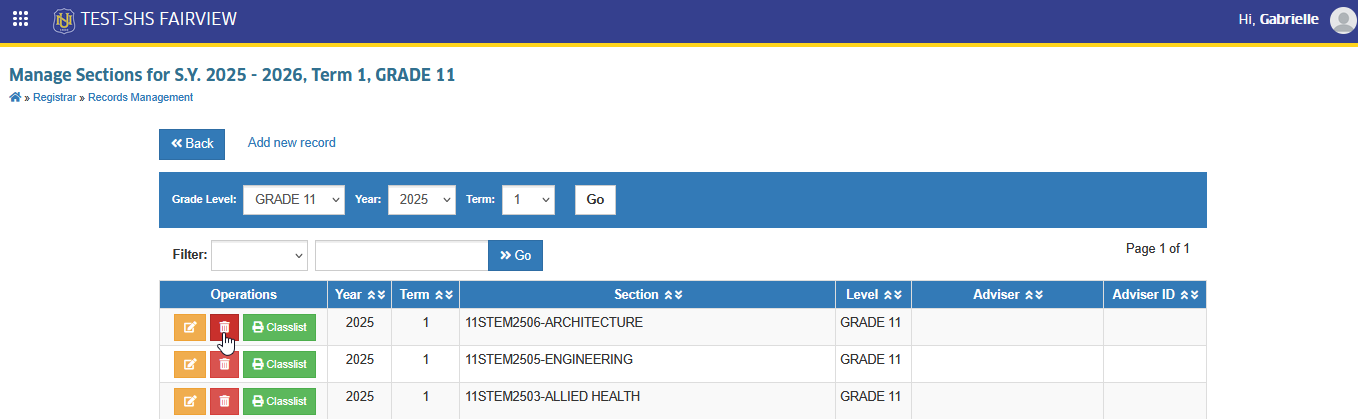
STEP 1. On the Manage Sections page, click the button of the section you want to remove. You will be redirected to Delete Section page.
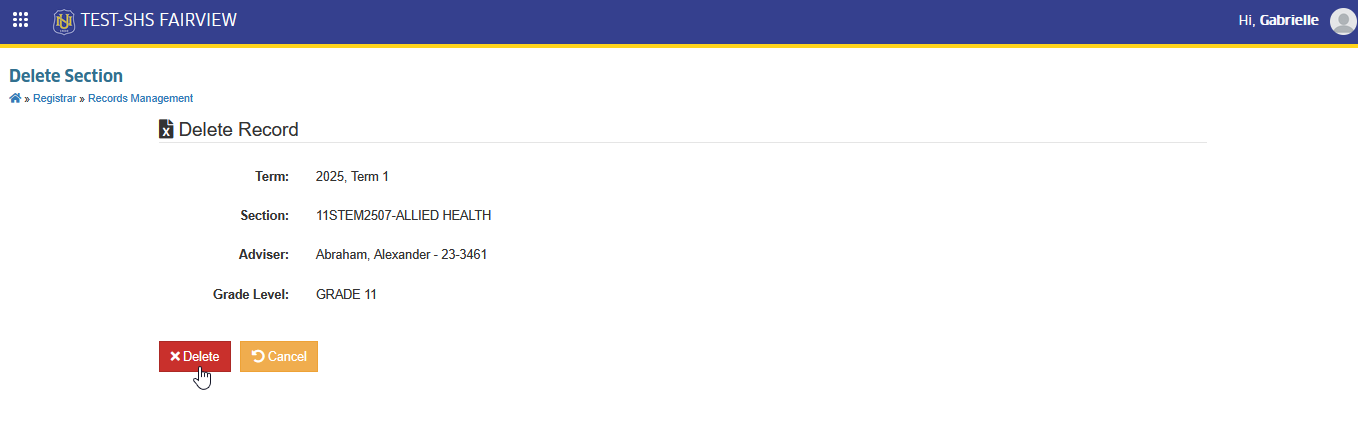
STEP 2 On the Delete Section page, click the button to confirm the deletion.
Mass Enrolling Students
This section explains how students from a 1st term section can be mass enrolled into sections for the 2nd and 3rd terms. Students may be enrolled either into newly created sections or into the same sections carried over from the previous term.
The Mass Enrollment feature is available during the 2nd and 3rd terms only.
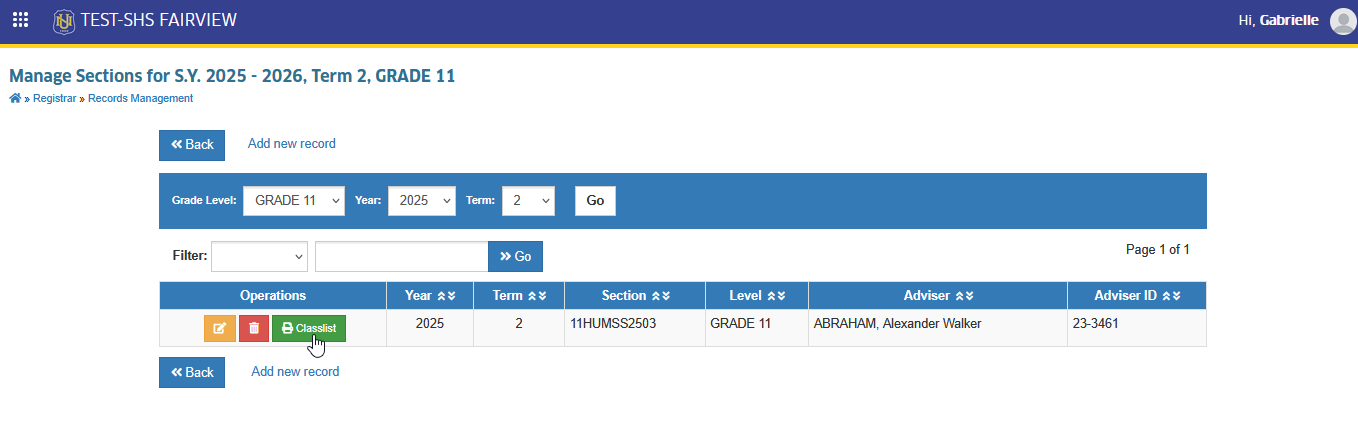
STEP 1. On the Manage Sections page, click the button of the section you want to manage. You will be redirected to Section's Information page.
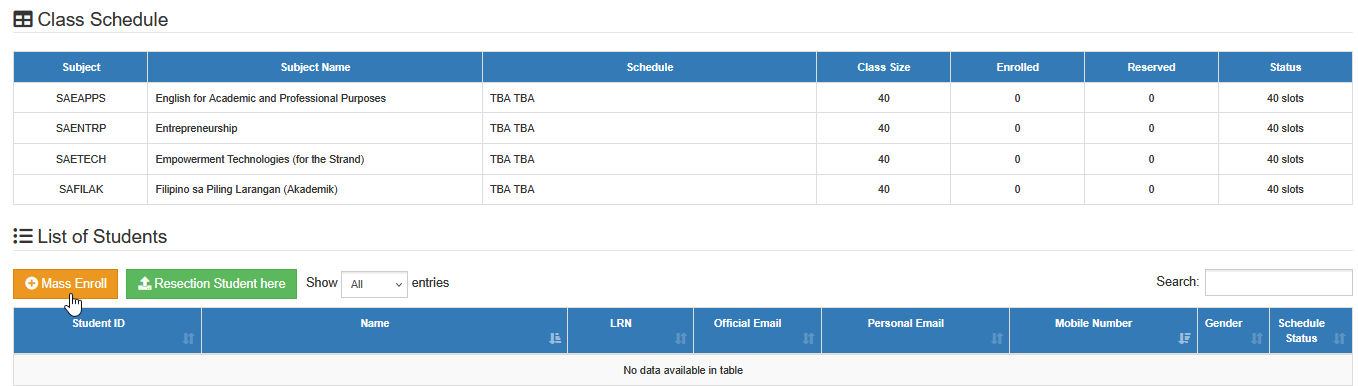
STEP 2. On the Section's Information page, scroll down to List of Students section. Click the button. Mass Enrollment promt will appear.
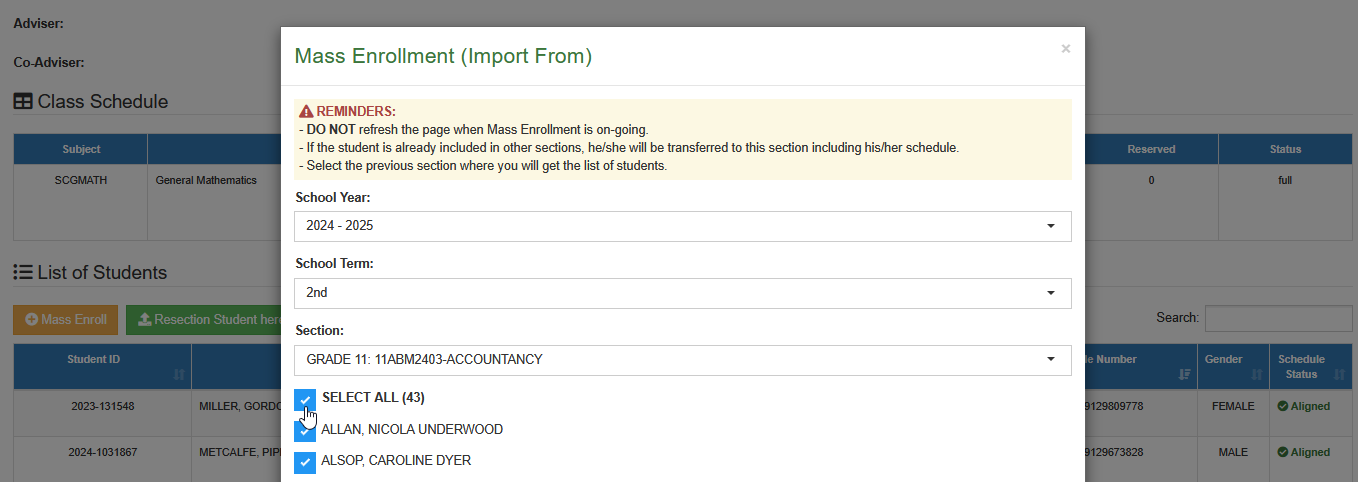
STEP 3. In the Mass Enrollment prompt, specify the Year, Term, and Section that will serve as the source of the classlist. Select specific students to include, or choose all students from the source section for mass enrollment.
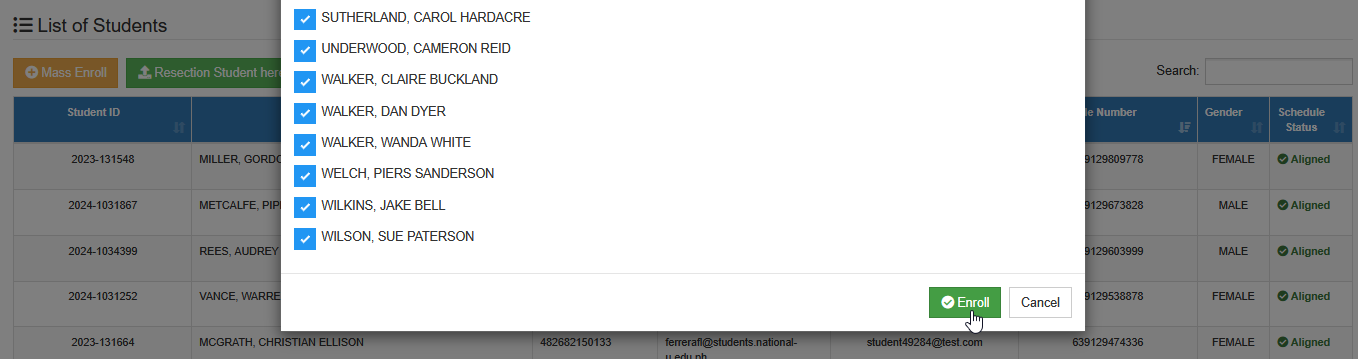
STEP 4. Once the details are set, click the button to complete the process.
-
DO NOT refresh the page when Mass Enrollment is on-going.
-
If the student is already included in other sections, he/she will be transferred to the new section including his/her schedule.
-
Select the previous section where you will get the list of students.
Resection of Students
This section explains how a student can be reassigned from one section to another.
STEP 1. In Manage Section page, open the section you want to manage by clicking the button
STEP 2. In the Section Information page, click the button. The Resection a Student prompt will appear.
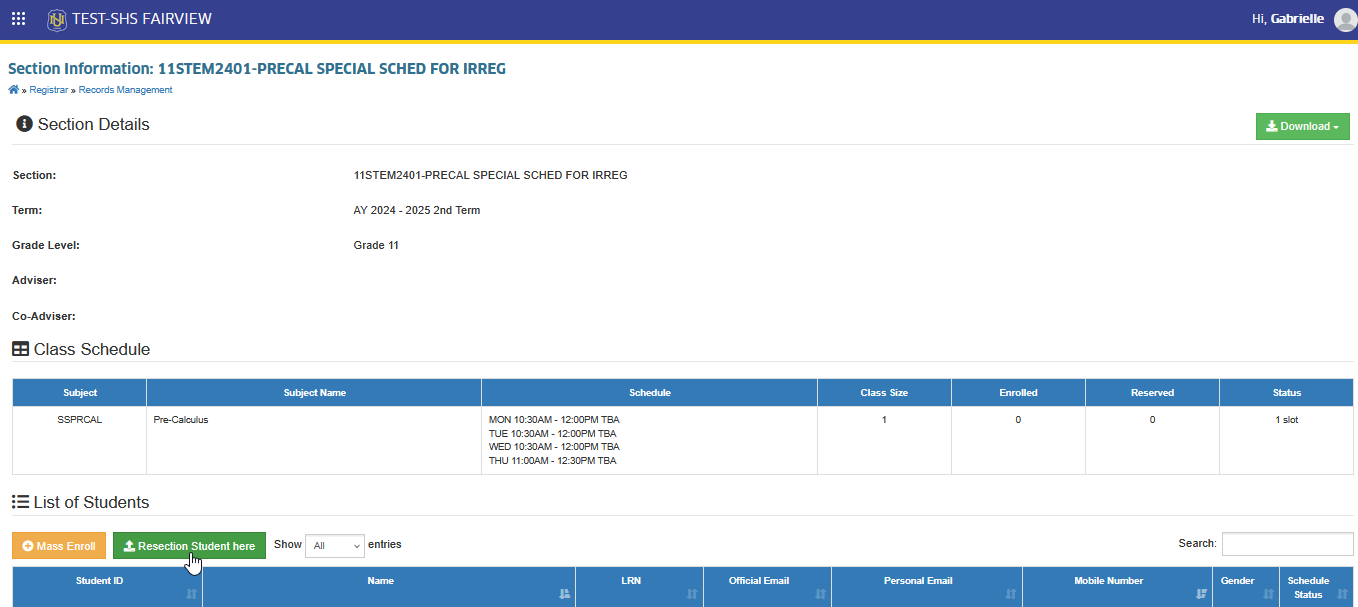
STEP 3. In the Resection a Student prompt, select the curriculum and section of the student(s) to be transferred into the new section.
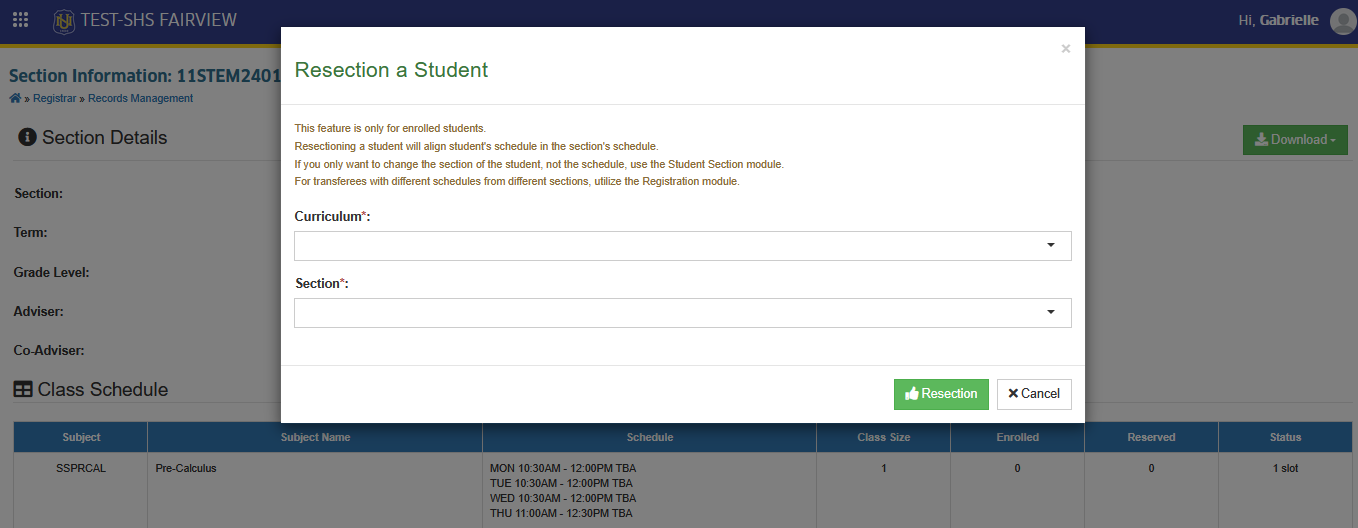
STEP 4. Click the button to proceed. Once this action is taken, the selected students will be moved to the new section and aligned with that section's schedules.

-
Resection Feature is for enrolled students only.
-
Resectioning a student will align student's schedule in the section's schedule.
-
If you only want to change the section of the student, not the schedule, use the Student Section module.
-
For transferees with different schedules from different sections, utilize the Registration module.
For more questions or concerns, email us at nu-desk@national-u.edu.ph