Courses
The Courses module is used by the Registrar Personnel to manage all course information in the system.
This is where you can create, update, and organize course details, as well as control the program offering status. Keeping this module updated ensures that enrollment, scheduling, and academic records are accurate.
Required Permission
Add Course - Allows the user to create and register a new course in the system.
Delete Course - Allows the user to permanently remove a course record from the system.
Edit Course - Allows the user to modify or update existing course information.
View Course - Allows the user to view and search course records in the system.
How to Access the Module
To access the module, make sure you have the View Course permission. If it doesn’t appear in your portal, request access from your System Administrator.
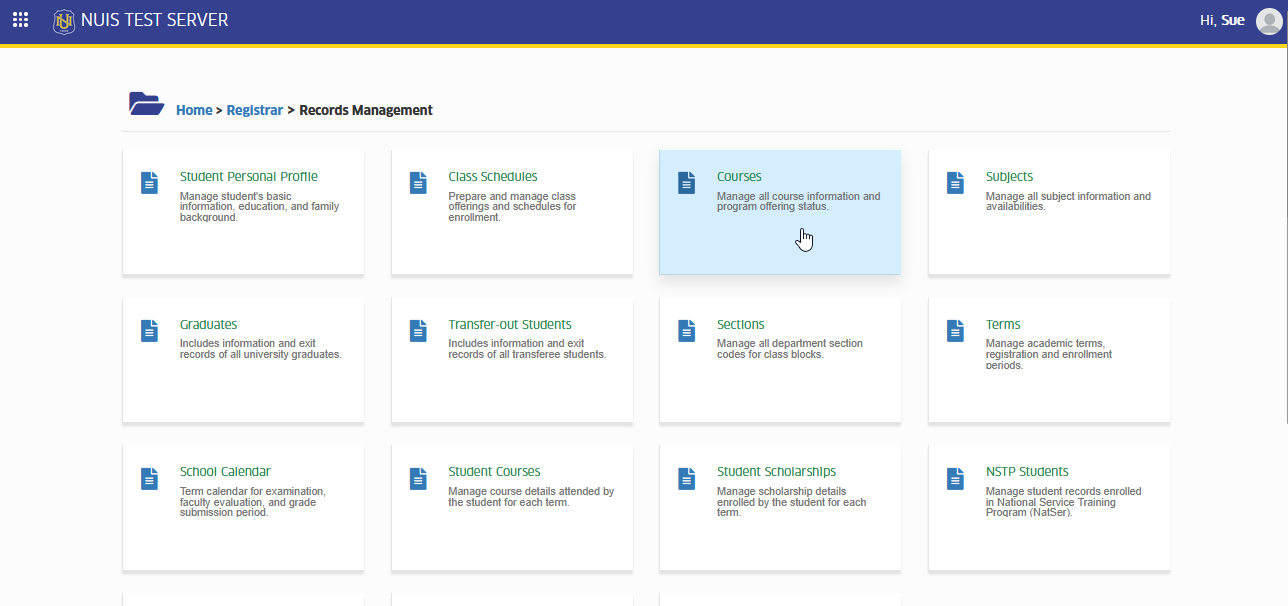
In NUIS portal, go to Registrar > Records Management > Courses. Click the module tab to redirect to the Courses list view page.
How to Use the Course Module
This section guides you on how to manage course information in the system.
Through this module, you can add, update, view, or remove course records as needed. Make sure all course details are accurate before saving, since this information may be used in enrollment, student records, and reports.
Follow the step-by-step instructions below to perform each task correctly.
Add a New Course
Follow the steps below to add new course record.
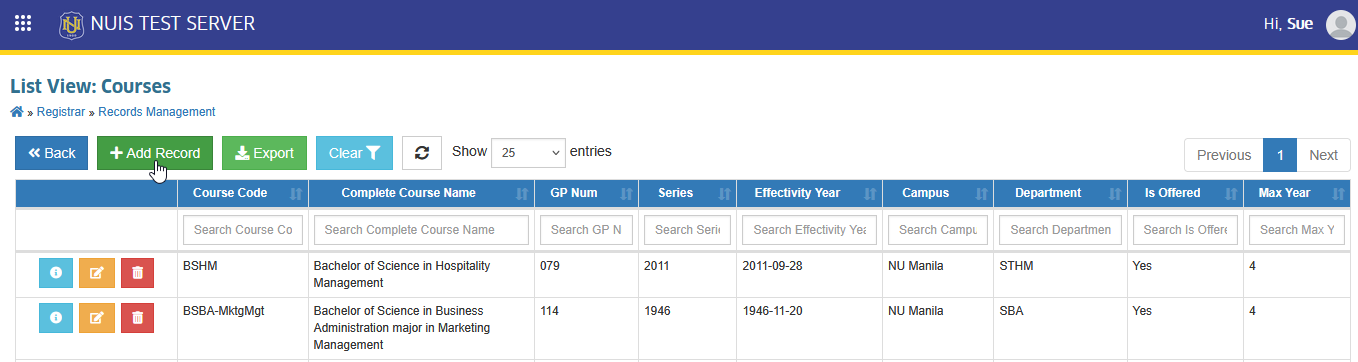
STEP 1. On the Courses list view page, locate and click the button. The system will redirect to the Add Course page.
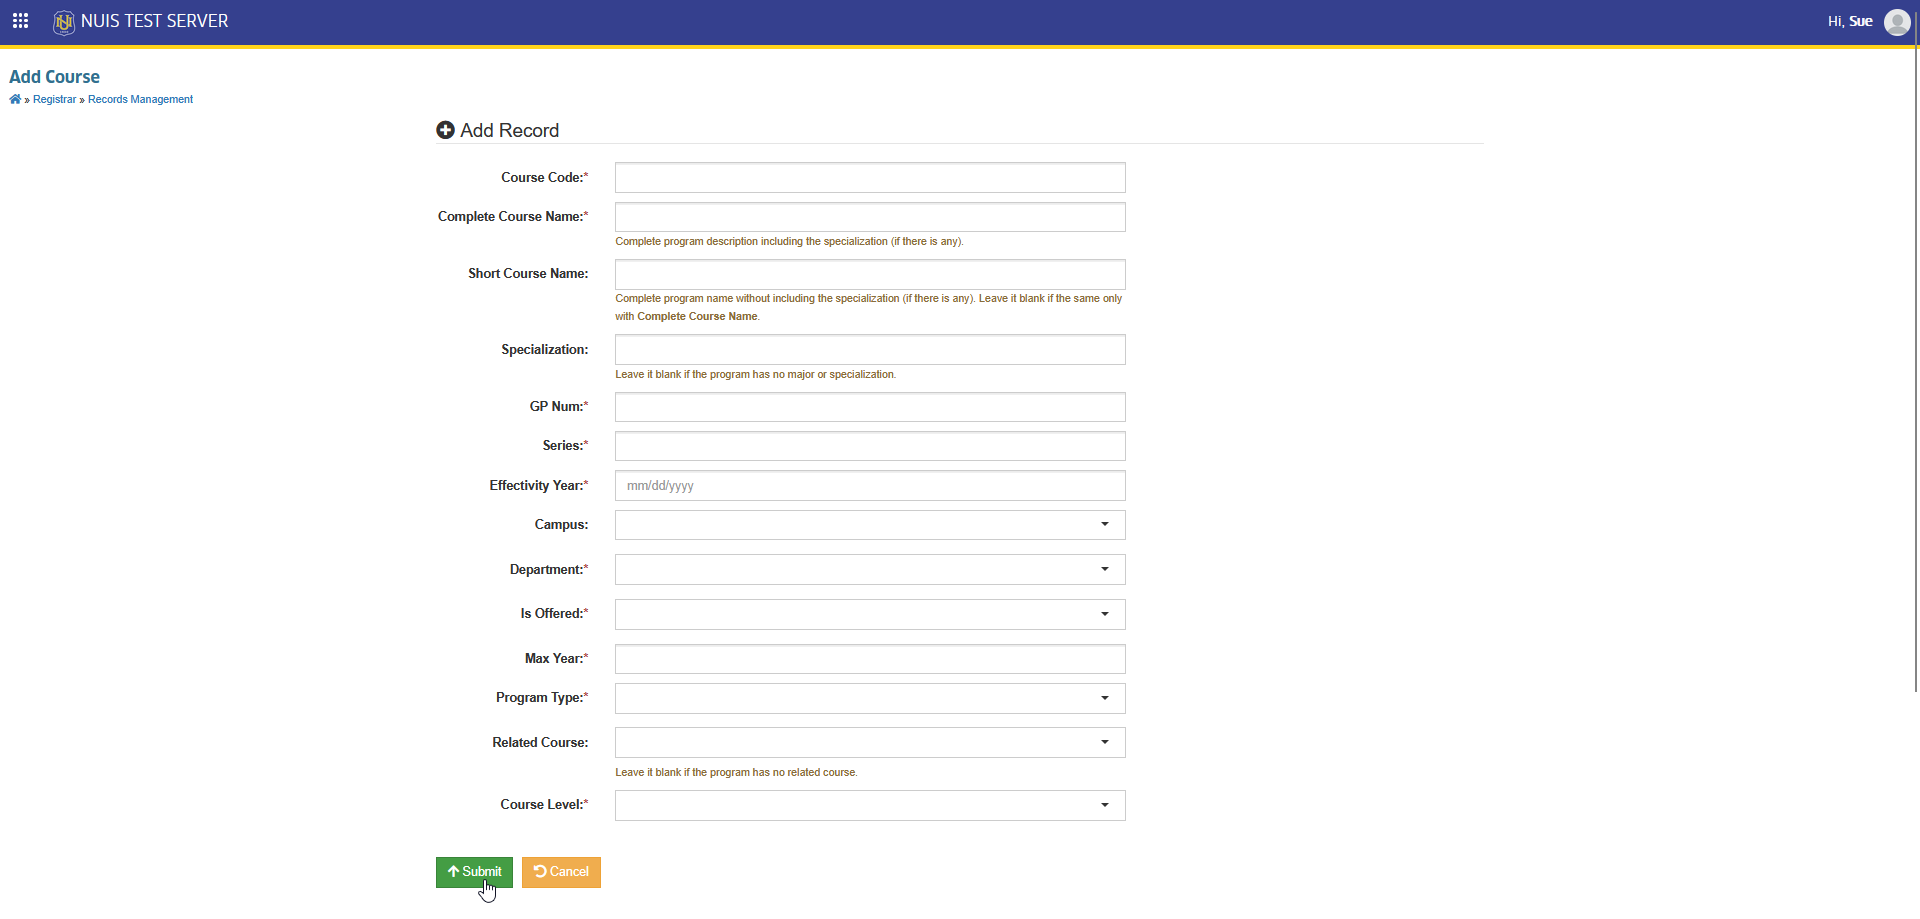
STEP 2. Fill out the required information on the Add Course page.
| Field Name | Description | Is Required |
|---|---|---|
| Course Code | Enter the official course code assigned to the program. Follow the approved institutional format. | Yes |
| Complete Course Name | Enter the full program name, including specialization or major (if any). | Yes |
| Short Course Name | Enter the complete program name without the specialization. Leave blank if it is the same as the Complete Course Name. | No |
| Specialization | Enter the major or specialization of the program. Leave blank if none. | No |
| GP Num (Government Permit Number) | Enter the official Government Permit number issued for the program. | Yes |
| Series | Enter the series or batch number associated with the Government Permit. | Yes |
| Effectivity Year | Enter the year when the program became officially effective or implemented. | Yes |
| Campus | Select the campus where the program is offered from the dropdown list. | No |
| Department | Select the department that owns or manages the program from the dropdown list. | Yes |
| Is Offered | Indicate whether the program is currently offered. This controls availability in the system. | Yes |
| Max Year | Enter the maximum number of years required to complete the program. | Yes |
| Program Type | Select the program classification from the dropdown (Degree or Title). | Yes |
| Related Course | Select the related course from the dropdown list. Leave blank if not applicable. | No |
| Course Level | Select the course level from the dropdown (Undergraduate, Certificate, Post Graduate, Title). | Yes |
STEP 3. Once completed, click the button to submit and save the new record.
Edit Course Information
Follow the steps below to edit course record
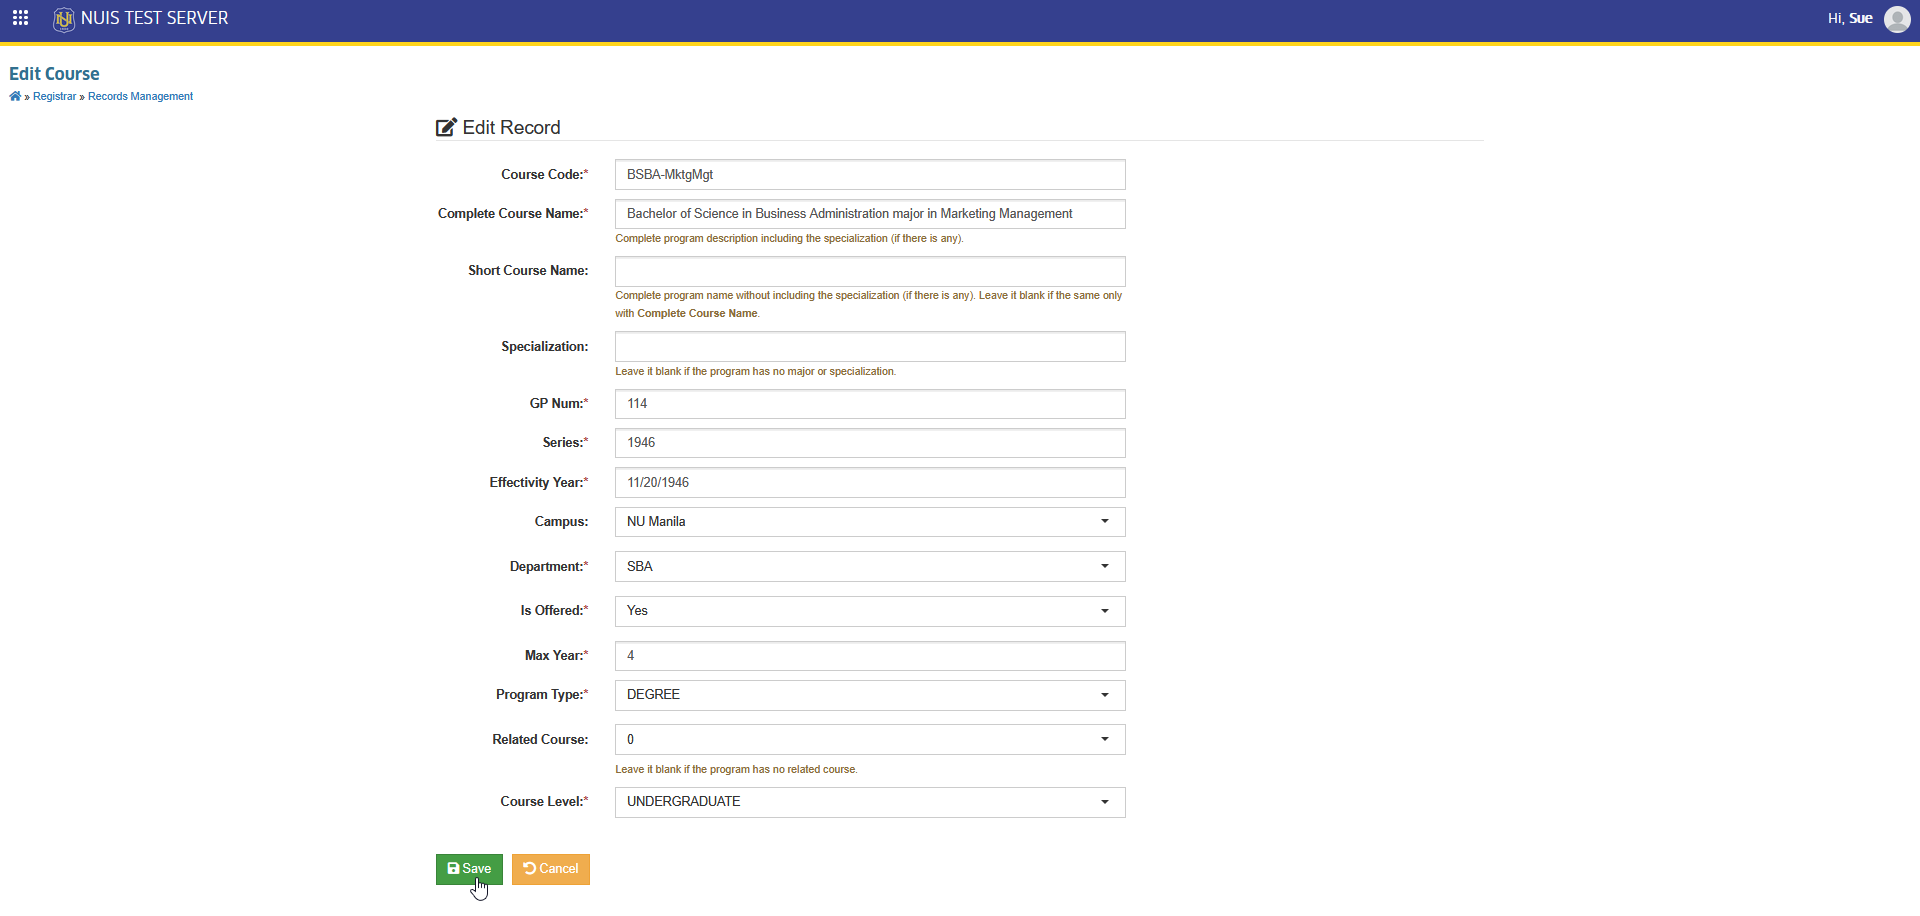
STEP 1. On the Courses list view page, click the corresponding button of the record to be modified.
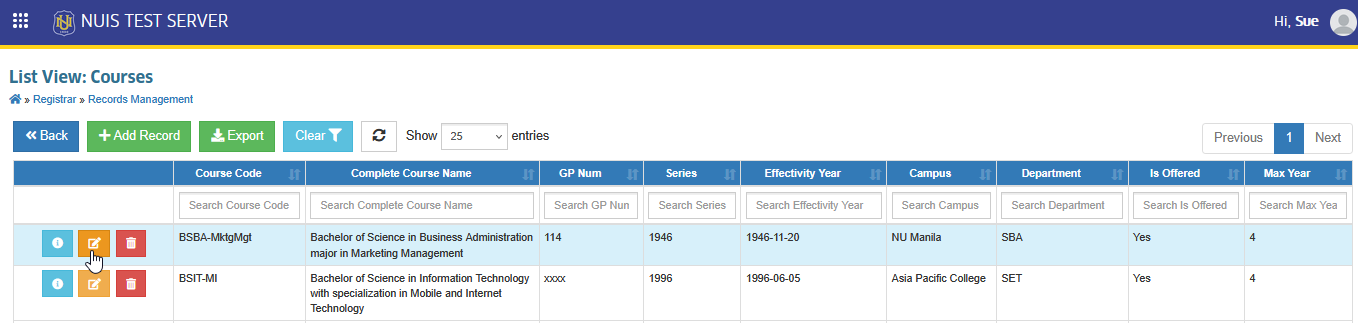
STEP 2. Update the necessary information, then click the button to save the changes.
Delete Course Record
Follow the steps below to delete a course record.
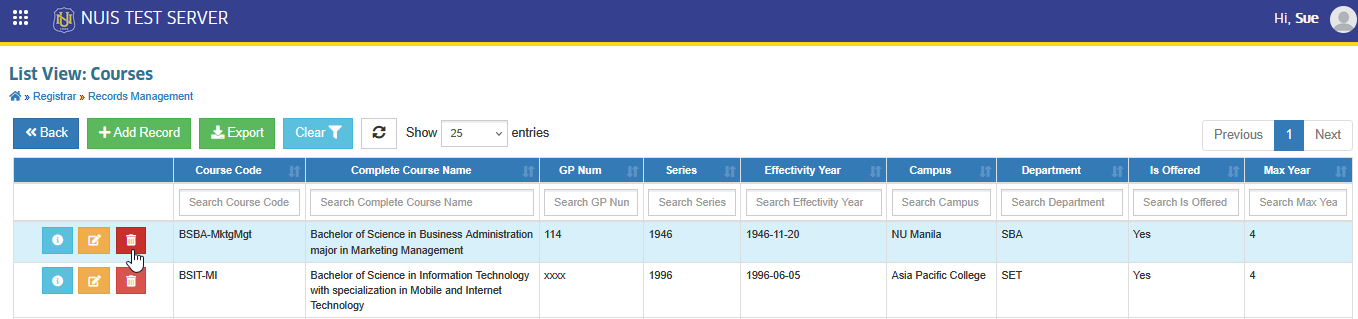
STEP 1. On the Courses list view page, click the corresponding button of the record to be removed. The system will redirect to Delete Course page.
STEP 2. Confirm the deletion by clicking the button.
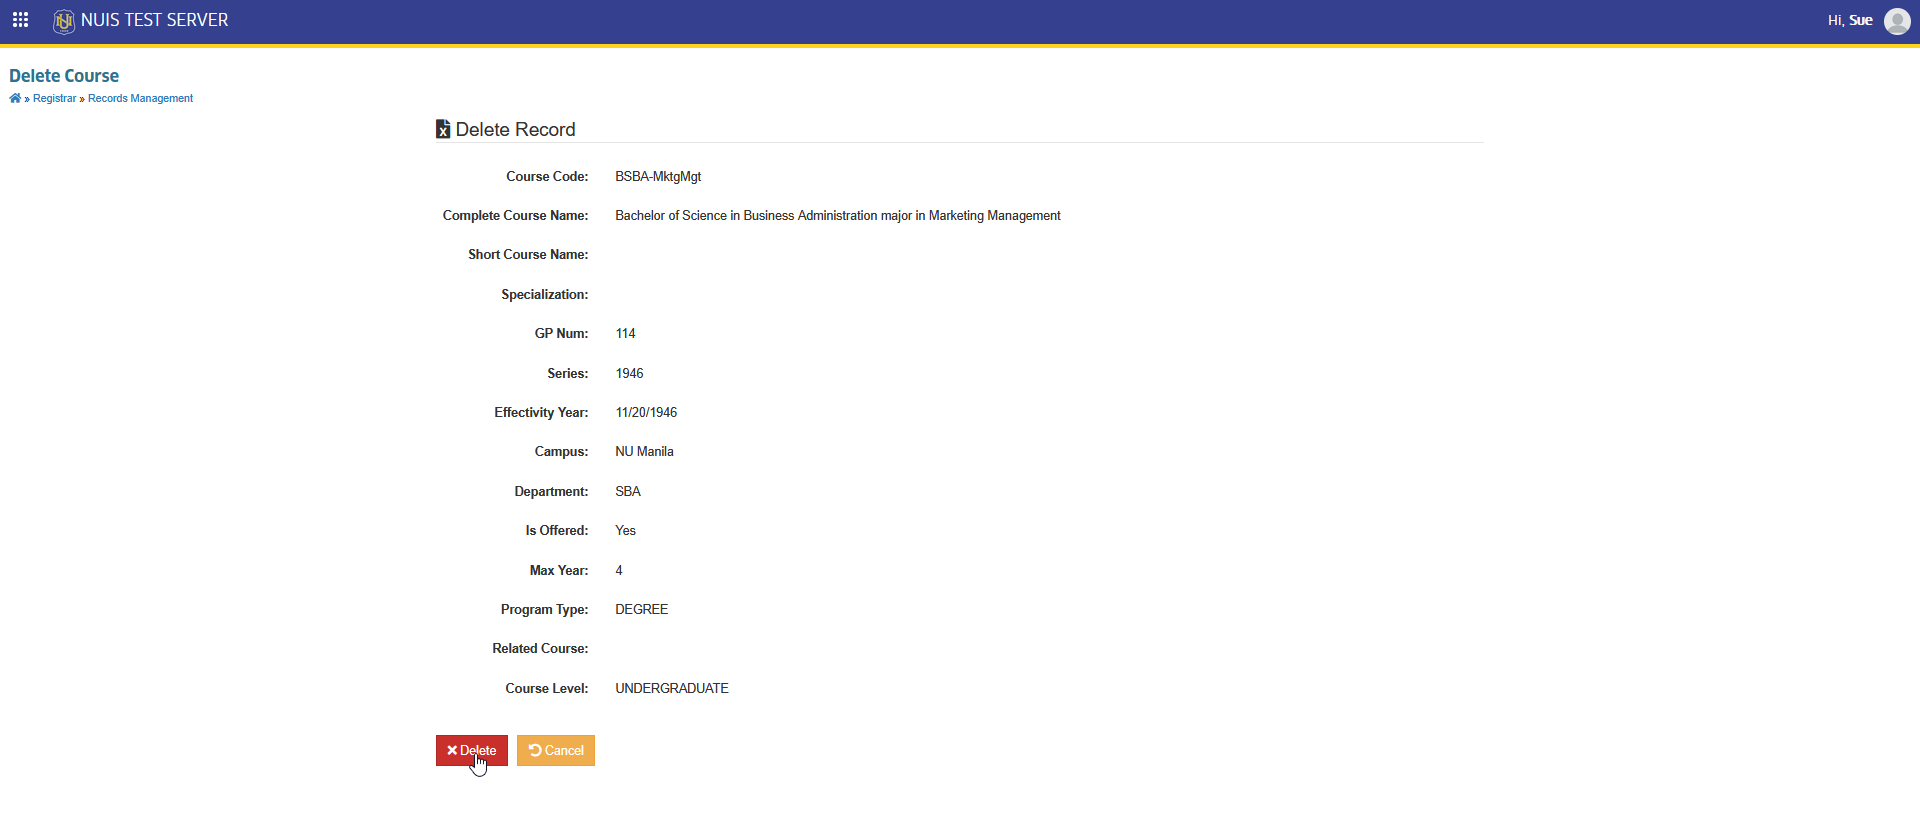
Please be careful when deleting a record, as this action cannot be undone.
Export Course Record
Follow the steps below to download the course record for offline backup.
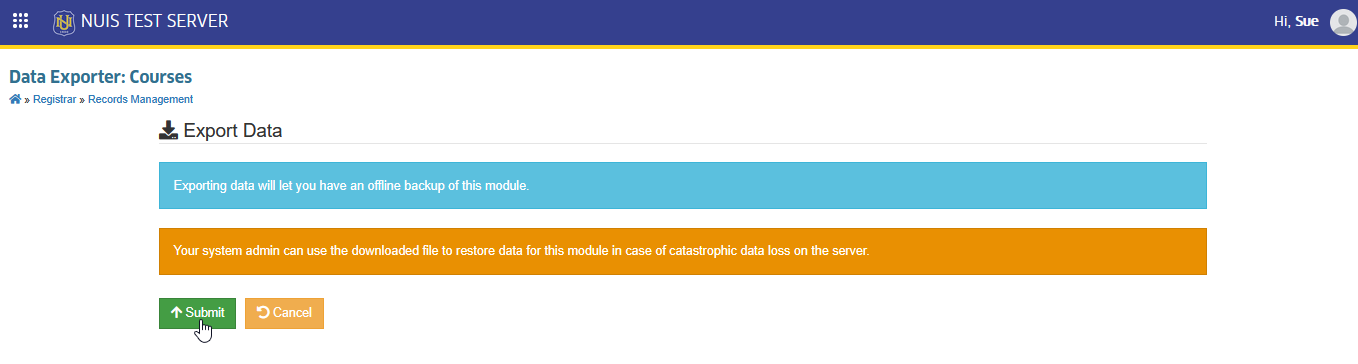
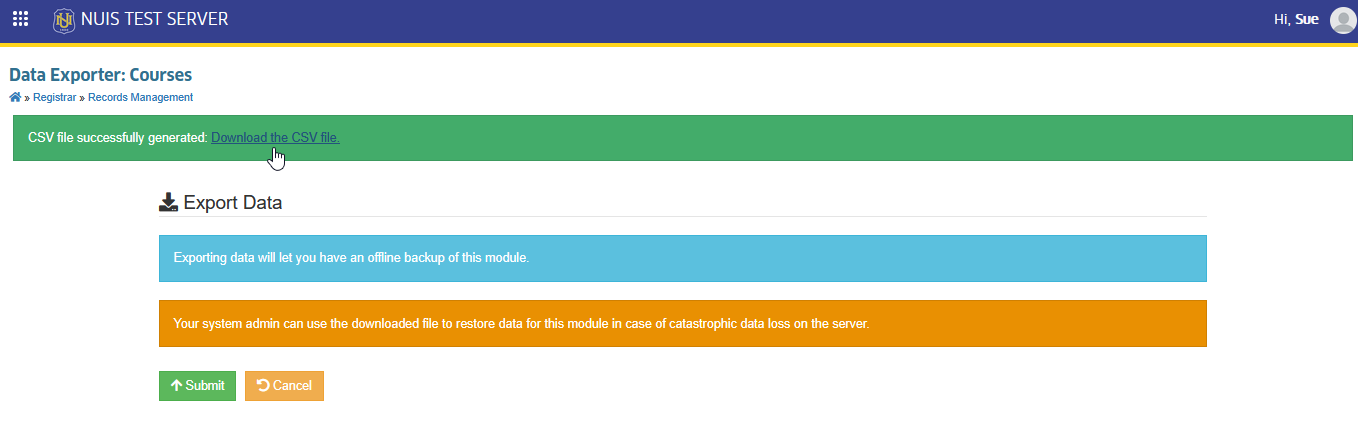
STEP 1. On the Courses list view page, locate and click the button. The system will redirect to Data Exporter: Courses page.

STEP 2. In the Data Exporter: Courses page, click the button. This action will generate the CSV file of the record.
STEP 3. Download the CSV File by clicking the link.
For more questions or concerns, email us at nu-desk@national-u.edu.ph