Student Clearance
Manage and settle student accountabilities and other clearance issues.
This module allows offices to manually add or remove student liabilities for their department.
Only the Treasury Office has the autoposting of clearance to students.
Module Features
-
View Clearance Status - View or check student's clearance information.
-
Add Clearance - Offices can assign new clearance requirement to students.
-
Modify Clearance Status - Offices can update a student’s clearance status to Yes, No, or Conditional Yes, based on their compliance with requirements.
-
Download Clearance Users with permission may download the list of students together with its clearance information.
Required Permission
-
Add refStudentClearance - This permission allows users to create and add new student clearance records. User with this access can assign clearance requirements to students, specify details for each requirement, and set the initial status of the clearance process.
-
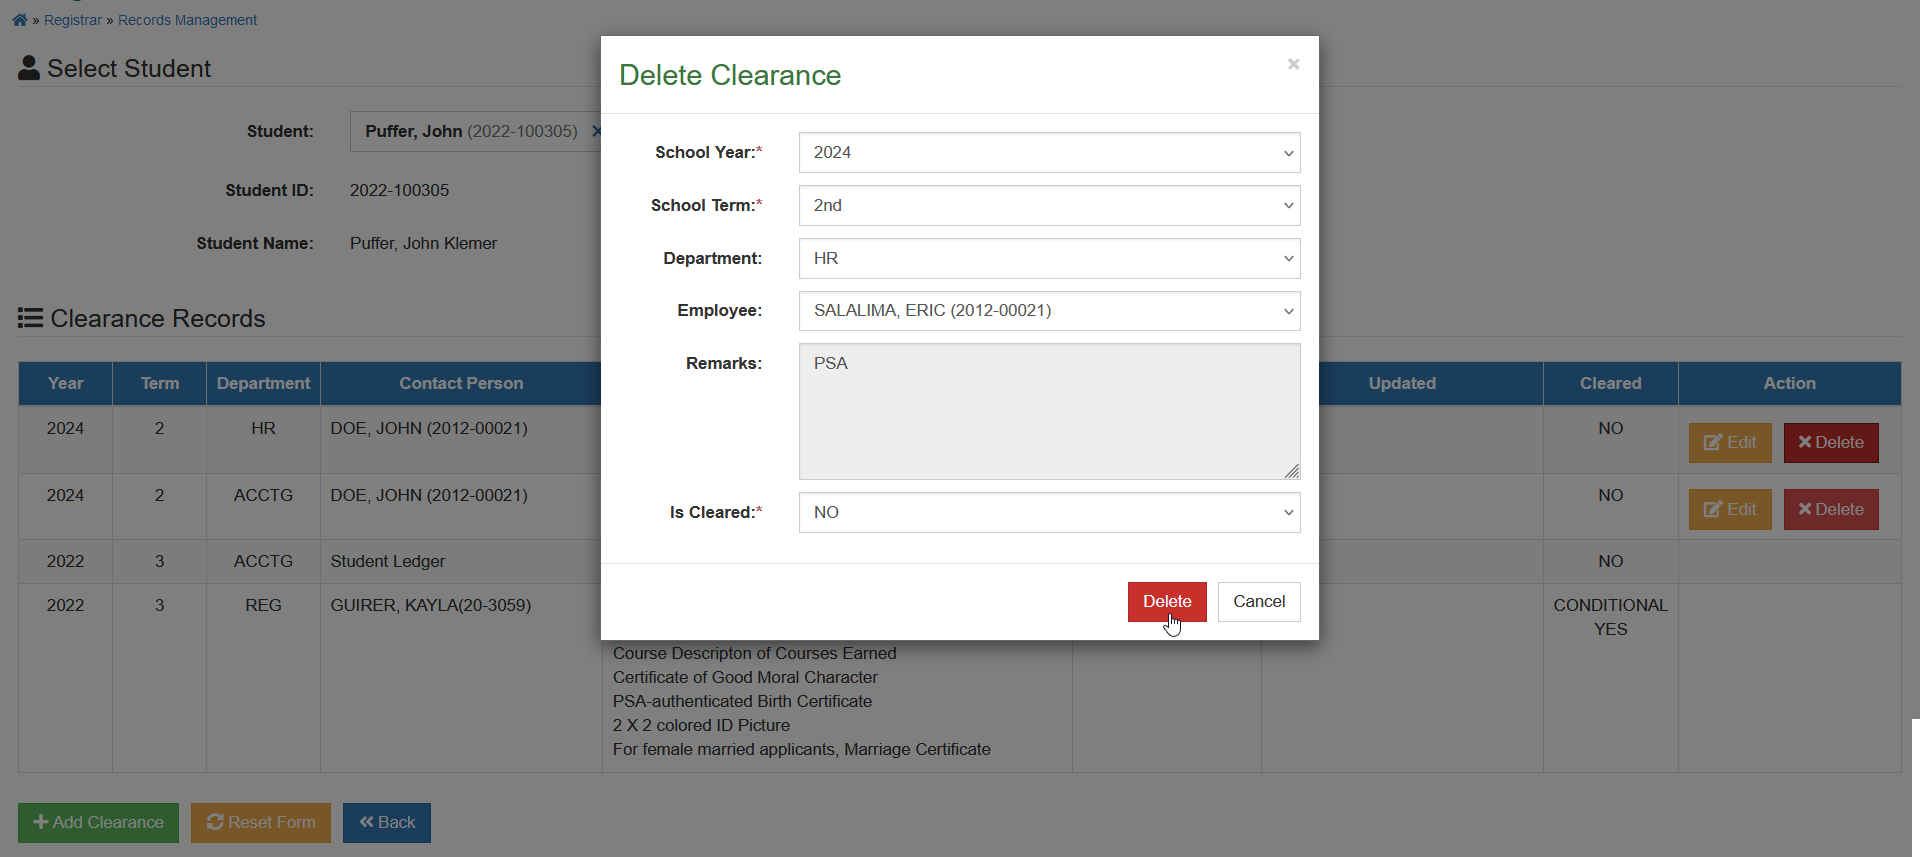
Delete refStudentClearance - This permission allows users to remove student clearance records from the system. Users with this access can delete clearance entries that are no longer needed.
-
Edit refStudentClearance - This permission allows users to modify existing student clearance records. Users with this access can update clearance requirements, changes statuses, or edit related details to ensure the information is accurate and reflects the current progress.
-
View refStudentClearance - This permission allows users to access and review student clearance records. Users with this access can see the list of clearance requirements statuses and any relevant details without making changes to the records.
How to Access the module
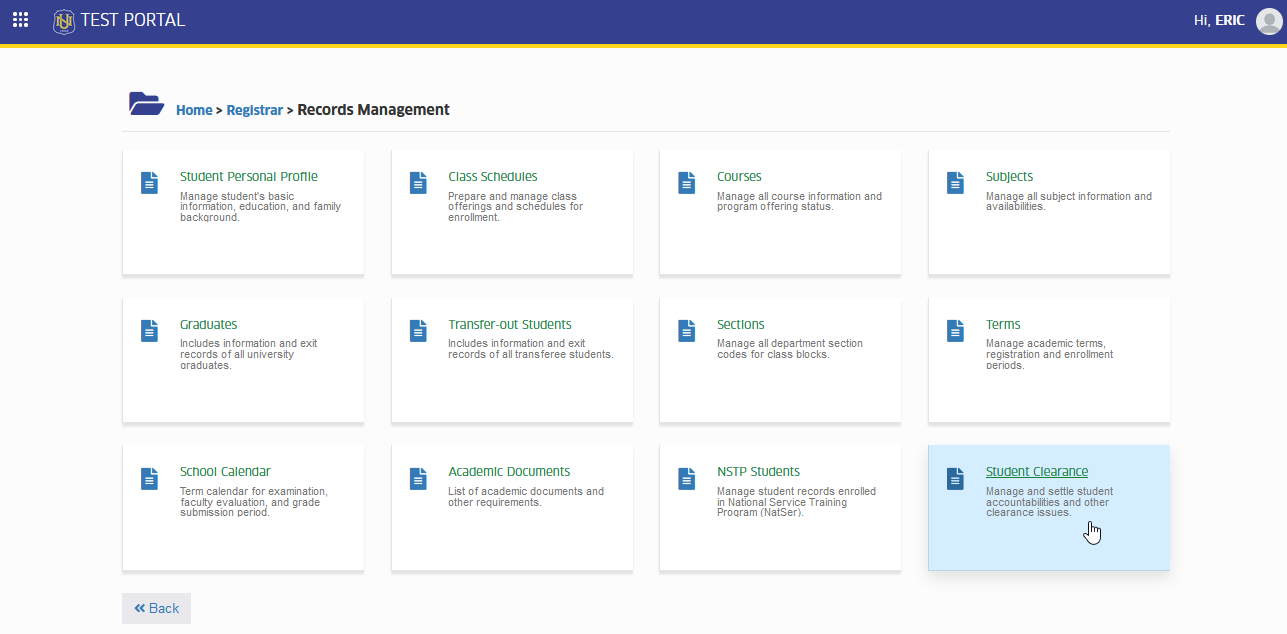
To access the module, make sure you have the Student Clearance permission. If it doesn’t appear in your portal, request access from your System Administrator.
To access the module go to Registrar > Records Management > Student Clearance
Click the module tab to redirect to Student Clearances page.
Clearance Statuses
This section explains the different statuses used in the clearance process. Each status reflects the current progress or outcome of a student's clearance requirement, helping students and offices track what's completed, pending or needs attention.
| Clearance Status Name | Description | Required |
|---|---|---|
| Yes | This status indicates that the student has successfully completed the specific clearance requirement and has been approved by the respective office or department. | Yes |
| Conditional Yes | This status indicates that the student has been temporarily cleared for the specific requirement but with conditions or pending actions that must be completed later. | Yes |
| No | This status indicates that the student has not yet completed the specific clearance requirement or has been denied clearance by the respective office or department. | Yes |
How to Use the module
This section provides a step-by-step guide on navigating and utilizing the features of the Student Clearance module. It guides you through the process of viewing, updating, and tracking clearance requirements to ensure the clearance process is completed efficiently.
How to View student's clearance
This section provides a step-by-step guide for office personnel on how to access and review the clearance status of individual students. It covers how to find student records, view clearance requirements, and check the current status of each requirement.
STEP 1. In the Student Clearances list view page, select the desired School Year and Term to view and click the button. The page will display all the students with clearance details.
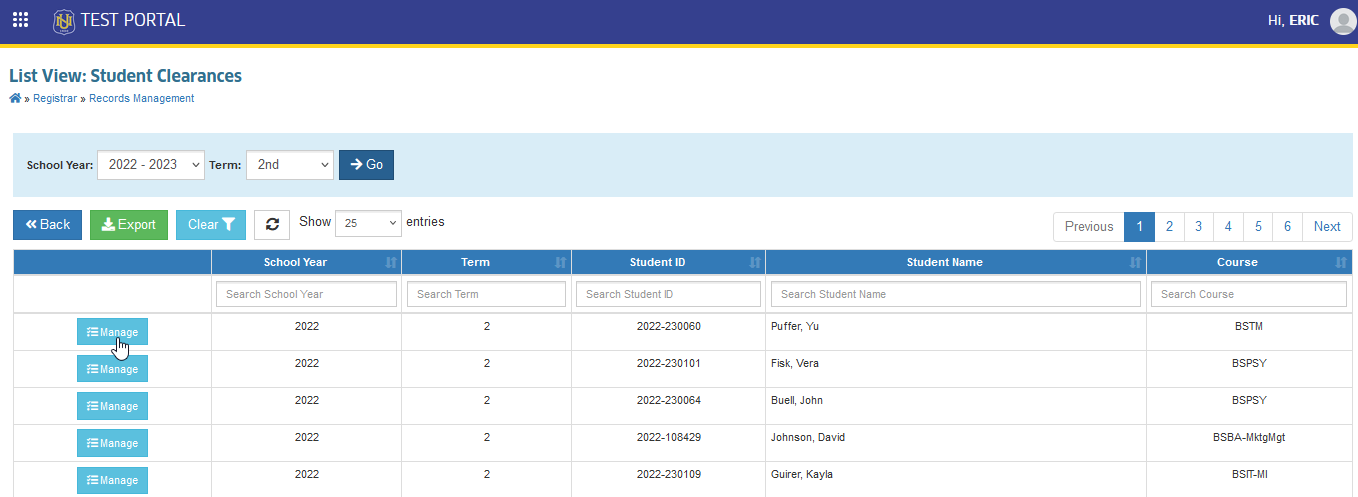
User may use other filtering options in the table to search the student in the list.
STEP 2. Click the corresponding button to see the clearance information of the specific student.
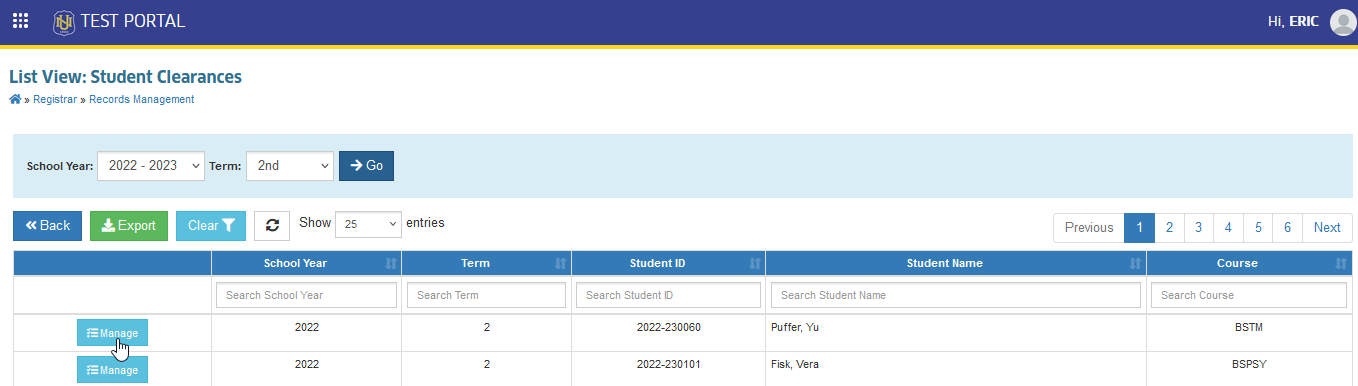
STEP 3. The page will display the clearance information of the specific student.
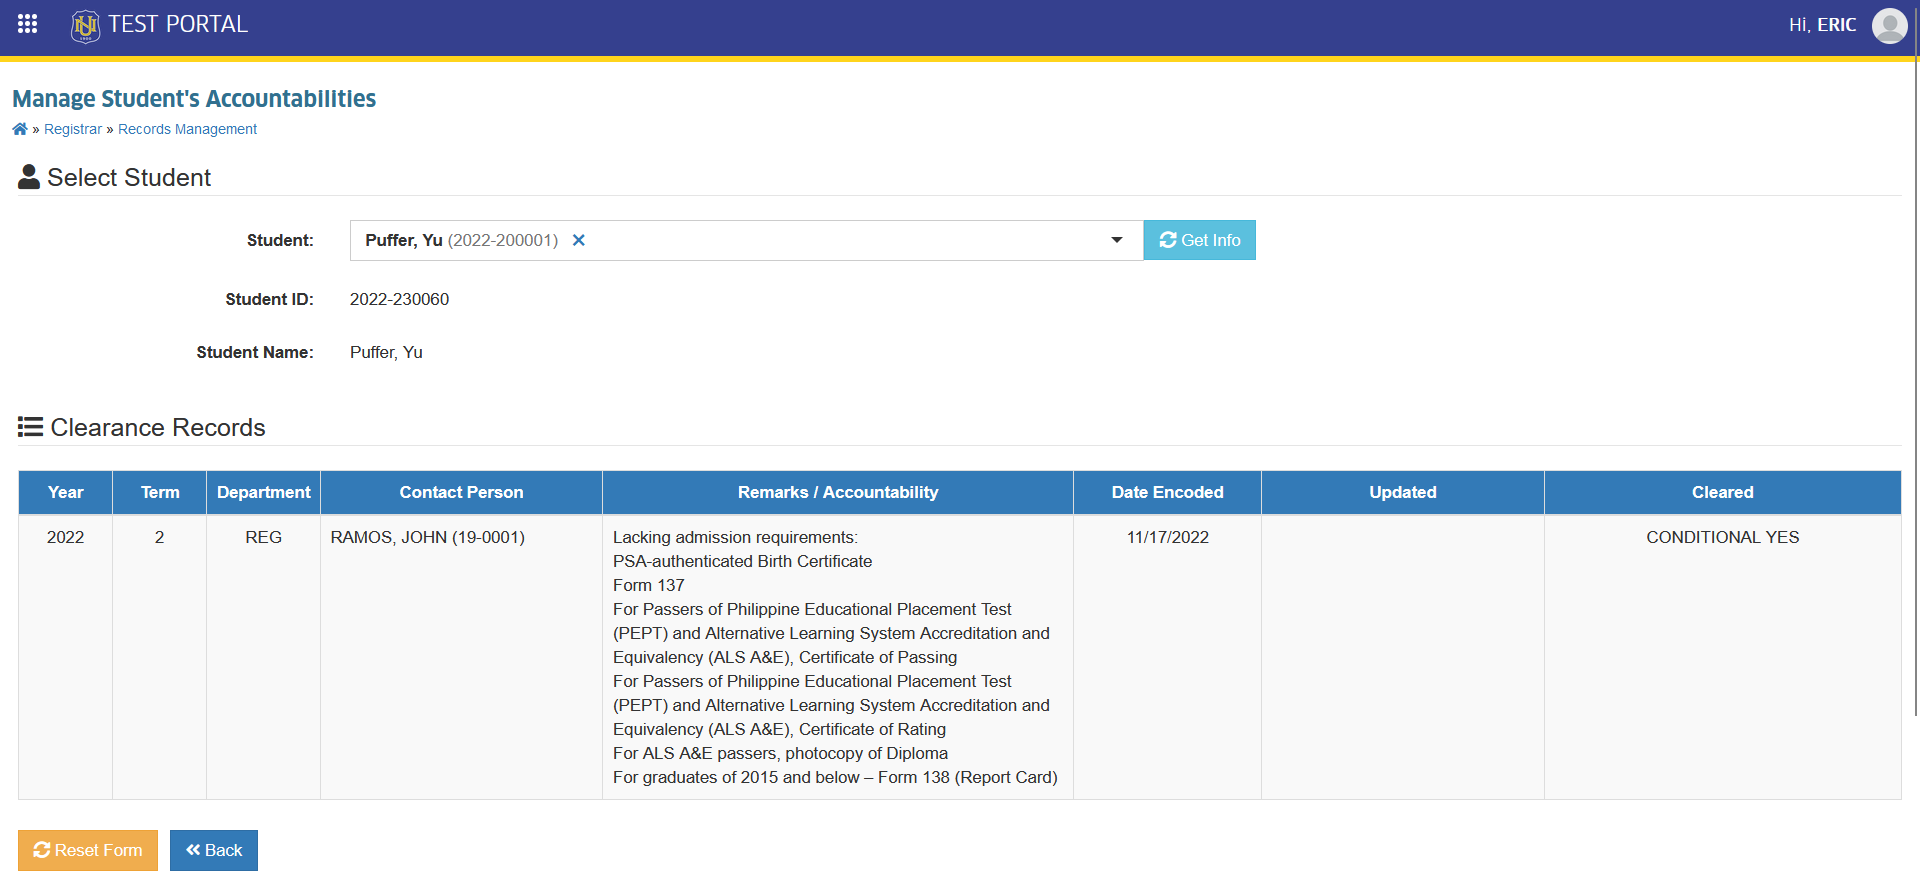
STEP 4. Click the button to search for another student to view.
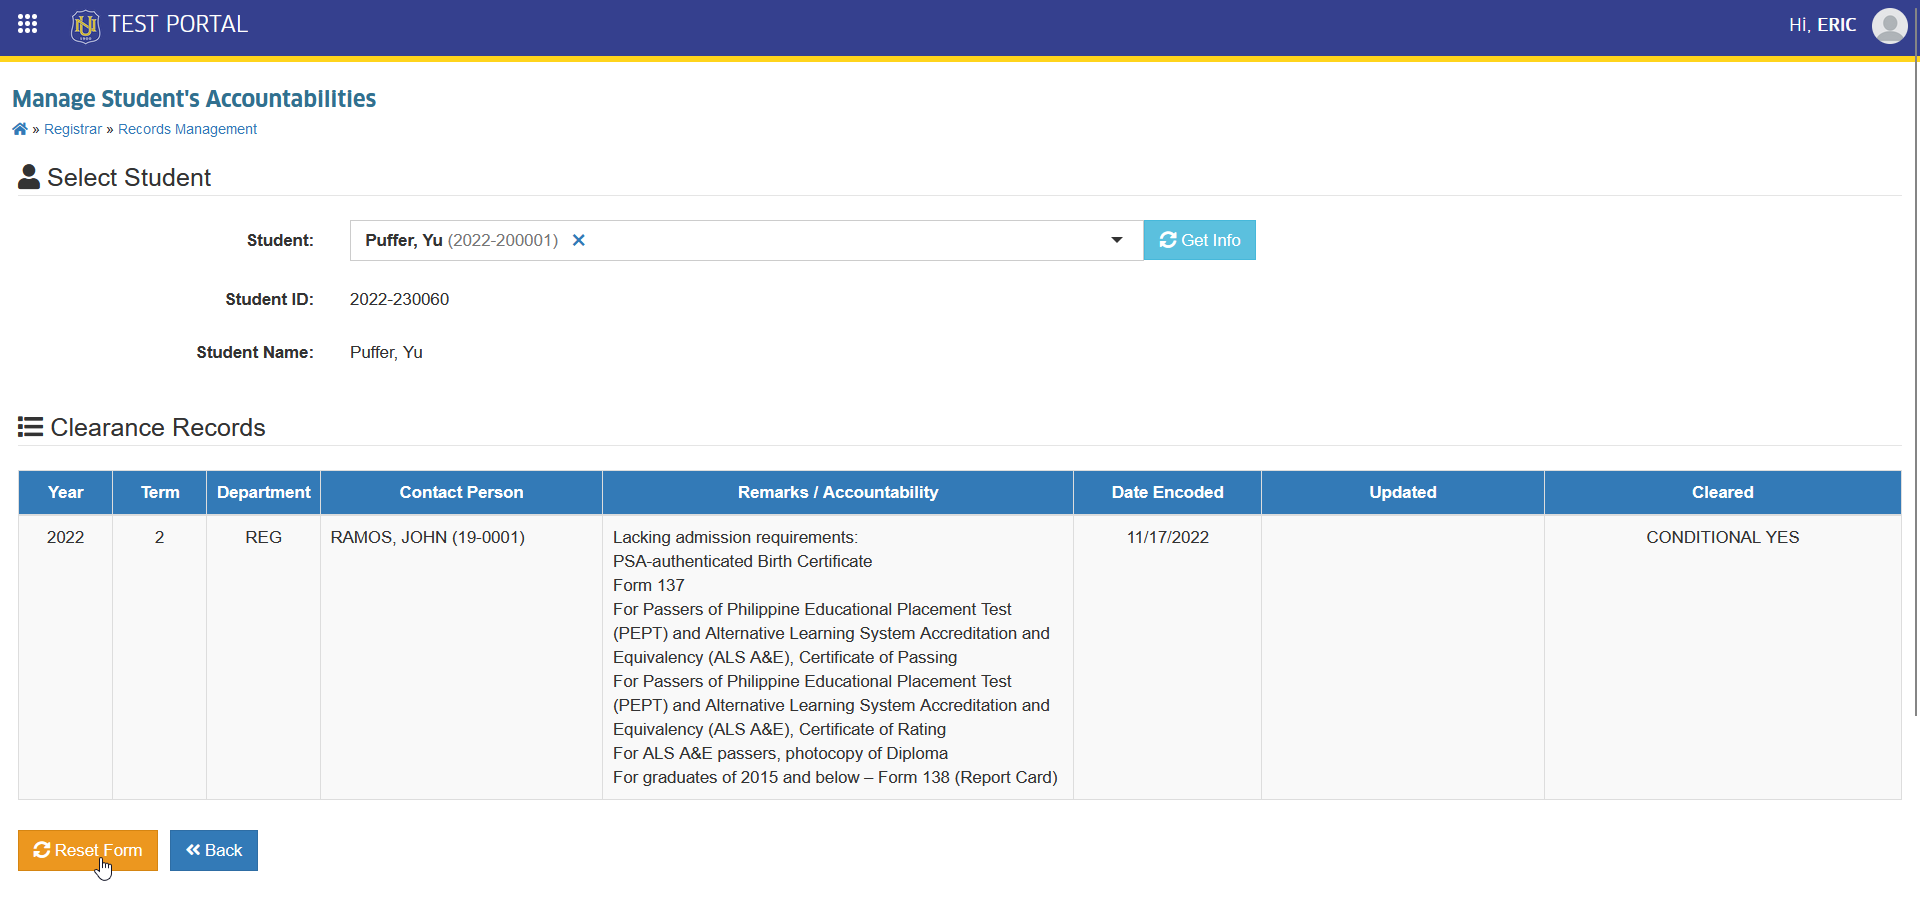
How to Add student's clearance
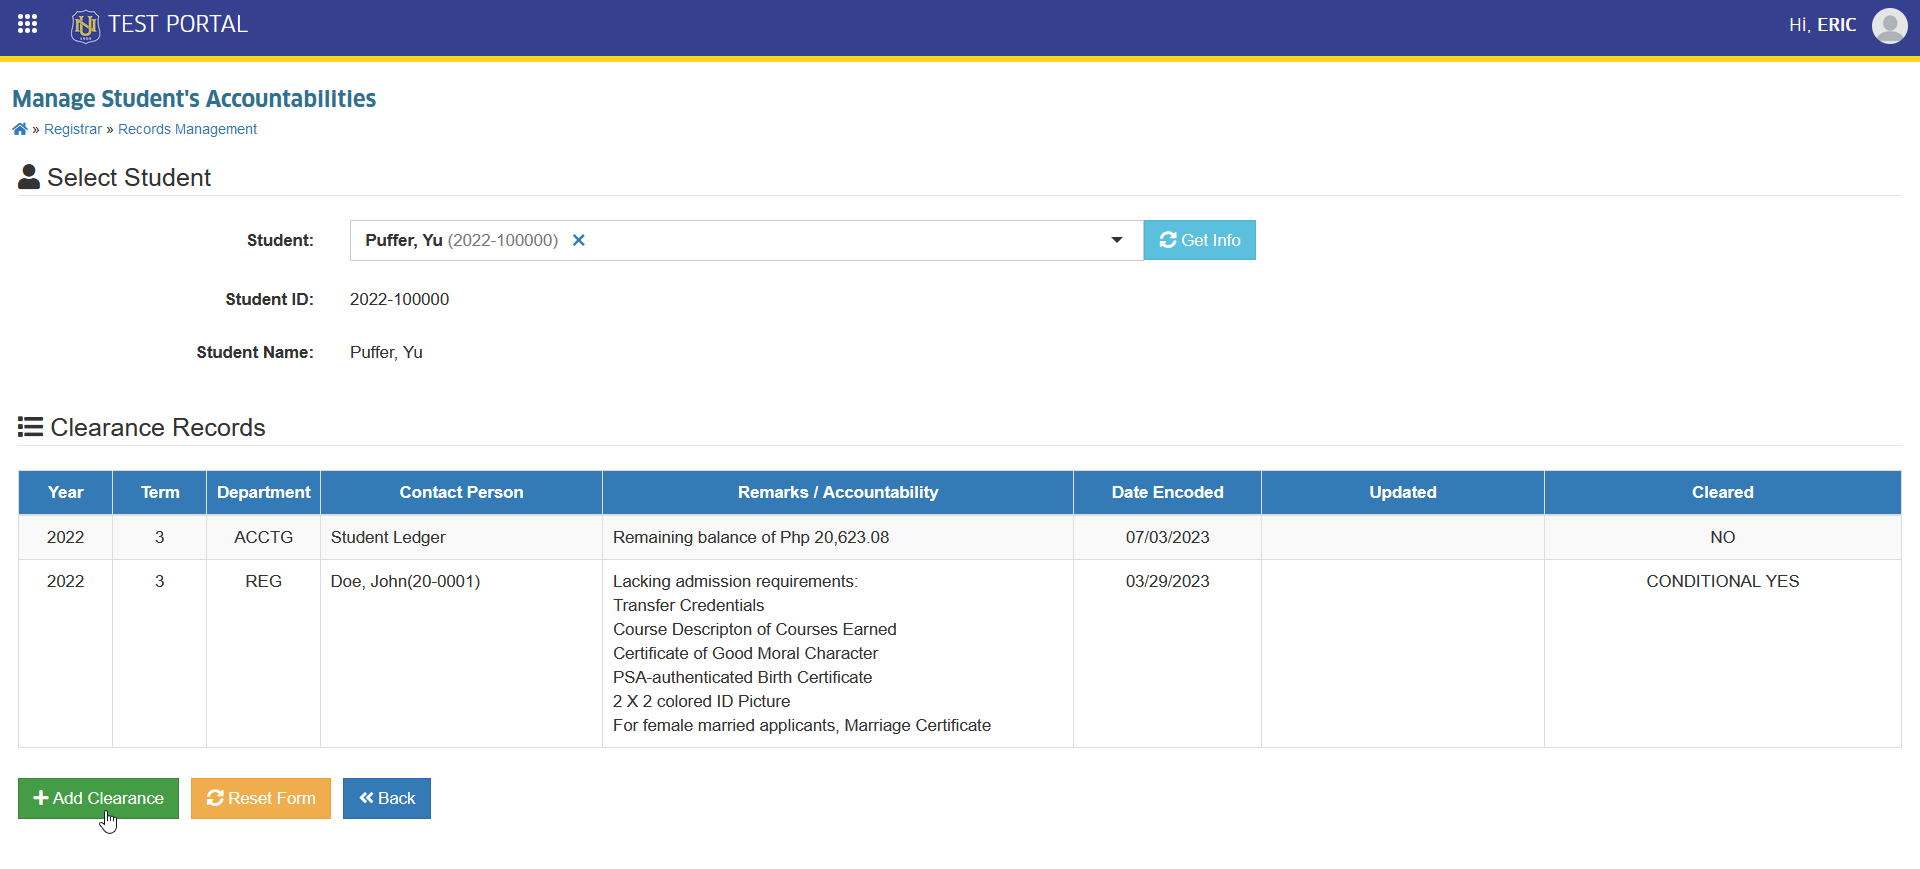
This section provides step-by-step instruction on how to add new clearance record for a student. It covers the process of assigning clearance requirements, setting initial statuses, and ensuring all necessary information is accurately entered into the system. Follow the steps below on how to add student's clearance.
STEP 1. STEP 1. In the Student Clearance list view page, select the desired School Year and Term then click the button. This action will redirect to Manage Student's Accountabilities page.
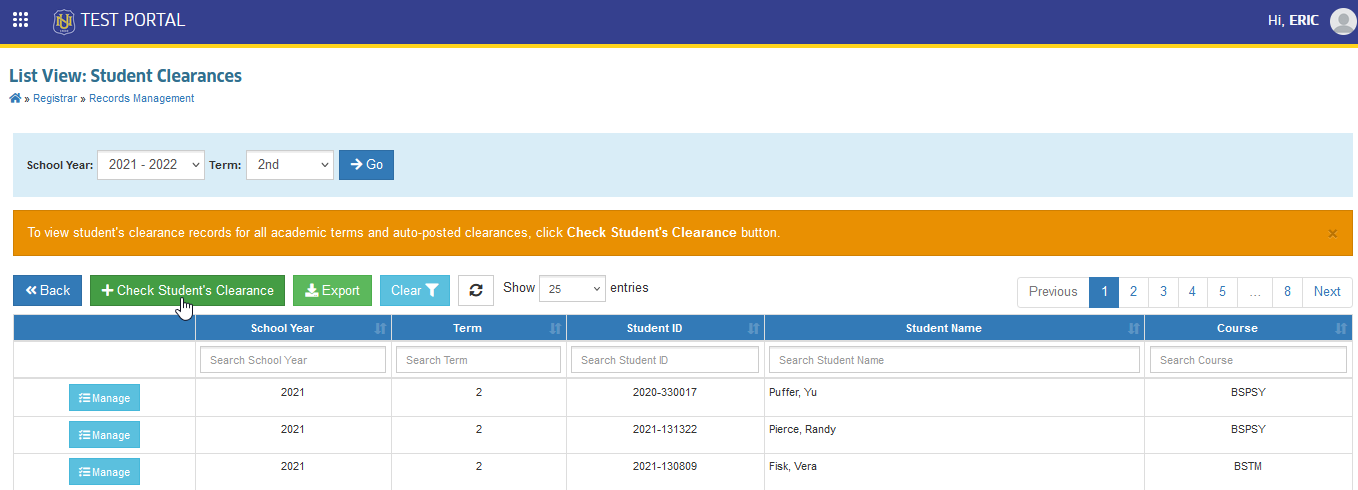
STEP 2. In Manage Student's Accountabilities page, enter the student's ID number then select the student from the list of search student.
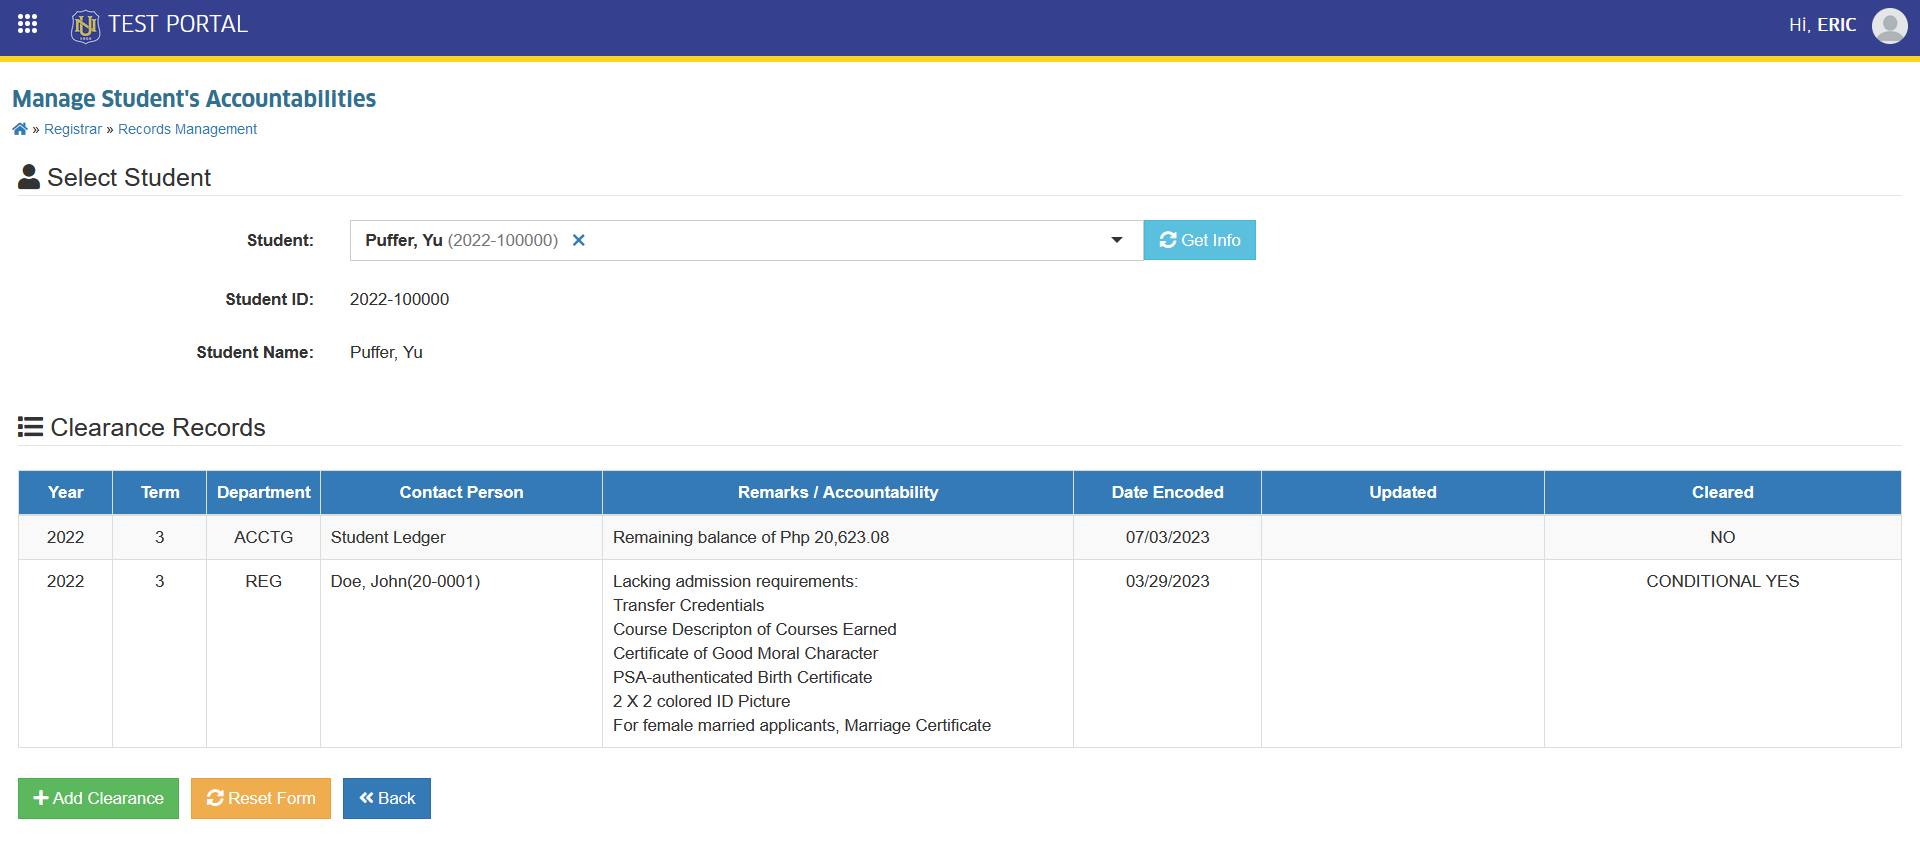
STEP 3. Click the button to add new clearance information for the student.
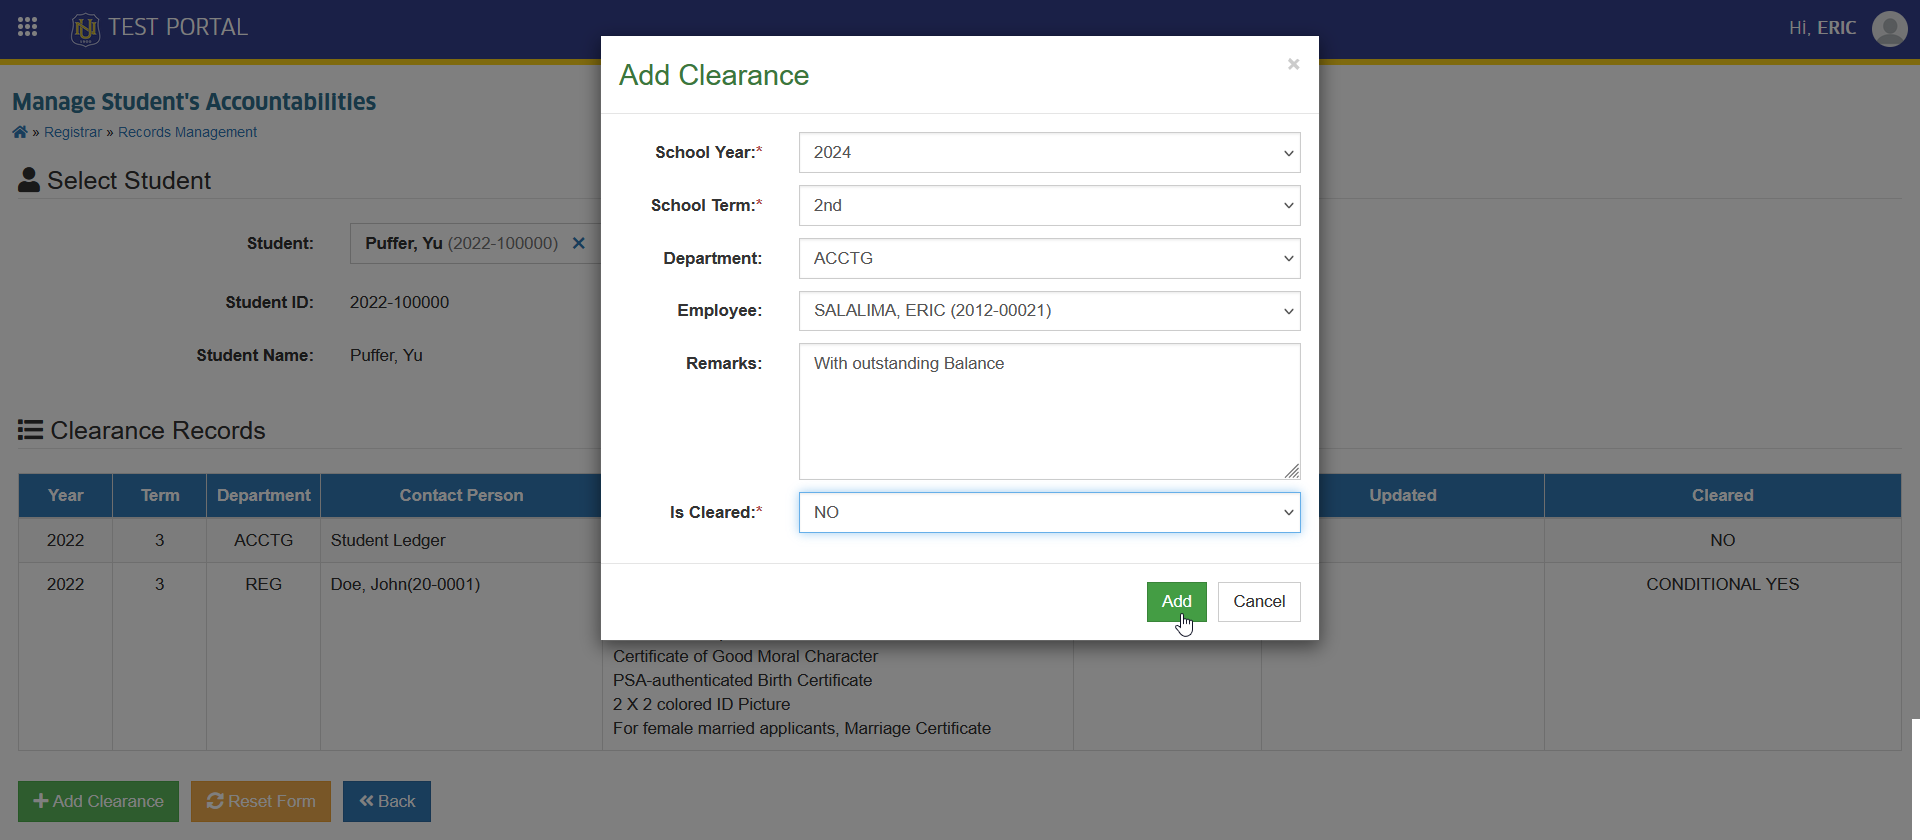
STEP 4. Enter the information in the required field of the Add Clearance form and click button.
How to Edit student's clearance status
This section outlines the steps for office personnel to update or modify a student's clearance status. It includes on how to change the status for specific clearance requirements and ensure accurate records are maintained. Follow the step below on how to edit student's clearance information.
STEP 1. Follow the steps 1 and 2 of How to View students clearance.
STEP 2. In Manage Student's Accountabilities page, under the Action column, click the corresponding button of the clearance information that will be modified.
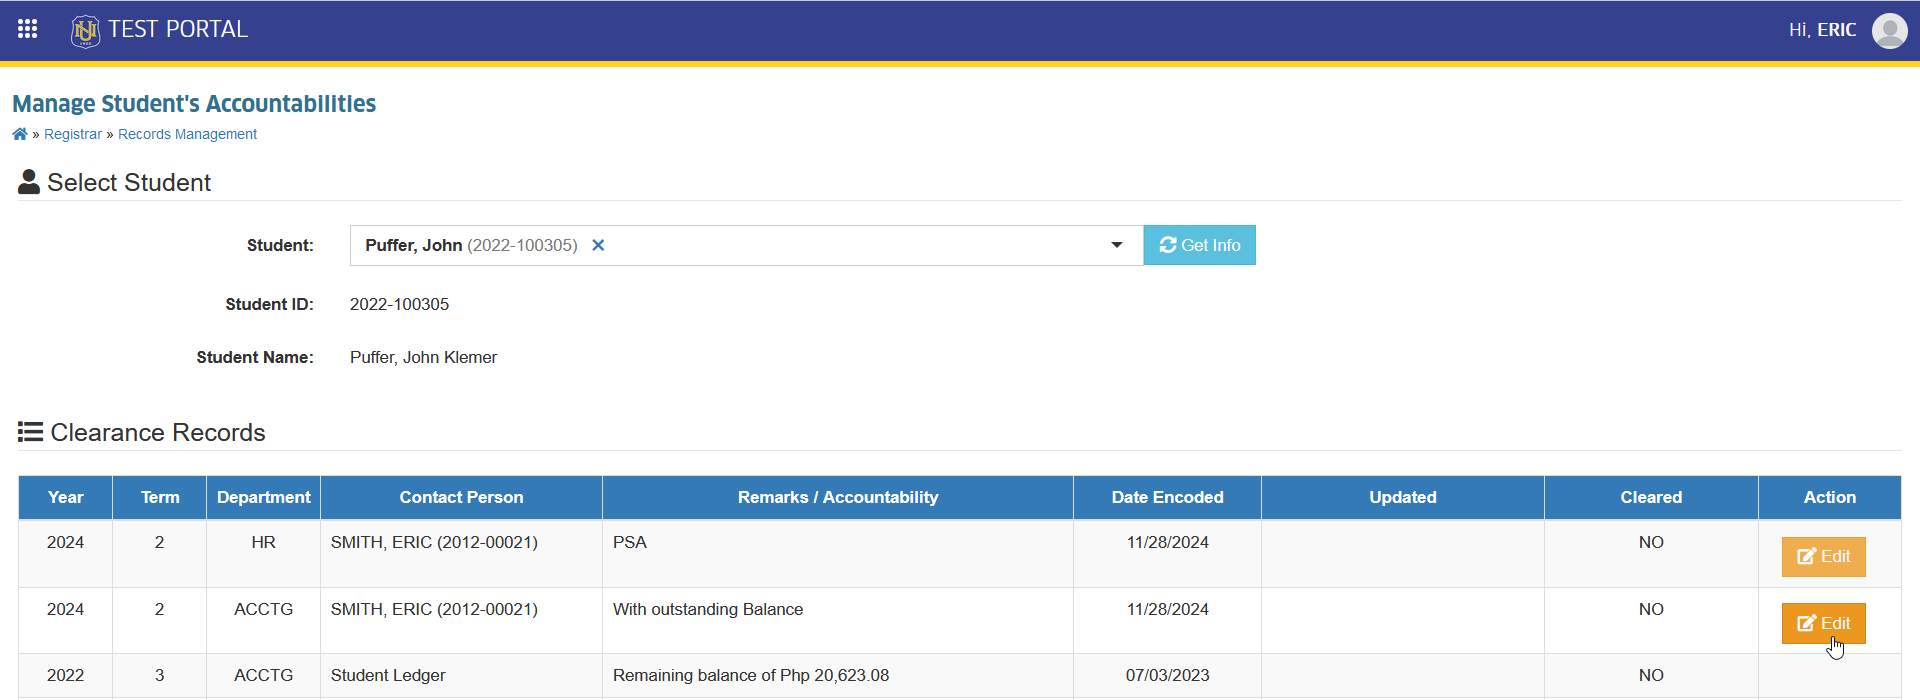
STEP 3. The Edit Clearance form will be displayed, manual change the status by changing the information entered in the Is Cleared entry field. Refer to the Clearance Statuses for the discription of each status. Click the button to save changes.
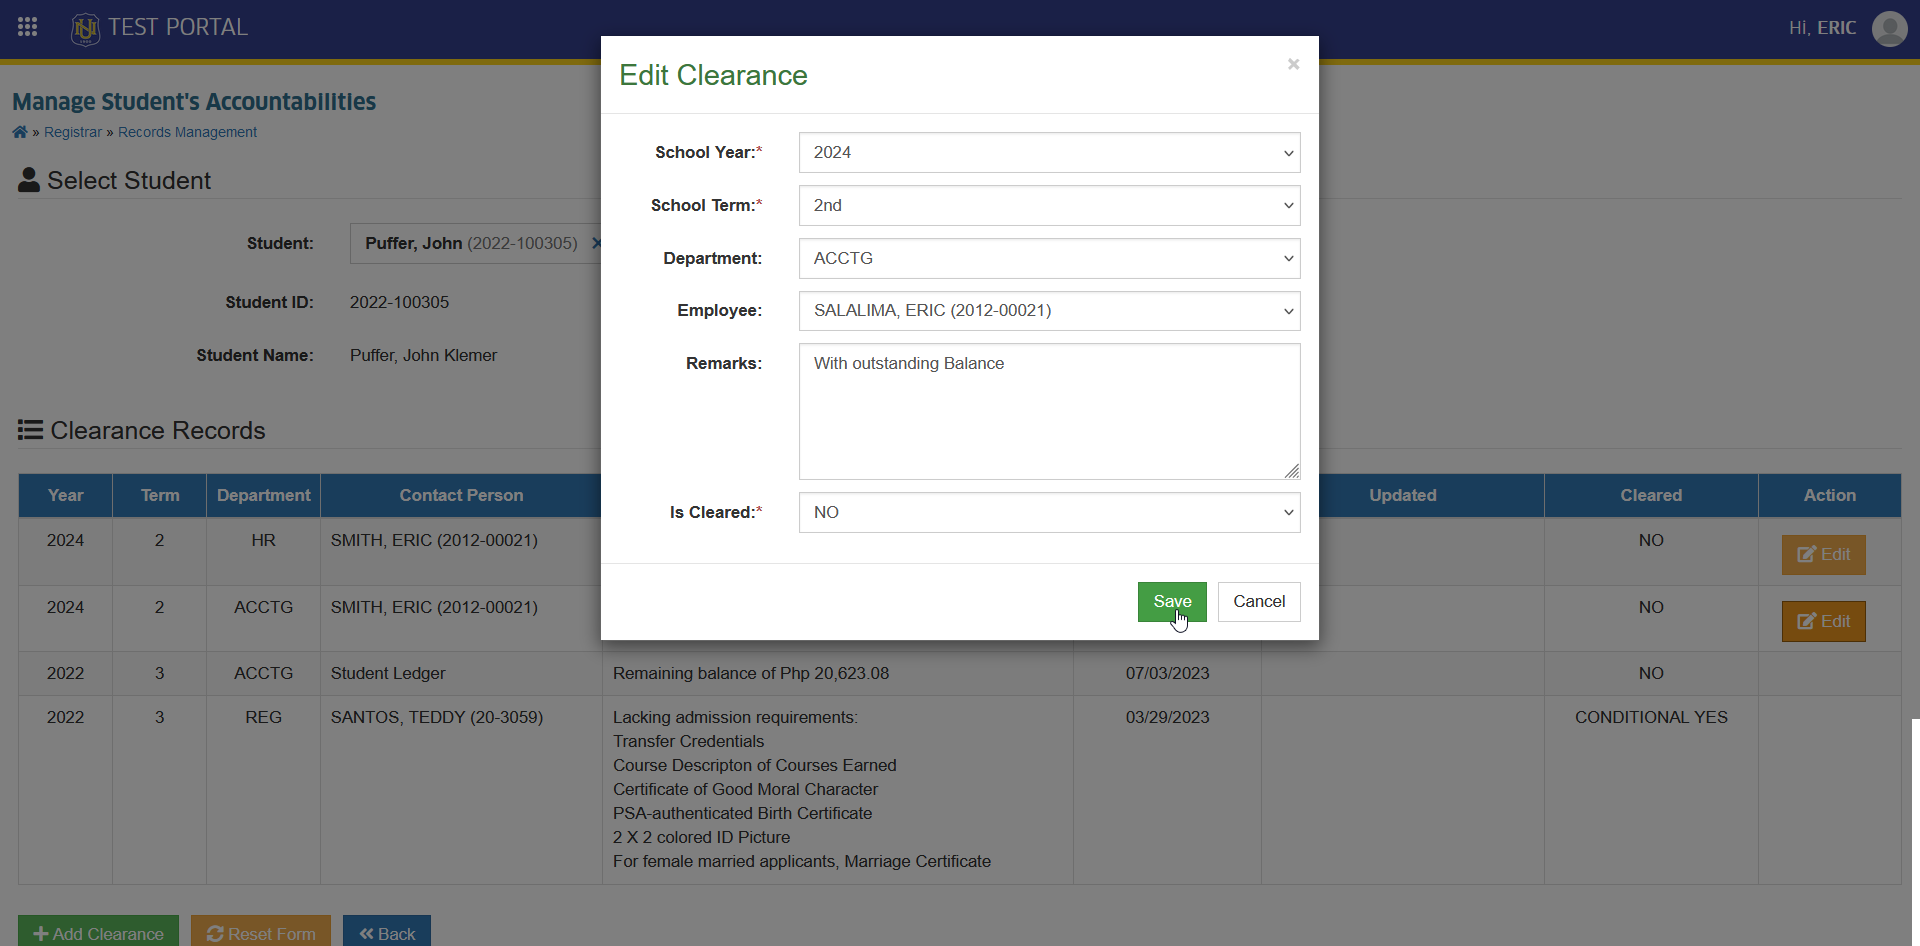
Only personnel within the department are authorized to edit or modify the clearance information and its status.
How to Exempt students in ledger clearance
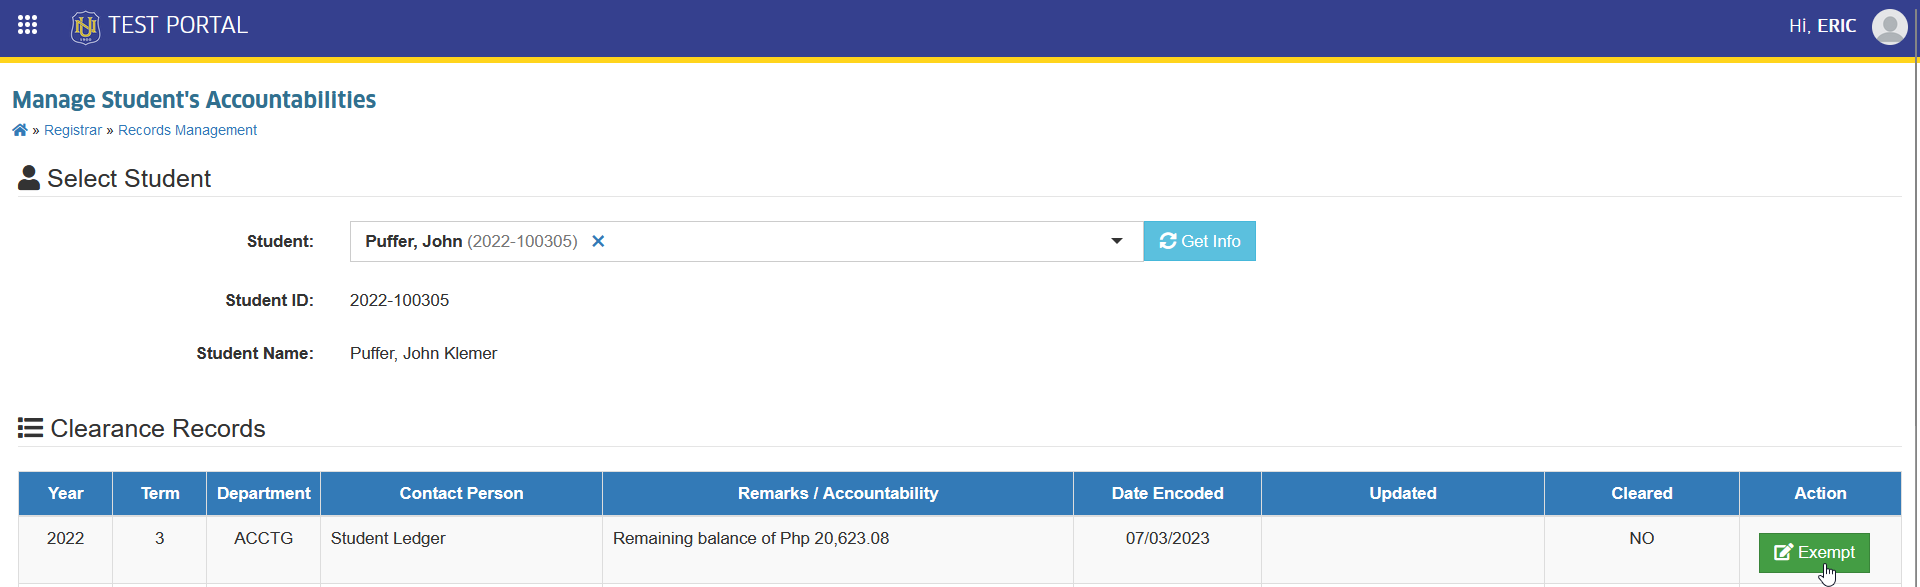
Exemption of students in ledger clearance is only applicable in Treasury/Accounting Office only.
Once the term has officially ended, the system will automatically update and post the clearance information for all students with outstanding balances exceeding the campus's designated clearance amount threshold.
Follow the steps below on how to exempt students in ledger clearance.
STEP 1. Follow the steps 1 and 2 of How to View students clearance.
STEP 2. In the Manage Student's Accountabilities page, under the actions columnn, Click the button.
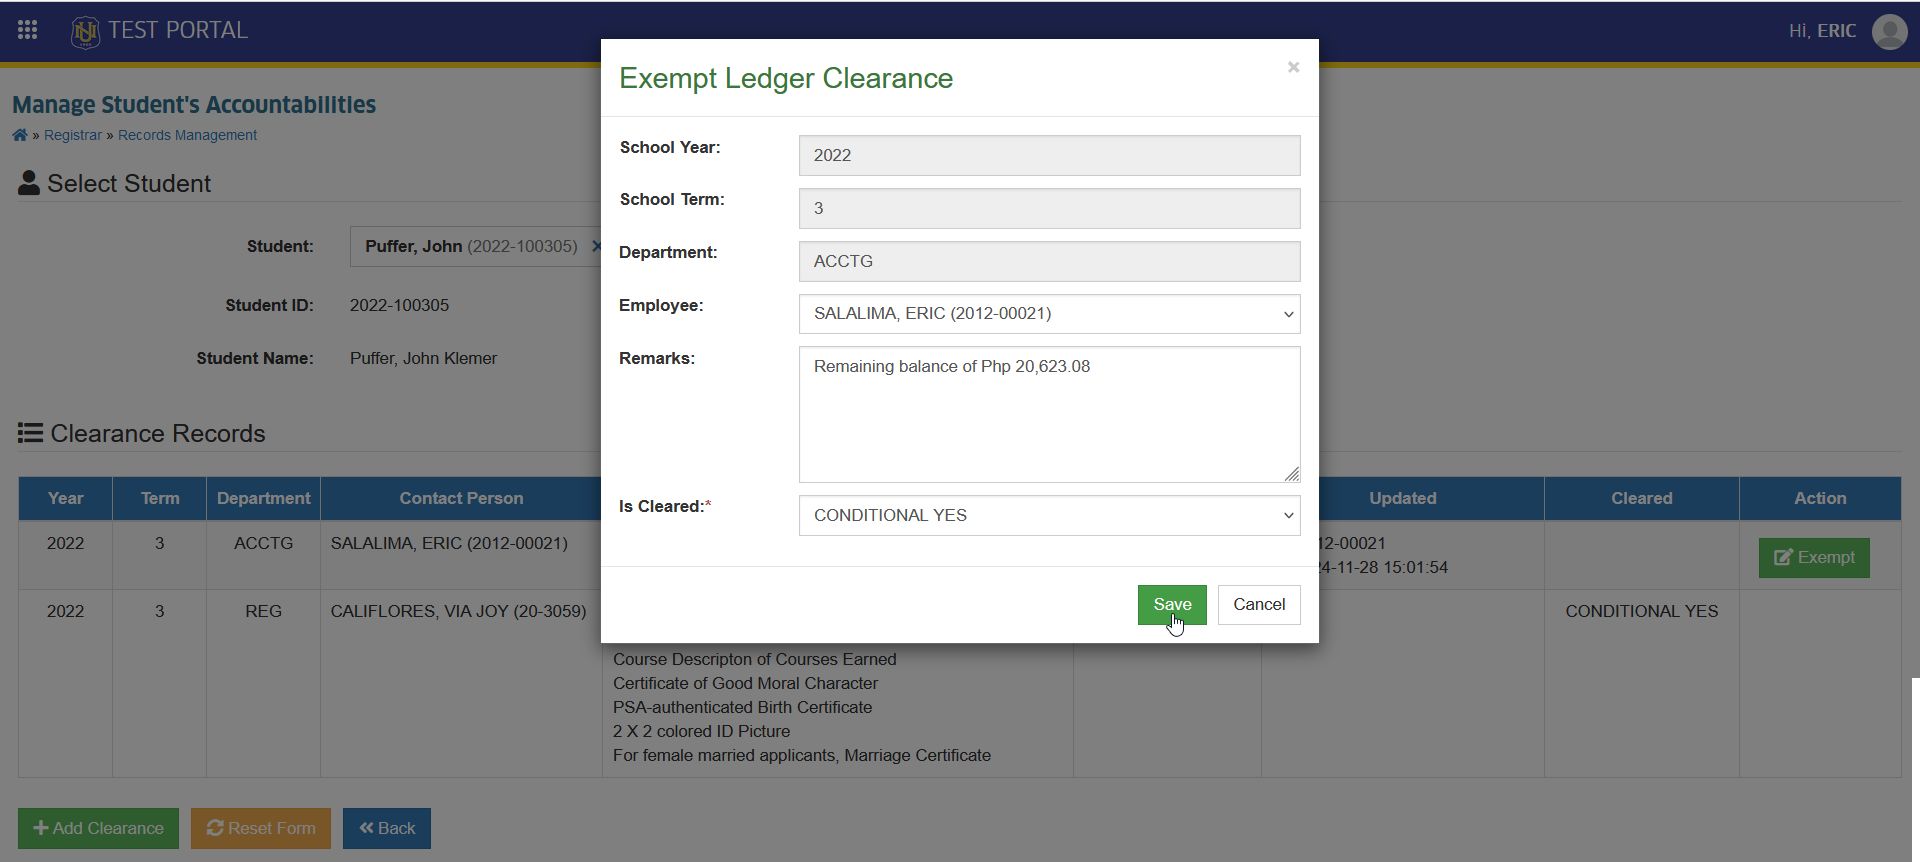
STEP 3. Confirm the exemption by changing the clearance status and click the button in the Exempt Ledger Clearance form.
How to Delete student's clearance
This section explains the steps for office personnel to remove a student's clearance record from the system.
STEP 1. Follow the steps 1 and 2 of How to View students clearance.
STEP 2. In Manage Student's Accountabilities page, under the actions column, click the corresponding button of a clearance information to be removed from the system.
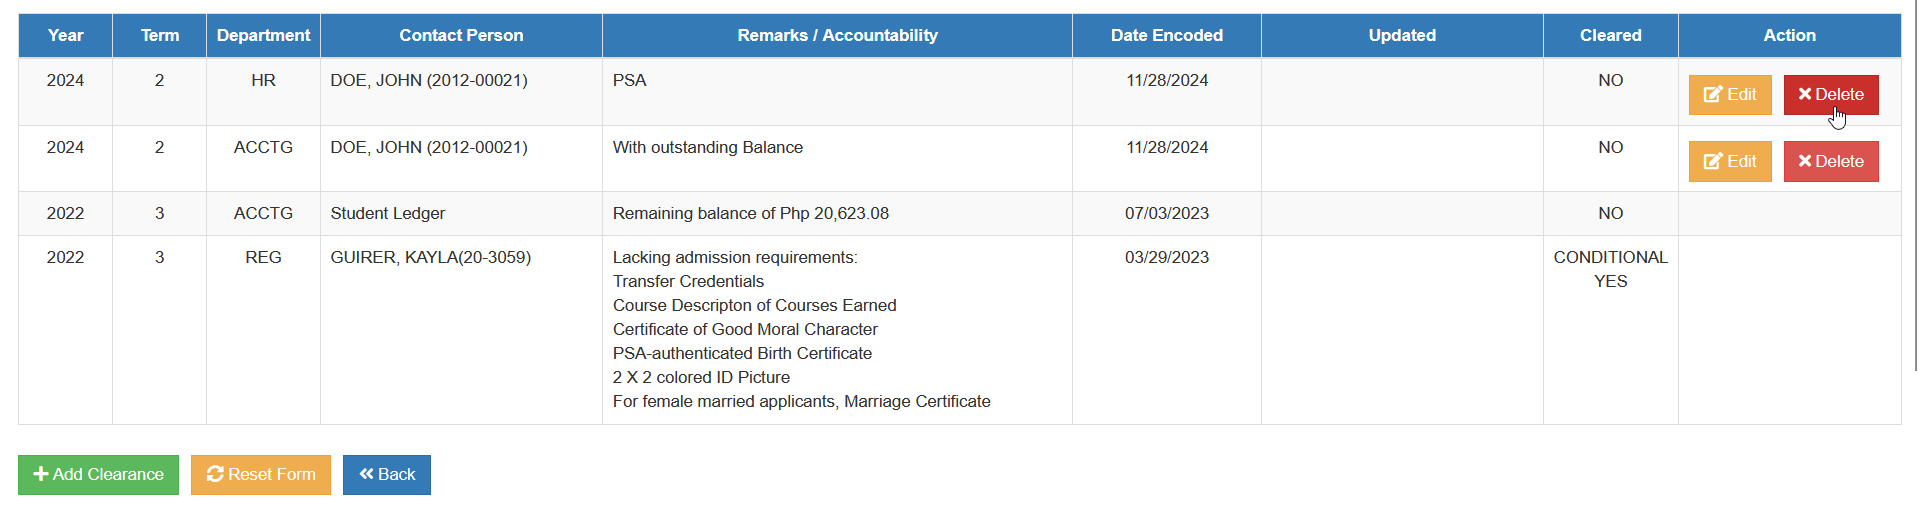
STEP 3. The Delete Clearance form will be displayed, confirm the deletion by clicking the button.