Student Courses
The Student Courses module is used by the Registrar Personnel to manage and monitor the courses a student is enrolled in for a specific term.
This module allows you to view, add, update, or remove course details attended by a student per term. It helps ensure that the student’s academic records are accurate and complete.
This module is also used by the registrar to process students shifting course request.
Required Permission
Add xrefstudentcourse -Allows the user to add a new course to a student’s record for a specific term.
Delete xrefstudentcourse - Allows the user to remove a course from a student’s record for a specific term.
Edit xrefstudentcourse - Allows the user to modify existing course details in a student’s record.
View xrefstudentcourse - Allows the user to view the list of courses enrolled by a student per term.
How to Access the Module
To access the module, make sure you have the View xrefstudentcourse permission. If it doesn’t appear in your portal, request access from your System Administrator.
In NUIS portal, go to Registrar > Records Management > Student Courses. Click the module tab to redirect to the Manage Student Courses list view page.
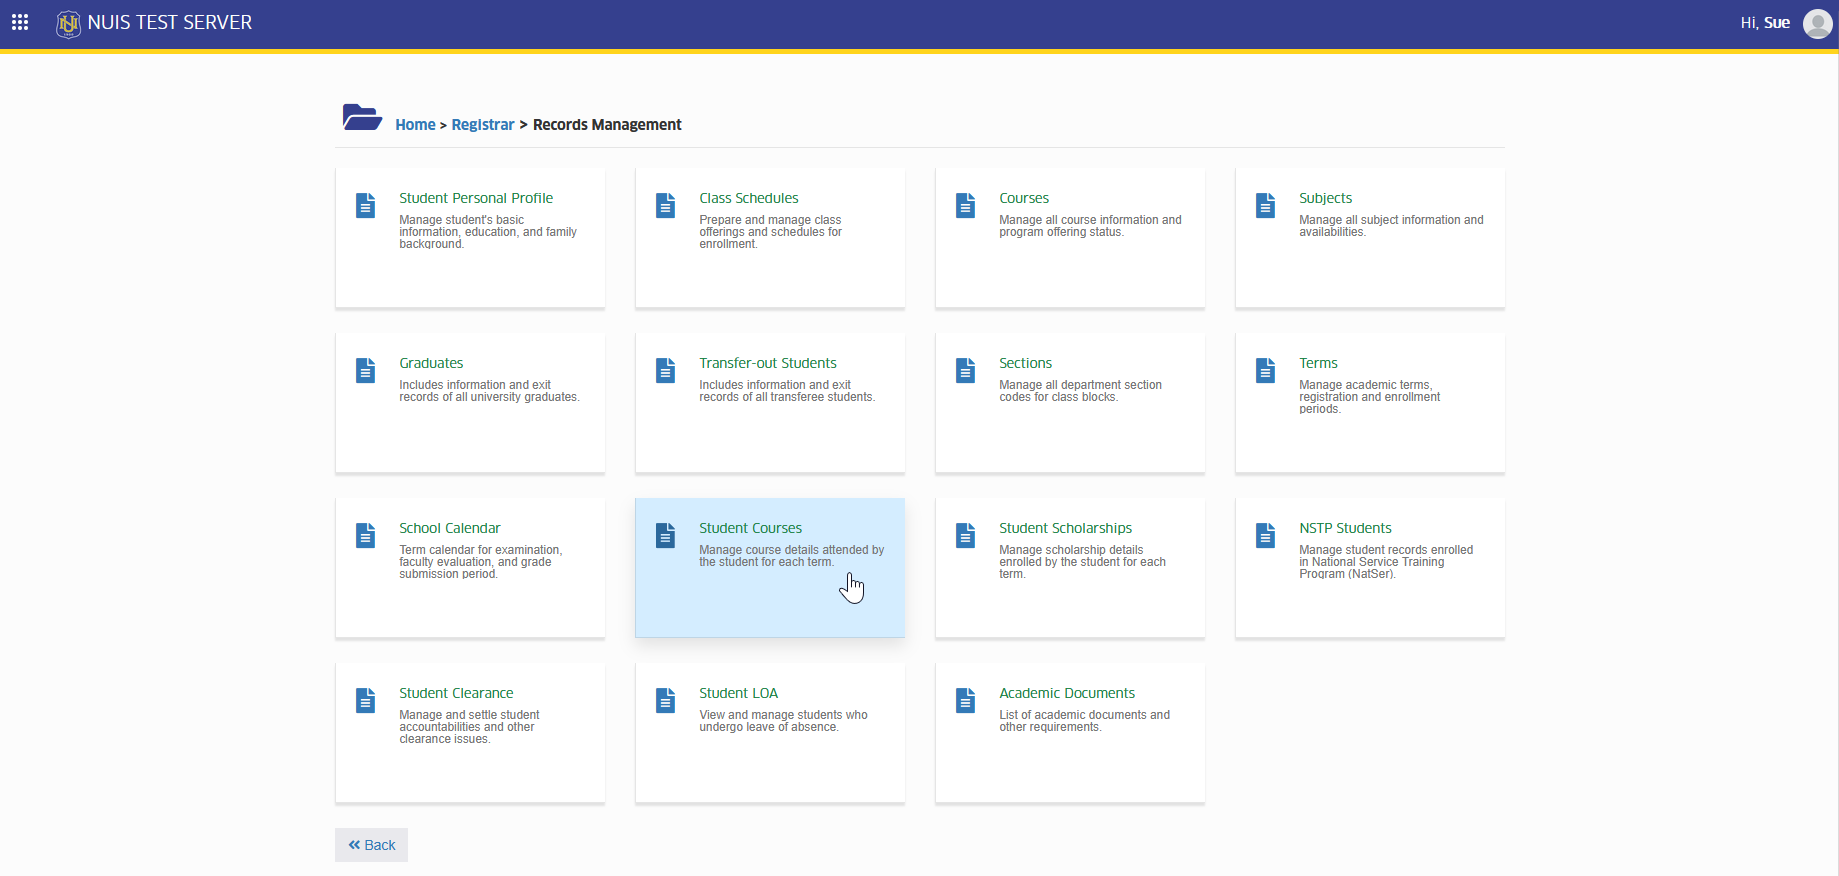
How to Use the Module
This section shows how Registrar Personnel can add, edit, or delete courses for a student. You can search for a student, select the term, and then update their course list as needed, including changes for program shifting.
Add Student Course
Student courses are automatically recorded each term after the Registrar Personel creates a term record. If there is a need to manually add a student course, follow the step below.
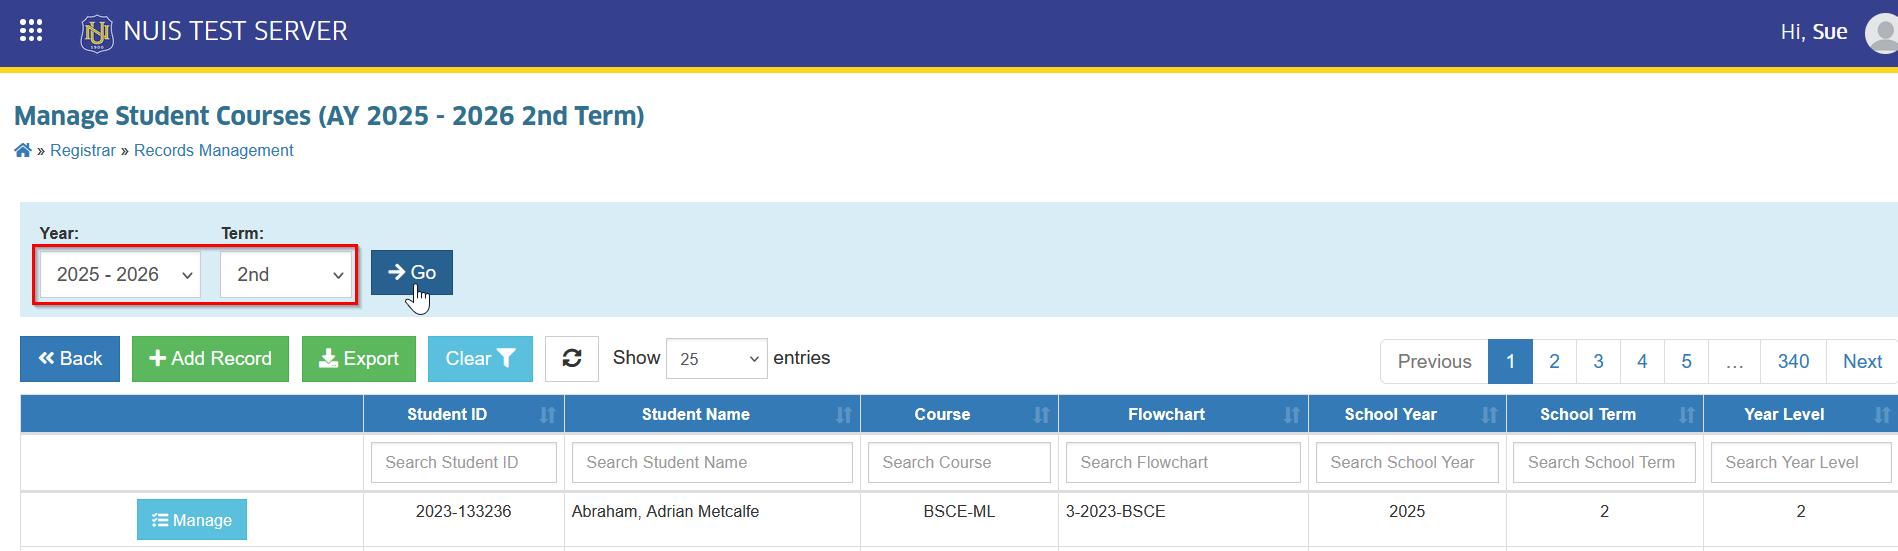
STEP 1. By default, the page will display the current school year and term. If you need to create a record for a different year or term, use the School Year and Term filter, then click the button.
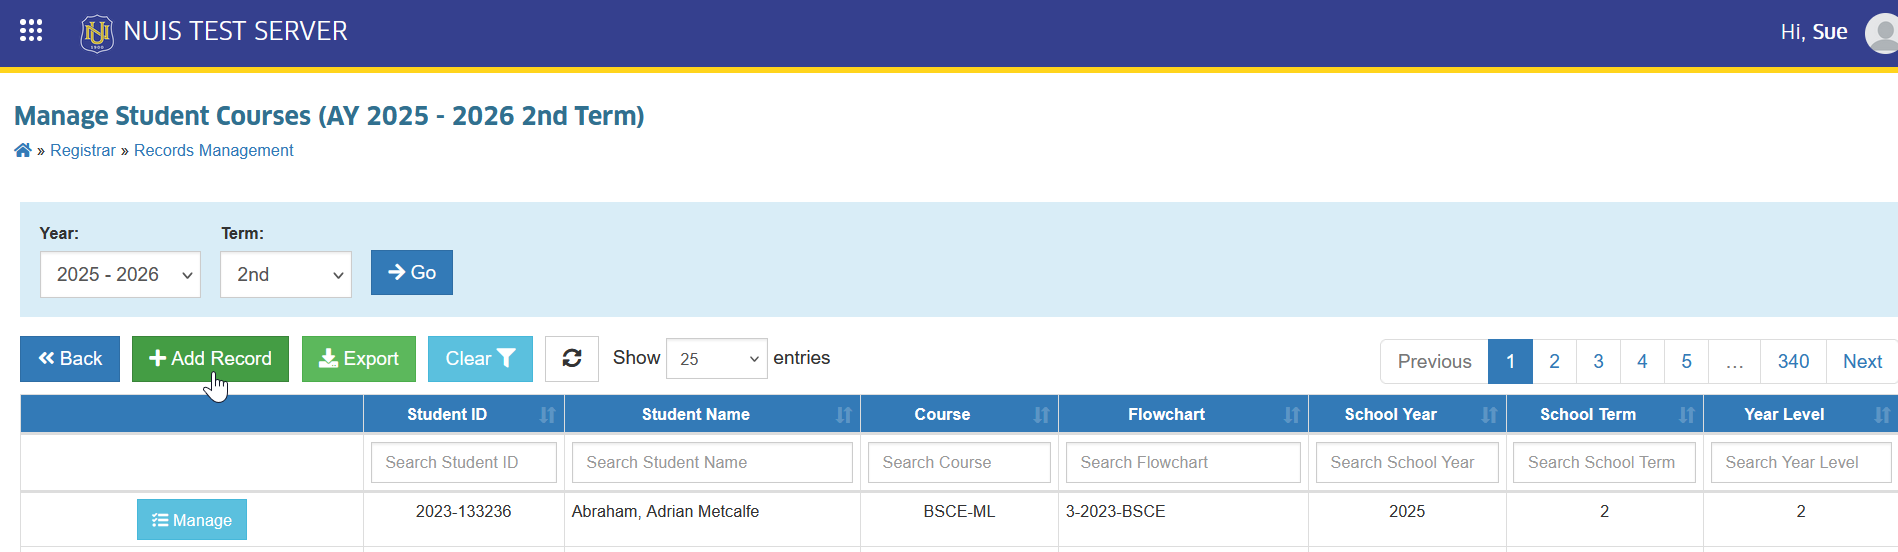
STEP 2. On the Terms Manage Student Courses page, locate and click the button. The system will redirect to Manage Student Course page.
STEP 3. On the Manage Student Course page, seacrh for the student by entering Student ID/Student Name, then click the button.
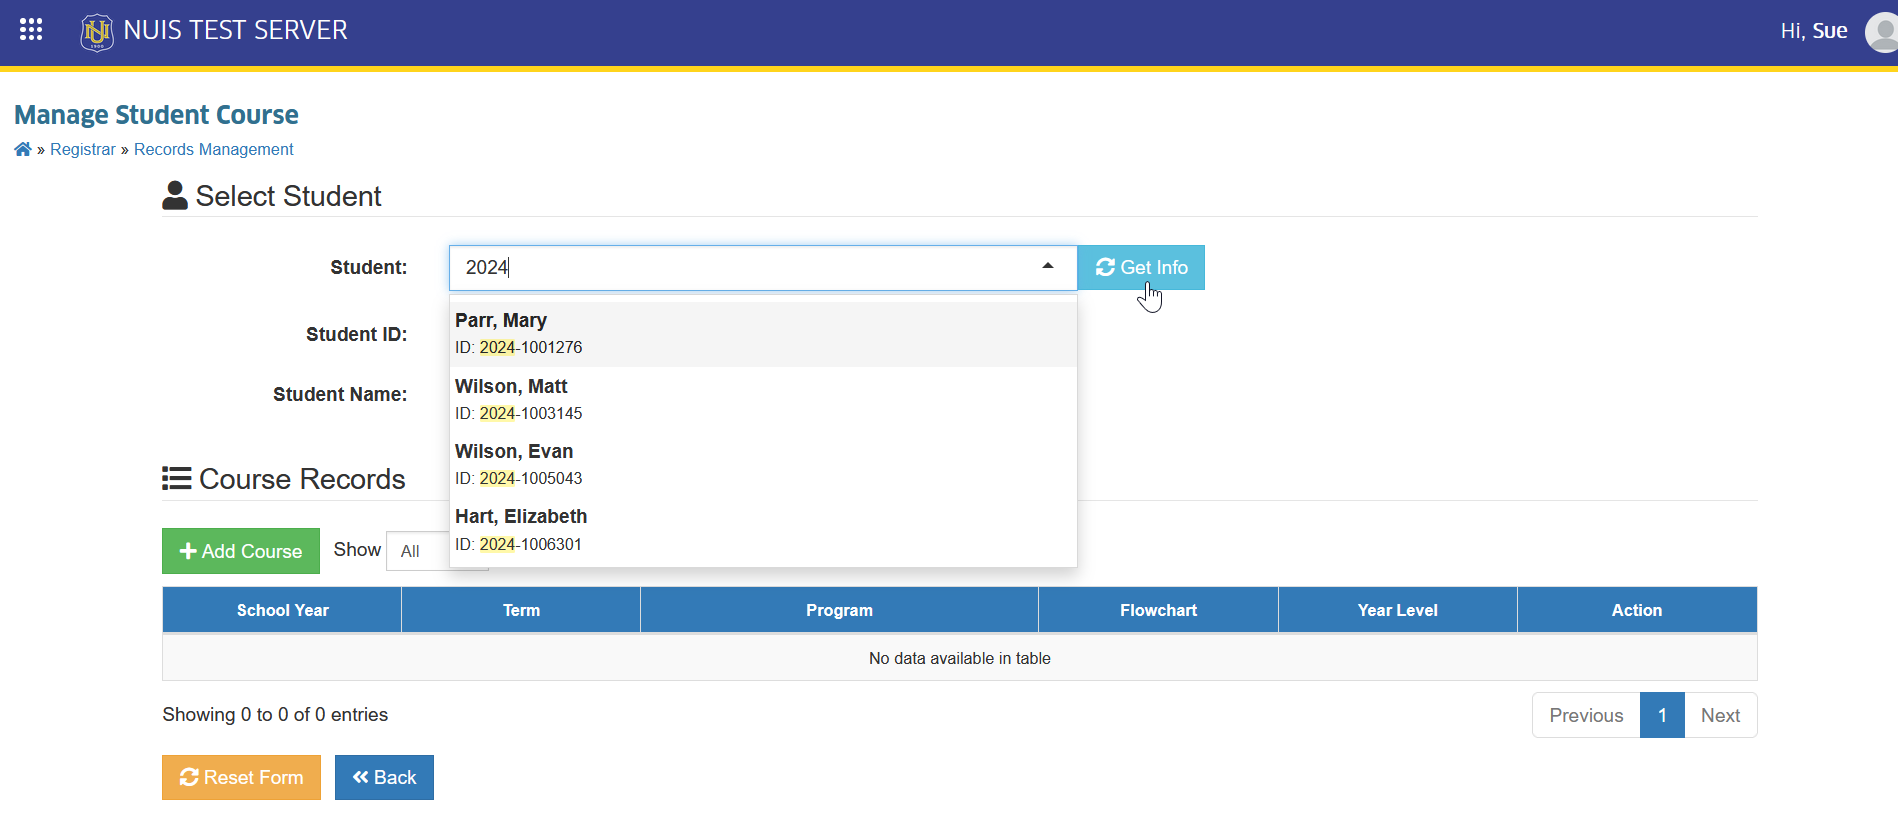
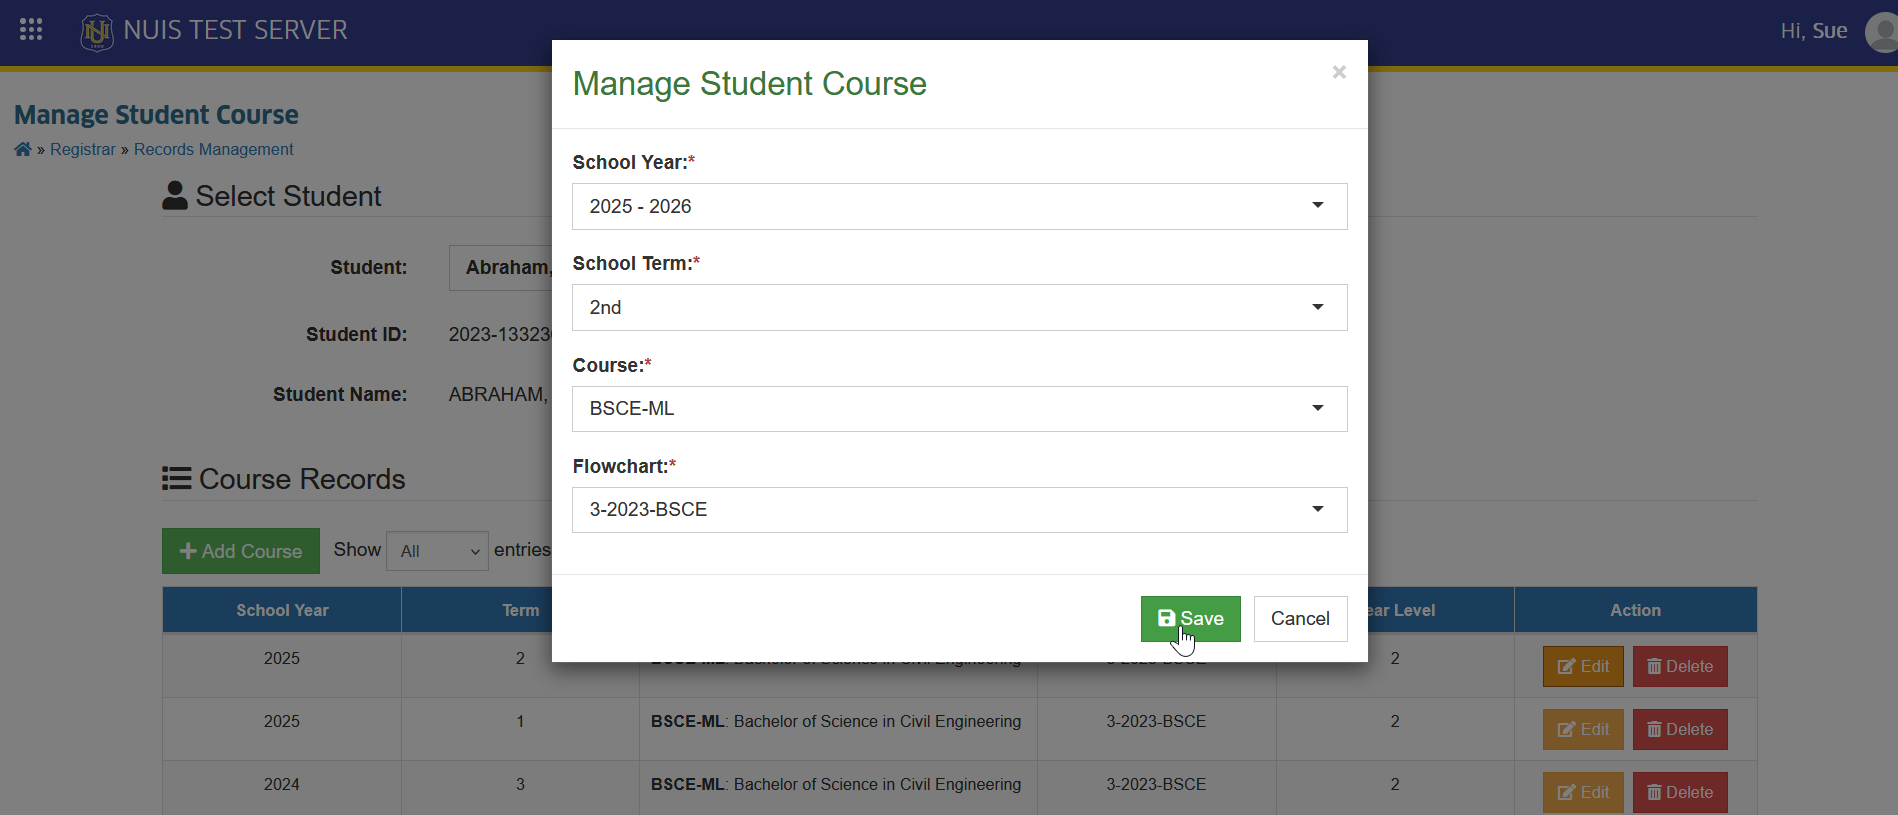
STEP 4. The page will display the student's entire course record for each term. Click the button. The Manage Student Course prompt will appear.
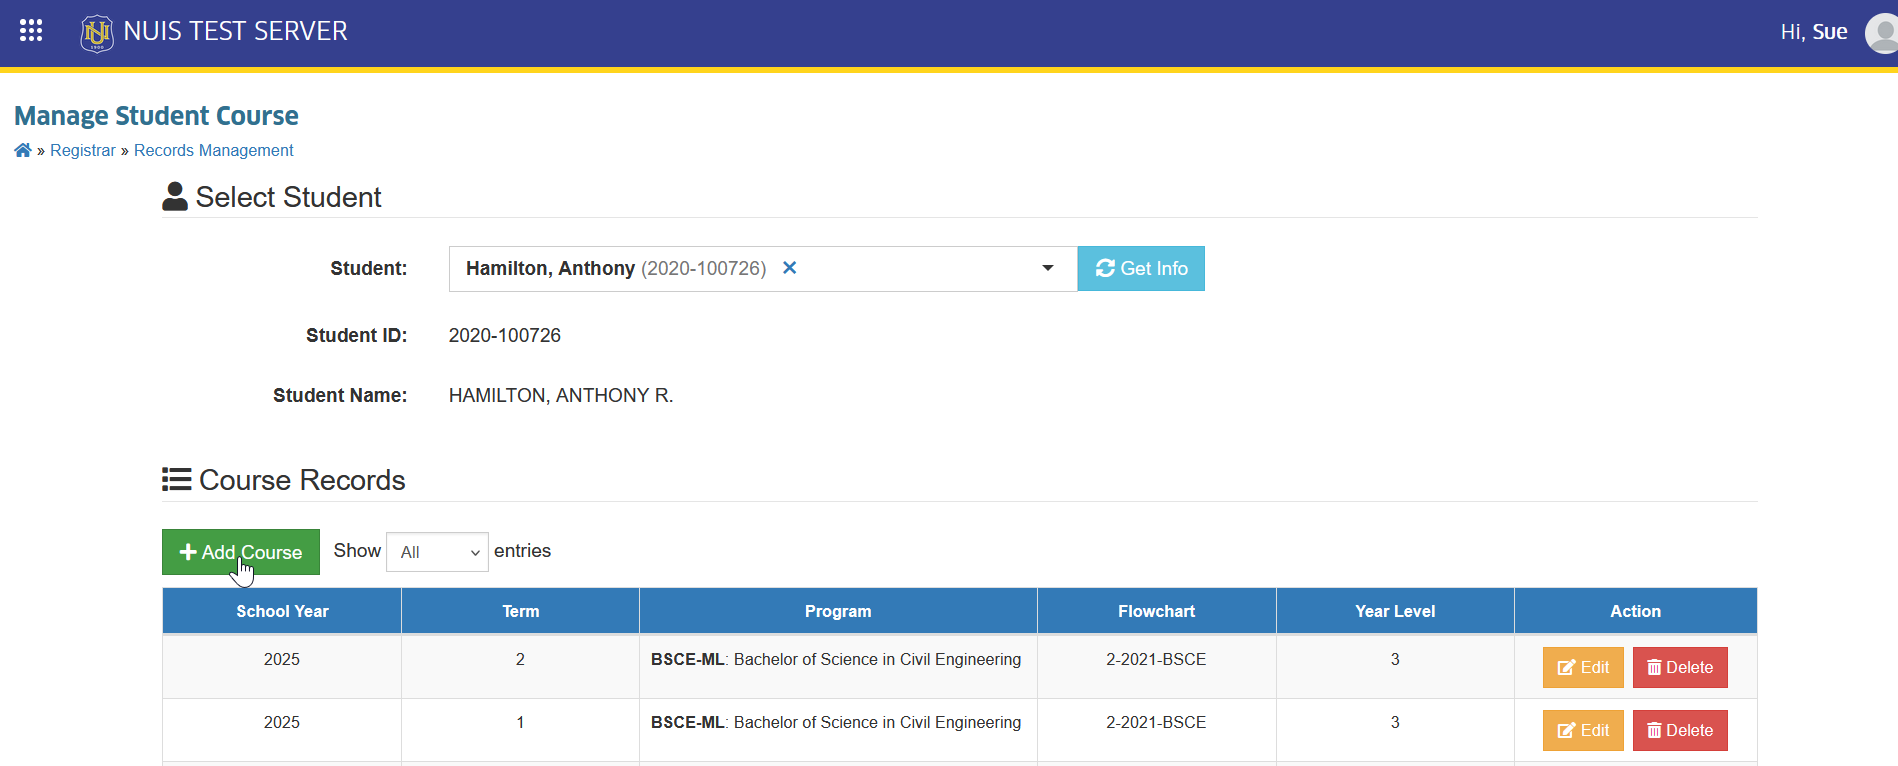
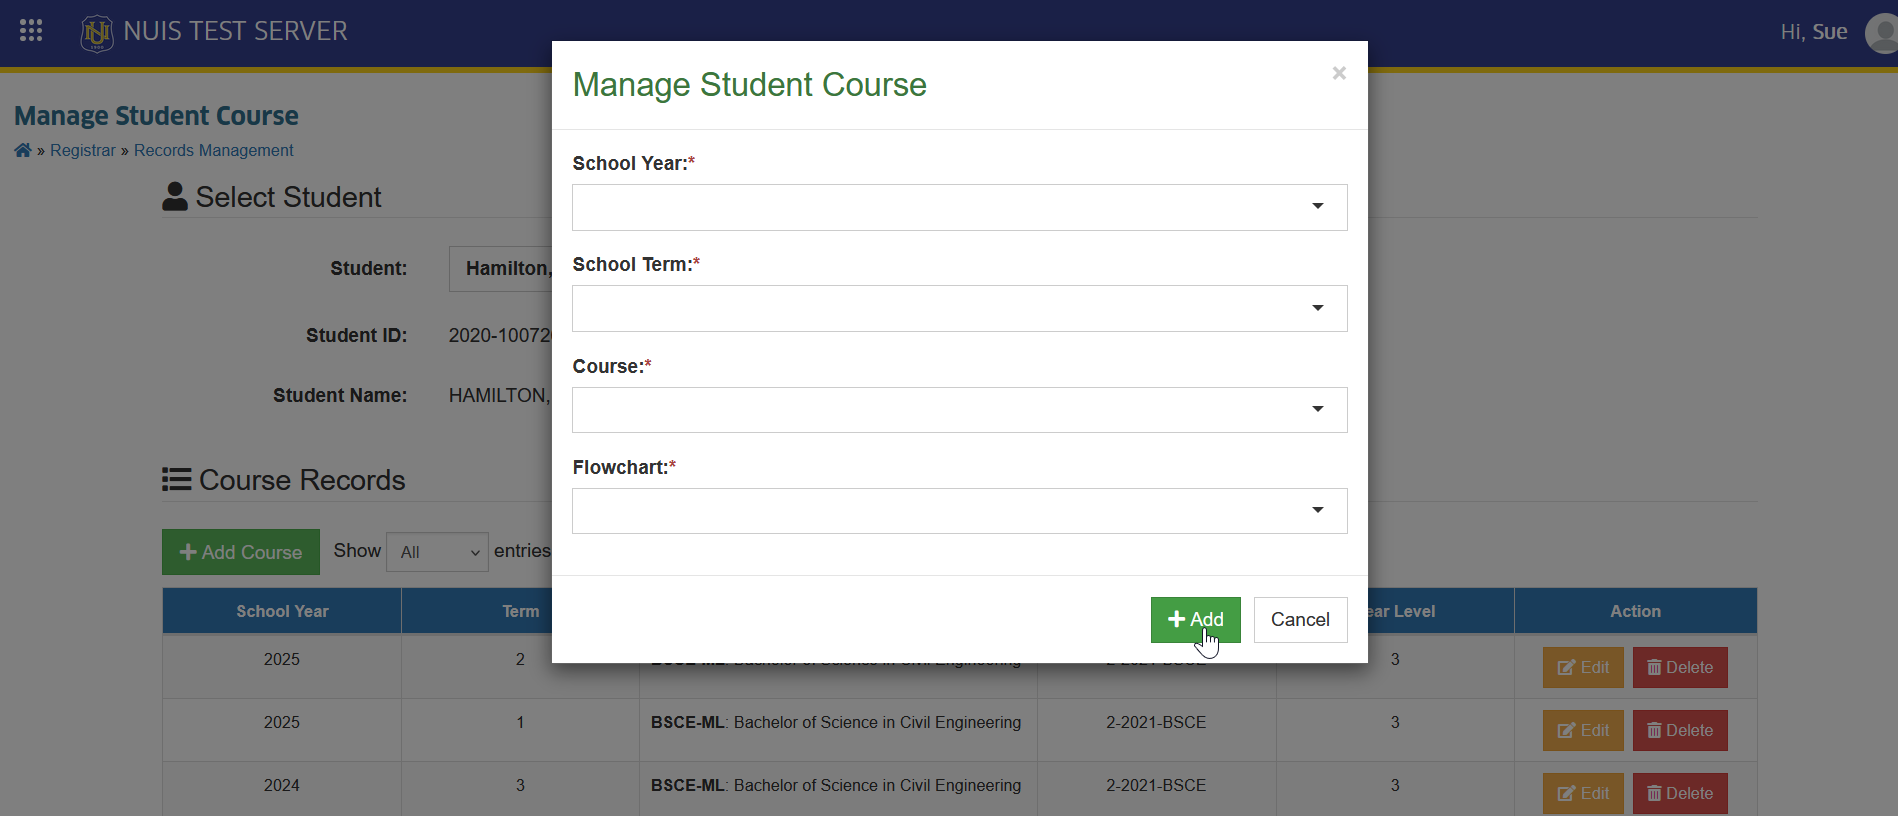
STEP 5. Fill out the required information in the prompt.
| Field Name | Description | Is Required |
|---|---|---|
| School Year | Select the academic year for which the student's course are being managed. This ensures that all course records are correctly associated with the right school year. | Yes |
| School Term | Choose the specific term for the student's course enrollment. | Yes |
| Course | Select the course to be added | Yes |
| Flowchart | Choose the student's program flowchart. | Yes |
STEP 6. Once completed, click the button to submit and save the new record.
Edit Student's Course
Follow the step below on how to edit student's course. User may edit the student's course when necessary or upon shifting course request.
STEP 1. On the Manage Student Courses page, select for the student to manage and click the button. This will redirect to the student's course record.
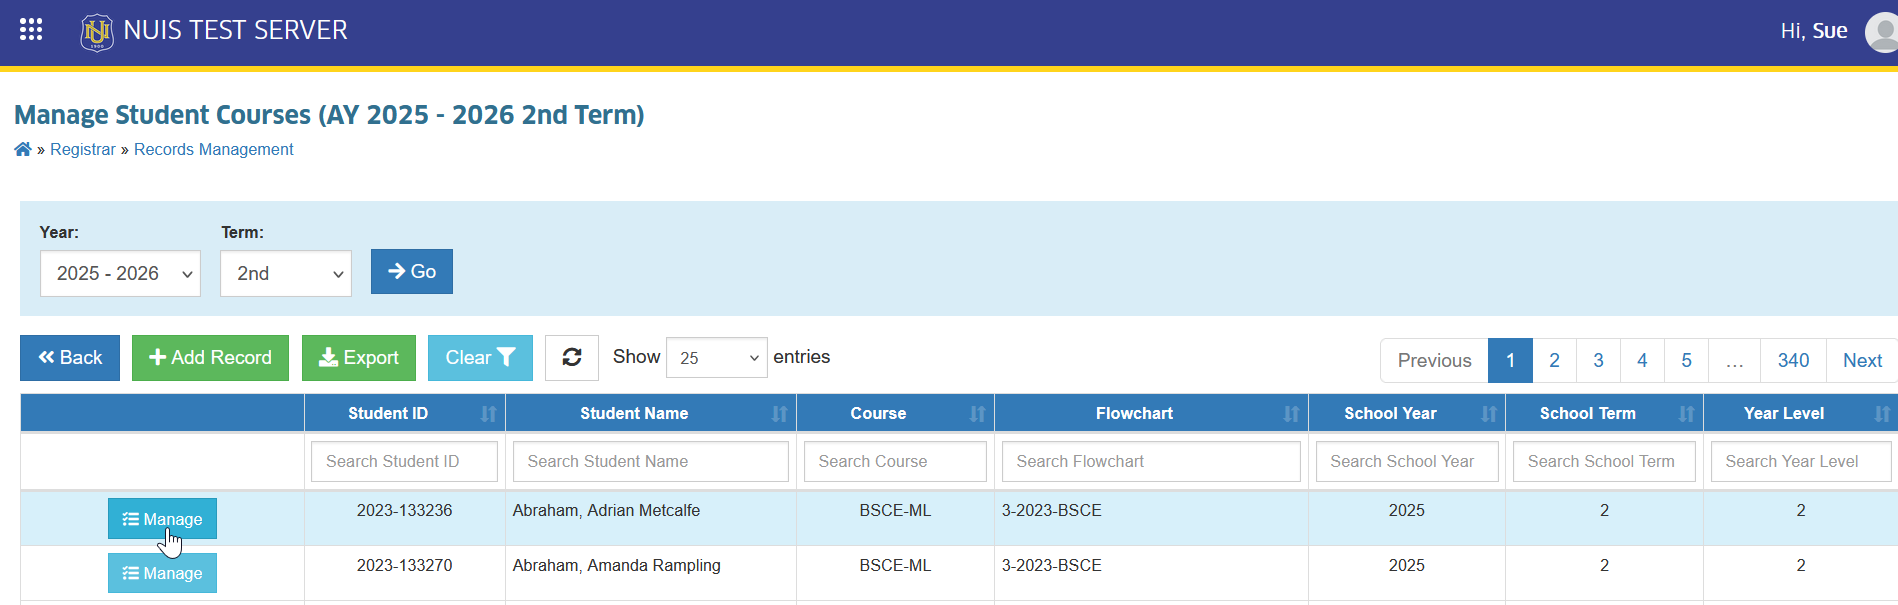
STEP 2. Click the corresponding button of the record to modify.
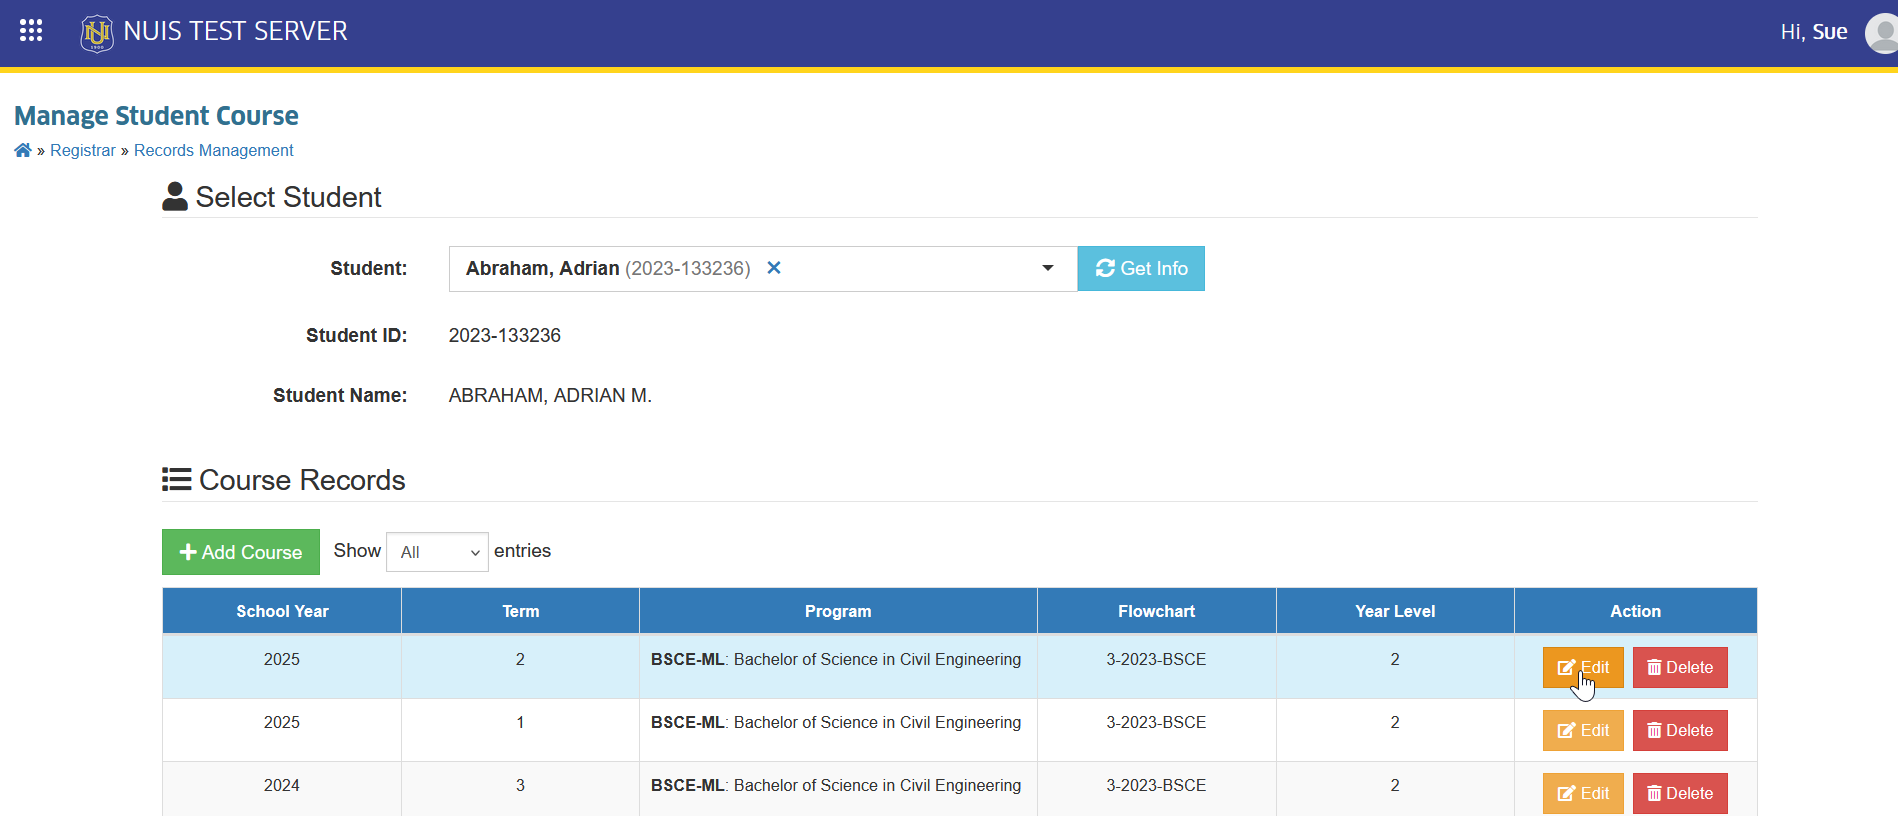
STEP 3. Update the necessary information, then click the button to save the changes.
Delete Student's Course
Follow the steps below to delete student's course record.
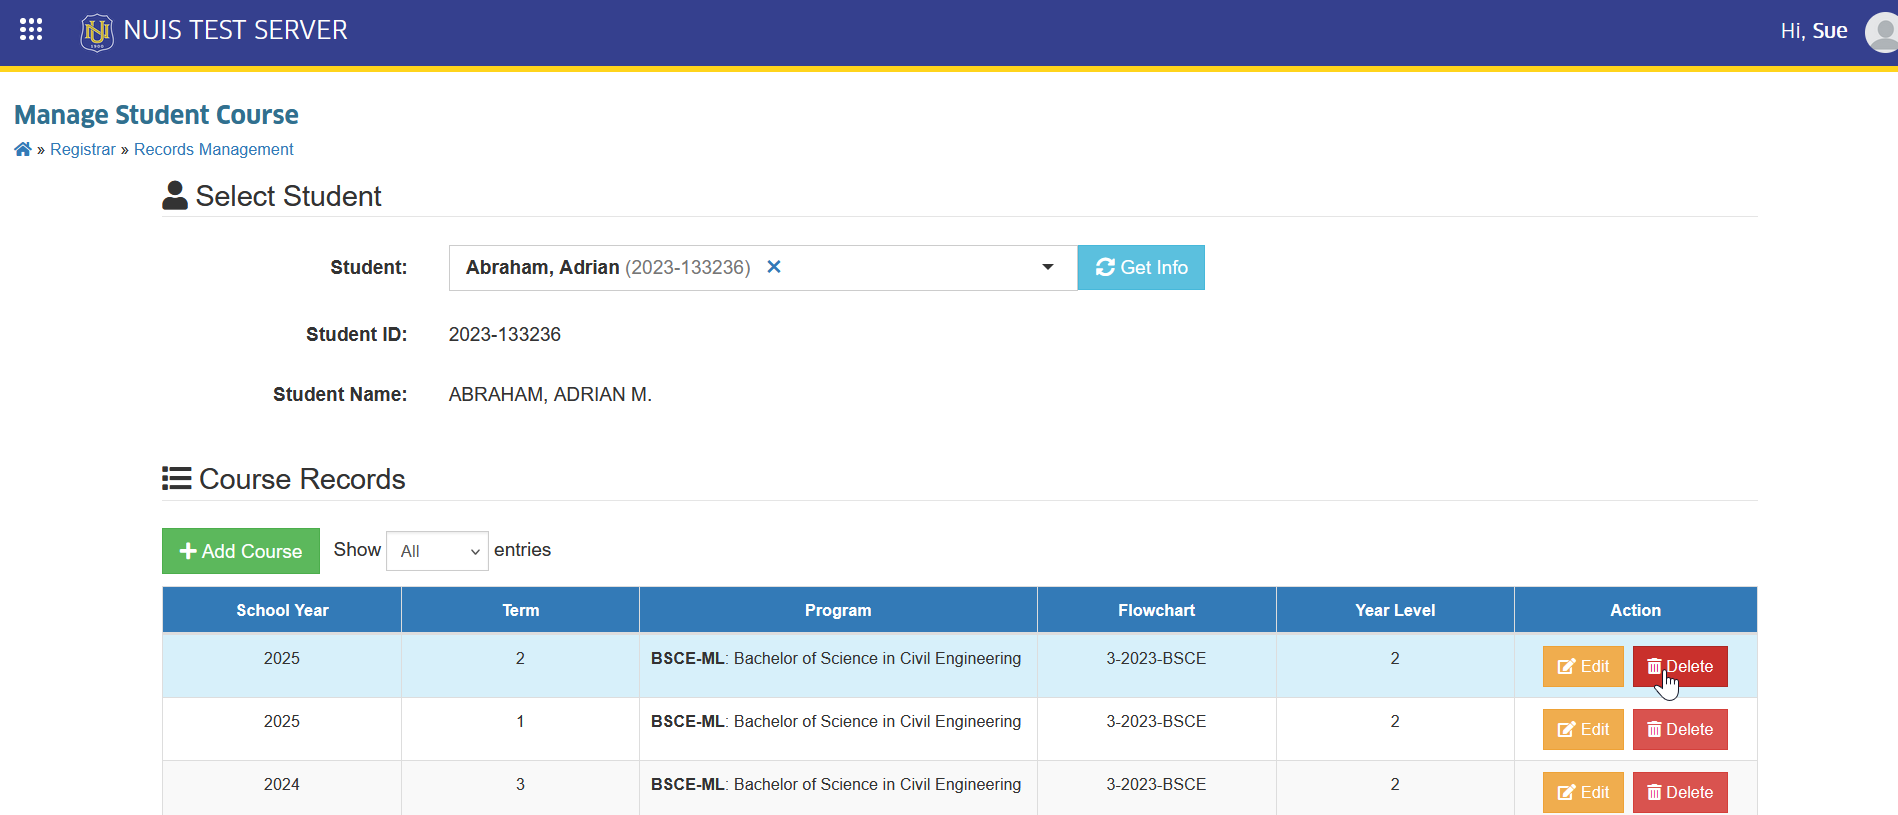
STEP 1. On the Manage Student Courses page, select for the student to manage and click the button. This will redirect to the student's course record.
STEP 2. Click the corresponding button of the record to remove.
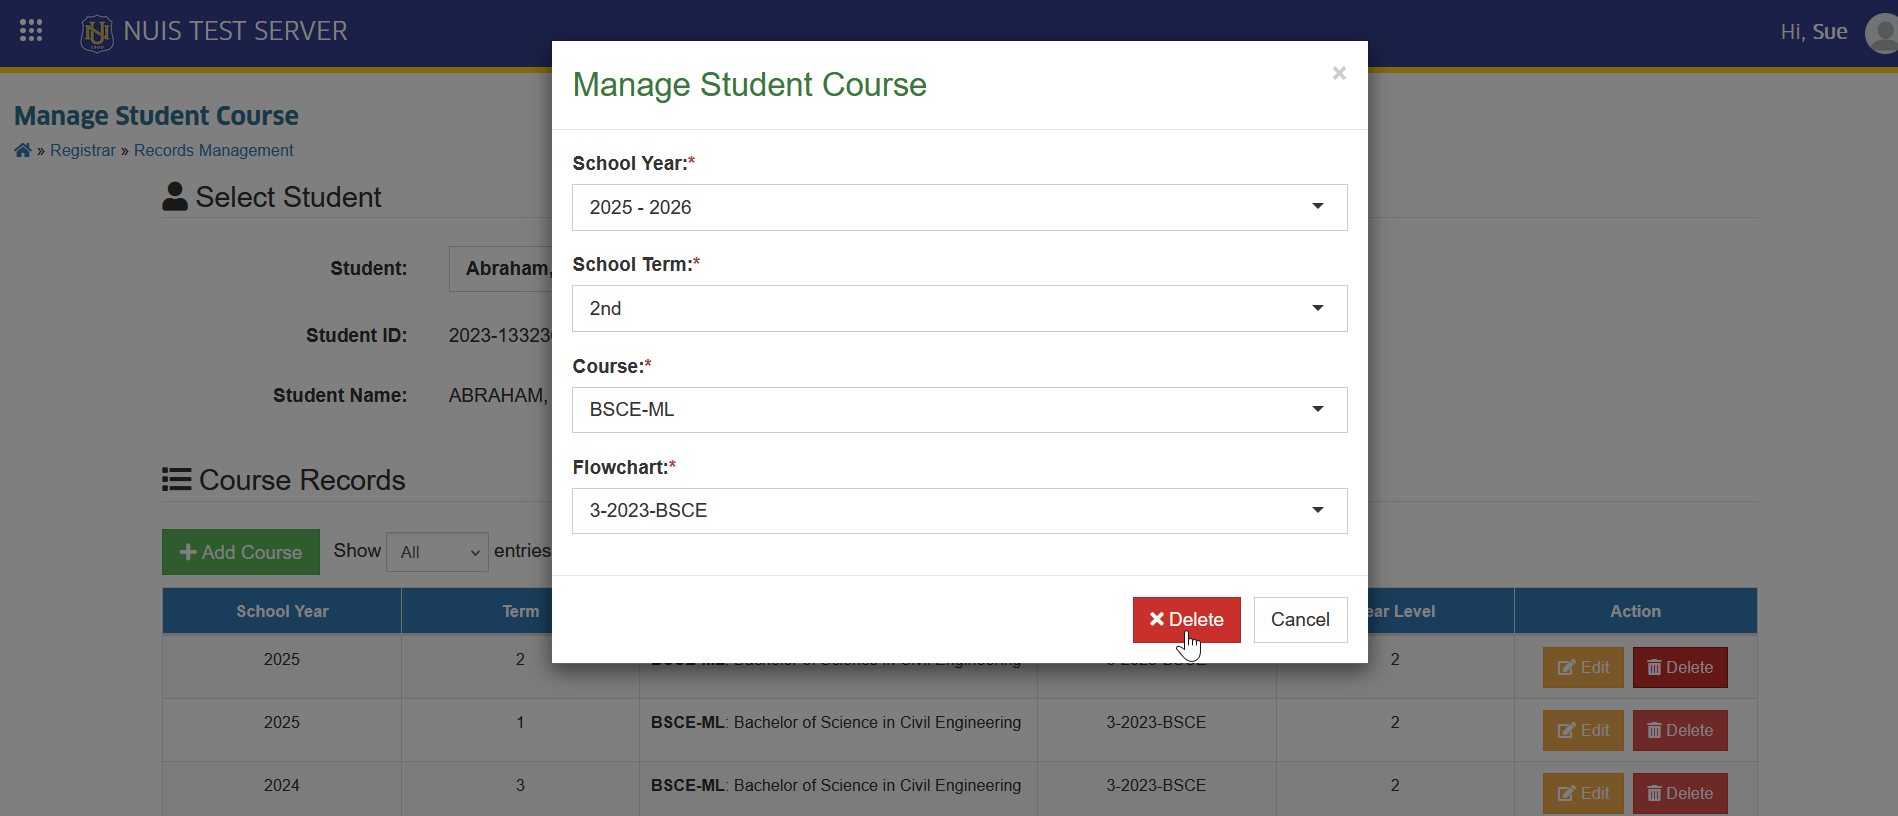
STEP 3. Confirm the deletion by clicking the button.
Export Student Course Record
Follow the steps below to download the student course record for offline backup.
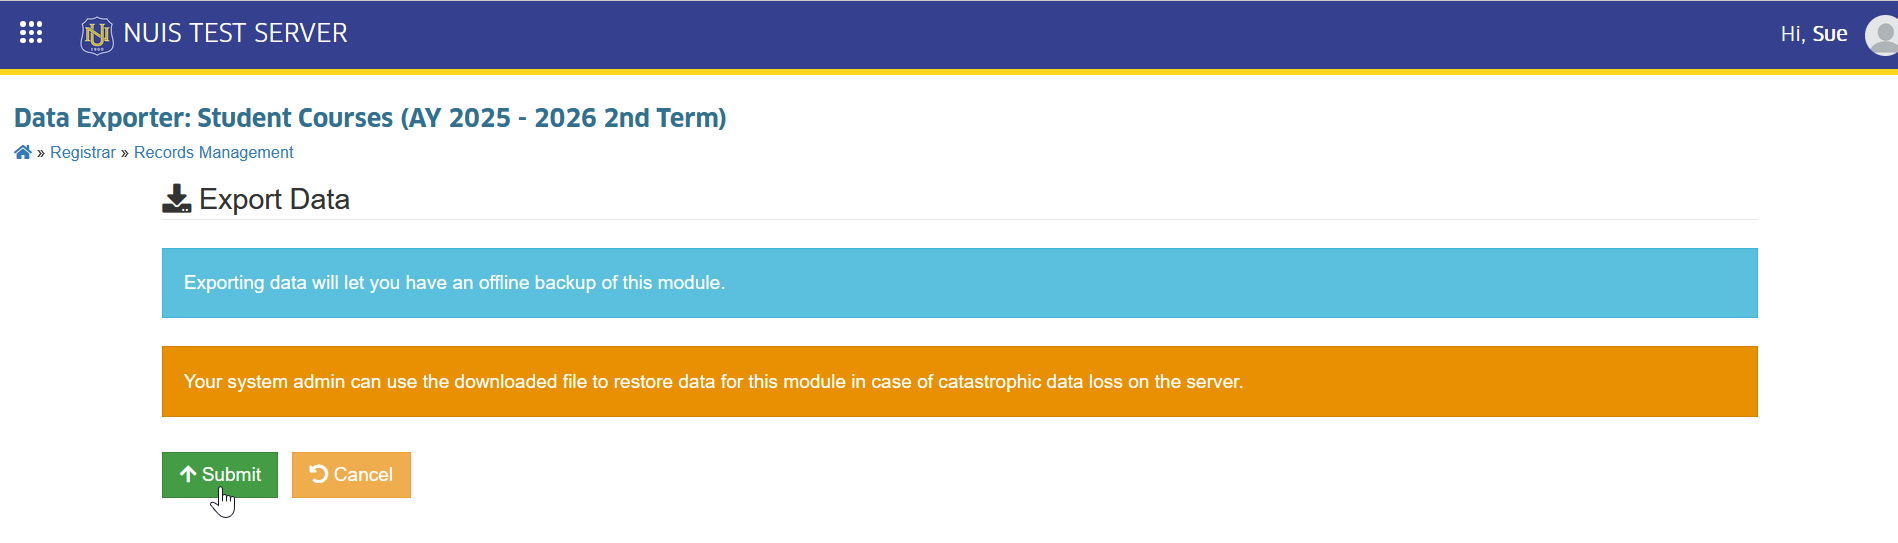
STEP 1. On the Manage Student Courses list view page, locate and click the button. The system will redirect to Data Exporter: Student Courses page.
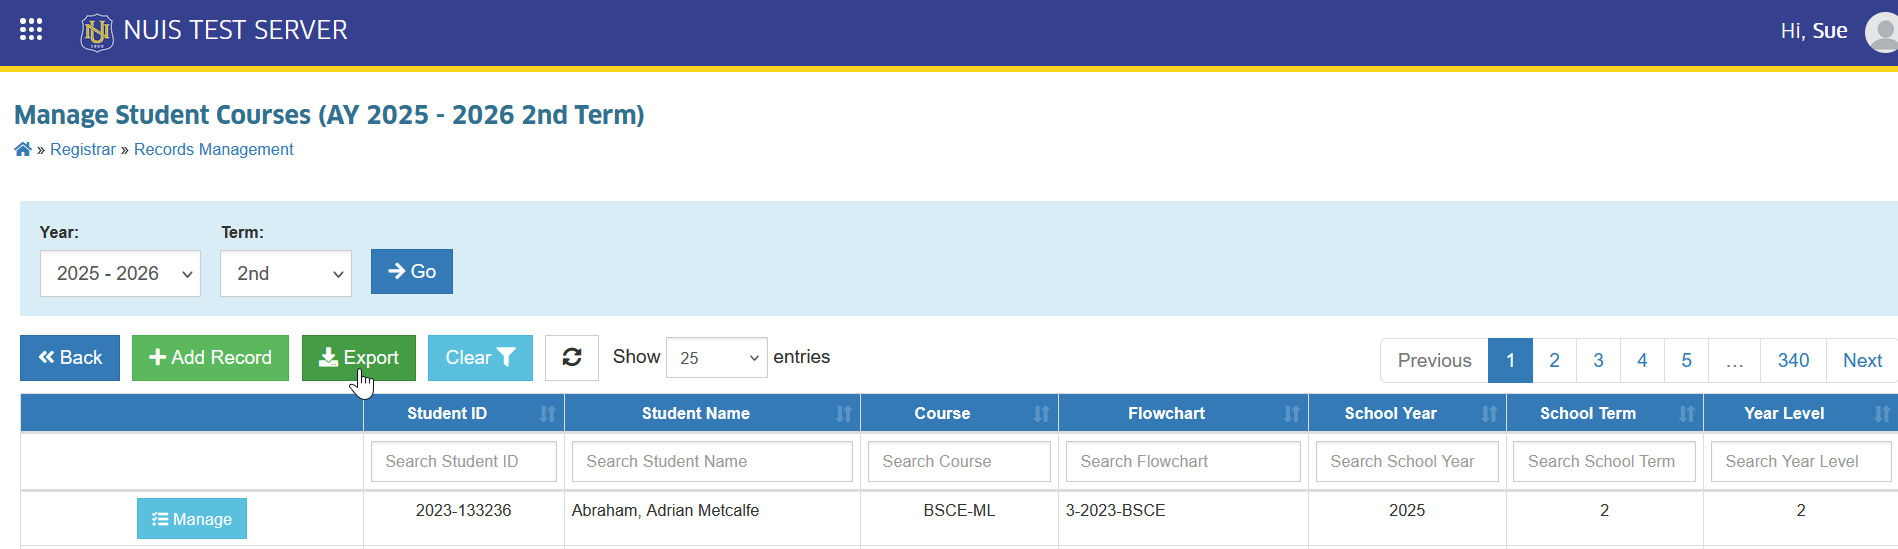
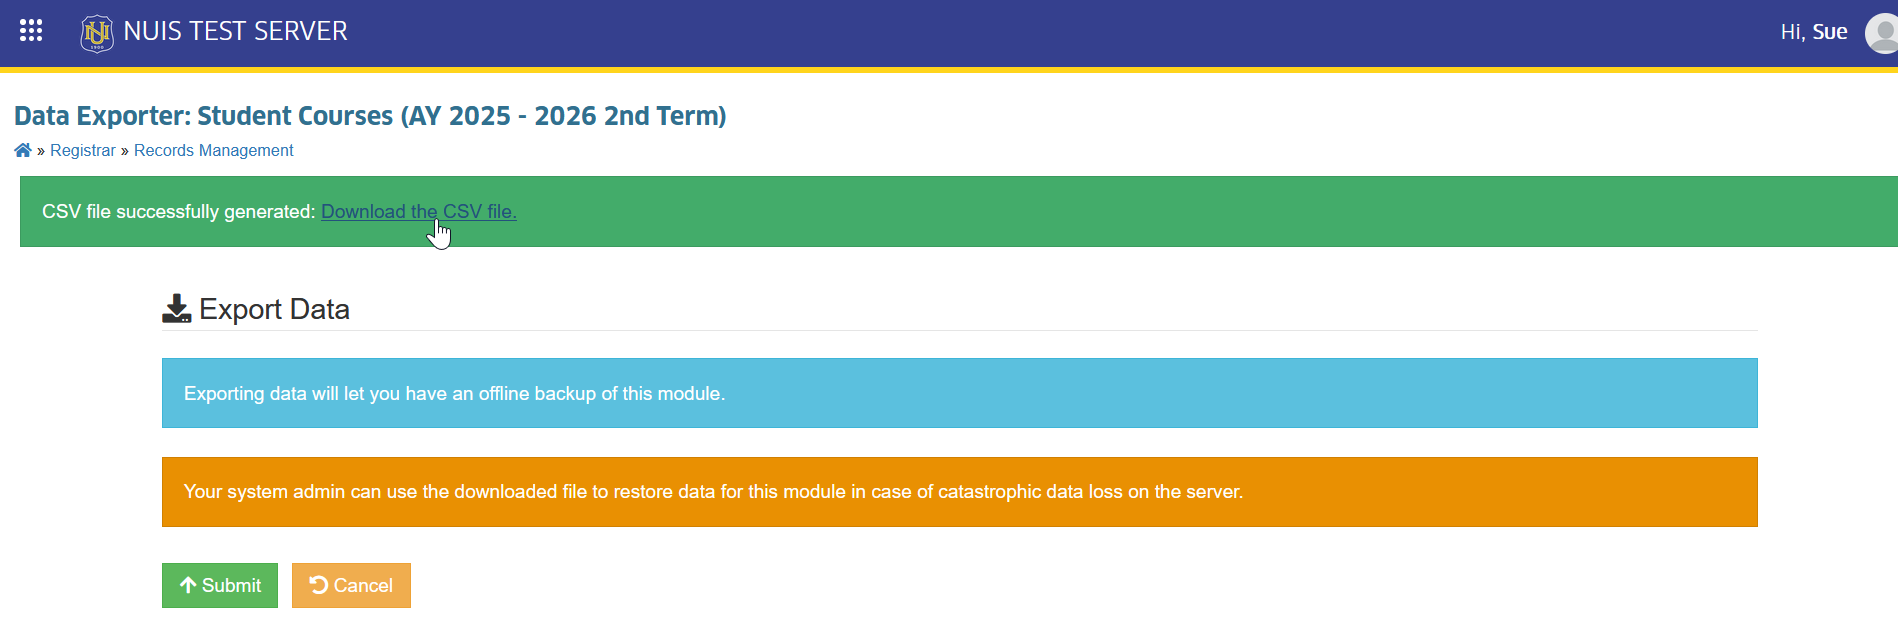
STEP 2. In the Data Exporter: Student Courses page, click the button. This action will generate the CSV file of the record.
STEP 3. Download the CSV File by clicking the link.
For more questions or concerns, email us at nu-desk@national-u.edu.ph