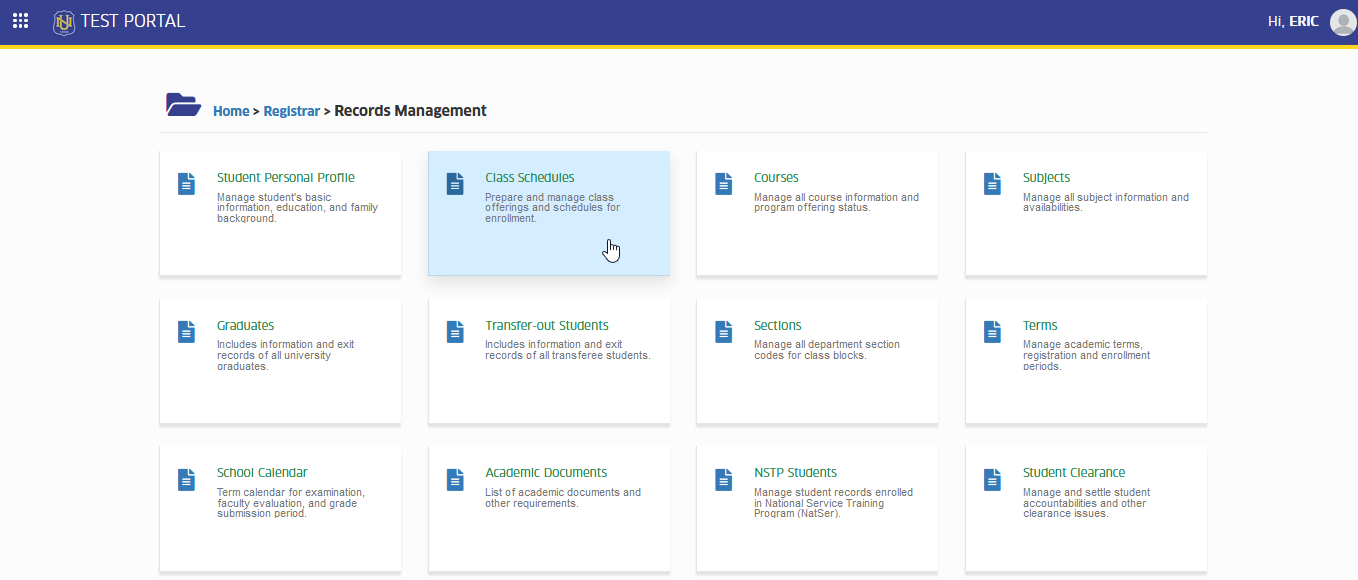
Class Schedules
Prepare and manage class offerings and schedules for enrollment.
This module helps users manage class schedules by making it easy to create and update them. It allows users to set limits on how many students can be in each class. Additionally, the module helps assign teachers to classes, ensuring that the right instructors are teaching the right courses. Overall, this module makes scheduling classes more organized and efficient.
This module has counterpart in Directors module group - Director > College Class Schedules, which is used to manage class schedules for their college/department.
Required Permissions
Under Class Schedules module permissions.
-
Add refSubjectOfferingHdr - This permission allows the user to add new record and its details like, subject code, section, class limits, type of students eligible for the course, schedule, and room assignment. This permission also enables the user to view the log history of every class schedule record.
-
Delete refSubjectOfferingHdr - This permisssion allows the user to delete a record.
-
Edit refSubjectOfferingHdr - This permission allows the user to modify/change the details of the class offering.
-
View refSubjectOfferingHdr - This permission allows the user to view and access the module.
Under Faculty Load module permissions.
-
Add FacultyLoad - This permission allows the user to add or assign faculty in the class schedule that was created.
-
Delete Facultyload - This permission allows the user to remove the faculty assigned to a class
-
Override FacultyLoad Conflict - This permission allows the user to approve the conflicts in faculty load assignment.
-
View FacultyLoad - This permission allows users to access and view the module feature.
How to access the module?
To access the module, make sure you have the View refSubjectOfferingHdr permission. If it doesn’t appear in your portal, request access from your System Administrator.
To access the module go to Registrar > Records Management > Class Schedules
Click the module tab to redirect to Class Scheduling page.
Required Fields
| Field Name | Description | Required |
|---|---|---|
| Subject | Unique subject code that identifies the specific course offering. | Yes |
| Section | Section name of the course. Use the correct section codes provided in the module. | Yes |
| Class Limit | Maximum number of students allowed to enroll in the course. | Yes |
| Offer To | Group or category of students eligible to enroll in the course. | Yes |
| Day | Day of the week when the class is scheduled. | Yes |
| Time Start | Start time of the class. | Yes |
| Time End | End time of the class. | Yes |
| Room Type | Type of classroom: Lecture or Laboratory. | Yes |
| Room | Assigned classroom for the course, selected from the available list. | Yes |
How to Add a New Class Schedule in this module
This section provides a clear, step-by-step guide for users on how to add a new class schedule within Class Schedules module. It explains the steps needed to enter important information like the subject code, section name, class limit, when the class meets, which room it will be in, and the student category that are eligible to take the course.
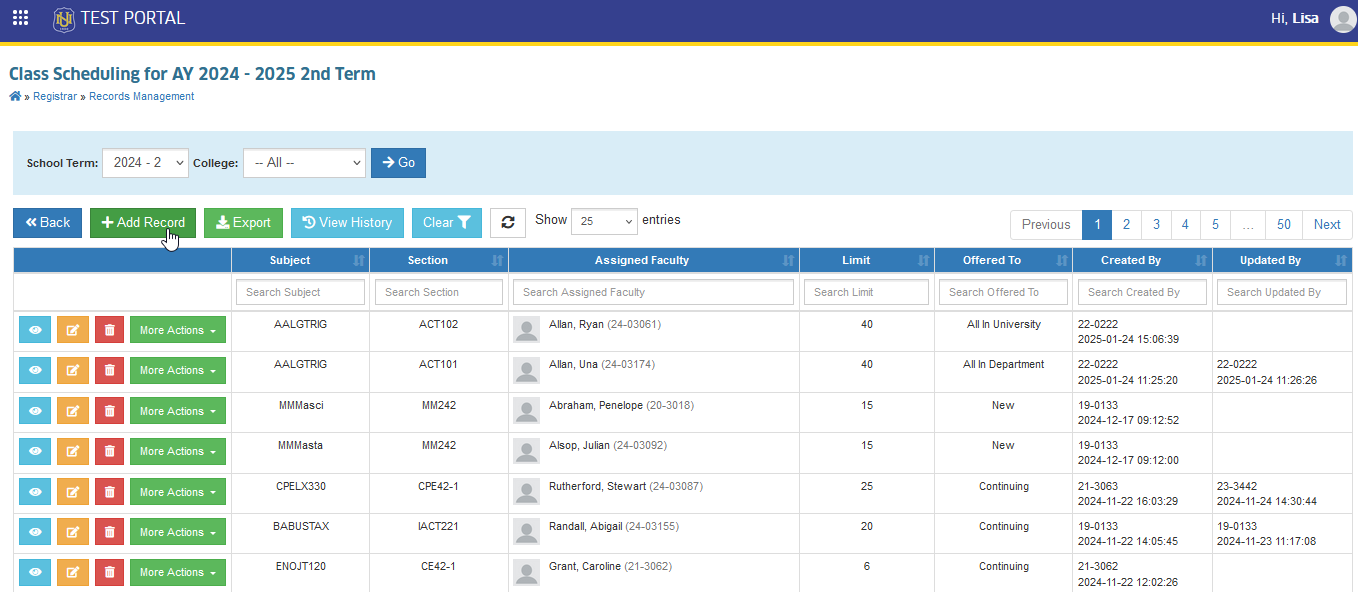
STEP 1. On the Class Schedules page, click on the button. User will be redirected to Add Class Offering page.
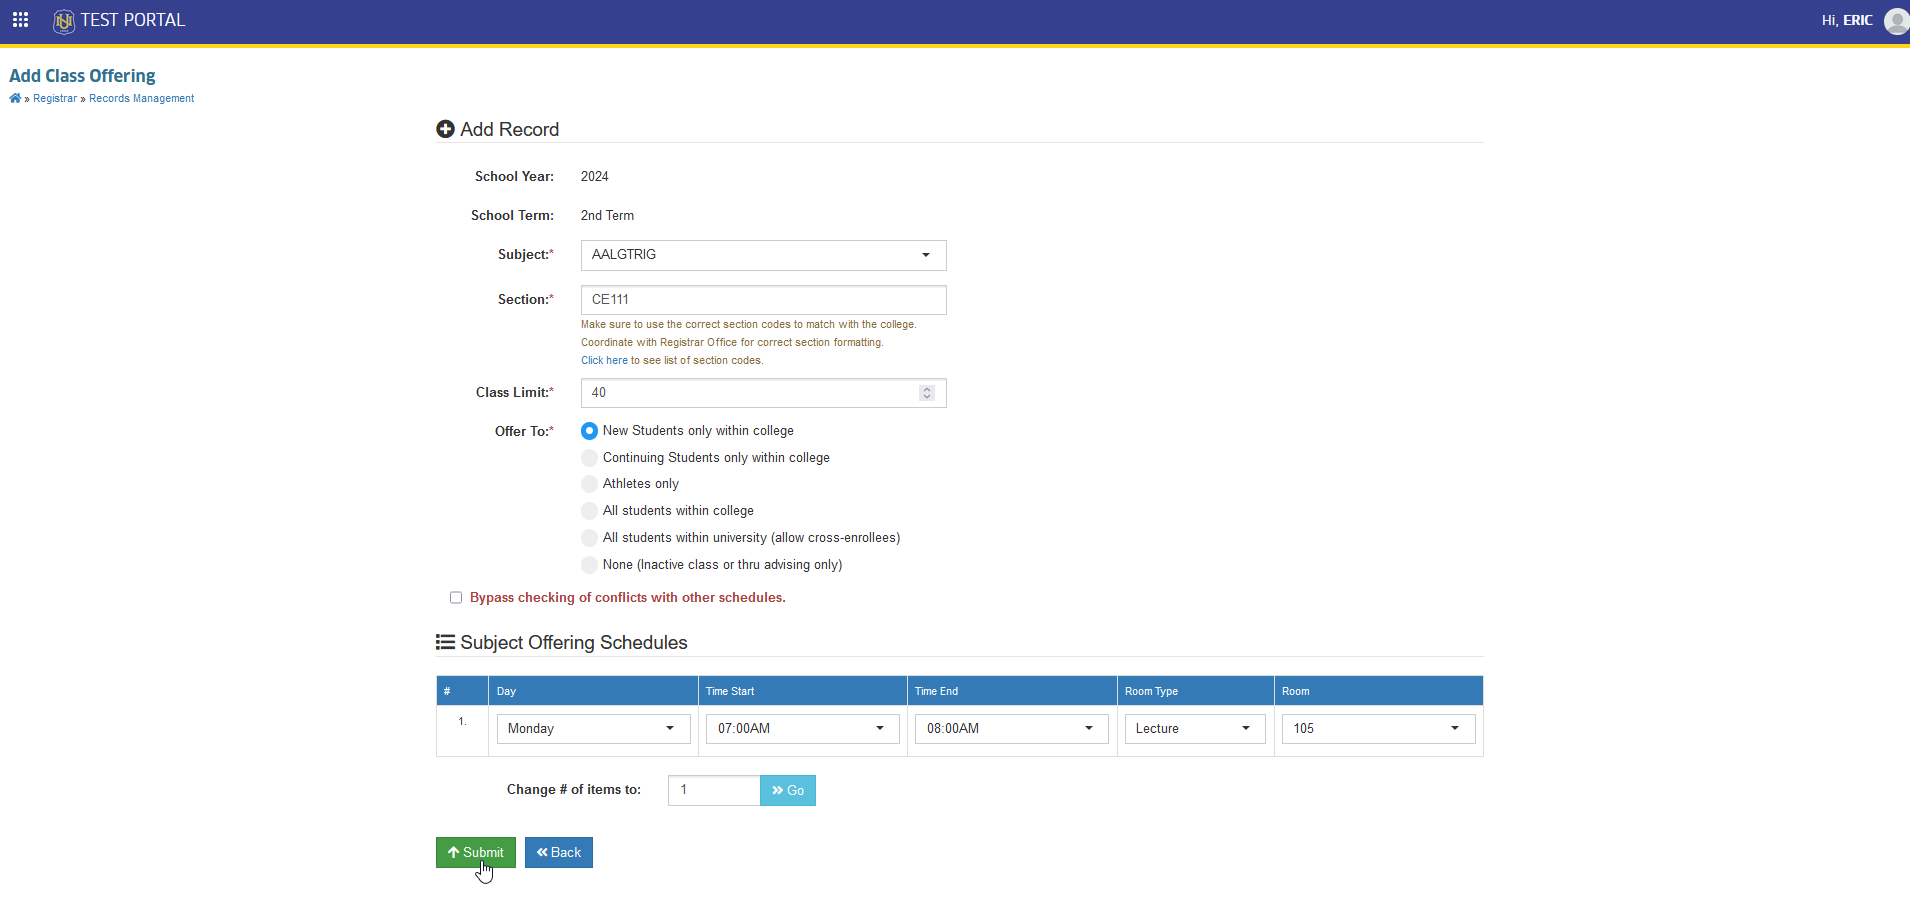
STEP 2. In Add Class Offering page, encode all the required information. Check the Required fields for reference. All entered details should be checked to ensure accuracy and completeness. Once reviewed, click on the button to save the new record.
New subject offering has been added. Assign the faculty who will teach the specific course.
-
Only the University Registrar and Deans has the permission to override conflicts in class schedule.
-
Change the number of items to add new subject offering schedule.
How to Edit Class Schedules
This guide will help the user in editing an existing class schedule in this module. Whether the user need to adjust class times, change room assignments and other updates in class schedule information. Follow the steps below on how to make necessary changes in existing class schedules.
STEP 1. On the Class Scheduling page, select the class schedule to edit from the list of subject offering and click the corresponding button of a record. The user will be redirected to Edit Class Offering page.
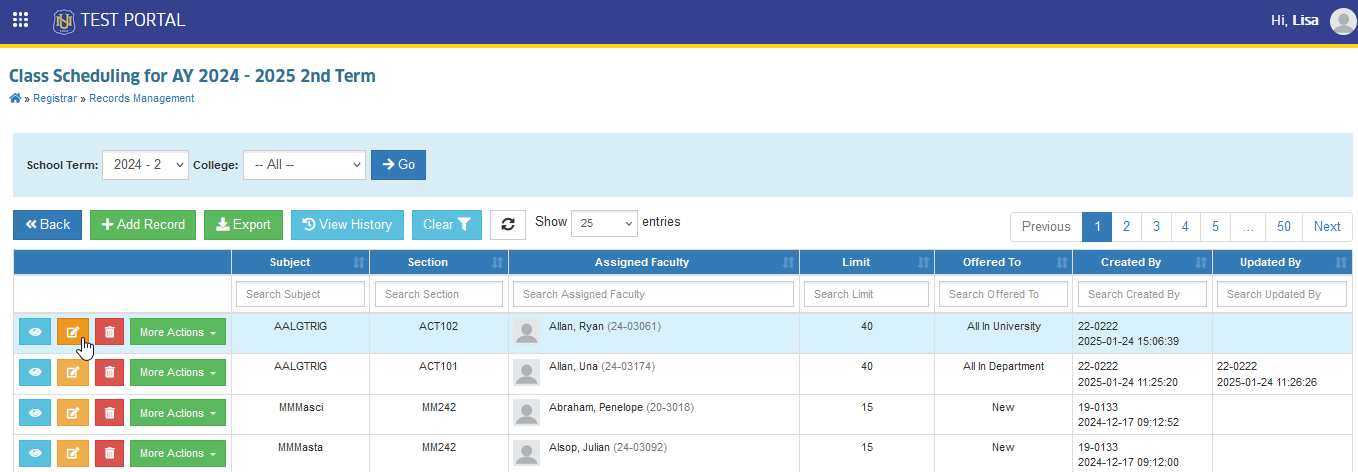
To make it easier to find specific class schedules, use the filtering feature of the module to narrow down the list of class schedules.
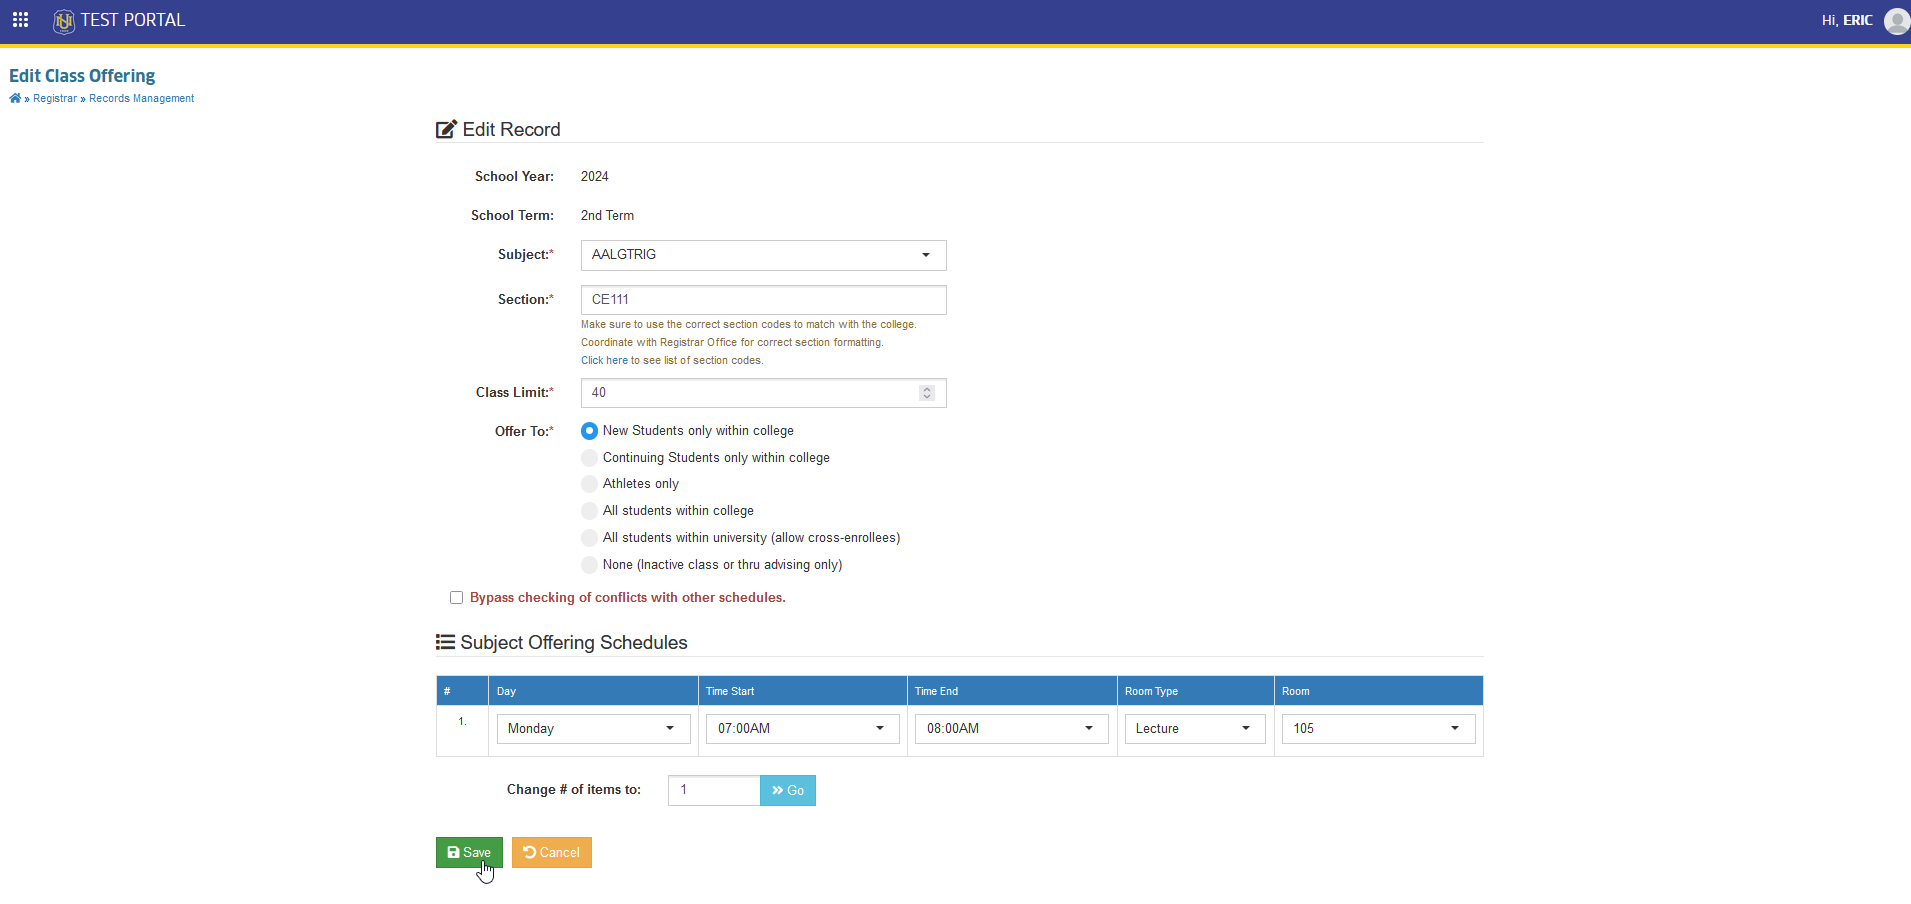
STEP 2. In Edit Class Schedule page, update the class schedule details such as class time, room assignment, class limits and other information in the required field. Click the button to apply changes and update the class schedule.
How to Delete Class Schedule record
To ensure that class schedules are correct and updated, users with the right permission may delete schedules if necessary. Follow the steps below on how to safely delete class schedule records.
STEP 1. In Class Scheduling page, Use the filtering feature of the module to find the specific class schedule to delete and click the corresponding button of a record.
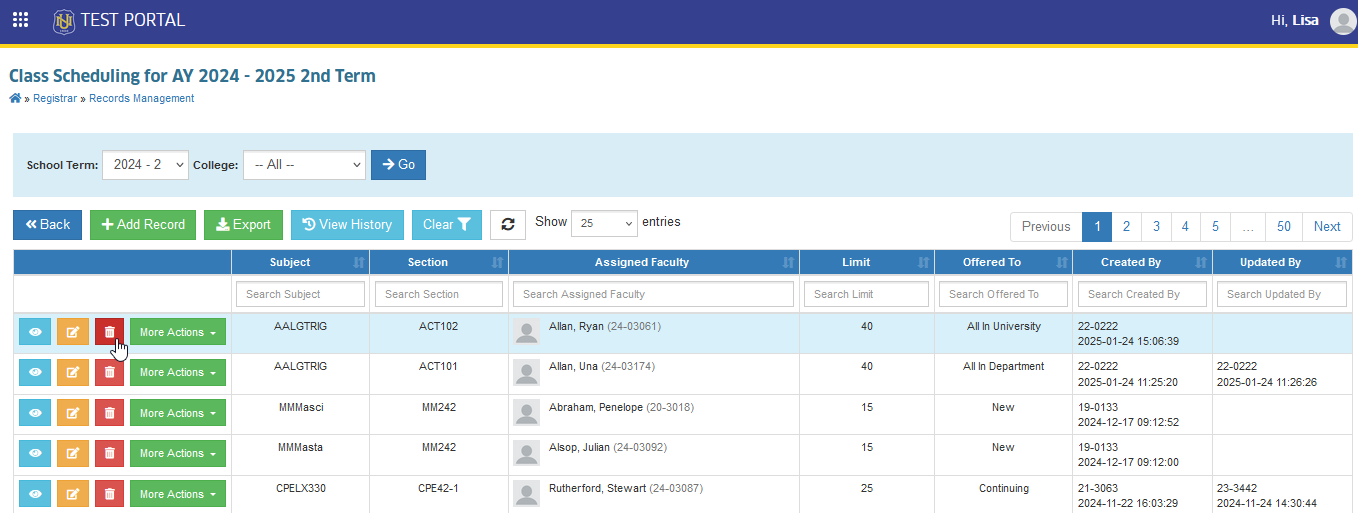
STEP 2. User will be redirected to Delete Class Offering page. To proceed with the deletion, click the button on that page.
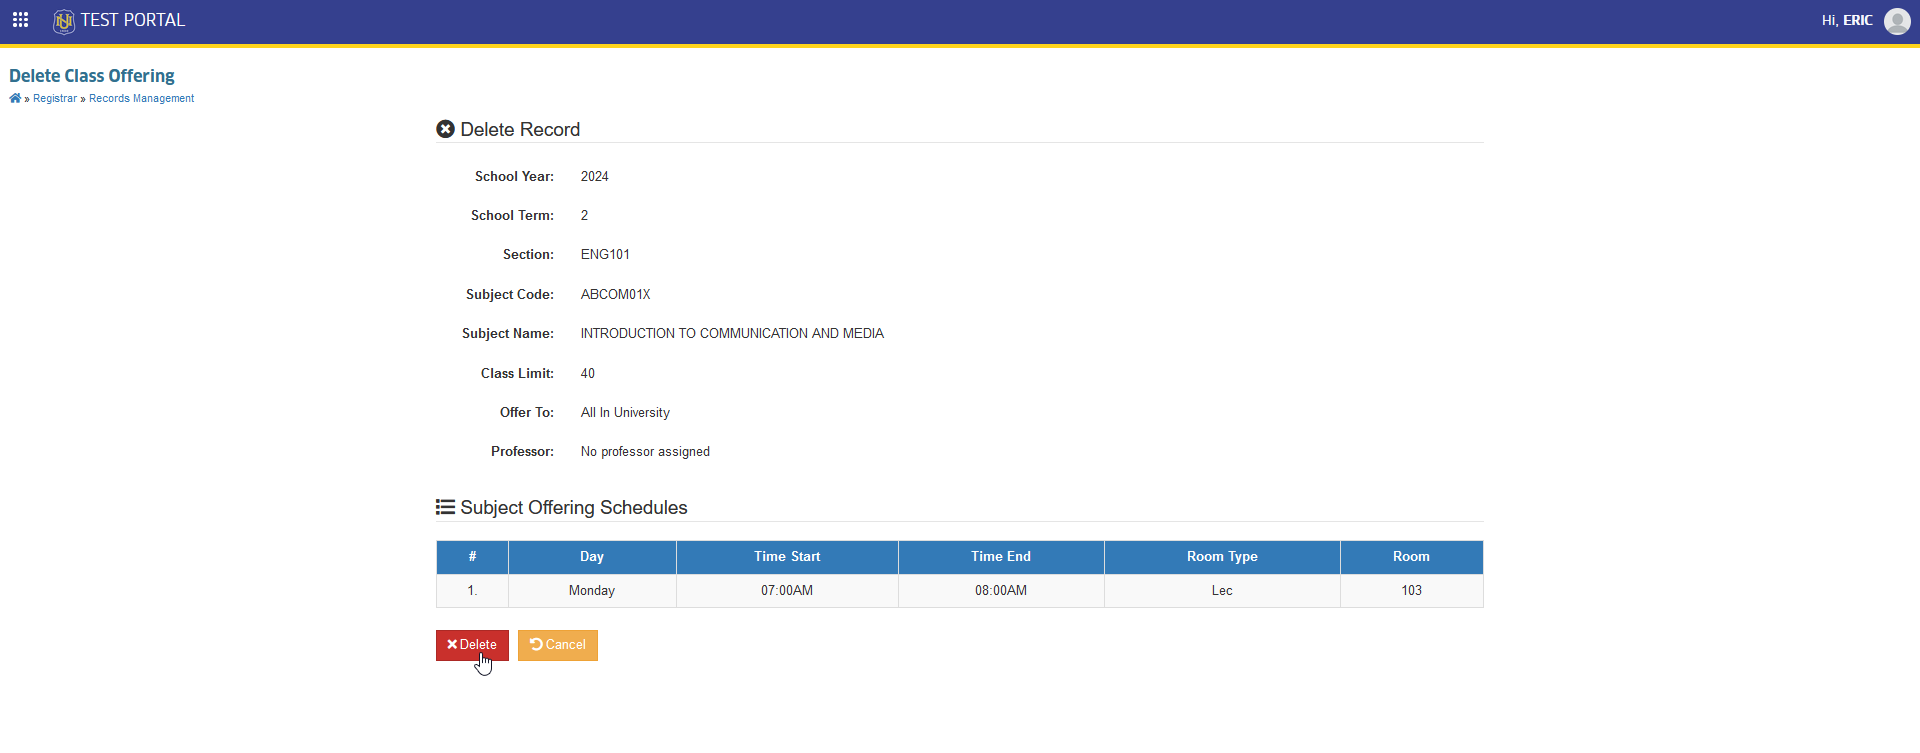
Users cannot delete a record if students are already enrolled in the class schedule.
How to Assign Faculty to a Class Schedule
This procedure will guide a user on how to add a teacher to a class schedule. It ensures that the right instructor is assigned to each class, considering their availability and their expertise. Follow the steps below on how to assign faculty to each class schedule.
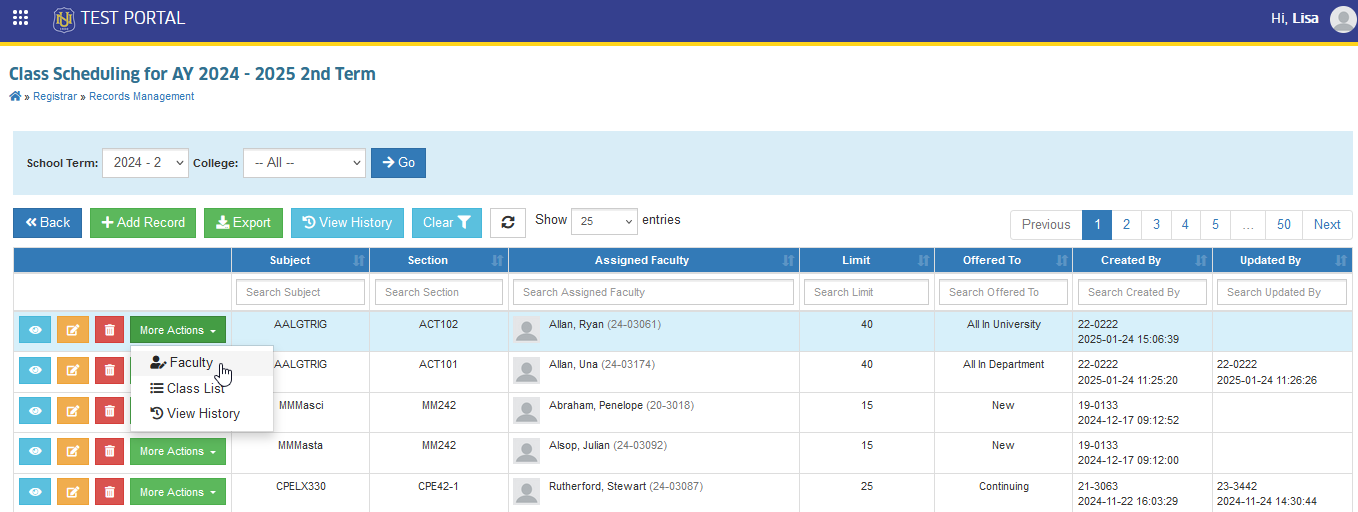
STEP 1. On the Class Scheduling page, the class schedule to be assigned to a faculty should be selected. Use the filtering feature of the module to speed up the process. Click the corresponding button and select in the list to add assigned faculty to the class schedule. User will be redirected to Assign Faculty page.
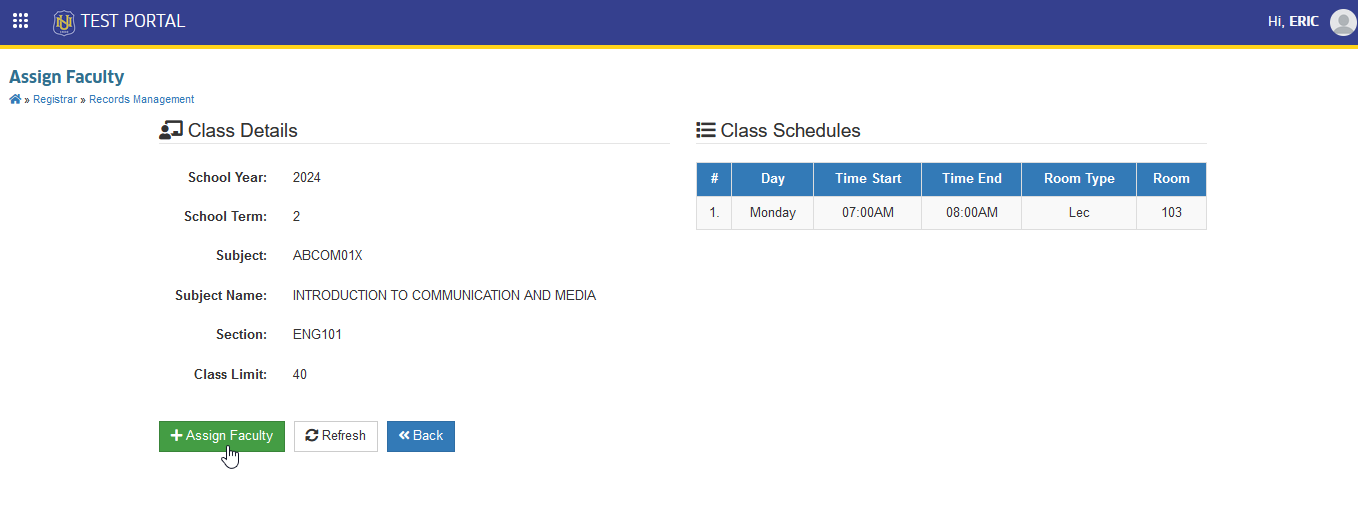
STEP 2. On the Assign Faculty page, click the button. Assign New Faculty prompt will appear.
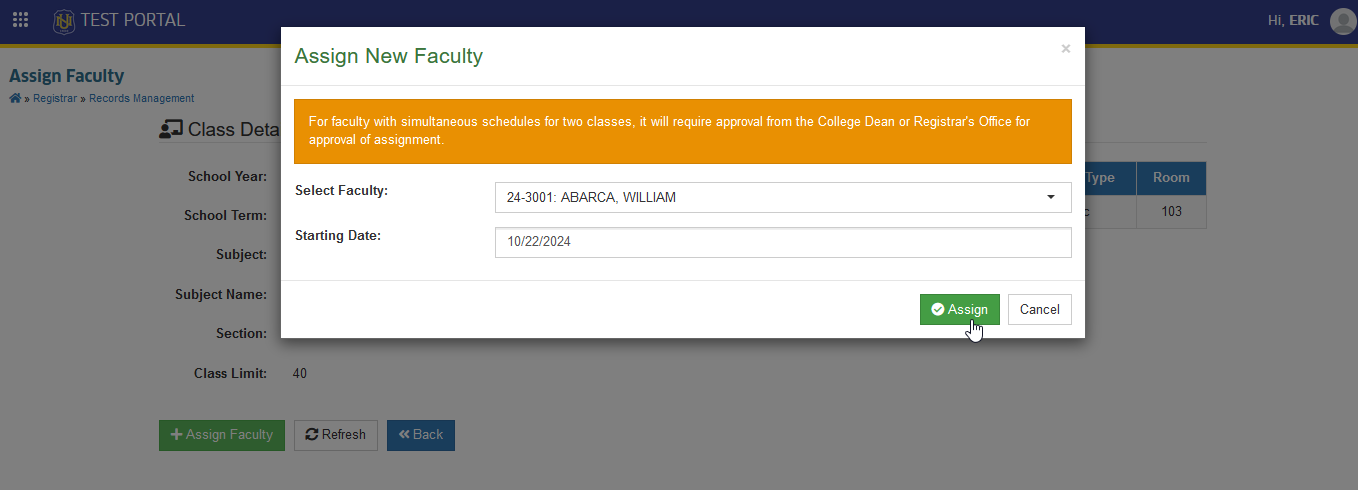
STEP 3. In the Assign New Faculty window, select the faculty to be assigned for the class from the list and click the button.
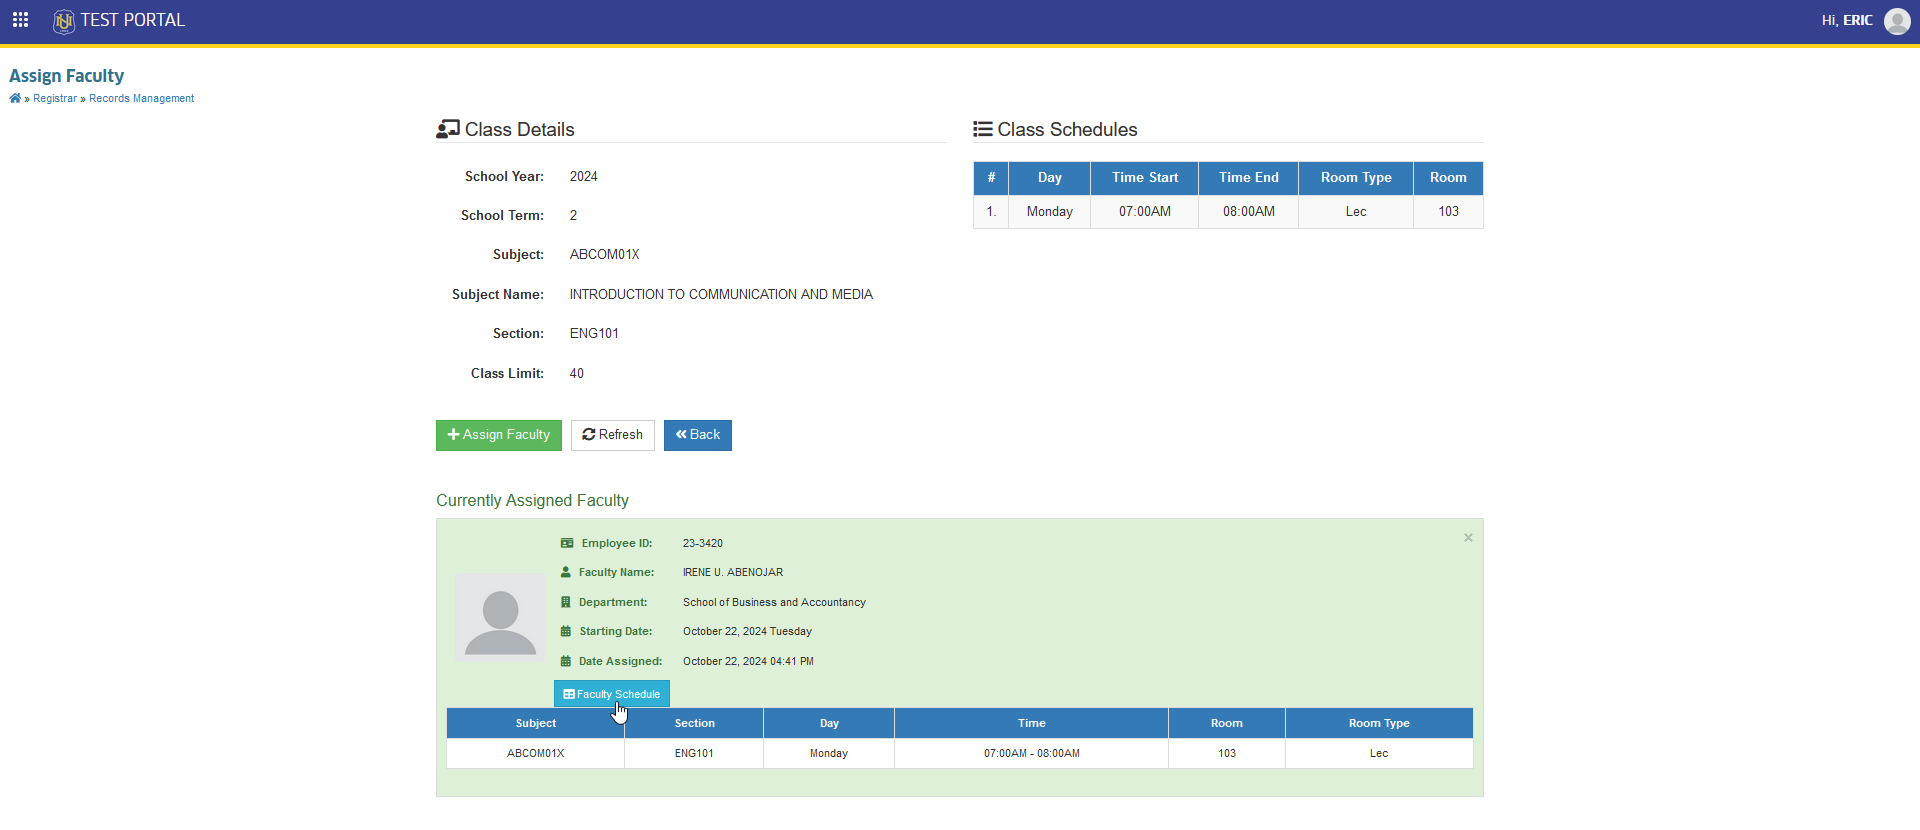
STEP 4. The system will show a confirmation message once the faculty member is successfully assigned. Their information will also appear in the module. Check the faculty schedule by clicking the button.
For faculty with simultaneous schedules for two classes, it will require approval from the College Dean or Registrar's Office for approval of assignment.
How to Remove Assigned Faculty
To remove an assigned faculty to a class schedule, follow the steps below.
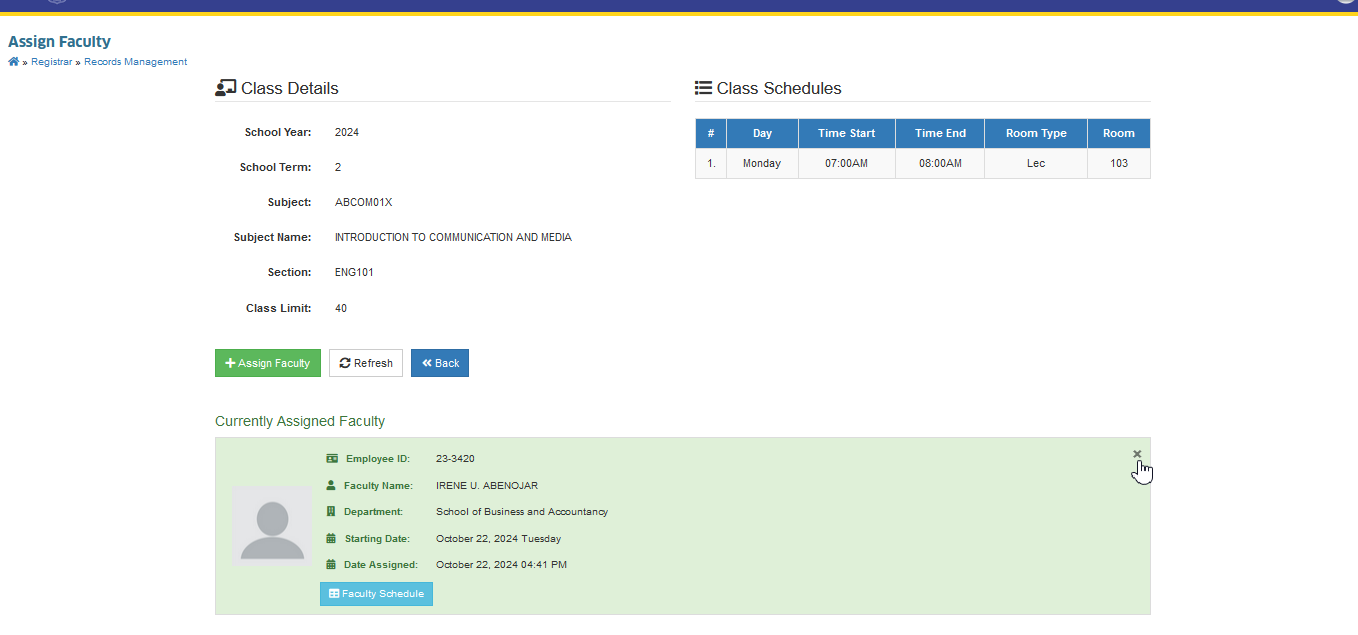
STEP 1. In the Class Scheduling page, search for the class schedule to modify. Use the filtering feature of the module to speed up the process. Click the corresponding button and select the button from the list of actions. User will be redirected to Assign Faculty page.
STEP 2. In the Assign Faculty page the class schedule information is displayed. In the lower part of the page, Assigned faculty is indicated. To remove the assigned faculty, click on the x icon located in the upper-right side of the currently assigned faculty.
STEP 3 A window will pop up, confirm the removal of the assigned faculty by clicking the button. Check the class schedule to confirm if the faculty has been successfully unassigned.
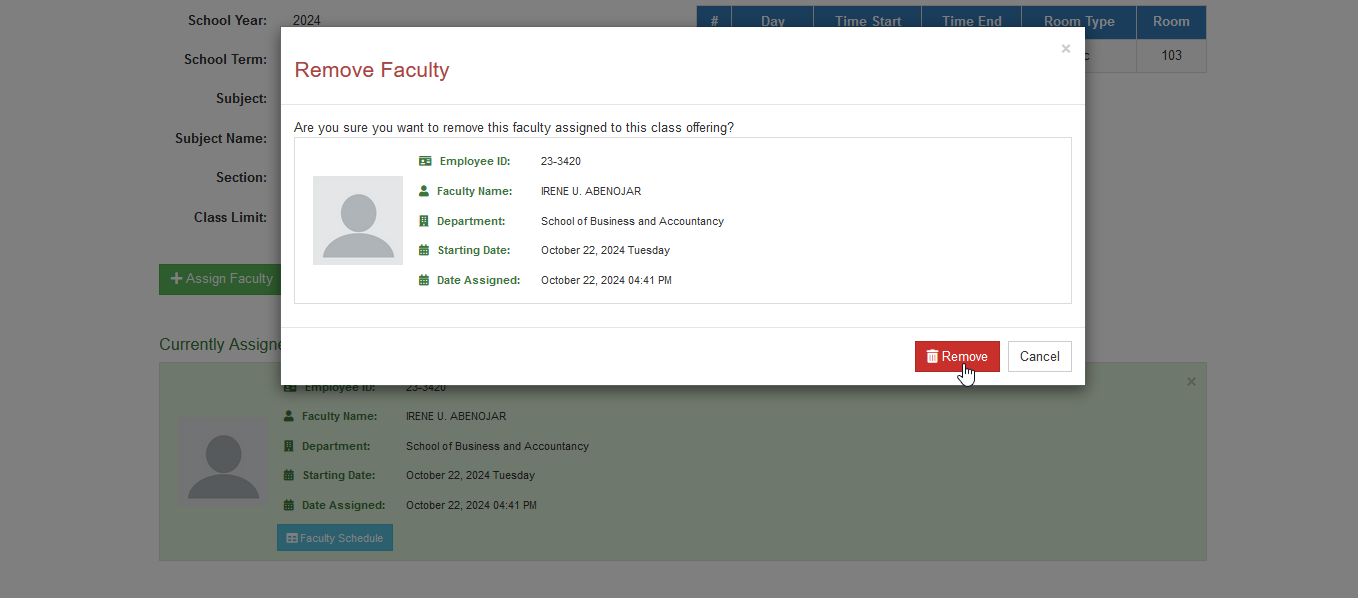
Removing evaluated faculty is not possible. Simply add the new faculty member to be assigned.
How to View the Classlist of the Class Schedule
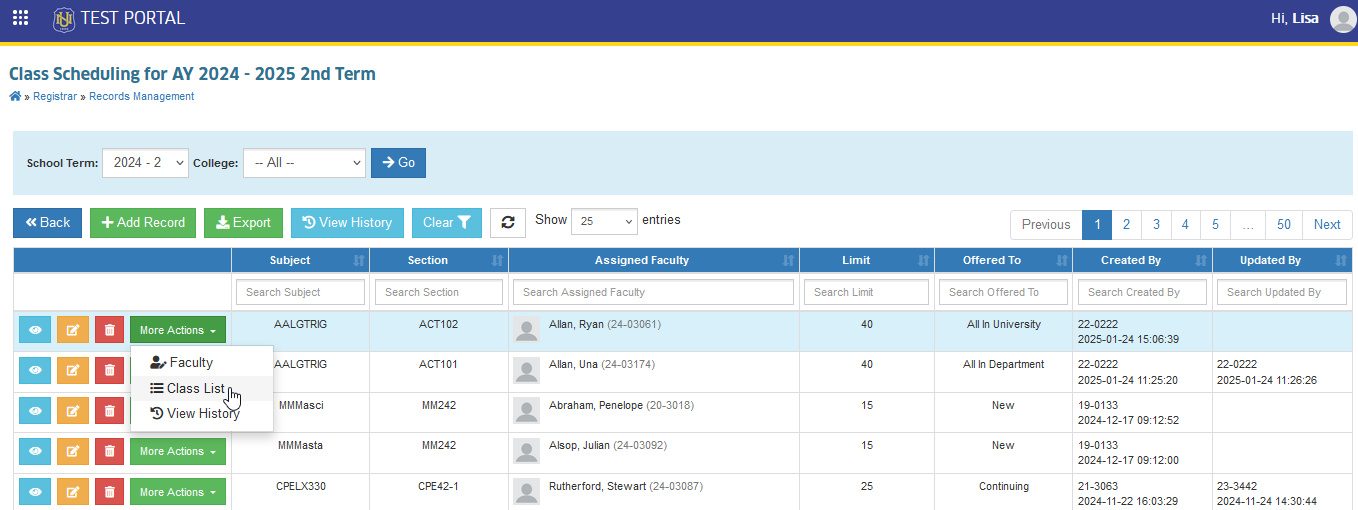
To see which students are registered or enrolled in a class, the class list can be accessed easily. Just click the button and select the button. User will be redirected to View Official Classlist page.
How to View History of Class Record?
In this section, the steps to access and view the history of class records will be outlined. The View History feature allows past activities in the record and other important information to be tracked. Follow the steps below on how to view the history of class schedules.
STEP 1. In Class Scheduling page, click on the button located at the upper part of the table.
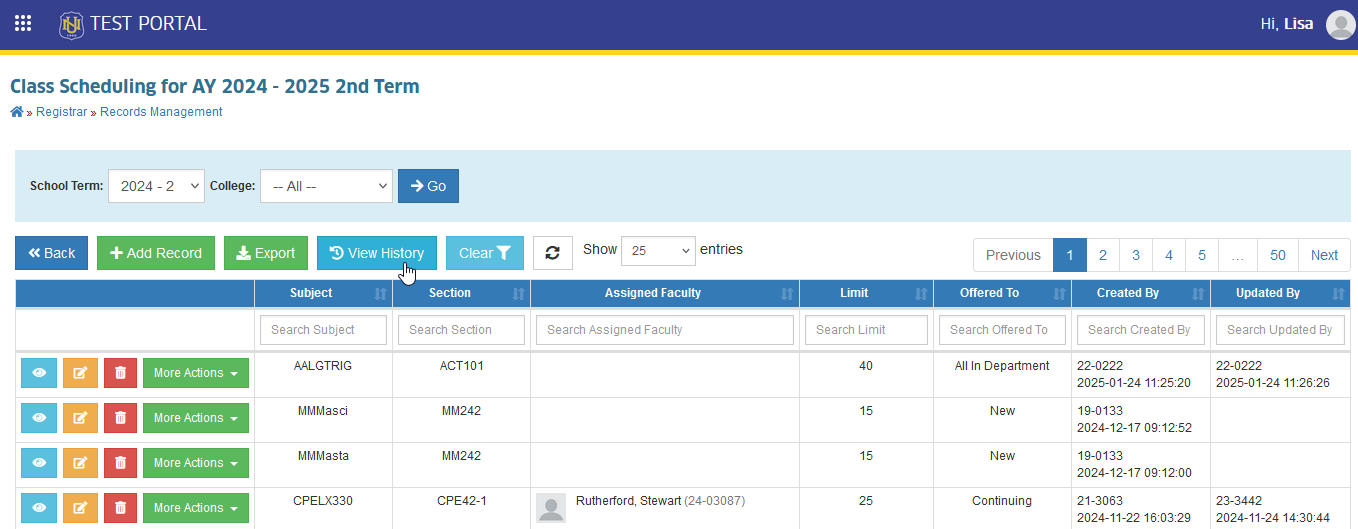
User may also click the button then select the View History in the list.
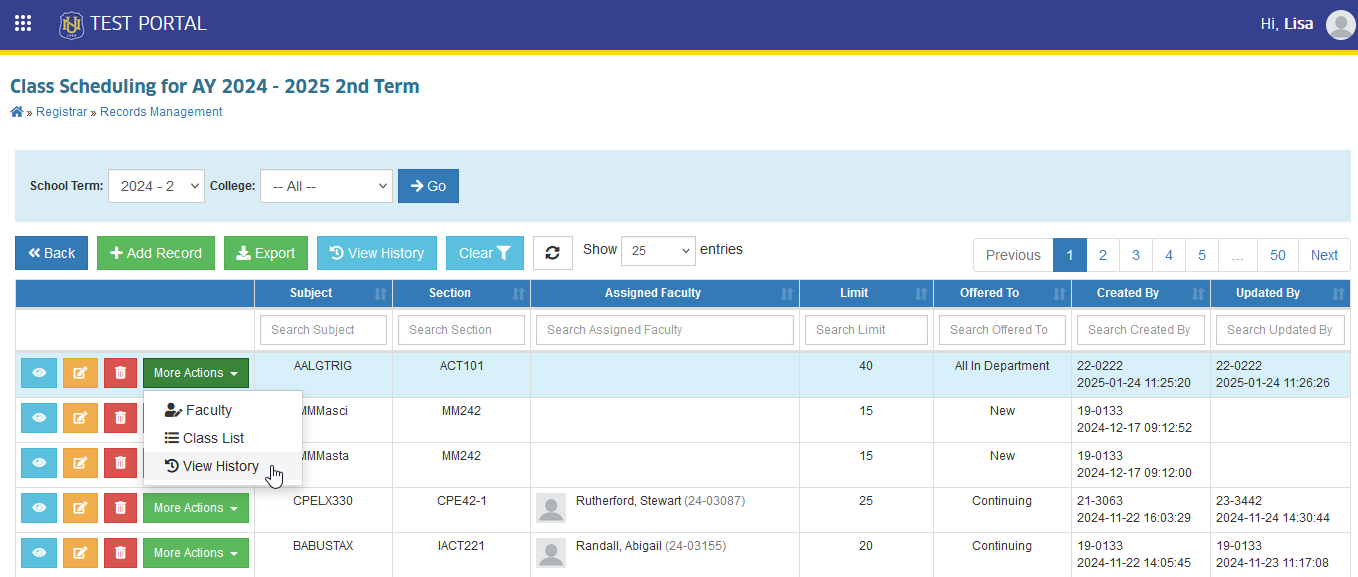
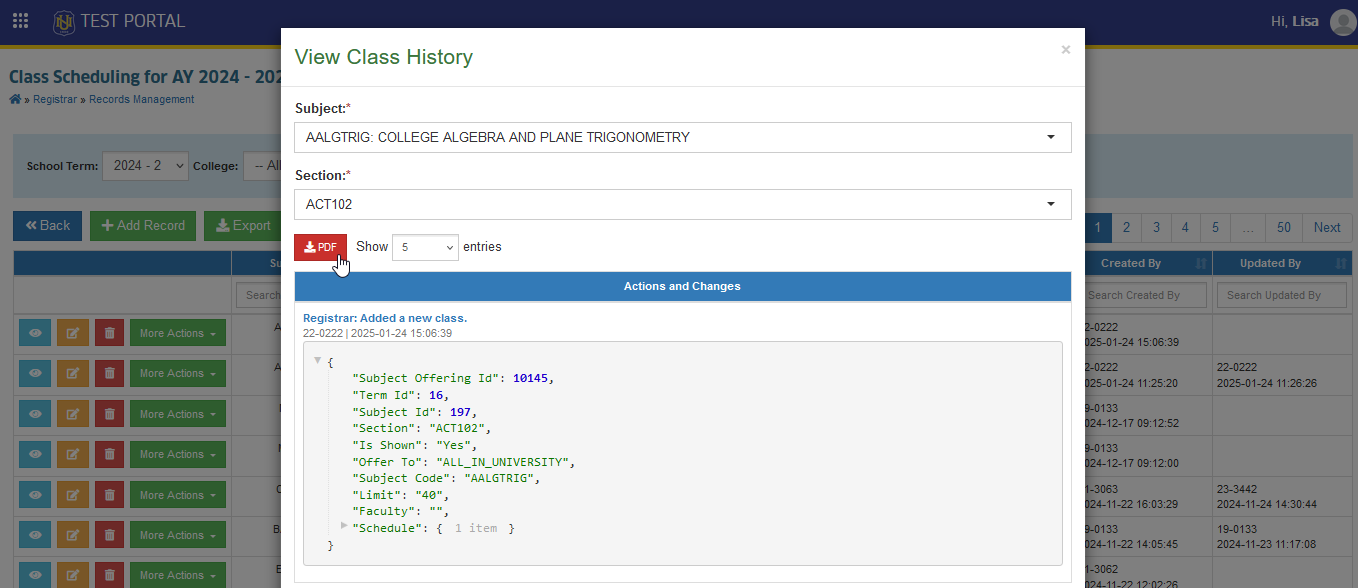
STEP 2. View Class History prompt will be displayed after clicking the button. Under the Actions and Changes section all the logs history will be displayed.
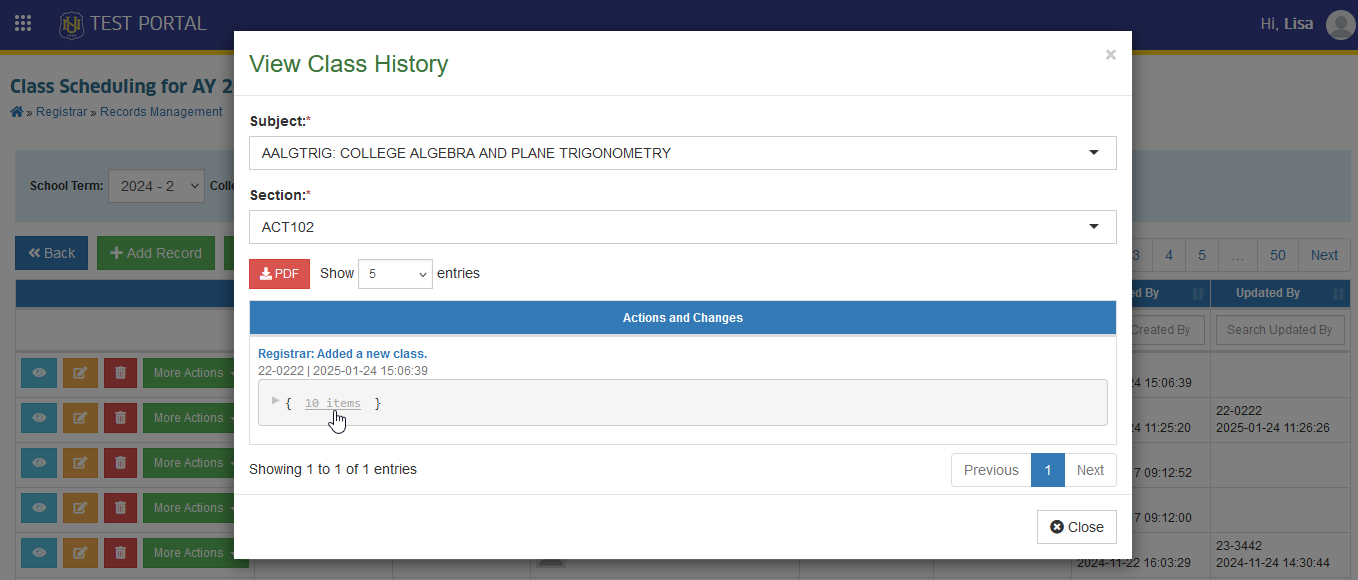
The listed items in the log can be clicked to view all the information included. The report can also be downloaded for offline access. To download the report, the button should be clicked.